Introduction
This manual provides detailed instructions for the safe and effective use of your RovyVon GL15 4-in-1 Crossbolt Rail Mounted Light. Please read this manual thoroughly before operating the device to ensure proper functionality and to prevent damage.
The RovyVon GL15 is a versatile rail-mounted device featuring a 400 lumen white light, a 520nm green beam, an 850nm IR illuminator, and an 850nm IR beam. It is designed for tactical applications and includes a GS15 remote switch for enhanced control.
Package Contents
Verify that all items are present in the package:
- 1x RovyVon GL15 4-in-1 Crossbolt Rail Mounted Light
- 1x GS15 Remote Switch
- 1x L-wrench
- 1x 1913 Adapter
- 1x Zeroing Coin
- 2x Nonstandard Battery (pre-installed or included separately)
Specifications
| Feature | Detail |
|---|---|
| Model | GL15 |
| White Light Output | 400 Lumens |
| Green Beam | 520nm, <5mW (Class 3R) |
| IR Illuminator | 850nm, 300mW |
| IR Beam | 850nm, <0.7mW (Class I) |
| Material | 7075 Aluminum Alloy |
| Water Resistance | IP68 |
| Impact Resistance | 1 Meter |
| Power Source | 2x Nonstandard Battery (included) |
| Dimensions | 2.95"D x 1.77"W x 1.26"H |
| Weight | 5.1 ounces (145.4g) |
Safety Information
WARNING: This device emits laser radiation. Avoid direct eye exposure to the green beam and IR beam. Class 3R and Class I lasers can cause eye injury if misused. Always follow local regulations regarding laser device usage.
- Do not disassemble the device.
- Keep out of reach of children.
- Use only specified batteries.
- Ensure the device is securely mounted before use.
Setup
1. Mounting the Device
The GL15 is designed for rail mounting. It is compatible with 1913 Picatinny rails and features a secure screw installation mechanism to prevent accidental detachment.
- Identify the desired mounting position on your 1913 Picatinny rail.
- Loosen the mounting screw on the GL15.
- Slide the GL15 onto the rail. Ensure it is seated correctly.
- Tighten the mounting screw firmly using the provided L-wrench. Do not overtighten.

Image: The RovyVon GL15 device shown mounted on a rail, highlighting the adjustable rail adapter and the screw installation point for secure attachment. The image illustrates how the device fits rails ranging from 20.7mm to 21.7mm.
2. Connecting the GS15 Remote Switch
Connect the GS15 remote switch cable to the port on the GL15 unit. Ensure the connection is secure.

Image: The RovyVon GL15 unit and its accompanying GS15 remote switch, connected by a cable. This image provides an overview of the main components.
3. Co-axial Zeroing (Green and IR Beams)
The green beam and IR beam are designed for synchronous adjustment, ensuring precise alignment. Once adjusted, no further individual adjustments are typically needed for each beam.
- Mount the GL15 securely.
- Activate the green beam (refer to Operating Modes section).
- Use the provided zeroing coin or a flat-head tool to adjust the windage and elevation screws. These screws are typically located on the side and top of the unit.
- Adjust until the green beam is aligned with your point of aim. The IR beam will adjust simultaneously.
Video: This video demonstrates the co-axial zeroing process for the RovyVon GL15. It shows how to adjust the windage and elevation screws to align the visible green beam, which simultaneously adjusts the IR beam for precise targeting.

Image: A close-up view of the RovyVon GL15, highlighting the adjustment dials for windage and elevation. These dials are used for co-axial zeroing of the green and IR beams.
Operating Instructions
1. Mode Selection
The GL15 features a rotary switch for selecting between six tactical modes. Rotate the dial to select the desired mode:
- Mode 1: White Light (400lm)
- Mode 2: Green Beam
- Mode 3: White Light + Green Beam
- Mode 4: IR Light + IR Beam
- Mode 5: IR Beam
- Mode 6: IR Light
Note: A green indicator light will illuminate when switching to IR modes (Mode 4, 5, 6).

Image: A visual representation of the RovyVon GL15's six 4-in-1 lighting modes, including White Light, Green Beam, White & Green Beam, IR Illuminator & IR Beam, IR Beam, and IR Illuminator. Each mode is depicted with its corresponding light output.
2. Using the GS15 Remote Switch
The GS15 remote switch provides convenient control over the GL15's functions.
- Momentary Mode: Click and hold the normal button (lower button) for momentary activation of the selected mode. Release to turn off.
- Constant On: Double-click the normal button (lower button) for constant activation of the selected mode. Double-click again to turn off.
- Override Function: Press the override button (upper button) to simultaneously activate both the white light and the green beam, regardless of the current mode selected on the rotary switch. This function is active in any mode except Mode 0 (off) and Mode 4 (IR Light + IR Beam).
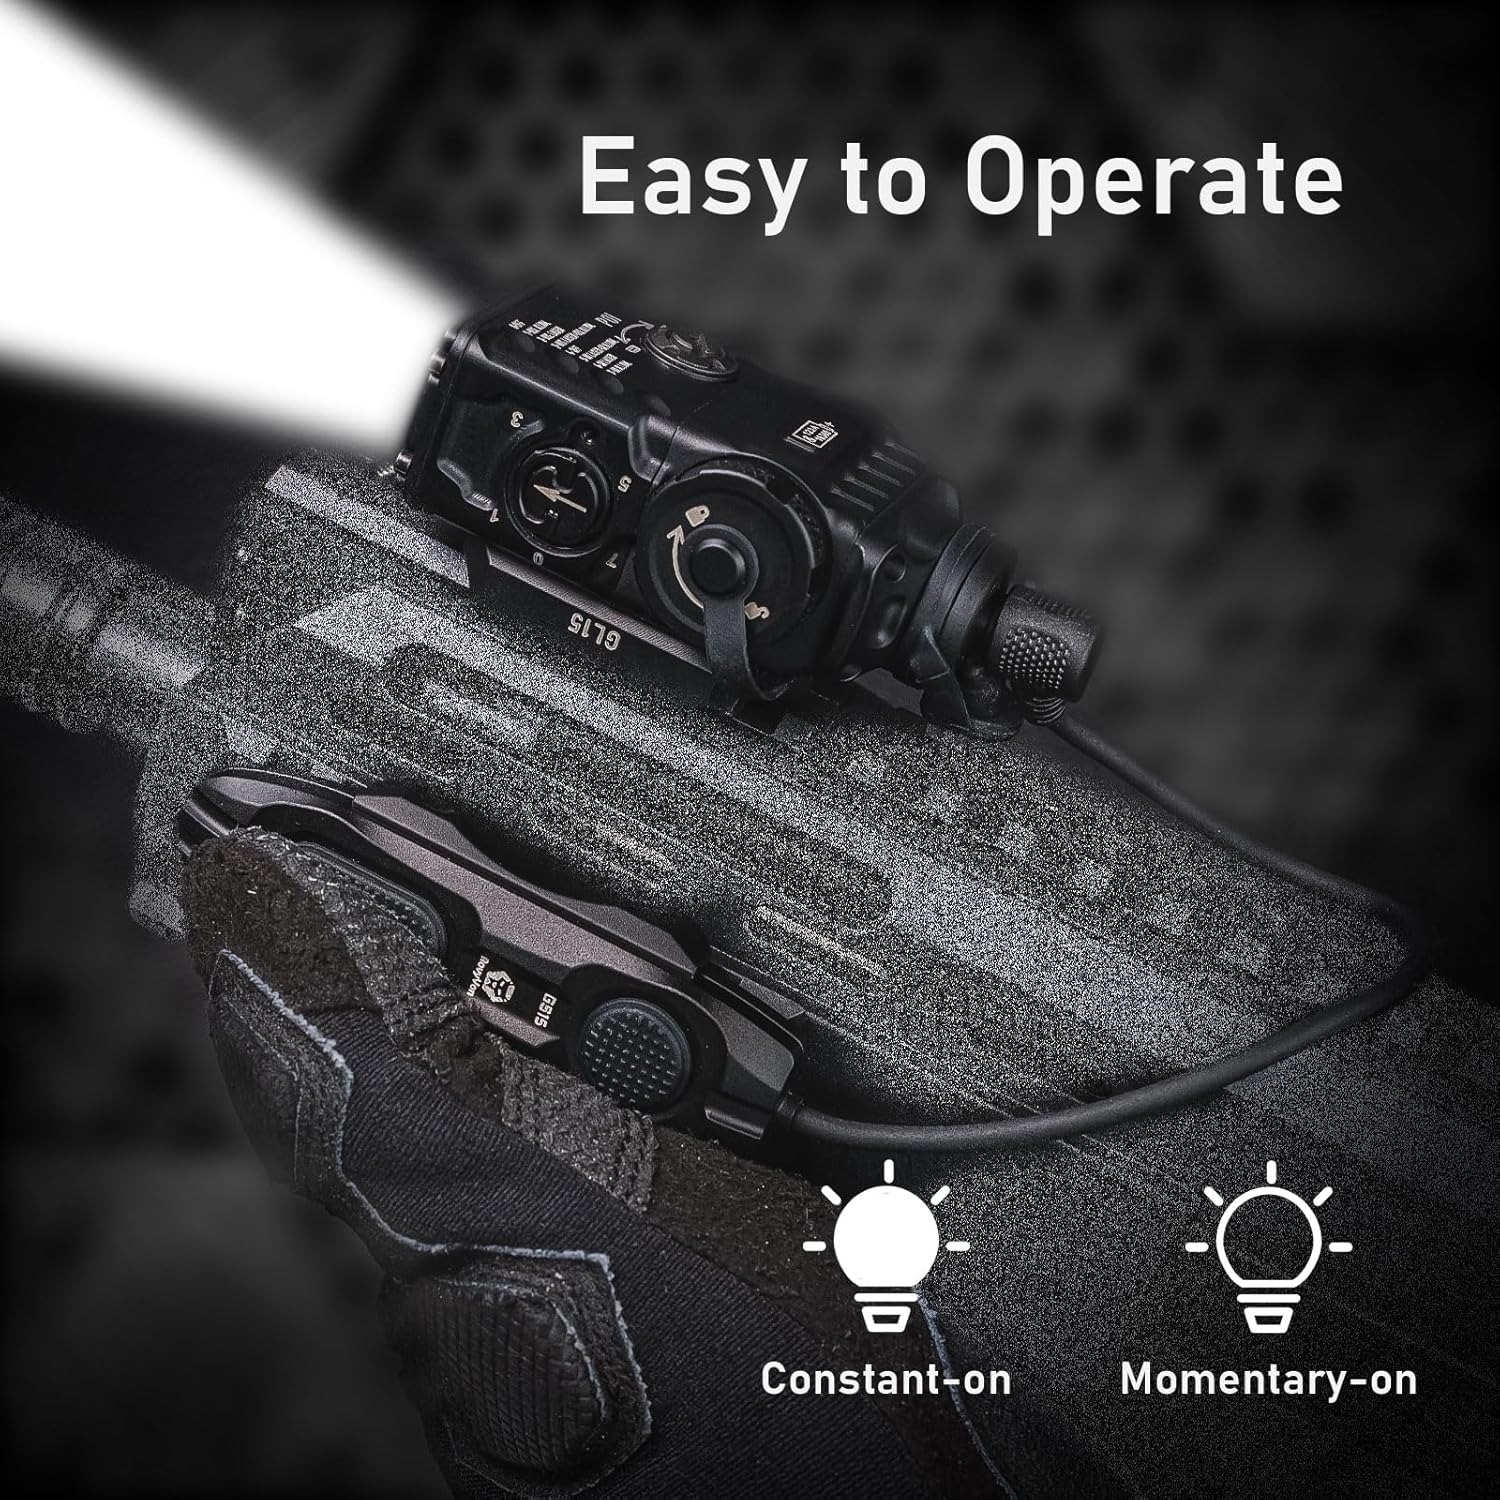
Image: A detailed diagram of the GS15 remote switch, indicating the "Override Button" for visible light activation and the "Normal Button" for constant and momentary modes. This image clarifies the controls for the remote switch.
Video: This video demonstrates the override function of the RovyVon GL15's remote switch. It shows how pressing the override button instantly activates both the white light and the green beam, illustrating its utility in various operational modes.
Maintenance
- Cleaning: Wipe the device with a soft, damp cloth. Do not use abrasive cleaners or solvents.
- Battery Replacement: Replace batteries as needed. Ensure correct polarity when inserting new batteries.
- Storage: Store the device in a cool, dry place when not in use. Remove batteries if storing for extended periods to prevent leakage.
- Inspection: Periodically inspect the mounting screws and connections for tightness and wear.
Troubleshooting
| Problem | Possible Cause | Solution |
|---|---|---|
| Device does not turn on. | Low or dead batteries. Incorrect battery installation. Loose remote switch connection. | Replace batteries. Check battery polarity. Ensure remote switch cable is securely connected. |
| Beam is not aligned. | Zeroing adjustment needed. | Perform co-axial zeroing as described in the Setup section. |
| Override function not working. | Device is in Mode 0 (off) or Mode 4 (IR Light + IR Beam). | Ensure the rotary switch is set to a mode other than 0 or 4. |
Warranty Information
The RovyVon GL15 comes with a 2-Year Warranty from the date of purchase. This warranty covers manufacturing defects and workmanship under normal use. It does not cover damage caused by misuse, unauthorized modification, accident, or neglect.
For warranty claims or service, please contact RovyVon customer support with your proof of purchase.
Customer Support
If you encounter any issues or have questions not covered in this manual, please contact RovyVon customer support:
- Website: RovyVon Official Store (for general inquiries and product information)
- Refer to your product packaging or the RovyVon official website for specific contact details (email, phone).


