1. Introduction
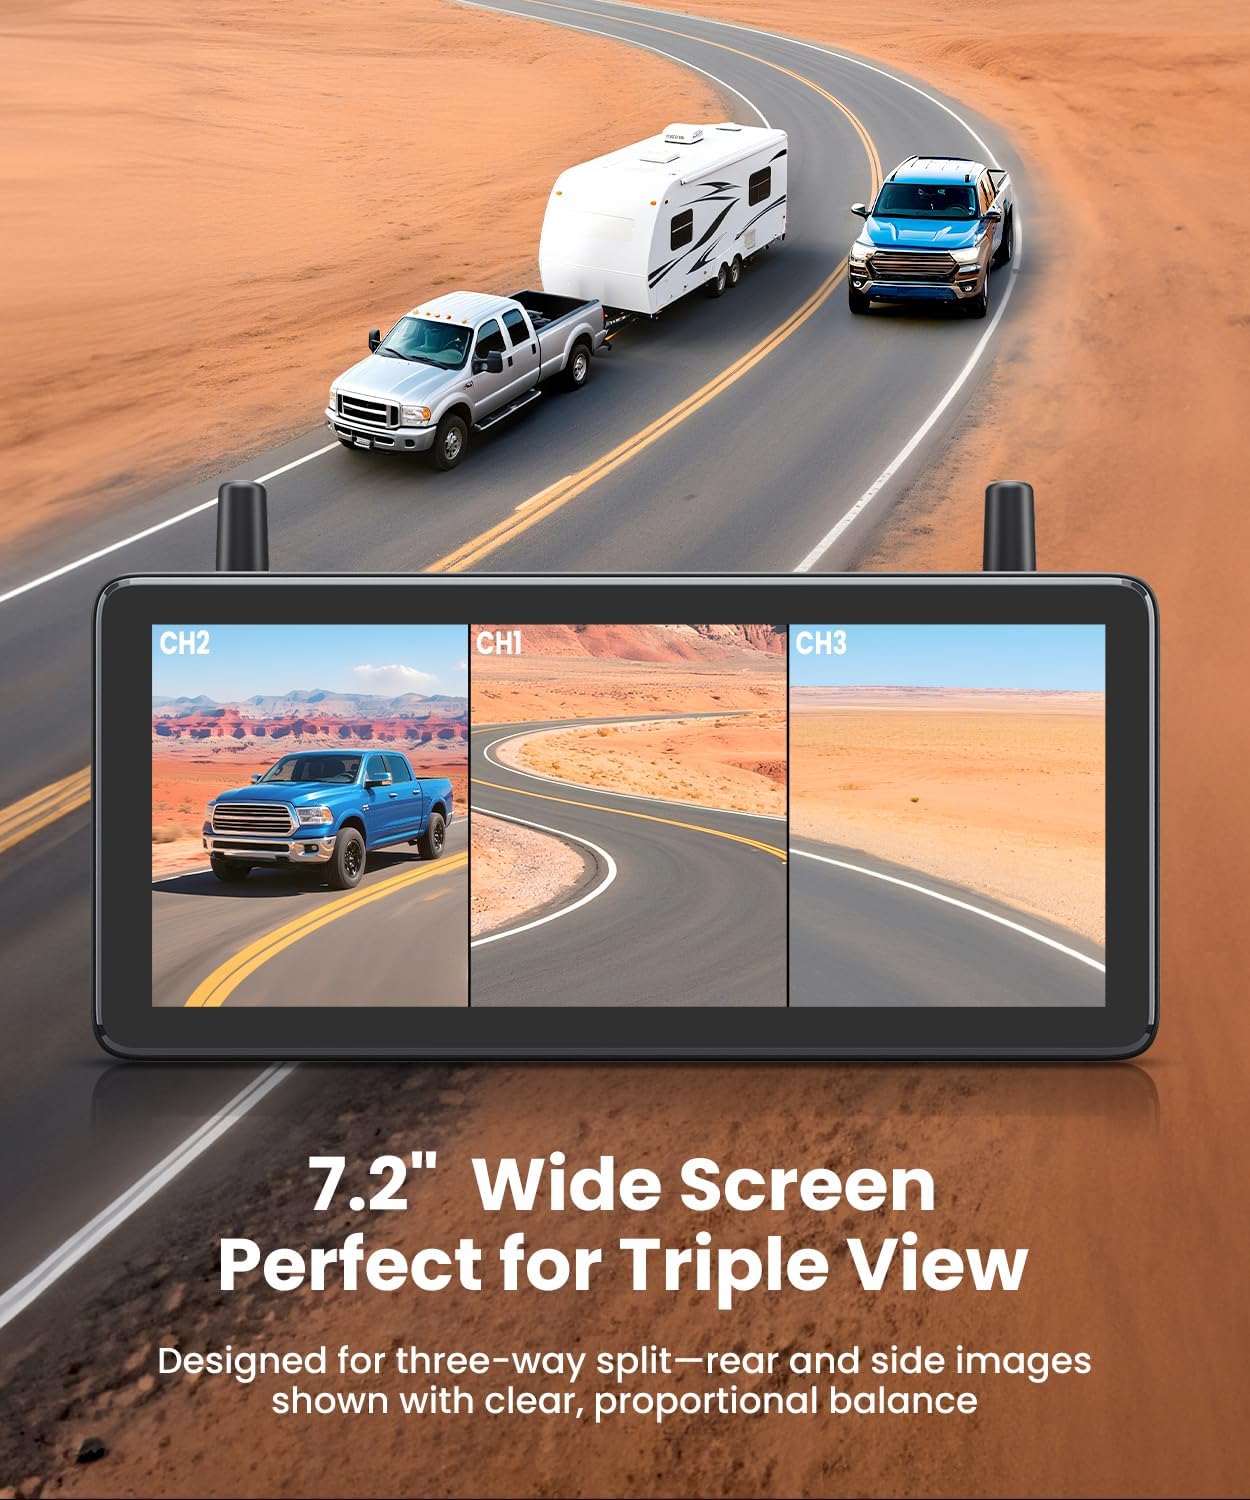
The AUTO-VOX WF4 Wireless RV Backup Camera System is designed to enhance safety and visibility for RVs, campers, and travel trailers. This system provides comprehensive rear and side views through a 7.2-inch HD triple-split screen monitor, offering clear 1080P resolution, infrared night vision, and stable wireless signal transmission. It also includes DVR recording capabilities to capture driving and reversing footage.

This image displays the complete AUTO-VOX WF4 wireless RV backup camera system, including the 7.2-inch HD monitor showing a triple-split view of a truck towing an RV, a landscape, and a motorhome. Below the monitor are the rear camera and two side cameras, highlighting the comprehensive view provided by the system.
2. Package Contents
Verify that all items listed below are included in your package:
- 7.2" Monitor
- WF1 Camera (Rear Camera)
- WF1 Extension Cable
- Monitor Mount
- WF2 Camera (Side Camera)
- WF2 Base
- WF1 Silicone Base
- Monitor Charger
- Theft-Proof Screws
- Hex Wrench
- Antenna
- Mounting Screws
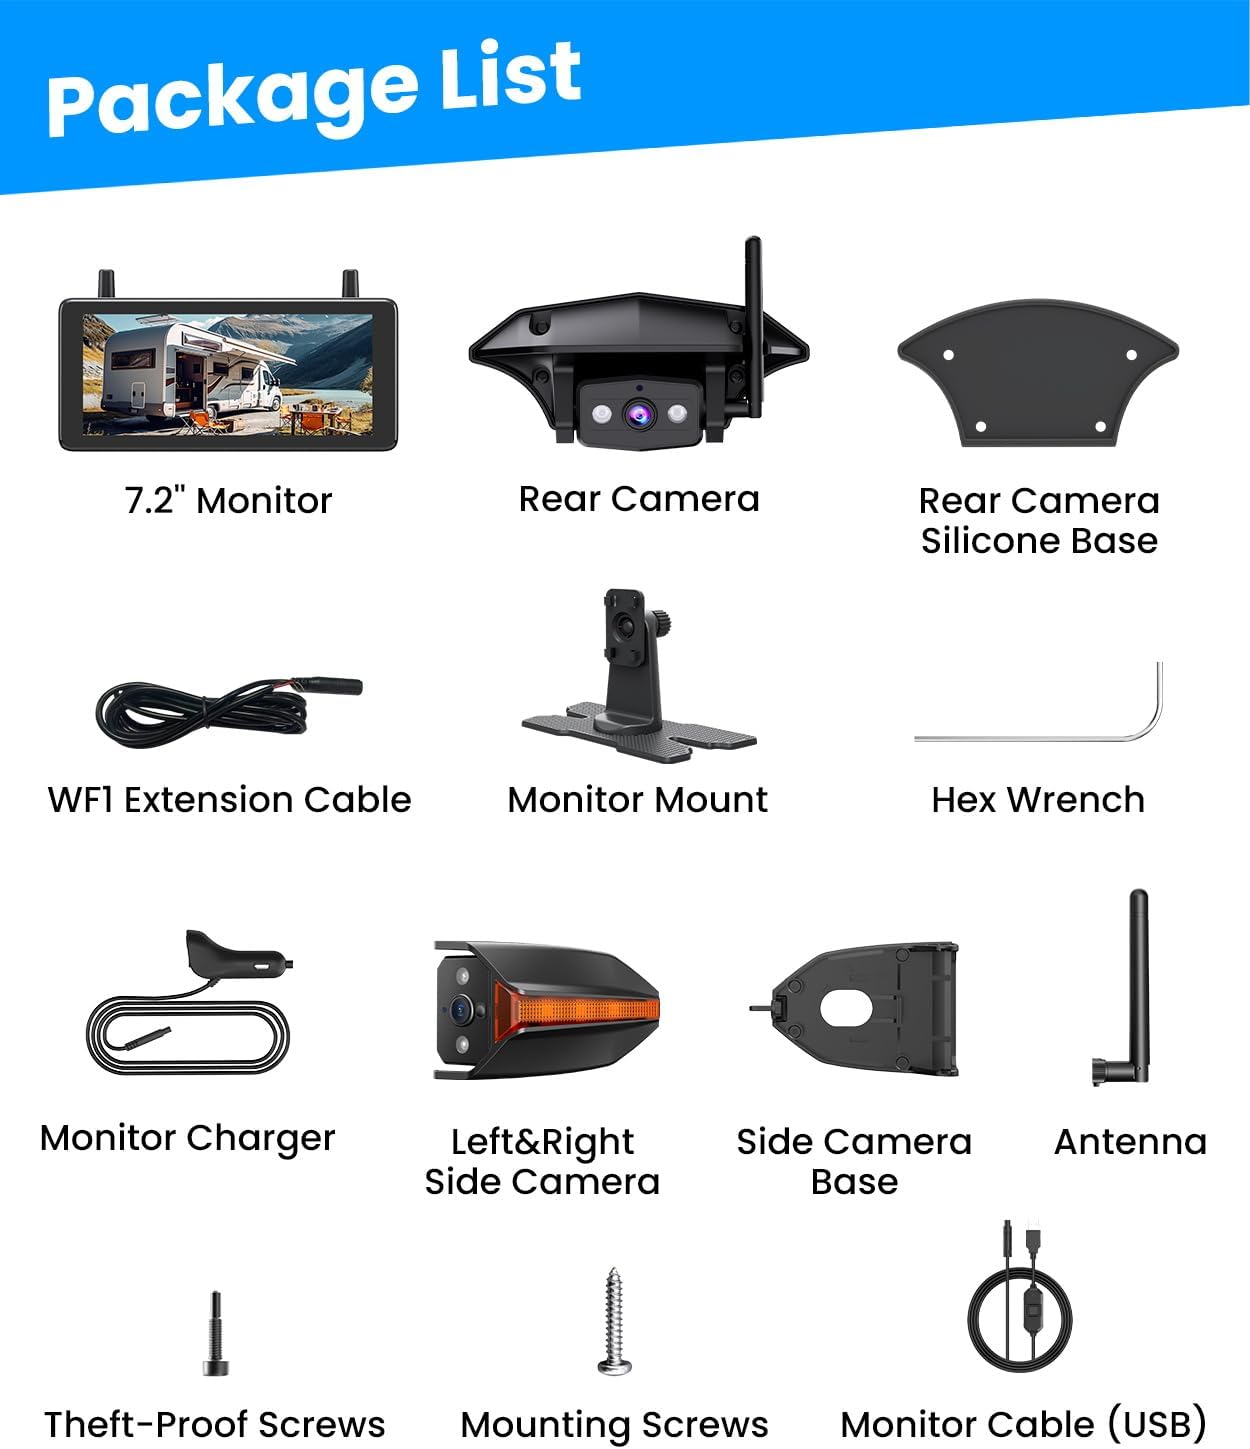
A clear layout of all items included in the product package: 7.2-inch Monitor, Rear Camera, Rear Camera Silicone Base, WF1 Extension Cable, Monitor Mount, Hex Wrench, Monitor Charger, Left & Right Side Camera, Side Camera Base, Antenna, Theft-Proof Screws, Mounting Screws, and Monitor Cable (USB).
An unboxing video showcasing all components included in the AUTO-VOX wireless backup camera kit, providing a clear view of the monitor, cameras, and accessories.
3. Product Features
- Rear + Side View System: Provides full rear and side views to eliminate blind spots for RV safety.
- Triple-Split Screen Display: 7.2-inch HD monitor allows simultaneous viewing of both sides and the rear.
- 1080P Clarity & IR Night Vision: Delivers sharp 1080P HD detail day and night with infrared LEDs for clear visibility in dark conditions.
- Stable Wireless Signal: Upgraded dual antennas ensure a steady and smooth video signal up to 500ft in open areas, ideal for long trailers.
- Compatible with Pre-Wired RV Systems: Seamless integration with factory pre-wired mounting brackets for straightforward installation.
- DVR Loop Recording: Built-in DVR automatically records driving and reversing footage, continuously overwriting old files.
- Dual Power Supply: Can be powered via USB cable or 12V car charger for flexible installation.
- IP69 Waterproof & All-Weather Ready: Designed to withstand heavy rain, snow, or dusty off-road conditions.

An aerial view diagram of an RV being towed by a truck, with blue shaded areas indicating the wide rear and side camera coverage, emphasizing enhanced visibility for safer driving and lane changes.
This video illustrates the comprehensive rear and side views provided by the AUTO-VOX wireless RV backup camera system, demonstrating how it enhances visibility for safer driving and maneuvering.
This image highlights the 1080P clarity and infrared night vision capabilities of the camera system. It shows a motorhome on a dark road, with the camera's view clearly illuminating the path ahead and surrounding obstacles, ensuring visibility in low-light conditions.
Footage from the AUTO-VOX RV reverse camera, showcasing its 1080P HD clarity during both daytime and nighttime conditions, including infrared night vision capabilities.

A visual representation of the system's stable wireless signal, showing an RV and truck in a vast landscape with signal waves extending up to 500 feet. Various types of RVs (Travel Trailers, 5th Wheel Trailers, Toy Haulers, Popup Campers, Class A Motorhomes, Class C Motorhomes, Camper Vans) are shown below, indicating broad compatibility.
4. Setup & Installation
Follow these steps for proper installation of your AUTO-VOX WF4 system.
4.1 Rear Camera Installation
- Identify the pre-wired location on the rear of your RV, typically above the license plate or existing backup camera mount.
- Remove any existing cover or camera.
- Connect the WF1 Rear Camera's power cable to the RV's existing wiring. Ensure correct polarity (positive to positive, negative to negative).
- Mount the WF1 Rear Camera using the provided screws and WF1 Silicone Base, ensuring a secure and waterproof fit.
4.2 Side Camera Installation
- Locate the existing side marker lights on your RV.
- Carefully remove the existing side marker lights.
- Connect the WF2 Side Camera's power and ground wires to the corresponding wires of the removed marker light. The side cameras also function as marker lights.
- Mount the WF2 Side Camera using the provided WF2 Base and screws. Apply glass sealant around the edges for optimal waterproofing.
- Repeat for the other side camera.
4.3 Monitor Setup
- Attach the Monitor Mount to the 7.2" Monitor.
- Secure the monitor to your dashboard or preferred location using the adhesive base of the monitor mount.
- Screw the antennas into the designated ports on the top of the monitor.
- Connect the Monitor Charger (USB or 12V car charger) to the monitor and a power source in your vehicle.
- The cameras are pre-paired at the factory. Once powered, the monitor should automatically display the camera feeds.

This image provides a visual guide for camera installation, demonstrating how to remove existing side driving lights, drill holes, fix the mount, connect cables, and firmly push the new camera into place. It emphasizes compatibility with pre-wired RV setups and universal vehicle installation.
This video demonstrates the straightforward installation process for the AUTO-VOX RV rear view camera, highlighting how easily it integrates with pre-wired RV systems and existing side marker lights.
5. Operating Instructions
5.1 Monitor Functions
- Power On/Off: The monitor powers on automatically when the cameras receive power (e.g., when vehicle lights are on or ignition is active).
- Switch Display Modes: Use the 'M' button on the monitor to cycle between single, dual, or triple-split screen views.
- Adjust Settings: Access the menu to adjust brightness, contrast, mirror/normal image, and guideline display.
5.2 DVR Recording
- The built-in DVR automatically begins recording when the system is powered on.
- Footage is saved to a microSD card (not included, typically up to 128GB supported).
- The system uses loop recording, overwriting the oldest files when the card is full.
- Review recorded footage via the 'Playback' option in the monitor's menu.

The 7.2-inch HD monitor is shown mounted on a vehicle dashboard, displaying a triple-split view. The left and right sections show side camera feeds, while the center displays the rear camera feed, providing a comprehensive view for maneuvering.
A demonstration of the DVR loop recording feature, showing real driving footage captured by the AUTO-VOX camera system, highlighting its continuous recording functionality.
6. Maintenance
- Cleaning: Regularly clean camera lenses and the monitor screen with a soft, damp cloth. Avoid abrasive cleaners.
- Wiring Inspection: Periodically check all wiring connections for tightness and signs of wear or corrosion.
- Waterproofing: Ensure all camera mounts remain sealed to prevent water ingress. Reapply sealant if necessary.
- Firmware Updates: Check the AUTO-VOX official website for any available firmware updates for improved performance.
7. Troubleshooting
- No Signal/Flickering:
- Ensure all cameras are powered correctly.
- Check antenna connections on both cameras and monitor.
- Verify no large metal obstructions are blocking the wireless signal path.
- Re-pair cameras with the monitor if necessary (refer to monitor settings).
- Monitor Not Turning On:
- Confirm the monitor's power cable is securely connected and receiving power from the vehicle's power outlet.
- Ensure the vehicle's ignition is on if connected to an ignition-controlled power source.
- Poor Image Quality:
- Clean camera lenses.
- Check for obstructions in the camera's field of view.
- Adjust brightness/contrast settings on the monitor.
- DVR Not Recording:
- Ensure a compatible microSD card is inserted correctly.
- Format the microSD card through the monitor's settings.
- Check if the card is full (loop recording should manage this, but a faulty card might prevent it).
8. Specifications
| Brand | AUTO-VOX |
| Model Number | WF4 |
| Screen Size | 7.2 Inches |
| Product Dimensions | 3.2 x 4.7 x 4.7 inches |
| Item Weight | 3.14 pounds |
| Optical Sensor Technology | CMOS Infrared |
| Lens Type | Wide Angle, Fixed |
| Voltage | 12 Volts (DC) |
| Installation Type | Bracket Mount |
| Other Display Features | Wireless |
9. Warranty & Support
For warranty information and technical support, please refer to the documentation included with your product or visit the official AUTO-VOX website. Keep your purchase receipt for warranty claims.


