1. Introduction
The IBKINXX Automatic Chicken Coop Door is designed to simplify poultry management by providing automated opening and closing functions for your chicken coop. This solar-powered door features multiple operating modes, remote control capabilities, and advanced safety features to ensure the well-being of your flock.
This manual provides detailed instructions for the installation, operation, and maintenance of your automatic chicken coop door. Please read it thoroughly before use to ensure proper functionality and safety.
2. Safety Information
Before operating the chicken coop door, please observe the display screen to verify sufficient battery charge. The battery icon in the upper right corner of the screen will flash if the battery level is low. If the battery is low, fully charge it before initial use or continued operation.
- Ensure the installation area is clear of obstructions that could impede door movement.
- Keep children and pets away from the door during operation.
- Do not attempt to force the door open or closed manually while it is in automatic operation.
- Regularly inspect the door and its components for any signs of damage or wear.
- The anti-pinch feature is designed to prevent injury, but always exercise caution when animals are near the door during closing cycles.
3. Product Features
- Spacious Opening: Features an upgraded opening measuring 9.45" x 10" (24cm x 25.4cm) for comfortable passage of poultry.
- Solar Powered: Equipped with a solar panel for continuous charging, reducing the need for manual battery replacement. Includes a Type-C port for backup charging.
- 4 Automatic Modes: Offers flexible operation with timed, light-sensitive, or combined modes (T-T, L-T, T-L, L-L) to suit various schedules and environmental conditions.
- Remote Control: Allows for convenient manual opening or closing of the door from a distance.
- LCD Display: Clear display for easy programming and monitoring of settings.
- Anti-Pinch Protection: Intelligent sensor system detects obstructions and automatically reverses the door to prevent injury to poultry.
- Intrusion Alarm: Built-in alarm sounds if the door is forced open, deterring predators and alerting the user.
- Weatherproof Design: Constructed from durable aluminum alloy, designed to withstand various weather conditions including rain, sun, and snow.
4. Package Contents
Verify that all components are present and undamaged upon unboxing:
- Automatic Chicken Coop Door Unit
- Solar Panel with Cable
- Remote Control (battery included)
- USB Type-C Charging Cable
- Mounting Hardware (screws, etc.)
- User Manual (this document)

Figure 4.1: Main components of the Automatic Chicken Coop Door system.
5. Installation Guide
Follow these steps for proper installation of your chicken coop door:
- Prepare the Opening: Identify the desired location on your chicken coop. Outline an area measuring approximately 9.45 inches (width) by 10 inches (height) for the door opening. Use appropriate tools to create this opening.
- Mount the Door Unit: Position the chicken coop door unit over the prepared opening. Ensure it is level and securely aligned. Use the provided screws to firmly attach the door unit to the coop structure.
- Install the Solar Panel: Choose a location for the solar panel that receives maximum direct sunlight throughout the day. The solar panel cable is 9.84 feet long, allowing flexibility in placement. Secure the solar panel using appropriate mounting hardware.
- Connect Solar Panel: Plug the solar panel cable into the designated port on the chicken coop door unit.
- Initial Charge: Before first use, ensure the internal battery is fully charged. This can be done via the solar panel in direct sunlight or by connecting the provided USB Type-C cable to a power source.

Figure 5.1: Visual guide for the installation process.
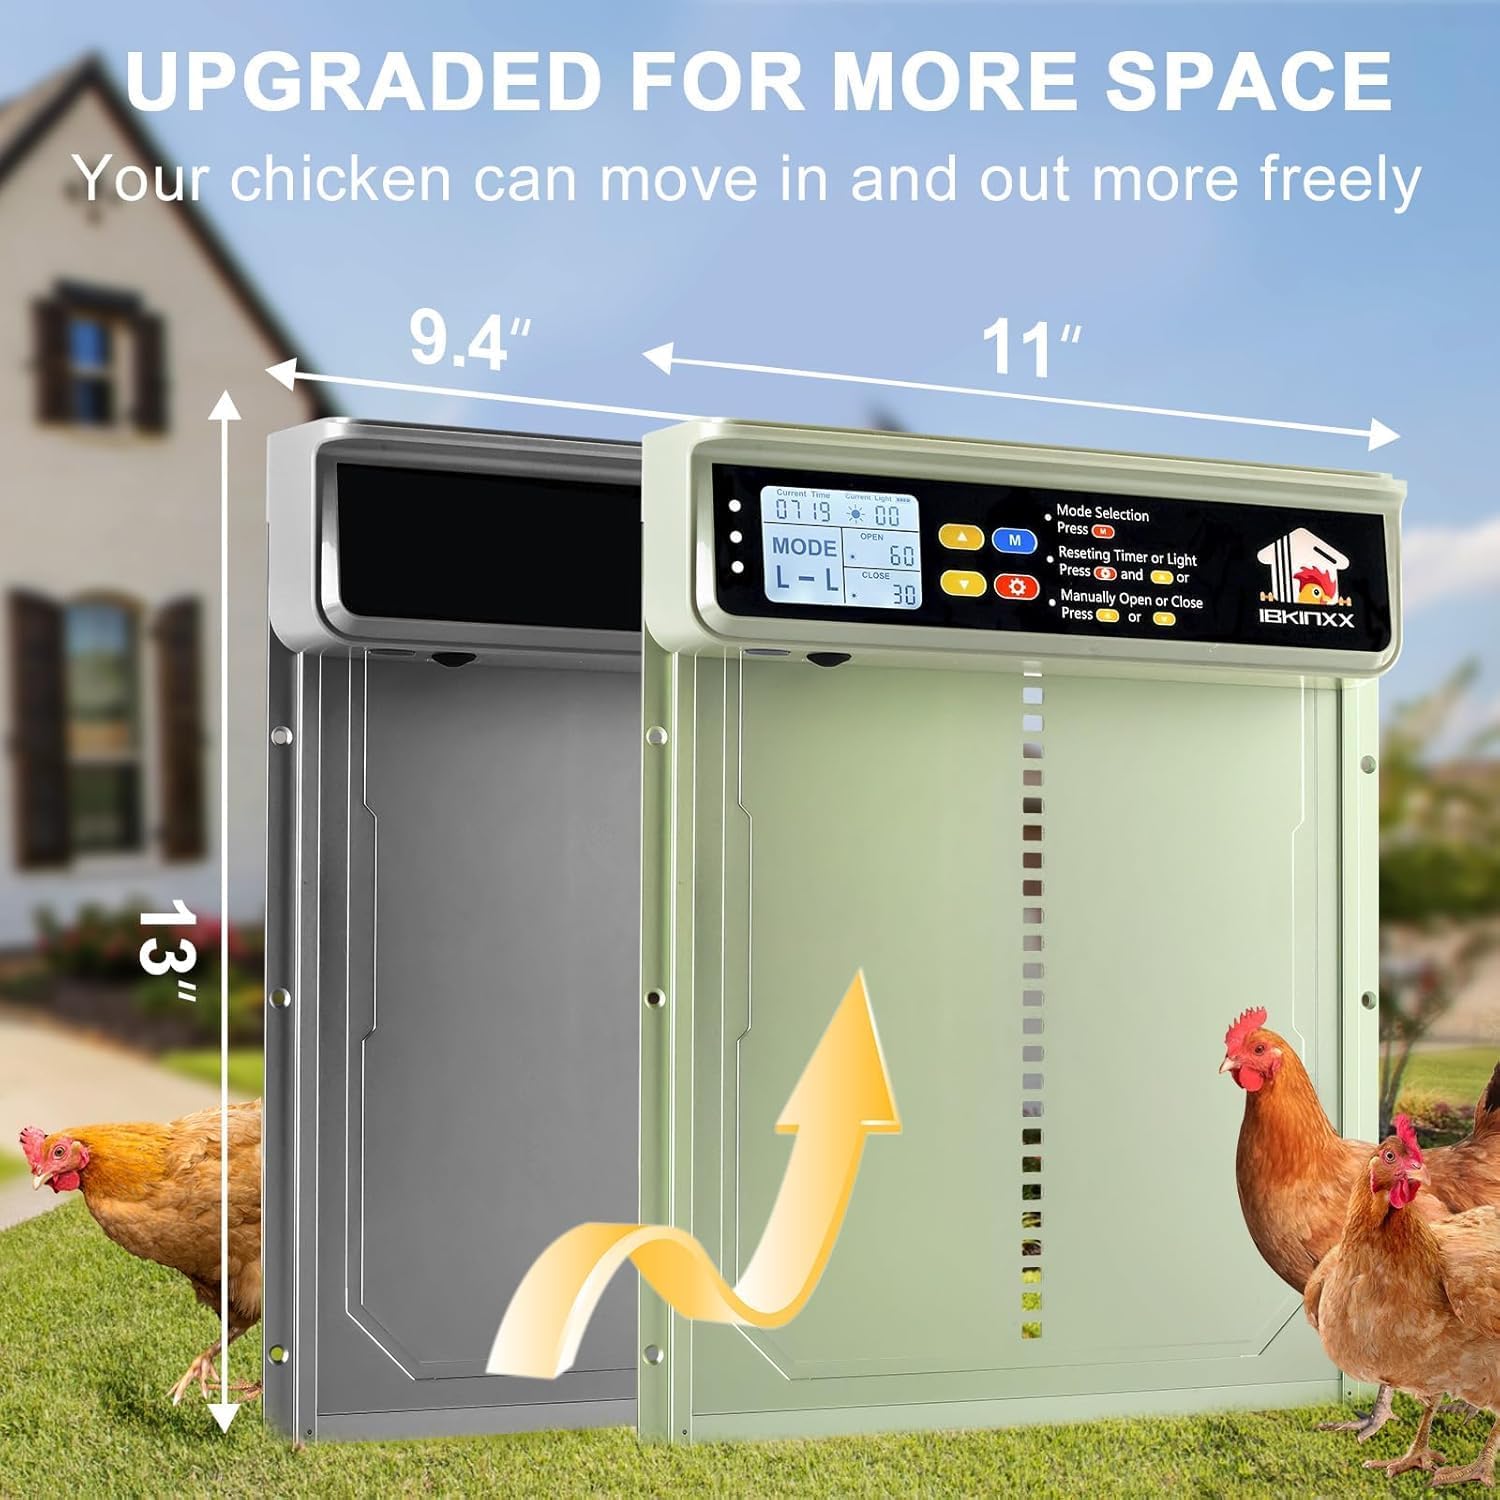
Figure 5.2: Door dimensions for opening preparation.
6. Operation Guide
6.1. LCD Display and Controls
The door unit features an LCD display and control buttons for setting up and managing its functions.
6.2. Setting Current Time
- Press the SET key.
- Use the UP or DOWN buttons to adjust the current local time.
6.3. Automatic Modes Selection
The door offers four automatic modes: Timer-Timer (T-T), Light Sensor-Timer (L-T), Timer-Light Sensor (T-L), and Light Sensor-Light Sensor (L-L). Short press the M key to cycle through these modes.
- T-T (Timer-Timer): Door opens and closes based on set times.
- L-T (Light Sensor-Timer): Door opens based on light sensor, closes based on set time.
- T-L (Timer-Light Sensor): Door opens based on set time, closes based on light sensor.
- L-L (Light Sensor-Light Sensor): Door opens and closes based on light sensor.

Figure 6.1: Overview of the four automatic operating modes.
6.4. Setting Opening/Closing Time or Light Sensing Value
- After selecting the desired mode, press the SET key.
- Use the UP or DOWN buttons to increase or decrease the time value (for timed modes) or the light sensing value (for light sensor modes).

Figure 6.2: Instructions for setting timer and light sensor values.
6.5. Manual Control
The door can be manually opened or closed using the dedicated buttons on the unit or via the remote control.
- On Unit: Press the OPEN or CLOSE buttons.
- Remote Control: Use the corresponding buttons on the remote to open or close the door.

Figure 6.3: Manual and remote control options.
7. Maintenance
Regular maintenance ensures the longevity and optimal performance of your chicken coop door.
- Cleaning: Periodically clean the door tracks and the door panel to prevent debris buildup that could hinder movement. Use a soft, damp cloth. Do not use abrasive cleaners.
- Solar Panel: Keep the solar panel clean and free of dust, dirt, or snow to ensure efficient charging.
- Battery Check: Monitor the battery indicator on the LCD display. If the battery is consistently low, ensure the solar panel is receiving adequate sunlight or use the USB Type-C backup charging.
- Inspection: Regularly check all mounting points, cables, and the door mechanism for any signs of wear, damage, or loose connections.

Figure 7.1: Dual charging options for continuous power.
8. Troubleshooting
| Problem | Possible Cause | Solution |
|---|---|---|
| Door does not open or close | Low battery Obstruction in path Incorrect mode setting Motor malfunction | Charge battery fully Clear any obstructions Verify mode and time/light settings Contact customer support |
| Door reverses unexpectedly | Anti-pinch sensor triggered Debris in track | Ensure no animals or objects are in the path Clean door tracks thoroughly |
| Solar panel not charging | Insufficient sunlight Dirty panel Loose connection | Relocate panel to sunnier spot Clean panel surface Check solar panel cable connection |
| Remote control not working | Remote battery dead Out of range | Replace remote battery Move closer to the door unit |
| Intrusion alarm sounds frequently | Door being forced open Sensor malfunction | Ensure door is not being tampered with Contact customer support if issue persists |

Figure 8.1: Anti-pinch protection system in action.
9. Specifications
| Feature | Detail |
|---|---|
| Model Number | BSV-AD002 |
| Brand | IBKINXX |
| Door Opening Dimensions | 9.45" (W) x 10" (H) |
| Power Source | Solar Powered with USB Type-C Backup |
| Battery Type | 1 Lithium Ion battery (included) |
| Material | Aluminum Alloy |
| Control Modes | Timer, Light Sensor, Combined (4 modes) |
| Special Features | Anti-Pinch, Intrusion Alarm, Weather Resistant, Remote Control, LCD Display |
| Item Weight | 3.05 pounds (approx. 1.38 kg) |
| Item Dimensions (LxWxH) | 0.1 x 0.1 x 0.1 inches (unit only, approximate) |
| Item Package Dimensions (LxWxH) | 14.06 x 11.77 x 2.52 inches |
| Color | Bright Green |
| Recommended Breed | Chicken |
| Specific Uses | Chicken Coop |
10. Warranty and Support
For warranty information and technical support, please refer to the product packaging or contact IBKINXX customer service directly. Keep your purchase receipt as proof of purchase for any warranty claims.
For further assistance, visit the official IBKINXX store or contact their support channels.
IBKINXX Store: https://www.amazon.com/stores/IBKINXX/page/259C15AB-634D-4633-ACF1-AF97A5057E64


