
Introduction
This manual provides essential instructions for the safe and efficient operation of your Tissting 3L Mini Electric Pressure & Slow Cooker. Please read this manual thoroughly before first use and retain it for future reference.
Important Safeguards
When using electrical appliances, basic safety precautions should always be followed to reduce the risk of fire, electric shock, and injury to persons. These include:
- Read all instructions before operating the appliance.
- Do not touch hot surfaces. Use handles or knobs.
- To protect against electrical shock, do not immerse cord, plugs, or the main unit in water or other liquid.
- Close supervision is necessary when any appliance is used by or near children. Keep children away from the cooker during operation to prevent burns from steam or hot surfaces.
- Unplug from outlet when not in use and before cleaning. Allow to cool before putting on or taking off parts.
- Do not operate any appliance with a damaged cord or plug, or after the appliance malfunctions or has been damaged in any manner.
- Do not use outdoors.
- Do not place on or near a hot gas or electric burner, or in a heated oven.
- Extreme caution must be used when moving an appliance containing hot oil or other hot liquids.
- Always attach plug to appliance first, then plug cord into the wall outlet. To disconnect, turn any control to "off", then remove plug from wall outlet.
- Do not use appliance for other than intended use.
- This appliance cooks under pressure. Improper use may result in scalding injury. Make certain unit is properly closed before operating.
- Never force open the cooker. Ensure pressure is completely released before opening.
- Do not fill the unit over 2/3 full. When cooking foods that expand during cooking, such as rice or dried vegetables, do not fill the unit over 1/2 full.
Package Contents
Verify that all items are present in the package:
- 1 x Mini Electric Pressure Cooker
- 1 x Supply Cord
- 1 x Instruction Manual (this document)
- 1 x Rice Spoon
- 1 x Measuring Cup

Product Overview
Components

- Rotary Pot Cover: The lid that seals the cooker for pressure cooking.
- Pressure Release Valve: Located on the lid, used to release steam.
- Inner Pot: Removable aluminum alloy pot with non-stick coating for cooking.
- Main Cooker Base: Houses the heating element and control panel.
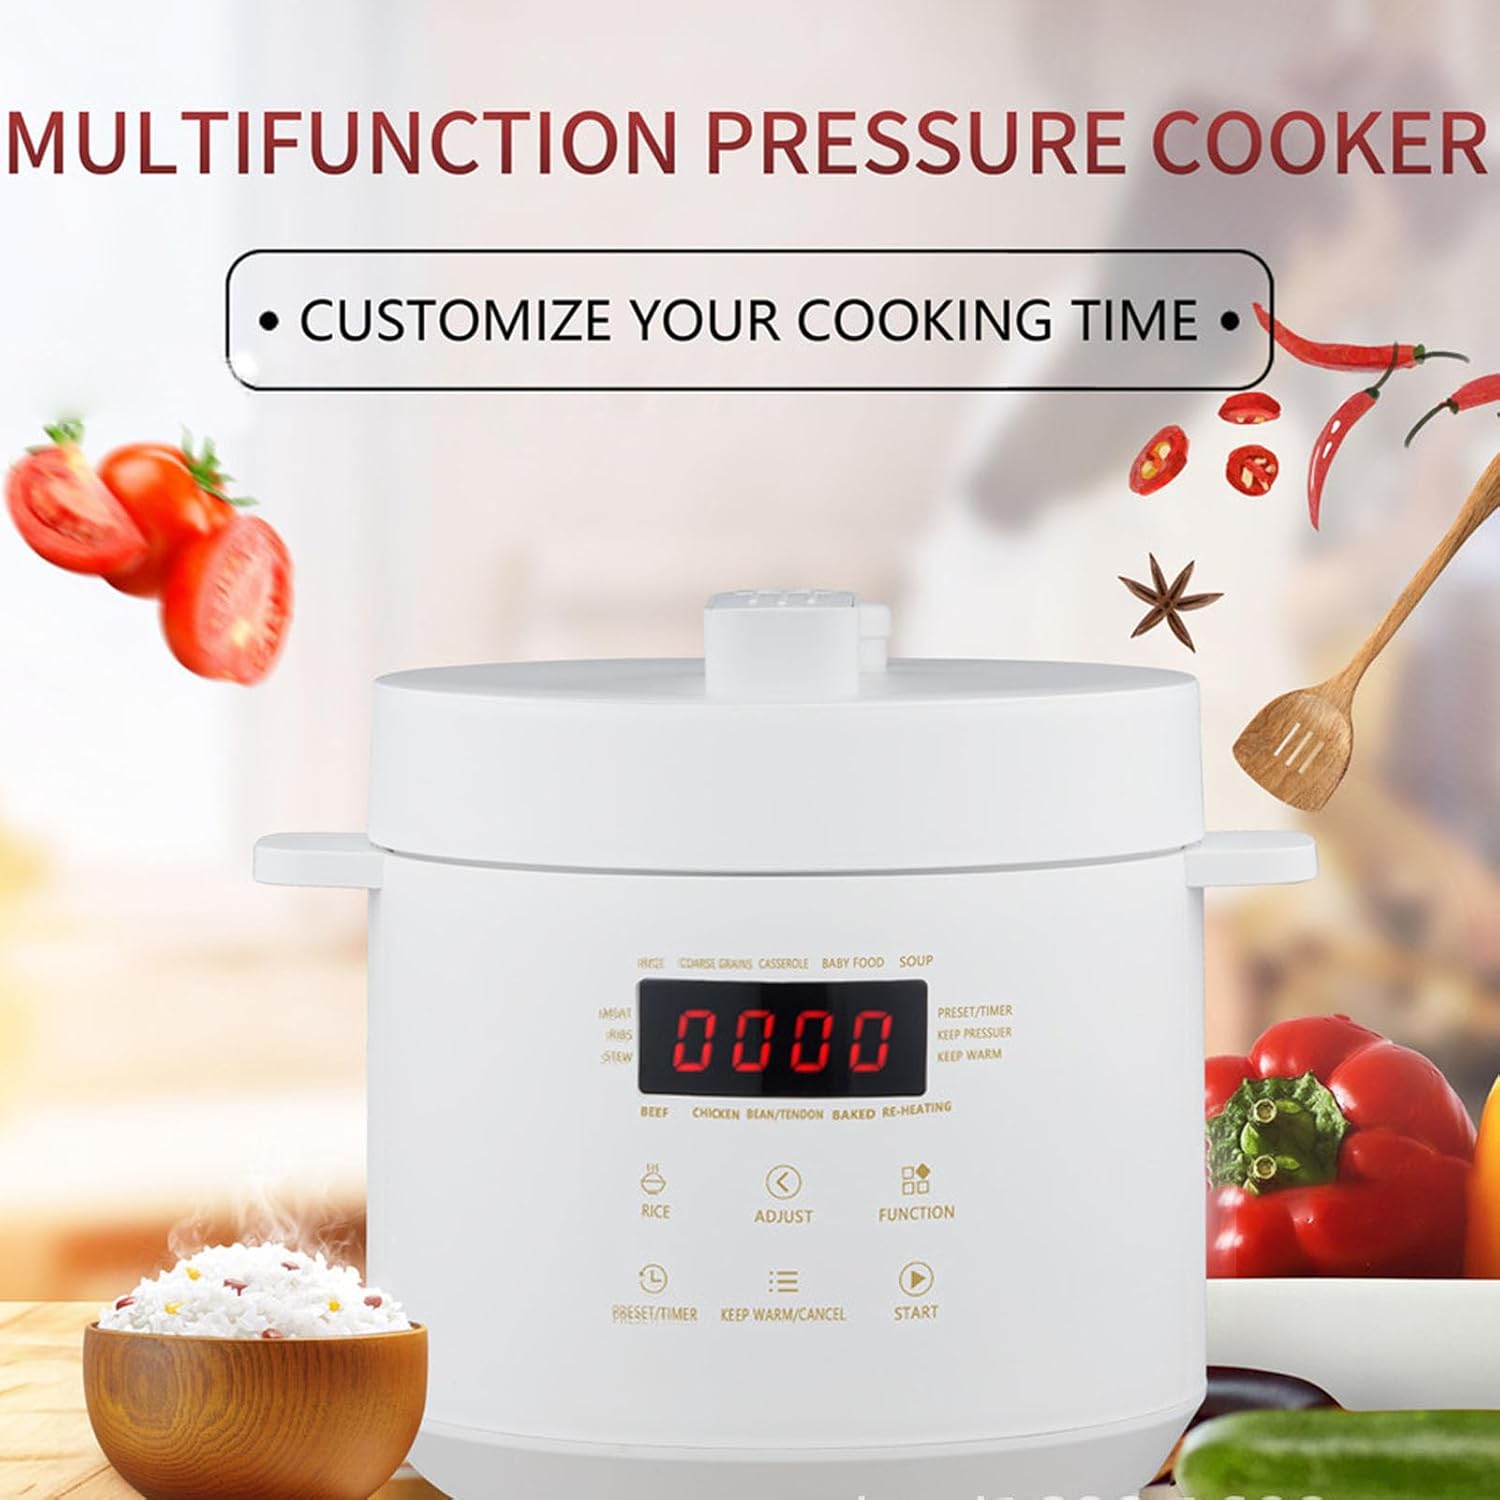
- Control Panel: Digital display and buttons for selecting functions and settings.

Control Panel

The control panel features a digital display and touch-sensitive buttons for selecting cooking functions, adjusting time, and starting/canceling operations. Available functions include:
- Cooking Modes: Rice, Coarse Grains, Casserole, Baby Food, Soup, Meat, Ribs, Stew, Beef, Chicken, Bean/Tendon, Baked, Re-heating.
- Preset/Timer: Sets a delayed start time or adjusts cooking duration.
- Adjust: Modifies time or other settings.
- Function: Cycles through available cooking modes.
- Keep Warm/Cancel: Maintains food temperature or stops current operation.
- Start: Initiates the selected cooking program.
Setup
- Unpack: Remove all packaging materials and accessories from the cooker.
- Clean: Wash the inner pot, lid, and accessories with warm, soapy water. Rinse thoroughly and dry. Wipe the exterior of the cooker base with a damp cloth.
- Placement: Place the cooker on a stable, level, heat-resistant surface, away from walls and cabinets to allow for proper ventilation and steam release.
- Insert Inner Pot: Place the clean, dry inner pot into the cooker base. Ensure it sits correctly.
- Connect Power: Plug the supply cord into the cooker, then into a grounded electrical outlet.
Operating Instructions
Basic Operation
- Add Ingredients: Place desired food and liquid into the inner pot. Do not exceed the MAX fill line.
- Close Lid: Align the lid with the cooker base, then rotate it clockwise until it locks into place. Ensure the pressure release valve is set to the 'Sealing' position (if applicable, refer to lid markings).
- Select Function: Press the 'Function' button to cycle through the cooking modes or directly select a specific mode (e.g., 'Rice', 'Meat'). The digital display will show the default cooking time.
- Adjust Time (Optional): Use the 'Adjust' or 'Preset/Timer' buttons to modify the cooking time if needed.
- Start Cooking: Press the 'Start' button. The cooker will begin to preheat, then build pressure.
- Pressure Release: Once cooking is complete, the cooker will beep and may automatically switch to 'Keep Warm' mode. To release pressure, carefully turn the pressure release valve to the 'Venting' position. Caution: Steam will be hot. Keep hands and face clear. Alternatively, allow for natural pressure release.
- Open Lid: Once all pressure has been released and the float valve has dropped, rotate the lid counter-clockwise to open.

Cooking Functions
The Tissting 3L Mini Electric Pressure & Slow Cooker offers multiple cooking functions:
- Pressure Cooking: Cooks food up to 70% faster than traditional methods, ideal for meats, stews, and beans.
- Slow Cooking: Prepares meals slowly over an extended period, enhancing flavors.
- Rice Cooking: Optimized settings for various types of rice.
- Yogurt Making: Provides the ideal temperature for fermenting yogurt.
- Steaming: Cooks vegetables, fish, and other foods with steam.
- Sautéing: Allows browning or searing ingredients directly in the inner pot before pressure cooking.
- Keep Warm: Automatically activates after cooking to maintain food temperature.
Cleaning and Maintenance
Regular cleaning ensures optimal performance and extends the life of your cooker.
- Unplug: Always unplug the cooker from the power outlet and allow it to cool completely before cleaning.
- Inner Pot: The non-stick inner pot is dishwasher safe, or can be washed by hand with warm, soapy water and a non-abrasive sponge.
- Lid: Wash the lid, including the sealing ring and pressure release valve, with warm, soapy water. Ensure all food particles are removed from the valve. The sealing ring can be removed for thorough cleaning.
- Cooker Base: Wipe the exterior of the cooker base with a damp cloth. Never immerse the cooker base in water or any other liquid.
- Accessories: Wash the rice spoon and measuring cup with warm, soapy water.
- Storage: Ensure all parts are completely dry before reassembling and storing the cooker in a dry place.

Troubleshooting
| Problem | Possible Cause | Solution |
|---|---|---|
| Cooker does not turn on. | Power cord not properly connected; no power from outlet. | Ensure power cord is securely plugged into both the cooker and a working electrical outlet. Check circuit breaker. |
| Pressure not building. | Lid not properly sealed; pressure release valve in 'Venting' position; insufficient liquid. | Ensure lid is fully locked. Turn pressure release valve to 'Sealing'. Add minimum required liquid. |
| Steam leaking from lid. | Sealing ring not properly installed or damaged; food debris on sealing ring or rim. | Check and properly install the sealing ring. Clean the sealing ring and lid rim. Replace sealing ring if damaged. |
| Food is undercooked. | Insufficient cooking time; too much food. | Increase cooking time. Reduce food quantity. |
Specifications
- Item Type: Mini Electric Pressure Cooker
- Brand: Tissting
- Model Number: Tisstingktechg1q2z
- Material: PP, Aluminum Alloy
- Power: 701W
- Capacity: 3L
- Item Weight: 8.72 pounds (Approx. 3.96 kg)
- Product Dimensions: 11.81"D x 11.42"W x 11.42"H (Approx. 30cm D x 29cm W x 29cm H)
Customer Support
For any questions, concerns, or assistance with your Tissting 3L Mini Electric Pressure & Slow Cooker, please contact the manufacturer or your retailer. Refer to your purchase documentation for specific contact information.
Manufacturer: Tissting