1. Product Overview
The ANDELI MIG-145 AIR is a versatile 145Amp 4-in-1 multiprocess welder designed for various welding tasks. It supports 110V/220V dual voltage input, making it suitable for both home DIY projects and professional applications. This machine integrates Gas MIG, Gasless MIG (Flux Core), Lift TIG, and MMA (Stick) welding capabilities. It features an intuitive LED digital display and IGBT inverter technology for stable performance and precise control.
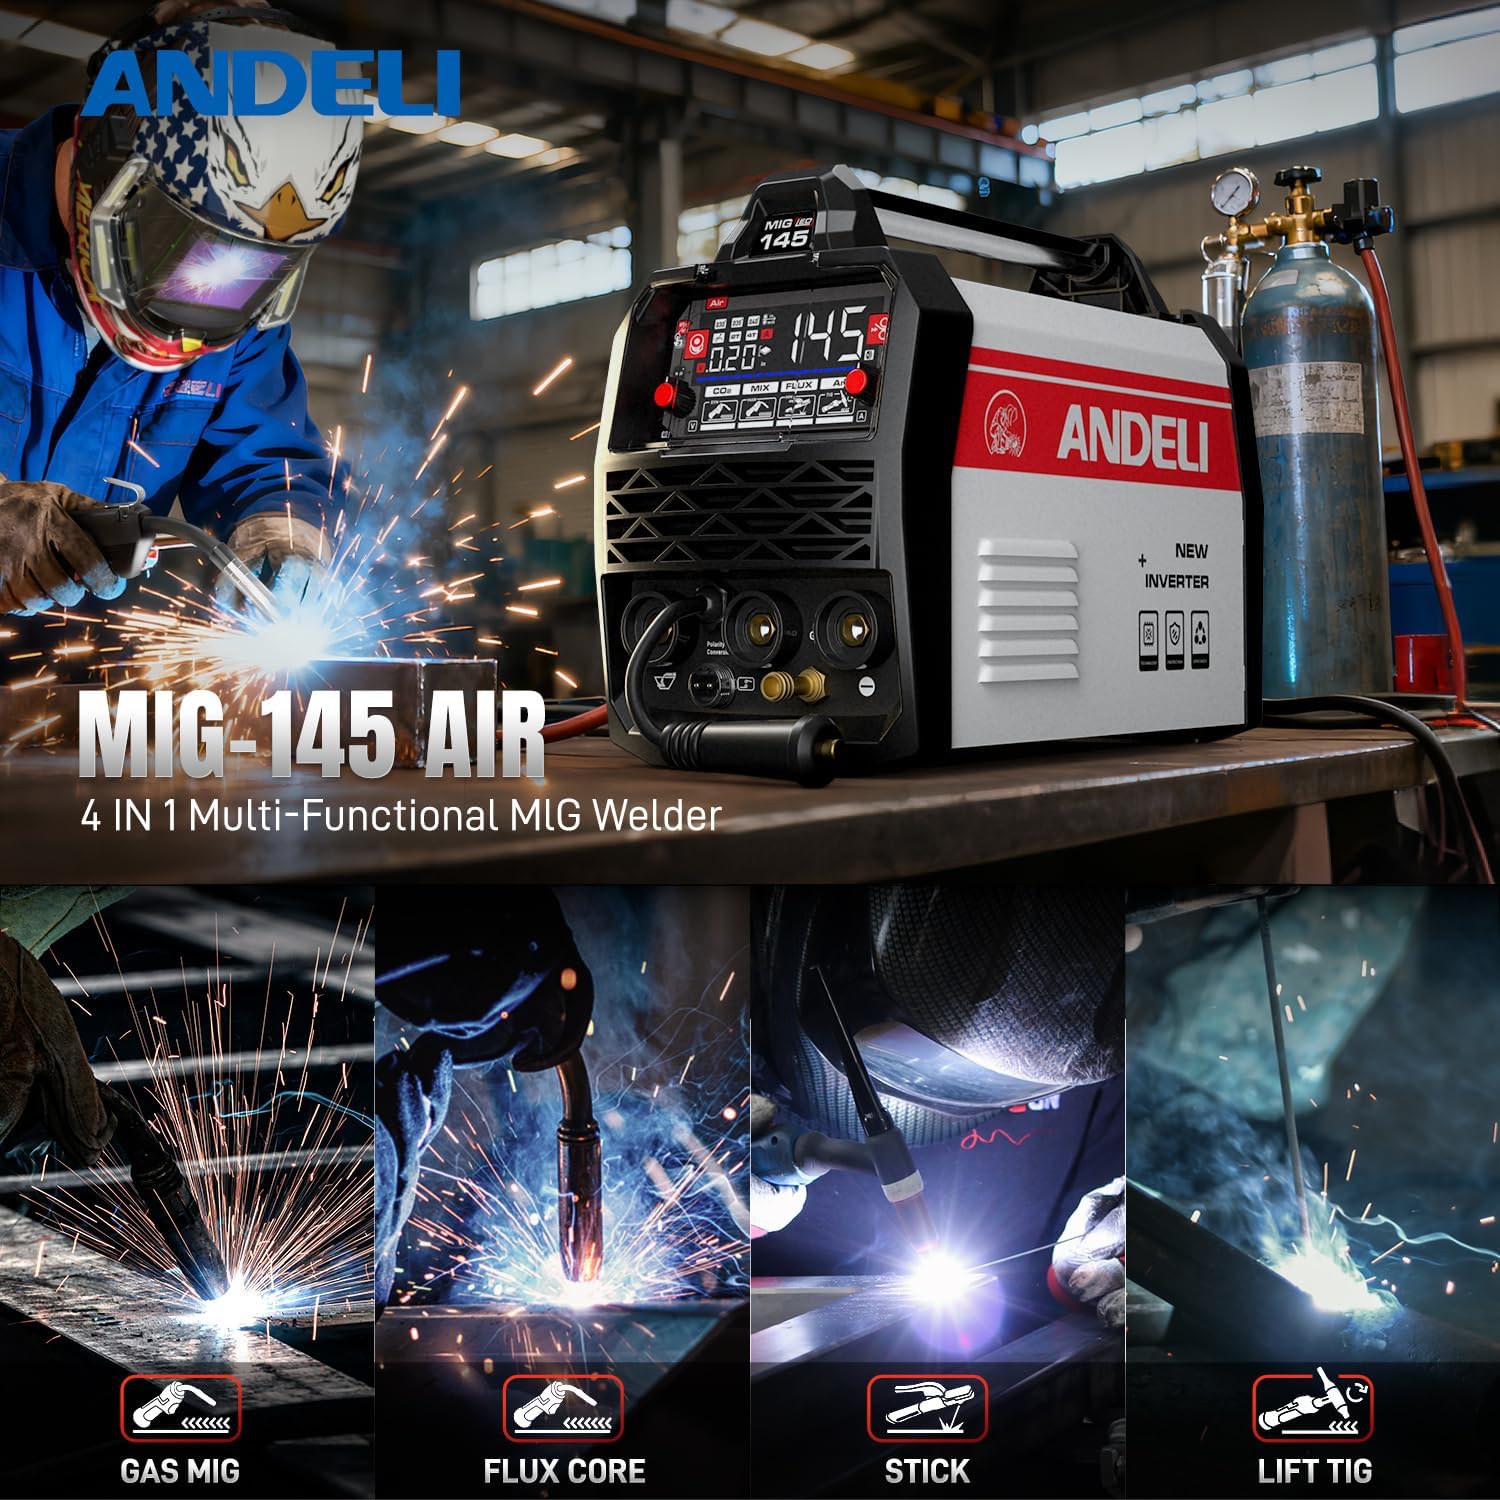
Image: The ANDELI MIG-145 AIR welder, showcasing its four primary welding functions: Gas MIG, Flux Core, Stick, and Lift TIG.
2. Safety Information
Always prioritize safety when operating welding equipment. Read and understand all safety warnings and instructions before use. Failure to follow safety guidelines can result in serious injury or death.
- Wear appropriate Personal Protective Equipment (PPE), including a welding helmet with proper shade, welding gloves, protective clothing, and safety shoes.
- Ensure adequate ventilation to avoid inhaling welding fumes.
- Keep a fire extinguisher nearby and be aware of fire hazards in the work area.
- Do not operate the welder in damp or wet conditions.
- Ensure proper grounding of the welding machine.
- Avoid touching live electrical parts.
- Disconnect power before performing any maintenance or changing accessories.

Image: The ANDELI MIG-145 AIR welder highlighting its safety features, including overheat, overcurrent, overvoltage protection, and a fan cooling system.
3. Package Contents
Verify that all items are present in the package:
- MIG-145 Plus Welder x1
- MIG Wire x1
- Flux Core Wire x1
- MIG Torch & Tips
- Electrode Holder x1
- 220V to 110V Adapter x1
- Gas Hose x1
- Ground Clamp x1

Image: A visual representation of the ANDELI MIG-145 AIR welder and all its included accessories, such as the MIG torch, wires, electrode holder, adapter, gas hose, and ground clamp.
4. Setup
4.1 Wire Installation (MIG/Flux Core)
To install the welding wire for MIG or Flux Core welding:
- Open the side panel of the welder.
- Place the wire spool onto the spindle and secure it.
- Feed the wire through the wire feeder mechanism, ensuring it passes through the correct groove for the wire diameter.
- Close the wire feeder tension arm and adjust the tension appropriately.
- Thread the wire through the MIG torch liner until it emerges from the contact tip.
Video: Demonstrates the wire installation process and basic settings for a multiprocess welder, applicable to the ANDELI MIG-145 AIR.
Video: Shows wire installation and compatibility with different wire spool sizes for a MIG welder, relevant for the ANDELI MIG-145 AIR.
4.2 Connecting Welding Cables (MMA/Stick, Lift TIG)
For MMA (Stick) or Lift TIG welding, connect the electrode holder and ground clamp to the appropriate terminals on the front panel of the welder. Ensure connections are secure.
4.3 Gas Connection (Gas MIG)
For Gas MIG welding, connect the gas hose from your shielding gas cylinder (e.g., CO2 or Argon/CO2 mix) to the gas inlet on the back of the welder. Ensure all connections are tight and leak-free. Adjust the gas flow rate using the regulator on your cylinder.
4.4 Power Connection
The ANDELI MIG-145 AIR supports dual voltage (110V/220V). Use the appropriate power cord and adapter for your power supply. Ensure the power source matches the welder's requirements.

Image: The ANDELI MIG-145 AIR welder illustrating its 110V/220V dual voltage capability, providing flexibility for various power sources.
5. Operating Modes
The welder features a 4.1-inch LED digital display for clear visibility and control. It offers both Automatic and Adjustment modes for ease of use and precision.
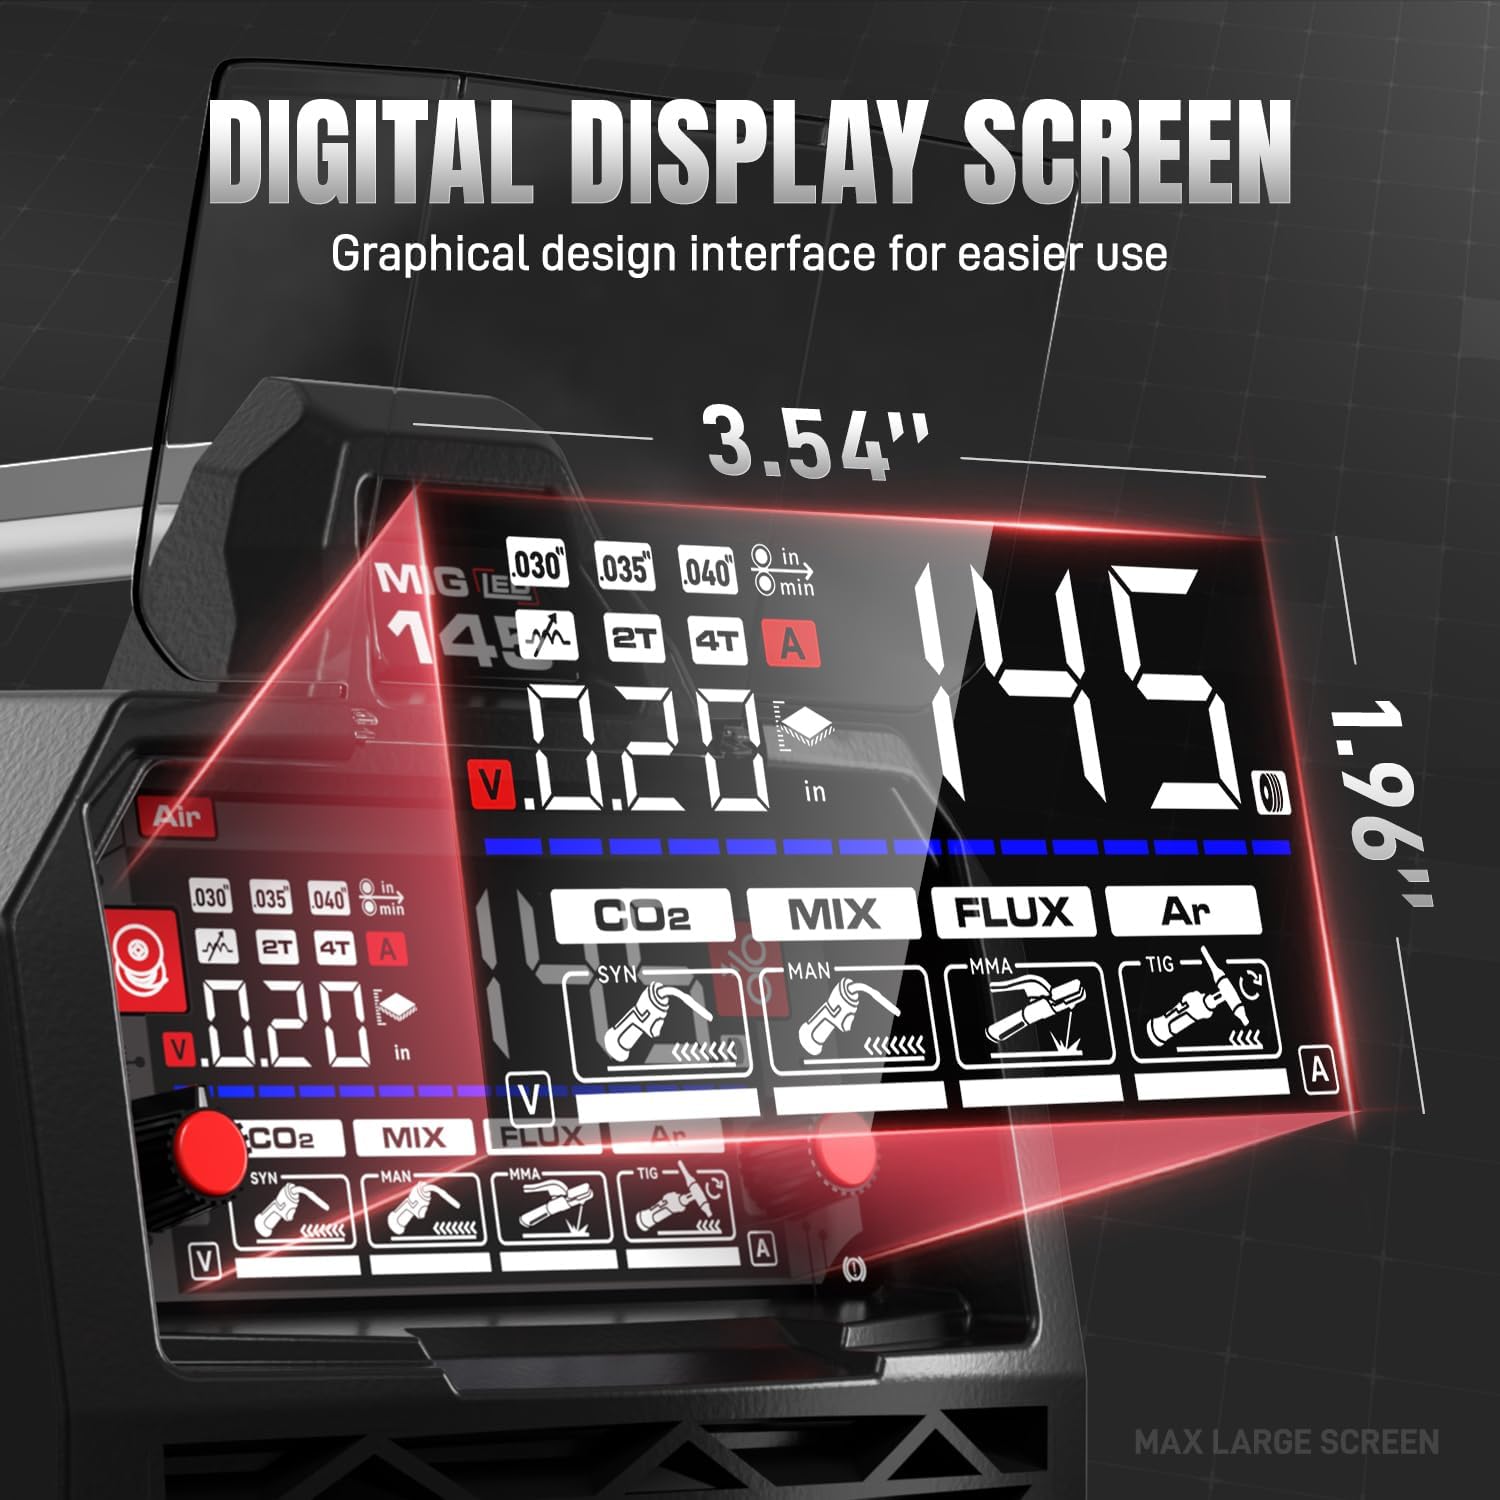
Image: A detailed view of the ANDELI MIG-145 AIR's 4.1-inch digital display, showing various welding parameters and settings.

Image: The welder's display illustrating the choice between Automatic Mode (recommended for beginners) and Adjustment Mode (for skilled workers).
5.1 Mode Selection
Use the control panel to select your desired welding mode: Gas MIG, Flux MIG, Lift TIG, or MMA. The LED display will show the selected mode and relevant parameters.
Video: A tutorial on accessory installation and use for a 4-in-1 MIG welder, demonstrating various welding modes and settings.
5.2 Synergic Control Technology
In Synergic Control mode, simply adjust the amperage or welding wire diameter, and the system will automatically optimize voltage and wire feed speed for optimal results. This feature simplifies setup and ensures precision.
5.3 2T/4T Settings
The welder offers 2T (Two-Touch) and 4T (Four-Touch) trigger settings:
- 2T (Two-Touch): Press and hold the trigger to weld; release to stop. Ideal for short welds and precise control.
- 4T (Four-Touch): Press the trigger once to start welding, release, and the arc will maintain. Press again to stop. Perfect for long welds without hand fatigue.
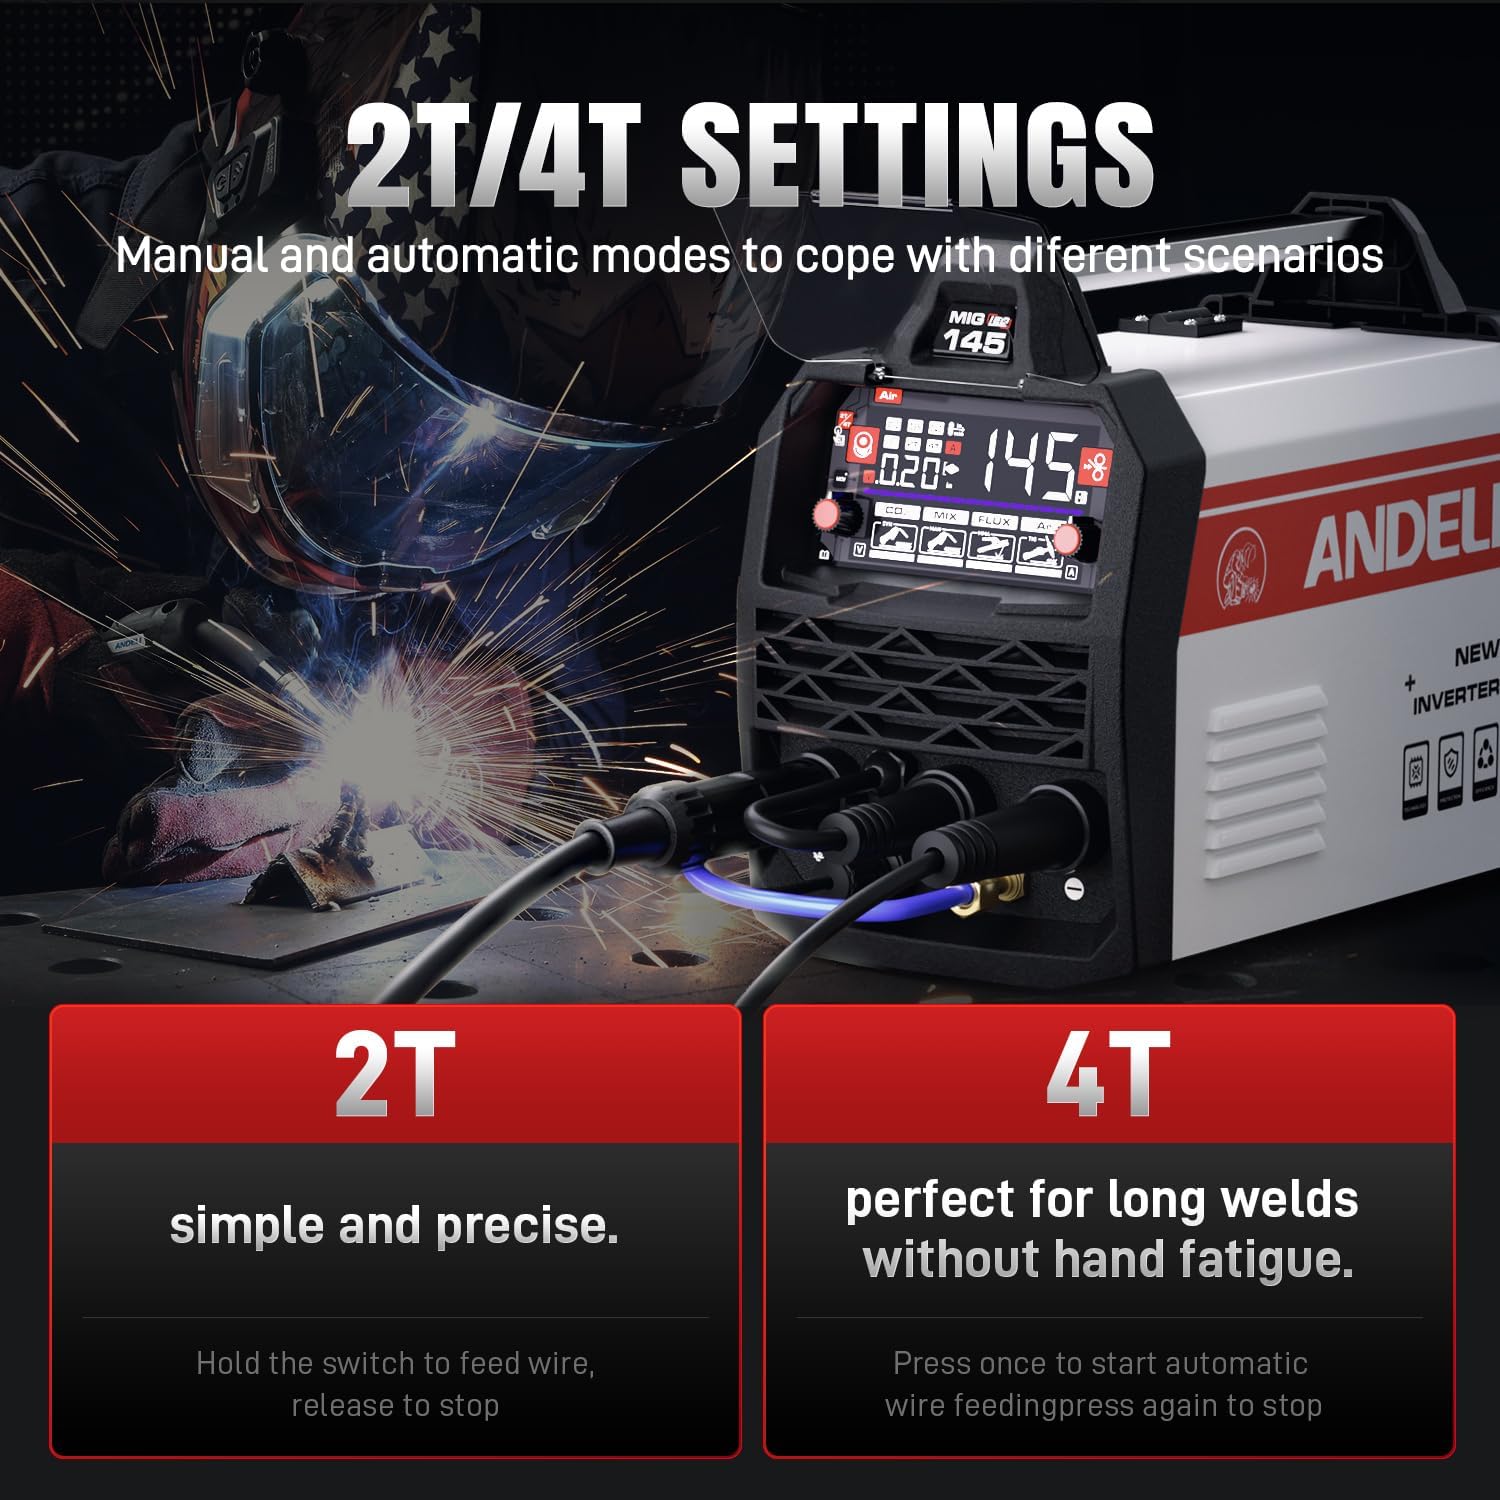
Image: The welder's control panel displaying the 2T and 4T settings, explaining their functions for different welding scenarios.
6. Specifications
| Feature | Detail |
|---|---|
| Manufacturer | ANDELI |
| Part Number | AMZMIG145AIR-USFBA |
| Parcel Dimensions | 42.16 x 29.21 x 28.57 cm |
| Item Model Number | MIG-145 AIR |
| Style | 145A MIG Welder |
| Item Weight | 10.1 kg |
| Batteries Included? | No |
| Batteries Required? | No |
| Date First Available | Oct. 23 2025 |
7. Maintenance
Regular maintenance ensures the longevity and optimal performance of your ANDELI MIG-145 AIR welder.
- Cleaning: Periodically clean the welder's exterior and ventilation openings to prevent dust and debris buildup. Use compressed air to clear internal components if necessary, ensuring the machine is unplugged.
- Cable Inspection: Regularly inspect all welding cables, torch, and ground clamp for damage, fraying, or loose connections. Replace any damaged components immediately.
- Contact Tip & Nozzle: For MIG welding, frequently check and clean the contact tip and nozzle. Replace the contact tip when it becomes worn or clogged to ensure consistent wire feeding and arc stability.
- Wire Feeder: Keep the wire feeder rollers clean and ensure proper tension. Check for any obstructions in the wire liner.
- Storage: Store the welder in a clean, dry environment away from excessive dust, moisture, and extreme temperatures.
8. Troubleshooting
If you encounter issues with your welder, refer to the following common troubleshooting steps:
- No Power: Check the power cord connection, wall outlet, and circuit breaker. Ensure the welder's power switch is ON.
- No Arc: Verify that the ground clamp is securely attached to the workpiece and that the electrode/torch is making proper contact. Check for correct mode selection and parameter settings.
- Poor Weld Quality: Adjust voltage, amperage, and wire feed speed according to the material thickness and welding process. Ensure the workpiece is clean and free of rust or paint. Check for proper gas flow (for Gas MIG) or correct wire type (for Flux Core).
- Wire Feeding Issues: Check wire spool installation, wire feeder tension, and ensure the contact tip is not clogged. Inspect the wire liner for kinks or blockages.
- Overheat Protection: If the welder stops and displays an overheat warning, allow it to cool down. Ensure adequate ventilation around the machine.
For persistent issues, contact ANDELI customer support or a qualified technician.
9. Warranty and Support
The ANDELI MIG-145 AIR welder comes with a manufacturer's warranty. Please refer to the warranty card included in your package for specific terms and conditions, including coverage duration and claim procedures. For technical assistance, spare parts, or any other inquiries, please contact ANDELI customer support through the contact information provided in your product documentation or on the official ANDELI website.


