1. Introduction
This manual provides detailed instructions for the installation, operation, and maintenance of your AINAVI 10-inch Touchscreen Car Stereo designed for Honda Accord 8th Generation vehicles (model years 2008-2012). Please read this manual thoroughly before installation and use to ensure proper functionality and safety.
The unit features an Android 12 system with 2GB RAM and 64GB ROM, offering a 10.2-inch IPS touchscreen display, wired/wireless CarPlay, Android Auto, GPS navigation, Bluetooth, Wi-Fi, and support for a 1080P AHD rearview camera.
2. Package Contents
Verify that all components are present in the package:
- Head Unit (10-inch touchscreen)
- Frame + Screen assembly
- Power cable (may include CANbus for some models)
- RCA cable set
- Car microphone
- GPS module
- 2x USB cables
- Reversing control cable
- 1080P Rear view camera
- Frame removal tool

Figure 2.1: Included Components. Note that specific cables may vary by model.
3. Setup and Installation
This unit is designed for 100% plug-and-play installation. However, professional installation is recommended. Ensure the vehicle's ignition is off and the battery is disconnected before beginning installation.
3.1. Compatibility Check
This radio is compatible with original factory-style car radios for Honda Accord 8th Generation (2008, 2009, 2010, 2011, 2012). Before proceeding, verify your car's model, year, and the shape of the center console. If your vehicle has a small display above the radio, this unit is generally compatible. If your vehicle has a large integrated screen, it may not be compatible.

Figure 3.1: Compatibility Guide for Honda Accord 8th Gen.
3.2. Installation Steps (General)
- Carefully remove the original factory radio and trim using the provided frame removal tool.
- Connect the new head unit's wiring harness to the vehicle's existing wiring. Ensure all connections are secure.
- Connect the GPS module and microphone. Position the GPS antenna in a location with a clear view of the sky (e.g., dashboard).
- If installing the rearview camera, route the camera cable to the rear of the vehicle and connect it to the reversing control cable.
- For audio input, if your vehicle has a built-in AUX port (e.g., in the center armrest), use Cable G (provided) to connect to that AUX input for sound transmission.
- Mount the new head unit and frame assembly into the dashboard opening.
- Reconnect the vehicle battery and test the unit's functionality.
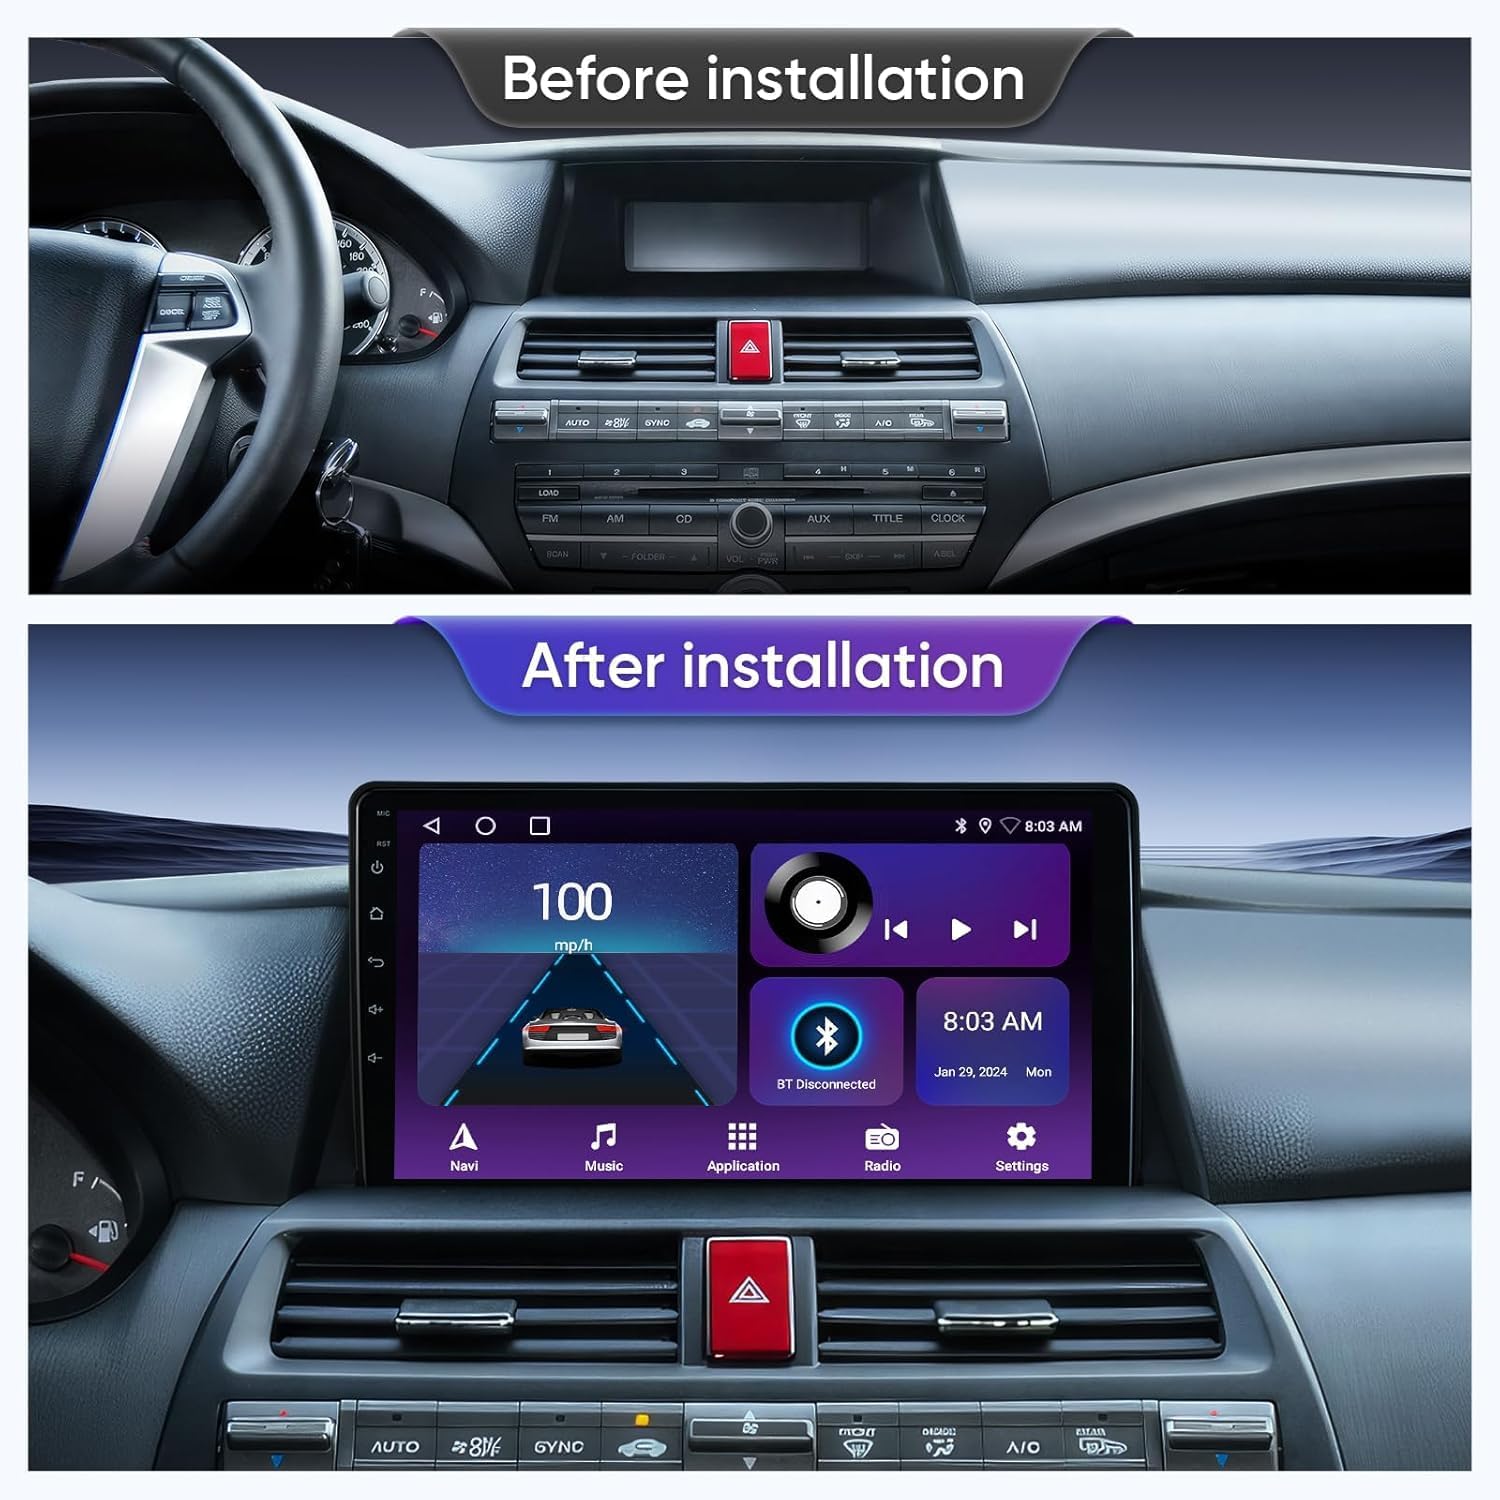
Figure 3.2: Before and After Installation.

Figure 3.3: Installed Head Unit Display.
4. Operating Instructions
4.1. Basic Interface Navigation
The unit operates on an Android 12 system with a responsive 10.2-inch IPS touchscreen. Navigate through applications and settings by tapping and swiping on the screen, similar to a smartphone or tablet.
4.2. Wired/Wireless CarPlay and Android Auto
Connect your iPhone via Bluetooth for wireless CarPlay or via USB for wired CarPlay. For Android phones, connect via USB for Android Auto. This allows access to maps, music, calls, and other compatible applications directly on the head unit's screen. Voice assistants like Siri or Google Assistant can be activated for hands-free operation.

Figure 4.1: Apple CarPlay and Android Auto Functionality.
4.3. GPS Navigation
The built-in GPS module supports both online and offline maps. You can download map software from the Google Play application market. The system provides real-time navigation and route guidance.

Figure 4.2: GPS Navigation Interface.
4.4. Wi-Fi and Bluetooth Connectivity
Connect the unit to a Wi-Fi hotspot (e.g., from your smartphone) to access the internet for online music streaming, map updates, and app downloads. Bluetooth allows for hands-free calling and audio streaming from your mobile device.

Figure 4.3: Wi-Fi and Bluetooth Connection Screens.
4.5. Split Screen Mode and MirrorLink/Airplay
The split-screen feature allows you to run two applications simultaneously on the display, such as navigation and music. MirrorLink (for Android) and Airplay (for iPhone) enable screen mirroring from your smartphone to the head unit.

Figure 4.4: Split Screen Mode and Steering Wheel Control.

Figure 4.5: Split Screen and Mirroring Capabilities.
4.6. Steering Wheel Control (SWC)
The unit supports existing steering wheel controls for convenient operation. You can configure button functions (short press and long press) through the system settings.
4.7. Full RCA Output
The unit provides full RCA output, allowing connection to external monitors (e.g., headrest screens) for passengers to view content from the head unit.

Figure 4.6: Full RCA Output to External Displays.
4.8. Rearview Camera
The included IP69 waterproof 1080P AHD rearview camera provides a 170° wide-angle view with a fisheye design for enhanced visibility when reversing. The display automatically switches to the camera feed when the vehicle is in reverse gear.

Figure 4.7: 1080P Rearview Camera Display.
5. Maintenance
To ensure the longevity and optimal performance of your car stereo, follow these maintenance guidelines:
- Cleaning the Screen: Use a soft, lint-free cloth to gently wipe the touchscreen. For stubborn smudges, slightly dampen the cloth with water or a screen-safe cleaner. Avoid abrasive materials or harsh chemicals.
- Software Updates: Periodically check for system software updates through the unit's settings menu to ensure you have the latest features and security patches.
- Environmental Conditions: Avoid exposing the unit to extreme temperatures, direct sunlight for prolonged periods, or excessive moisture.
- Cable Connections: Ensure all cables are securely connected. Loose connections can lead to intermittent issues.
6. Troubleshooting
This section addresses common issues you might encounter.
| Problem | Possible Cause | Solution |
|---|---|---|
| No sound output. | Incorrect AUX cable connection or volume too low. | Ensure Cable G is correctly connected to the vehicle's AUX port. Check the volume settings on both the head unit and the vehicle's audio system. |
| Unit does not power on. | Loose power connection or blown fuse. | Verify all power cables are securely connected. Check the vehicle's fuse box for any blown fuses related to the stereo. |
| GPS signal is weak or inaccurate. | GPS antenna obstruction or poor placement. | Ensure the GPS antenna is placed in a location with a clear view of the sky, free from obstructions. |
| CarPlay/Android Auto not connecting. | Incorrect connection method or software issue. | For wireless CarPlay, ensure Bluetooth is enabled on your iPhone. For wired connections, try a different USB cable. Restart both the phone and the head unit. |
If problems persist, please refer to the Support section for further assistance.
7. Specifications
| Feature | Detail |
|---|---|
| Display Size | 10 Inches |
| Operating System | Android 12 |
| RAM | 2GB |
| ROM | 64GB |
| Connectivity Technology | Bluetooth, USB, Wi-Fi |
| Special Features | Touchscreen, CarPlay, Android Auto, MirrorLink, Airplay, DSP, GPS Navigation, Backup Camera Support |
| Map Type | North America, Worldwide (via downloadable apps) |
| Audio Output Mode | Stereo |
| Mounting Type | Dashboard Mount |
| Item Weight | 5.17 pounds |
| Package Dimensions | 15.39 x 13.58 x 5.67 inches |
8. Warranty Information
This AINAVI car stereo unit comes with a 12-Month Manufacturer's Guarantee from the date of purchase. This warranty covers defects in materials and workmanship under normal use. It does not cover damage caused by improper installation, accident, misuse, abuse, neglect, or unauthorized modification.
Please retain your proof of purchase for warranty claims.
9. Support
For technical assistance, installation support, or any other inquiries regarding your AINAVI car stereo, please contact the seller directly through the Amazon messaging system.
To do this:
- Go to your Amazon order history.
- Locate your purchase of the AINAVI 10-inch Touchscreen Car Stereo.
- Click on the seller's name (e.g., "HomeCar").
- Select the option to "Ask a question" or "Contact Seller."

Figure 9.1: How to Contact Seller for Support.


