
Introduction
This manual provides detailed instructions for the setup, operation, maintenance, and troubleshooting of your SOVMIKU Vicohome 2G6B and 2CG6 2K Solar Security Camera. Please read this manual thoroughly before using the product to ensure proper function and safety.
1. Product Overview
The SOVMIKU Vicohome 2K Solar Security Camera is a wireless outdoor surveillance system designed for ease of use and reliable performance. It features a 2K resolution camera, solar panel for continuous power, motion detection, two-way audio, and color night vision.
Package Contents
- SOVMIKU Vicohome 2K Solar Security Camera (2G6B or 2CG6 model)
- Solar Panel with 9.8ft Cable
- Mounting Bracket and Screws
- USB Charging Cable
- User Manual

Image: The SOVMIKU Vicohome 2K Solar Security Camera with its accompanying solar panel, ready for outdoor installation.
2. Setup
2.1 Initial Charging
Before first use, fully charge the camera using the provided USB cable. The camera has a built-in 5200mAh battery. A full charge can power the camera for approximately two months under normal usage conditions.
2.2 App Installation and Account Creation
- Download the Vicohome app from your smartphone's app store (iOS or Android).
- Open the app and create a new account or log in if you already have one.
- Follow the on-screen instructions to add your camera to the app. Ensure your camera is powered on and in pairing mode.

Image: The Vicohome application interface displaying live feeds from multiple connected security cameras.
2.3 MicroSD Card Installation (Optional)
The camera supports local storage via a microSD card (up to 128GB, not included). To install:
- Locate the microSD card slot on the camera.
- Gently insert the microSD card into the slot until it clicks into place.
- Format the card through the Vicohome app settings for optimal performance.

Image: A hand demonstrating the insertion of a microSD card into the designated slot on the camera body.
2.4 Mounting the Camera and Solar Panel
The camera and solar panel are designed for outdoor use with an IP65 weather resistance rating. The charging interface features a silicone waterproof protective plug for safe outdoor installation.
- Choose a Location: Select a location that provides the desired viewing angle and receives ample direct sunlight for the solar panel. The solar panel cable is 9.8ft long, allowing flexible placement.
- Install the Mounting Bracket: Use the provided screws to securely attach the mounting bracket to a wall or ceiling.
- Attach the Camera: Clip the camera onto the installed bracket.
- Connect Solar Panel: Attach the solar panel to its bracket and connect its cable to the camera's charging port, ensuring the waterproof plug is properly sealed.
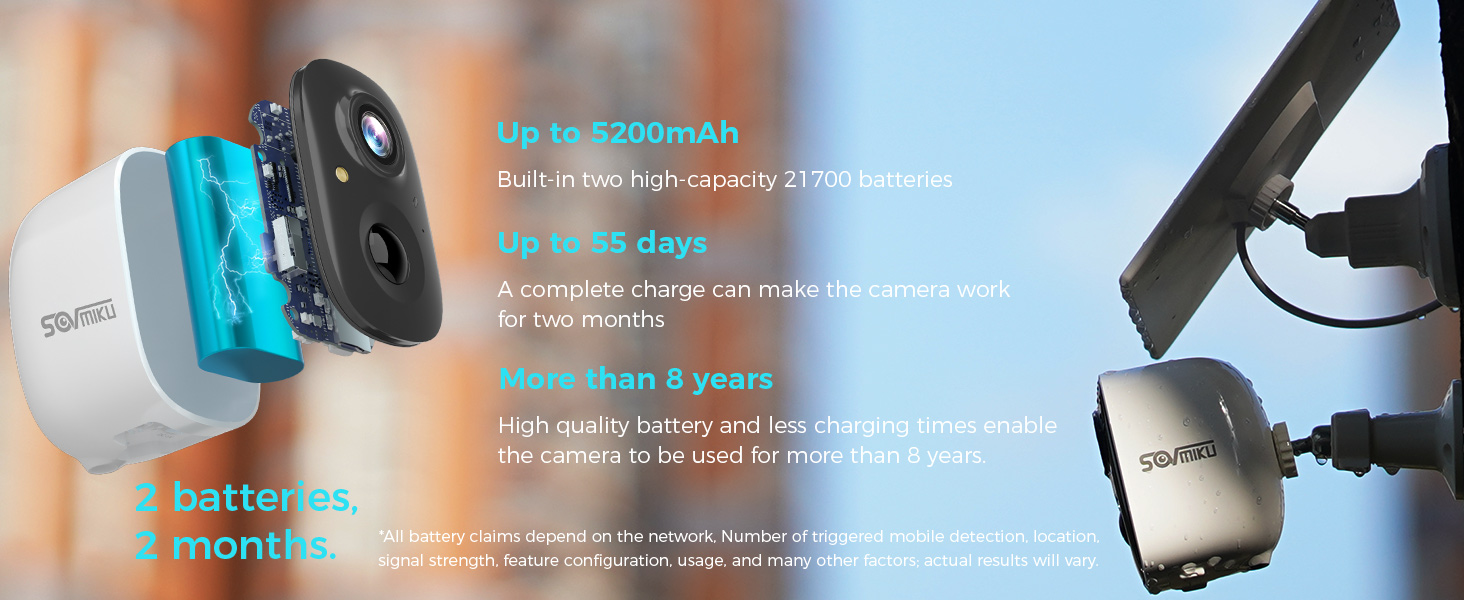
Image: A hand demonstrating how to hold the camera mount, illustrating its suitability for wall or ceiling installation.
Solar Panel Placement Guide
For optimal charging, the solar panel should be pointed directly at the sun during the middle of the day. Avoid shaded areas. The optimal charging temperature range is 0°C to 45°C (14°F to 113°F).

Image: A visual guide illustrating various scenarios for solar panel placement, indicating both optimal and suboptimal positions for maximum sun exposure.
3. Operating Instructions
3.1 Live View and Recording
Open the Vicohome app to view live footage from your camera. You can manually record video or take screenshots directly from the live view interface.
3.2 Motion Detection and Alerts
The camera features a Passive Infrared (PIR) sensor for motion detection. When a warm body (human or animal) passes by, the PIR sensor triggers the camera, activating recording and sending alerts to your smartphone.
- Spotlight Activation: At night, motion detection can activate a spotlight for improved visibility and deterrence.
- Audible & Flashlight Alarm: If enabled in the app, the camera will automatically flash its light and sound an alarm when motion is detected.
Image: A security camera with an activated flashlight illuminating a person at night, demonstrating its alarm features.
3.3 Two-Way Audio
Utilize the two-way audio feature through the Vicohome app to communicate with individuals near the camera. This allows for real-time conversations.

Image: An illustration of two-way audio functionality, showing a person speaking into a phone and another person near the camera responding.
3.4 Color Night Vision
The camera provides color night vision, offering clearer and more detailed images in low-light conditions compared to traditional black and white infrared night vision.
Image: An outdoor night scene brightly illuminated by the camera's color night vision, showcasing its ability to capture clear images in darkness.
3.5 Cloud Intelligence (Optional Service)
The camera supports optional cloud intelligence services for advanced features, including AI analysis to identify vehicles, pets, persons, and packages. This service provides enhanced alarm notifications and cloud storage for recordings.

Image: A security camera monitoring a driveway, with a smartphone displaying notifications for detected persons and vehicles, illustrating cloud intelligence features.
3.6 Multi-Device and Multi-User Support
- The Vicohome app can manage up to 50 cameras simultaneously.
- You can share camera access with up to 10 different users, with support for 3 users viewing simultaneously.
4. Maintenance
4.1 Solar Panel Cleaning
Regularly wipe the solar panels to remove dust, dirt, and debris. This ensures optimal energy conversion and continuous power supply to the camera.
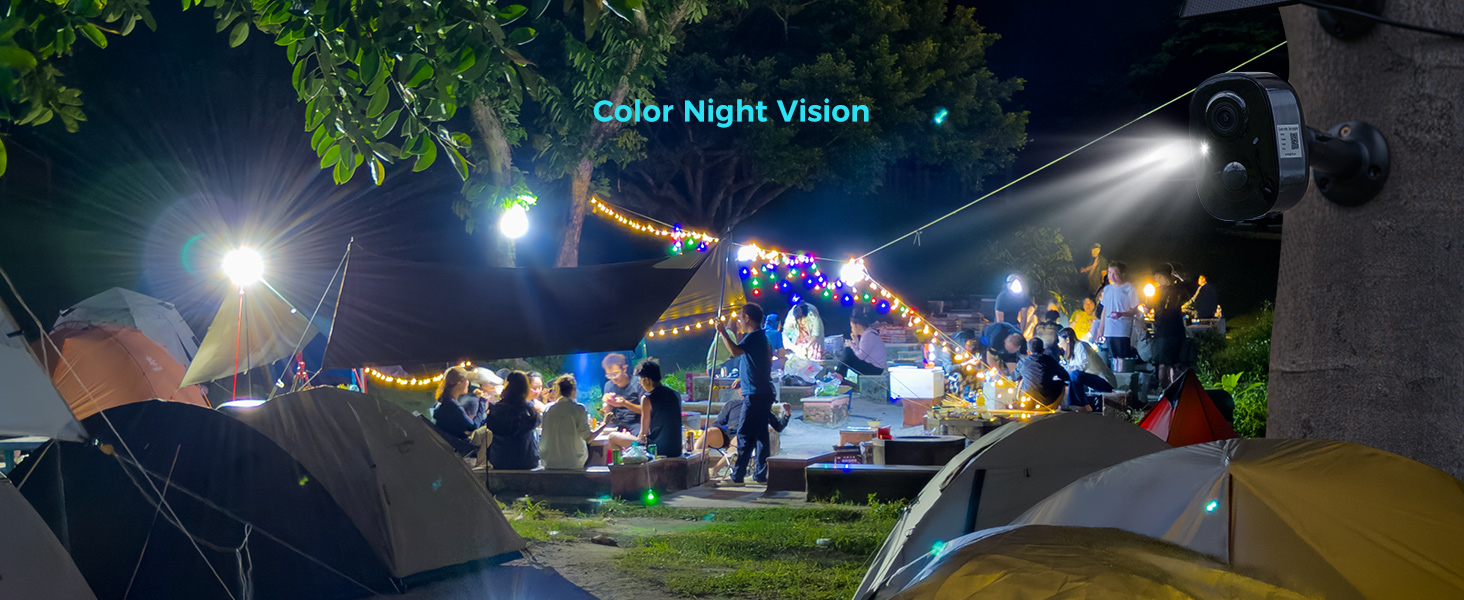
Image: A solar panel mounted outdoors, with text providing tips for cleaning and optimal charging temperatures.
4.2 General Cleaning
Wipe the camera lens and body with a soft, damp cloth as needed. Avoid using harsh chemicals or abrasive materials that could damage the camera's finish or lens.
4.3 Battery Care
The camera's high-quality battery is designed for long-term use (over 8 years). Ensure the camera operates within the recommended temperature range of -20°C to 50°C (-4°F to 122°F) for optimal battery life.
5. Troubleshooting
5.1 Camera Not Powering On
- Ensure the camera battery is charged. Connect it to a power source using the USB cable.
- Verify the solar panel is connected correctly and receiving sufficient sunlight.
5.2 No Motion Detection Alerts
- Check the motion detection settings in the Vicohome app to ensure it is enabled.
- Adjust the sensitivity settings.
- Ensure there are no obstructions blocking the PIR sensor.
5.3 Poor Video Quality
- Clean the camera lens.
- Ensure a stable Wi-Fi connection. Weak signals can affect streaming quality.
- Check app settings for resolution options.
5.4 Connectivity Issues
- Restart the camera and your Wi-Fi router.
- Ensure the camera is within range of your Wi-Fi network.
- If issues persist, try re-pairing the camera with the Vicohome app.
6. Specifications
| Feature | Specification |
|---|---|
| Model Numbers | 2G6B, 2CG6 |
| Resolution | 2K (3 Megapixels) |
| Battery Capacity | 5200mAh (2x 21700 batteries) |
| Solar Panel Type | Monocrystalline Silicon |
| Solar Panel Efficiency | Up to 23% energy conversion rate |
| Solar Panel Cable Length | 9.8 ft |
| Weather Resistance | IP65 |
| Operating Temperature | -20°C to 50°C (-4°F to 122°F) |
| Local Storage | MicroSD card, up to 128GB (not included) |
| Viewing Angles | Horizontal 95°, Vertical 55°, Diagonal 110° |
| App Compatibility | Vicohome (iOS, Android) |
7. Warranty and Support
7.1 180-Day Exchange Policy
SOVMIKU offers a 180-day exchange policy. If you encounter any issues with your product, you may submit a request for an exchange within 180 days of purchase.
7.2 Customer Support
For technical assistance or customer service inquiries, please contact us via email. We commit to responding to all inquiries within 12 hours.
- Email: Sovmiku@163.com


