
1. Introduction
Thank you for choosing the Ganiza 1200W Immersion Blender. This versatile kitchen appliance is designed to simplify your food preparation with its powerful motor and multiple attachments. Please read this manual thoroughly before first use to ensure safe and efficient operation.
2. Important Safety Instructions
When using electrical appliances, basic safety precautions should always be followed to reduce the risk of fire, electric shock, and/or injury to persons, including the following:
- Read all instructions before using the appliance.
- To protect against electric shock, do not immerse the motor unit, cord, or plug in water or other liquids.
- Close supervision is necessary when any appliance is used by or near children.
- Unplug from outlet when not in use, before putting on or taking off parts, and before cleaning.
- Avoid contact with moving parts.
- Do not operate any appliance with a damaged cord or plug or after the appliance malfunctions or has been dropped or damaged in any manner.
- The use of attachments not recommended or sold by the manufacturer may cause fire, electric shock, or injury.
- Do not use outdoors.
- Do not let cord hang over edge of table or counter or touch hot surfaces.
- Keep hands and utensils out of the container while blending to prevent the possibility of severe injury to persons or damage to the unit. A scraper may be used but must be used only when the appliance is not running.
- Blades are sharp. Handle carefully.
- Always operate the blender with the cover in place.
- Do not blend hot liquids in the chopper bowl without allowing them to cool slightly to prevent pressure buildup.
- The innovative SafetyGuard design prevents accidental blending even when dropped.
3. Package Contents
Your Ganiza Immersion Blender set includes the following components:
- Hand Blender Motor Unit
- Immersion Blending Shaft (6-leaf blade)
- 600 ml Chopper Bowl with Blade and Lid
- 800 ml Mixing Beaker
- Whisk Attachment
- Frother Attachment (Dual-whisk system)
- Puree Masher
- Travel Cup with Lid
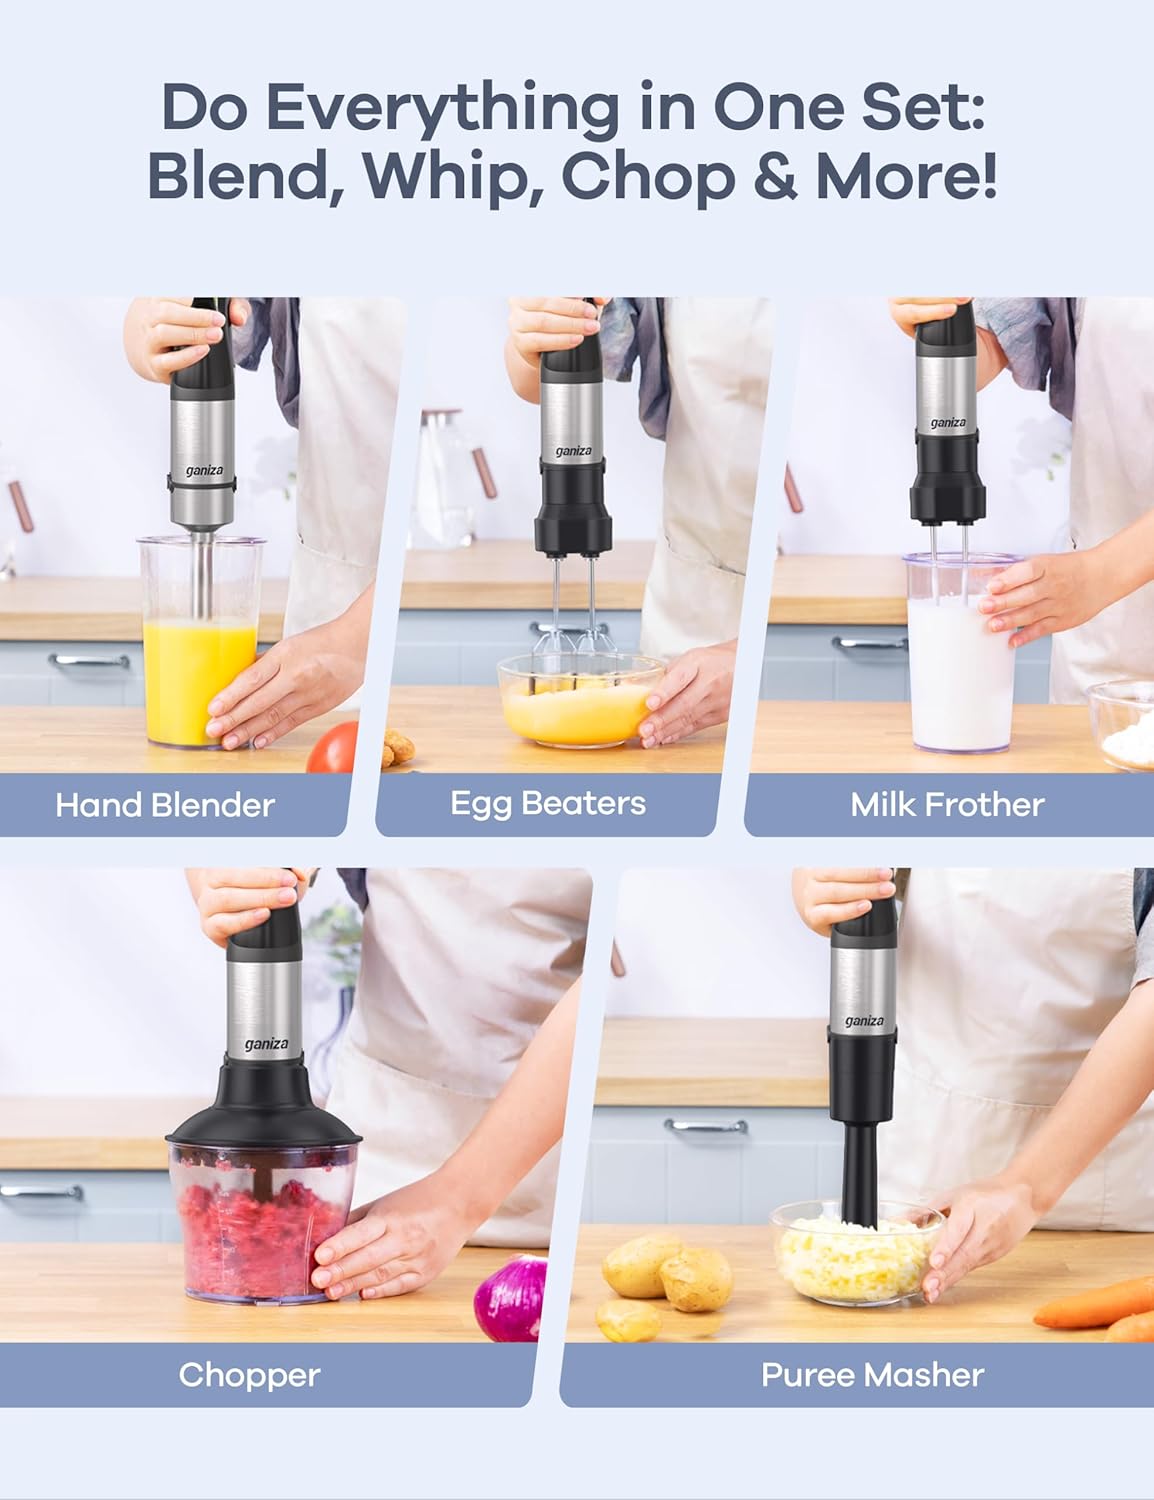
Image: All components of the Ganiza Immersion Blender set, including the motor unit, various attachments, and containers.
4. Assembly
The Ganiza Immersion Blender features a single-click system for attaching and detaching accessories. Ensure the motor unit is unplugged before assembling or disassembling any parts.
- Attaching Accessories: Align the desired attachment (blending shaft, chopper lid, whisk adapter, frother adapter, or puree masher) with the motor unit. Push firmly until you hear a 'click' indicating it is securely locked.
- Detaching Accessories: Press the release buttons on the sides of the motor unit and pull the attachment away.
Video: Demonstration of assembling and disassembling the Ganiza Immersion Blender attachments.
5. Setup
Before operating your immersion blender, ensure it is properly set up.
- Power Connection: Plug the power cord into a standard electrical outlet. The StatusLume™ display on top of the motor unit will show three blinking blue dashes (---), indicating standby mode.
- Unlocking the Device: To unlock the blender from standby mode, press and hold the trigger button for approximately one second. The display will change from blinking dashes to '000' or a similar active indicator, and the blue light will form a smile, signifying it is ready for use.
- Safety Lock: The innovative SafetyGuard design prevents accidental activation. The unit will not operate unless the trigger is pressed after unlocking.

Image: The Smart Time Display (StatusLume™) on the Ganiza Immersion Blender motor unit.
Video: A user demonstrating the digital display and activation of the Ganiza Immersion Blender.
6. Operating Instructions
The Ganiza Immersion Blender offers various functions with its interchangeable attachments.
6.1 Immersion Blending
Use the immersion blending shaft for smoothies, soups, sauces, and purees. The 1200W motor and 6-leaf stainless steel blade provide efficient blending.
- Attach the immersion blending shaft to the motor unit.
- Submerge the blade guard into your ingredients in a deep pot or the 800ml mixing beaker.
- Press the SmartUniPress™ trigger to start blending. The speed is variable based on how hard you press the trigger.
- The StatusLume™ display will track the blending time and speed.
- The VortexShear™ technology minimizes suction and splashing, allowing for direct blending in pots without scratching surfaces.

Image: Close-up of the Ganiza Immersion Blender's 1200W motor and 6-leaf stainless steel blade for efficient blending.
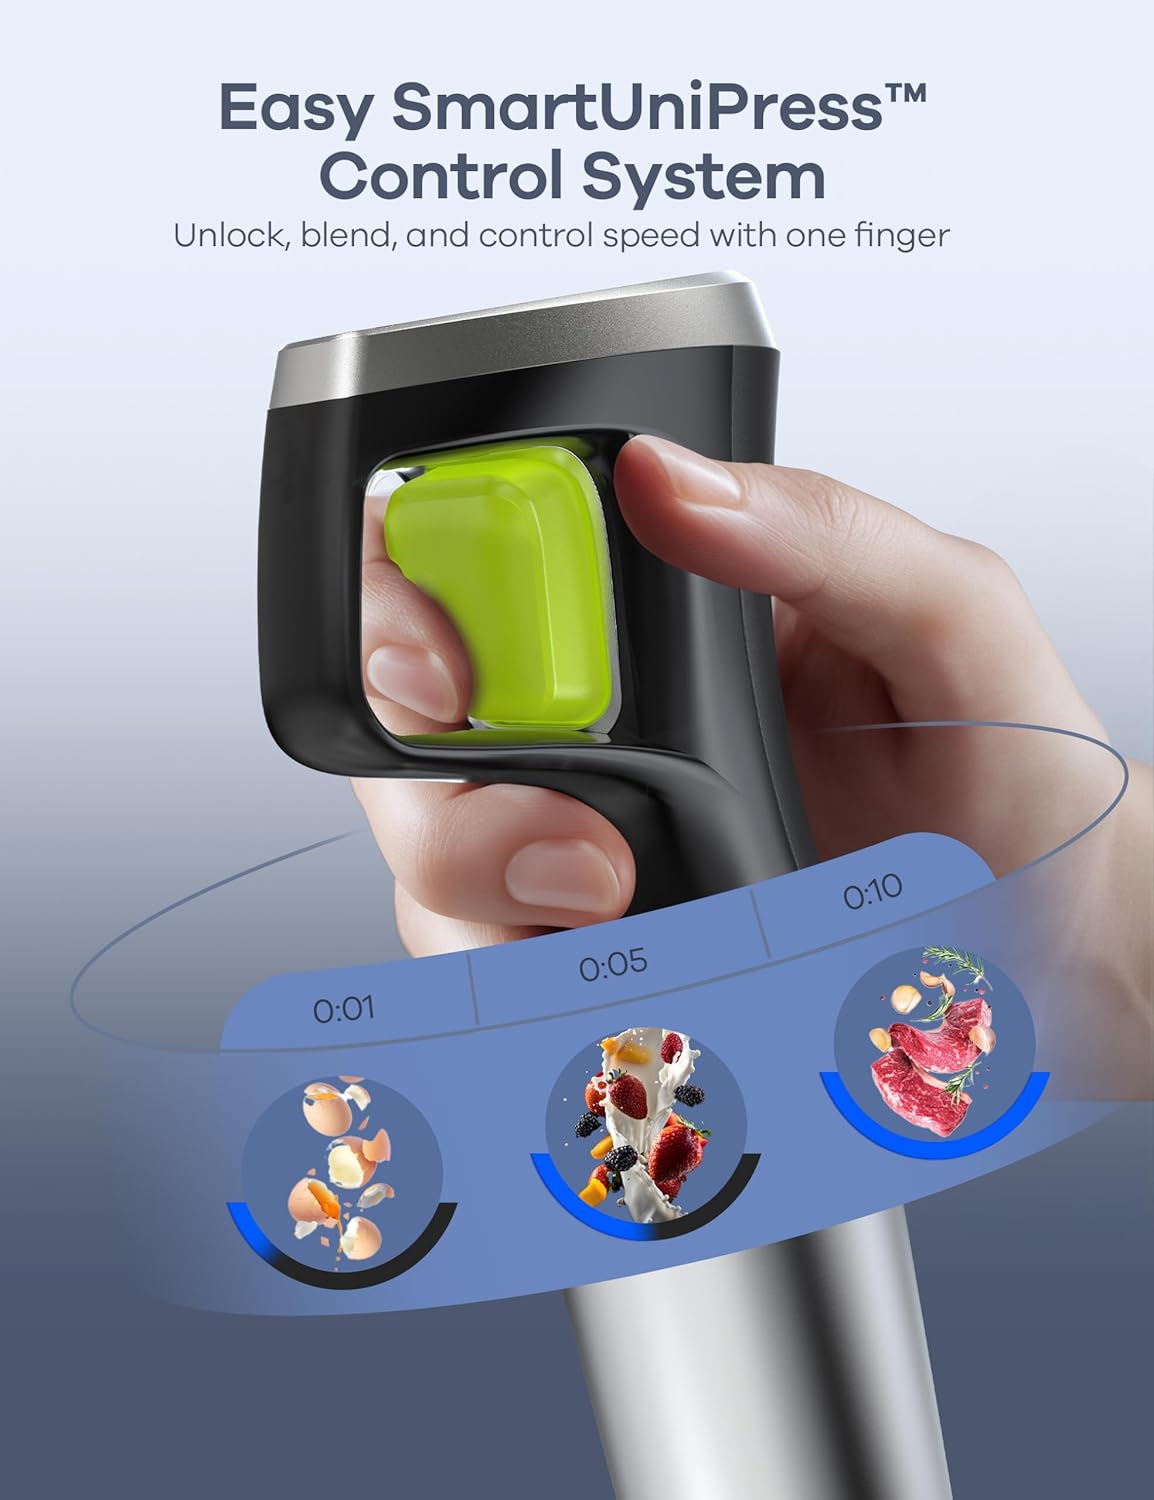
Image: A hand demonstrating the SmartUniPress™ variable speed control on the Ganiza Immersion Blender.

Image: A user blending with the Ganiza Immersion Blender, highlighting the VortexShear™ no-splash technology.
6.2 Chopping
The 600ml chopper is ideal for mincing meat, chopping vegetables, nuts, and herbs.
- Place the chopping blade onto the center pin of the chopper bowl.
- Add your ingredients to the chopper bowl.
- Place the chopper lid onto the bowl, ensuring it is securely seated.
- Attach the motor unit to the chopper lid.
- Press the trigger to chop. Use short pulses for coarse chopping or hold longer for finer results.
Video: A user demonstrating the chopping function of the Ganiza Immersion Blender with the chopper attachment.
6.3 Whisking
The whisk attachment is perfect for whipping cream, beating egg whites, and mixing batters.
- Insert the whisk into the whisk adapter.
- Attach the whisk adapter to the motor unit.
- Submerge the whisk into your ingredients.
- Press the trigger to whisk. The dual-whisk system is designed for 4x faster whipping.

Image: The Ganiza Immersion Blender with the whisk attachment in use.
6.4 Frothing
Create frothy milk for lattes and cappuccinos with the frother attachment.
- Insert the frother into the frother adapter.
- Attach the frother adapter to the motor unit.
- Submerge the frother into milk or other liquids.
- Press the trigger to froth. The patented twin frother creates milk foam 6x quicker.

Image: The Ganiza Immersion Blender with the frother attachment in use.
6.5 Pureeing/Mashing
Use the puree masher for smooth mashed potatoes, baby food, and other soft ingredients.
- Attach the puree masher to the motor unit.
- Place the masher into cooked, soft ingredients.
- Press the trigger and move the masher up and down to achieve desired consistency.

Image: The Ganiza Immersion Blender with the mashing attachment in use.
7. Cleaning and Maintenance
Proper cleaning and maintenance will extend the life of your Ganiza Immersion Blender.
- Motor Unit: Wipe the motor unit with a damp cloth. Do not immerse it in water or any other liquid.
- Attachments: All detachable attachments (blending shaft, whisk, frother, puree masher, mixing beaker, travel cup) are dishwasher safe for effortless cleanup.
- Chopper Bowl & Blade: The chopper bowl and blade are dishwasher safe. The chopper bowl lid and connectors are not dishwasher safe and should be wiped clean with a damp cloth.
- Storage: Store the blender and its attachments in a dry place. The motor unit features a hang loop design for convenient storage.
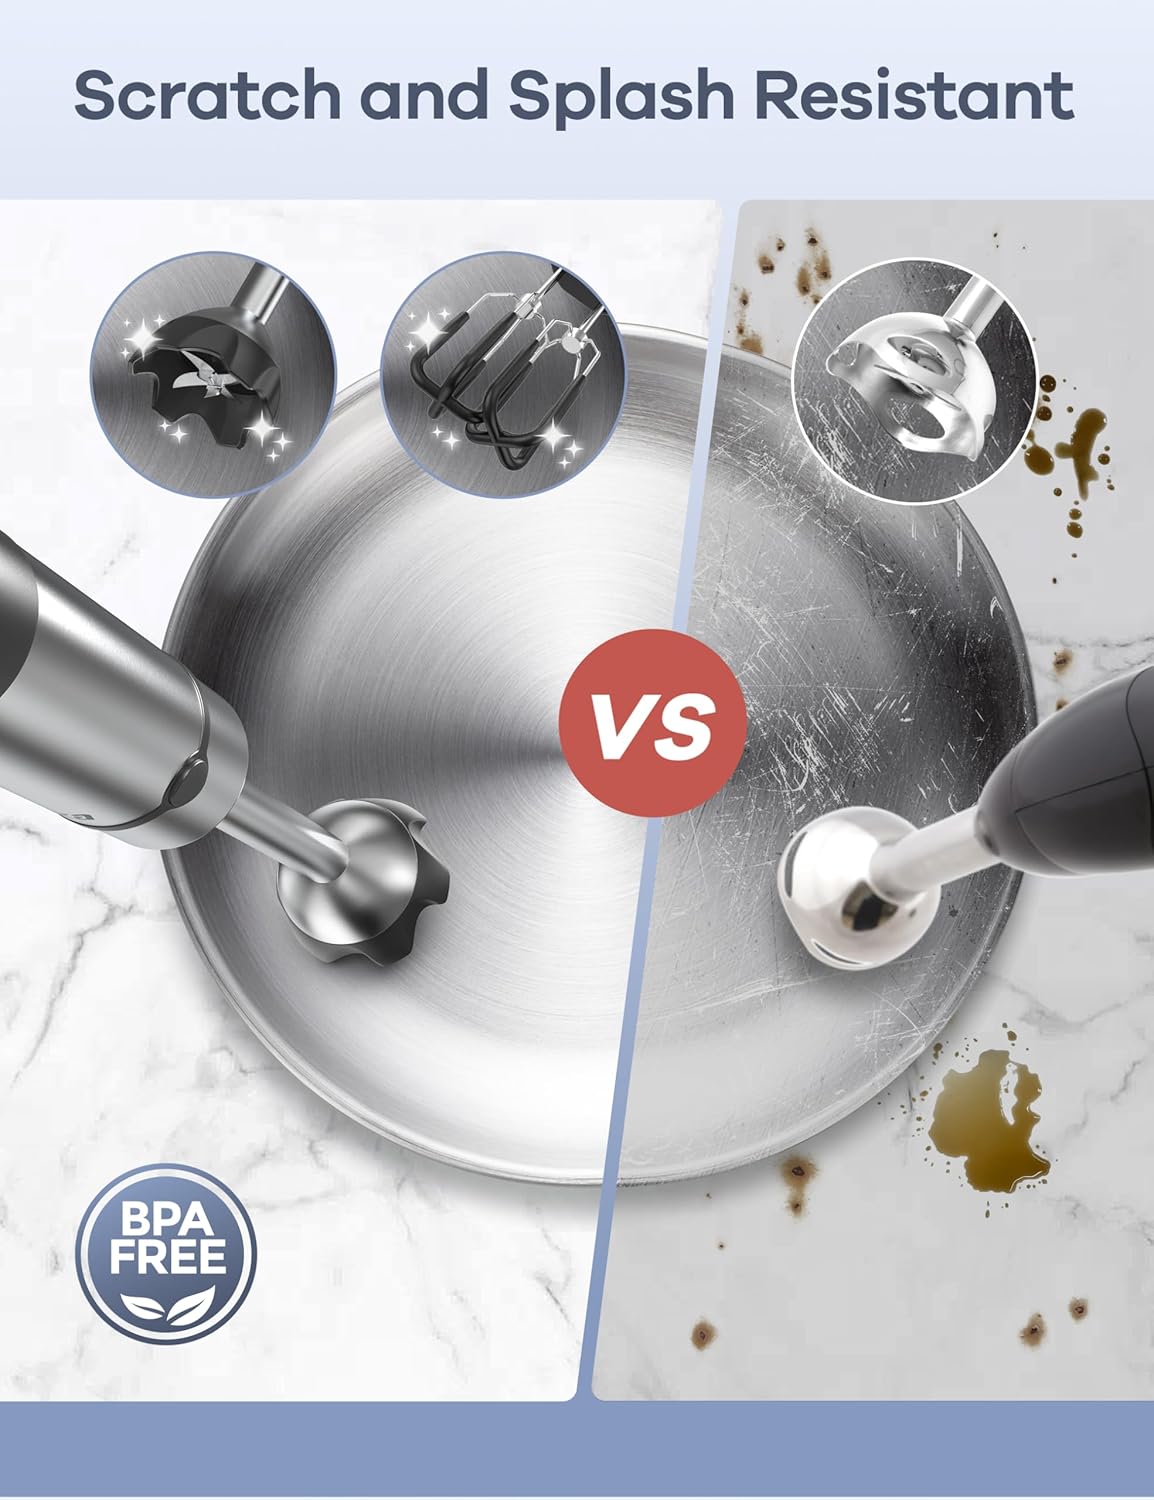
Image: Visual comparison highlighting the scratch and splash-resistant design of the Ganiza Immersion Blender's components.
8. Troubleshooting
If you encounter issues with your Ganiza Immersion Blender, refer to the following common problems and solutions:
- Blender does not turn on:
- Ensure the power cord is securely plugged into a working outlet.
- Verify the unit is out of standby mode by pressing and holding the trigger for one second until the display shows '000' or an active indicator.
- Check if the SafetyGuard design has been activated (e.g., if the unit was dropped). Re-unlock the device if necessary.
- Attachments are difficult to connect/disconnect:
- Ensure proper alignment of the attachment with the motor unit.
- Apply firm, steady pressure when attaching until it clicks. When detaching, press the release buttons firmly.
- Motor seems weak or overheats:
- Avoid overloading the blender with too many ingredients or excessively hard items.
- If the unit overheats, the StatusLume™ display may show a red blinking light. Unplug the unit and allow it to cool down before attempting to use it again. Re-unlock after cooling.
9. Specifications
| Feature | Detail |
|---|---|
| Brand | Ganiza |
| Model | Max 1200W Heavy Duty Hand Blender |
| Power | 1200 Watts |
| Blade Material | Stainless Steel (6-leaf) |
| Control Type | Trigger Variable Speed (SmartUniPress™) |
| Display | Smart Time Display (StatusLume™) |
| Special Features | Detachable Attachments, Near-Zero Suction (VortexShear™), Anti-Drop Safety Lock (SafetyGuard™) |
| Included Components | 600 ml Chopper, 800 ml Mixing Beaker, Frother Attachment, Puree Masher, Hand Blender, Whisk Attachment, Travel Cup |
| Material | Stainless Steel, BPA Free |
| Dishwasher Safe | Yes (except chopper bowl lid and connectors) |
10. Warranty and Support
Ganiza is committed to providing high-quality products and excellent customer service.
- Limited Warranty: This product comes with a limited warranty. Please refer to the product packaging or contact customer support for specific details.
- Free Replacement: Enjoy 1 year of free replacement for eligible parts or the entire unit under warranty.
- Lifetime Support: Ganiza offers lifetime support and aims to provide satisfied solutions for any inquiries or issues you may have.
- Contact Support: For assistance, please refer to the contact information provided on the product packaging or visit the official Ganiza website.

Image: Ganiza customer support details, including 24-hour response, 30-day return policy, 1-year free replacement, and lifetime support.

