Introduction
This manual provides essential information for the proper setup, operation, and maintenance of your VSDISPLAY 7-inch IPS LCD Monitor. Please read this manual thoroughly before using the product to ensure optimal performance and longevity.

Image: The 7-inch IPS LCD monitor, showcasing its sleek design and clear display.
Product Overview
The VSDISPLAY 7-inch IPS LCD Monitor features a 1280x800 high-resolution display with a wide 178° viewing angle, ensuring clear and vivid images. It supports brightness adjustment and is designed for versatile applications, including use as a secondary display for PCs, laptops, or for monitoring GPU/CPU temperature data within a PC case.

Image: The 7-inch IPS LCD monitor showcasing its wide 178-degree viewing angle, ideal for various display needs.
Package Contents
Verify that all items are present in your package:
- 1 × VSDISPLAY 7-inch 1280x800 VS070ZJ01A-B LCD Monitor
- 1 × USB-C Power Cable
- 1 × Signal Cable (Mini H-D compatible)

Image: The monitor's dimensions and the standard accessories included in the package.
Setup
- Connect Power: Connect the provided USB-C power cable to the monitor's USB-C port and to a suitable power source (e.g., PC USB port, USB power adapter).
- Connect Signal: Connect the provided signal cable (Mini H-D compatible) to the monitor's Mini H-D port and to your PC or laptop's HDMI output.
- Driver Installation (Windows PC):
After connecting the monitor, navigate to "My PC" on your computer. Locate and open the U Disk (often labeled as a removable drive). Run the "AicUsbDisplayDriver" executable to install the necessary drivers. Follow the on-screen prompts to complete the installation.
Video: This video demonstrates the process of installing the display driver on a Windows PC, which is crucial for the monitor's functionality.
- Configure Display Settings:
Once connected and drivers are installed, right-click on your desktop and select "Display settings." Your computer should detect the VSDISPLAY monitor as a secondary display. You can then configure it for Extended Mode, Duplicate Mode, or as a Second Screen Only.
Video: This video illustrates how to connect the 7-inch monitor to a PC/laptop and configure it for extended, duplicate, or second screen modes, as well as connecting to a Fire TV Stick and DIY development board. Note: The video may show a 1024x600 resolution, but this product supports 1280x800.
Operating Instructions
Extended Mode
In extended mode, the VSDISPLAY monitor acts as an additional workspace, allowing you to spread your applications across multiple screens. This is ideal for multitasking.
Duplicate Mode
Duplicate mode mirrors your primary display's content onto the VSDISPLAY monitor. This is useful for presentations or sharing your screen with others.
Second Screen Only Mode
In this mode, only the VSDISPLAY monitor will show content, with your primary display turned off. This is useful for focusing on content on the smaller screen or for specific applications.

Image: The monitor seamlessly integrated into a multi-monitor setup, extending the desktop workspace.
Connectivity
The monitor is equipped with the following ports:
- Mini H-D Compatible Port: For video signal input.
- USB-C Port: For power supply.
- VGA Port: For video signal input (as seen in some product media).
- AV Port: For analog video input (as seen in some product media).
- Audio Output: 3.5mm jack for external audio devices.

Image: Detailed view of the monitor's input and power ports, along with the brightness control.
Mounting Options
The monitor features 75x75mm VESA mounting holes on the back, allowing for flexible installation with compatible desk or wall mounts. This provides convenience for various setup configurations.
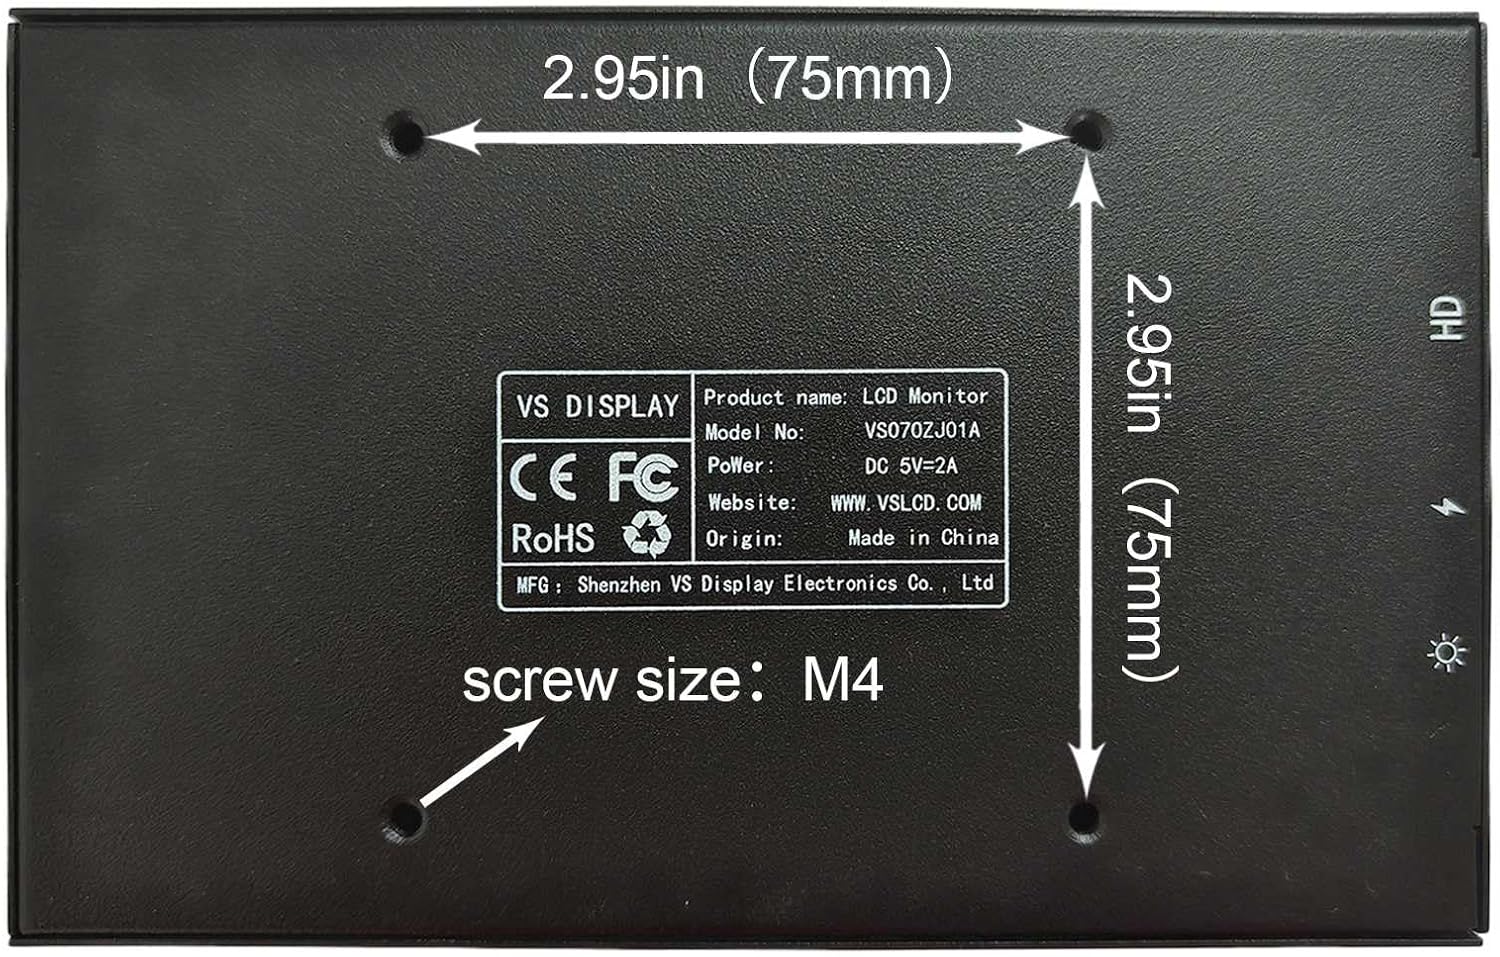
Image: The back panel of the monitor, showing the VESA mounting points for easy installation.
Brightness Adjustment
The monitor supports brightness adjustment. A dedicated button or joystick (depending on the specific model variant) is located on the side or back of the unit to control the screen brightness. Refer to the physical unit for the exact location and operation of the brightness control.
PC Case Monitoring
This monitor can be used as an internal PC case screen to display real-time GPU and CPU temperature data. To achieve this, you will need to download and configure third-party monitoring software (e.g., AIDA64, Rainmeter) on your PC. The monitor itself does not come with pre-installed monitoring software.
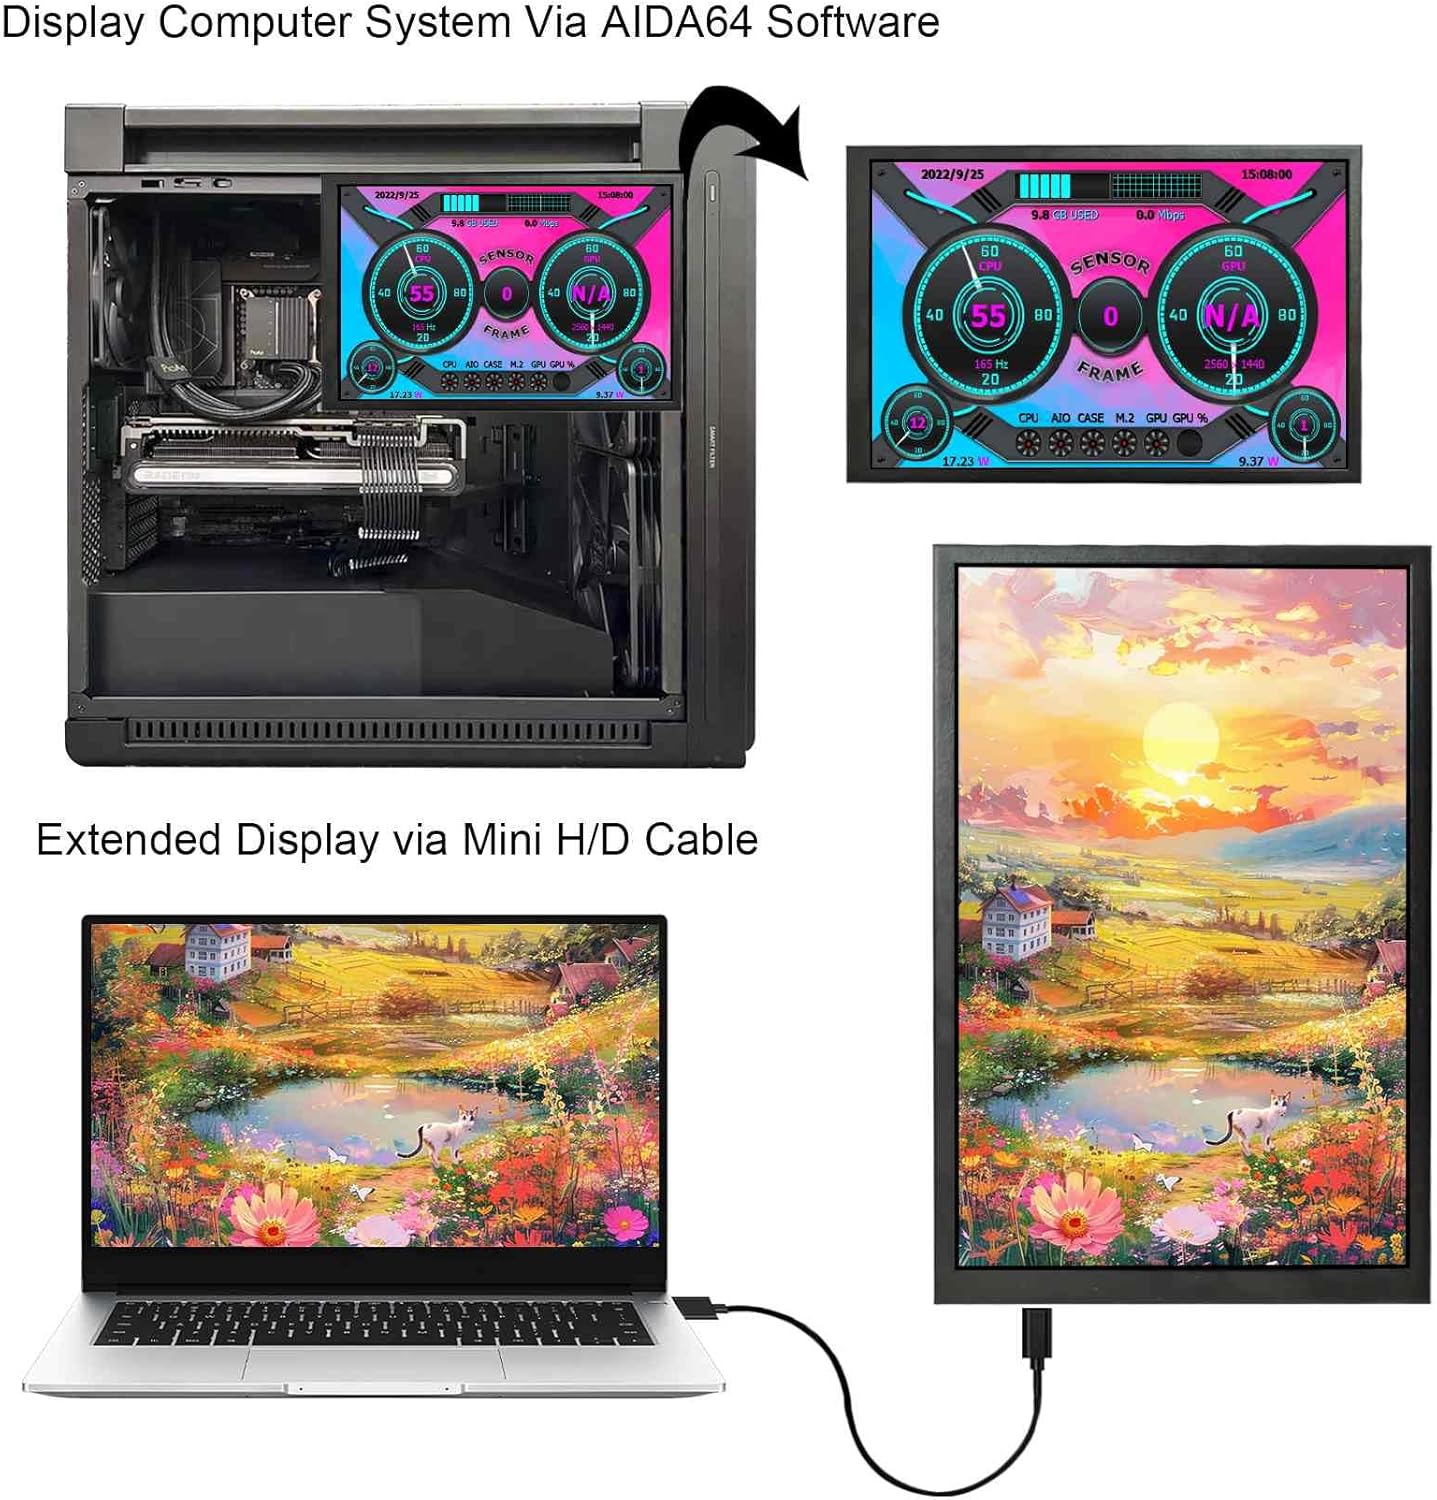
Image: The monitor displaying system information within a PC case, demonstrating its utility for hardware monitoring.
Video: This video demonstrates how the monitor can be used as a PC case display, showing various themes and data monitoring capabilities through compatible software.
Specifications
| Feature | Detail |
|---|---|
| Screen Size | 7 Inches |
| Resolution | 1280x800 Pixels |
| Aspect Ratio | 16:10 |
| Panel Type | IPS |
| Viewing Angle | Wide (178°) |
| Screen Brightness | 350 cd/m2 |
| Screen Contrast | 800:1 |
| Screen Surface | Glossy |
| Product Dimensions | 0.55 x 6.5 x 4.09 inches |
| Item Weight | 1.1 pounds |
| Mounting | 75x75mm VESA compatible |
| Connectivity | Mini H-D compatible (Signal), USB-C (Power) |
Troubleshooting
- No Display:
- Ensure both the USB-C power cable and the signal cable are securely connected.
- Verify that the correct input source is selected on the monitor (if applicable, via OSD menu).
- Check your PC's display settings to ensure the monitor is detected and configured correctly (Extended, Duplicate, or Second Screen Only mode).
- Reinstall the display driver if necessary.
- No Power:
- Confirm the USB-C power cable is connected to a functional power source.
- Try a different USB port or power adapter.
- Image Quality Issues:
- Adjust the brightness using the dedicated button/joystick.
- Check the resolution settings on your PC to ensure it matches the monitor's native 1280x800 resolution.
- Ensure the signal cable is not damaged.
Warranty and Support
For warranty information and technical support, please refer to the manufacturer's official website or contact their customer service directly. Keep your purchase receipt for warranty claims.
