
Introduction
This manual provides detailed instructions for the Dpofirs M.2 SSD Duplicator. This device is designed for efficient and reliable duplication and data transfer between M.2 NVMe and M.2 SATA hard drives. It supports offline cloning and offers high-speed data transfer capabilities.
Package Contents
- 1 x Hard Drive Duplicator
- 1 x Storage Box
- 1 x USB Cable
- 1 x User Manual
Product Overview
The Dpofirs M.2 SSD Duplicator features dual bays for M.2 Serial ATA and NVMe SSDs, a USB-C interface for power and data, and a cloning key for offline operations. It is designed for stability and efficient heat dissipation.
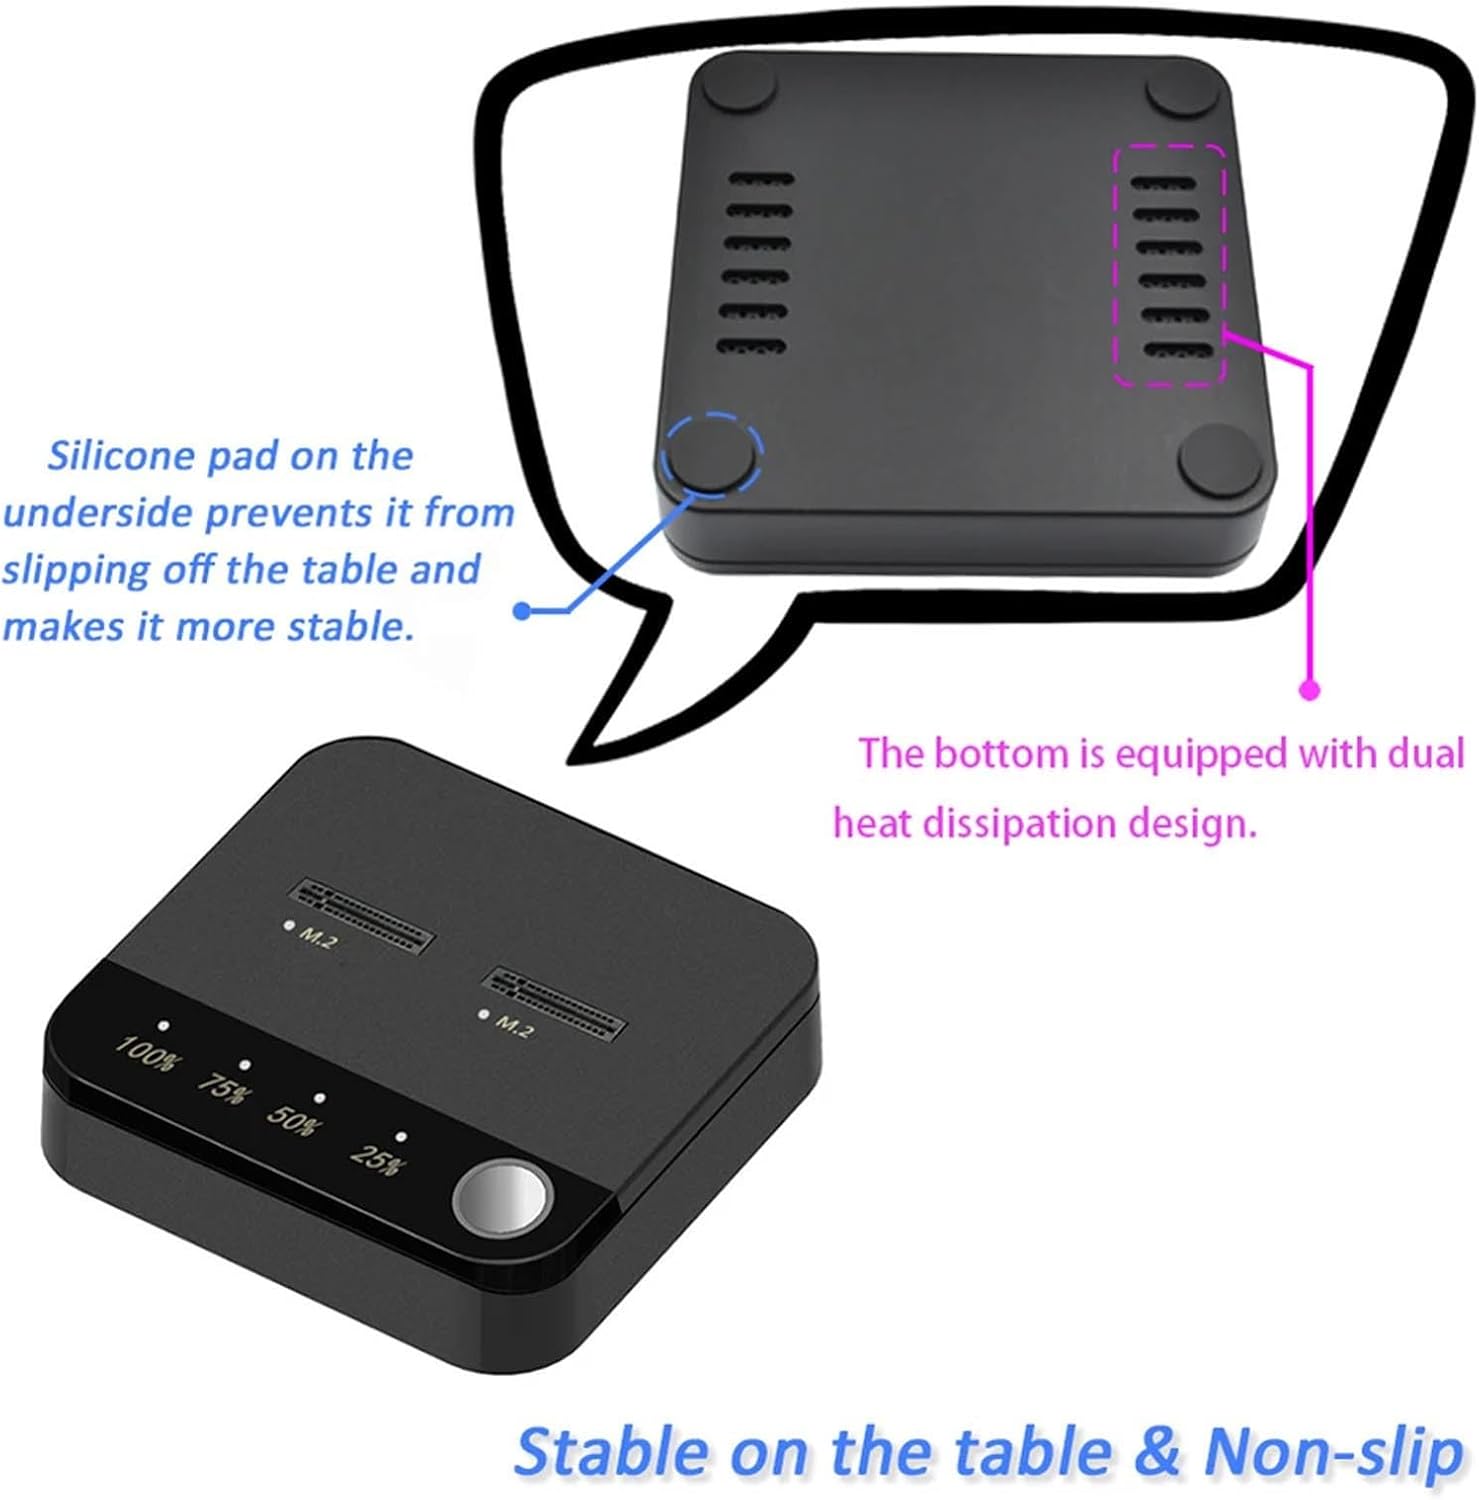
Image: Front view of the Dpofirs M.2 SSD Duplicator, showing the two M.2 slots and the cloning progress indicators.

Image: Labeled diagram of the duplicator, highlighting the M.2 Serial ATA slot, M.2 NVMe slot, Clone Progress Lights, Cloning Key, Type C Data Port, and Type C Power Port. It also shows the switch for SerialATA to NVMe and NVMe to SerialATA copy directions.

Image: Bottom view of the duplicator, illustrating the silicone pads for stability and the dual heat dissipation vents.
Setup
- Connect Power: Connect the provided USB-C cable to the Type C Power Port on the duplicator and to a suitable USB power source.
- Connect to Computer (Optional for Read/Write): If using the device for hard drive read and write functions, connect the USB-C data cable from the Type C Data Port on the duplicator to your computer.
- Insert Hard Drives: Carefully insert your M.2 SSDs into the appropriate slots. The device supports M.2 Serial ATA and M.2 NVMe (B-KEY/B M-KEY) drives. Ensure the hard drives are installed in the correct position.
- Verify Hard Drive Detection: After inserting the M.2 SSDs, observe the hard drive test indicators. A steady light indicates correct detection. If the indicator lights up and then goes off, the hard drive may not meet the requirements or is incorrectly inserted.

Image: The duplicator connected to a laptop via USB-C, with two M.2 SSDs inserted into the bays.

Image: A visual representation of how to correctly insert M.2 SSDs into the duplicator's dual bays.
Operating Instructions
Offline Cloning
The offline cloning function allows you to duplicate data from a source M.2 SSD to a target M.2 SSD without connecting to a computer. This supports copying data between M.2 Serial ATA and M.2 NVMe protocol hard drives.
- Prepare Drives: Ensure both the source and target M.2 SSDs are correctly inserted into their respective bays. The target drive capacity must be equal to or greater than the source drive capacity.
- Select Copy Direction: Use the key switch on the side of the duplicator to select the desired copy direction (NVMe to SerialATA or SerialATA to NVMe).
- Initiate Cloning: Press and hold the offline clone key (usually labeled 'Cloning Key') for 3 seconds.
- Monitor Progress: The cloning progress indicators (25%, 50%, 75%, 100%) will begin blinking. Briefly press the cloning key again to start the automatic cloning process.
- Completion: The cloning process is complete when all progress indicators are steady.

Image: The duplicator with two M.2 SSDs inserted, illustrating the setup for an offline cloning operation. The progress indicators are visible.

Image: Close-up of the duplicator's indicators, showing the hard disk test lights for M.2 slots and the copy progress indicators (100%, 75%, 50%, 25%).

Image: A detailed view of the side of the duplicator, showing the key switch used to select the copy direction between NVMe to SerialATA and SerialATA to NVMe.
Hard Drive Read and Write Function
When connected to a computer via the USB-C data port, the duplicator functions as an external dual-bay M.2 SSD enclosure.
- Supports individual read and write operations for M.2 Serial ATA protocol hard drives.
- Supports individual read and write operations for M.2 NVMe protocol hard drives.
- Supports simultaneous read and write operations for both M.2 Serial ATA and M.2 NVMe protocol hard drives.
Compatible Systems: The device supports Windows, macOS, and Linux operating systems for read/write functionality.
Maintenance
To ensure optimal performance and longevity of your Dpofirs M.2 SSD Duplicator:
- Heat Dissipation: The device is designed with bottom vents to enhance airflow. Ensure these vents are not obstructed during operation to prevent heat buildup. While SSDs may reach temperatures up to 60°C during intensive tasks, proper ventilation helps maintain stable performance.
- Cleaning: Use a soft, dry cloth to clean the exterior of the device. Avoid using liquid cleaners or solvents.
- Storage: When not in use, store the duplicator in its provided storage box in a cool, dry place away from direct sunlight and extreme temperatures.
- Handling: Handle the device and M.2 SSDs with care. The slots allow for quick replacement without screws, but avoid excessive force during insertion or removal.
Troubleshooting
- Hard Drive Test Indicator Not On: If the hard drive test indicator does not light up continuously after inserting an M.2 SSD, check the following:
- Ensure the M.2 SSD is fully and correctly seated in its slot.
- Verify that the M.2 SSD is compatible with the device (M.2 Serial ATA or NVMe B-KEY/B M-KEY).
- Try a different M.2 SSD to rule out a drive issue.
- Cloning Fails or Stops:
- Ensure the target drive capacity is equal to or greater than the source drive capacity.
- Check that both source and target drives are properly detected (steady hard drive test indicators).
- Verify the power connection is stable.
- Ensure the copy direction switch is set correctly.
- Device Not Recognized by Computer:
- Ensure the USB-C data cable is securely connected to both the duplicator and the computer.
- Try a different USB-C port on your computer.
- Test with a different USB-C data cable.
- Ensure your operating system drivers are up to date.
Specifications
| Item Type | M.2 SSD Duplicator |
| Product Material | ABS |
| Product Color | Black |
| Support Hard Drive | M.2 Serial ATA / NVME (B-KEY/B M-KEY) |
| Number of Bays | Dual Bays |
| External Interface | 2 x USB C |
| Cloning Speed | Up to 20Gbps (NVMe), 6Gbps (SATA III) |
| Max Capacity per Slot | 8TB (16TB total) |
| Compatible Systems | Windows, macOS, Linux |
| Offline Cloning | Supported (NVMe to SATA, SATA to NVMe) |
| Dimensions | 7.87 x 4.33 x 1.57 inches |
| Item Weight | 10.4 ounces |
| Model Number | Dpofirsvouxyr3pzh |
Warranty and Support
Specific warranty information is not provided in this manual. For warranty details, technical support, or service inquiries, please refer to the product packaging or contact Dpofirs customer support directly through their official website or the retailer where the product was purchased.