1. Introduction
This manual provides essential instructions for the safe operation, assembly, maintenance, and troubleshooting of your Imdot X99 5000PSI Pressure Cleaner. Please read this manual thoroughly before using the product and retain it for future reference.
2. Important Safety Information
WARNING: Failure to follow these instructions may result in serious injury or property damage.
- Always wear appropriate personal protective equipment, including eye protection, hearing protection, and gloves.
- Never point the spray gun at people, pets, or electrical outlets.
- Ensure all connections are secure before operating the pressure cleaner.
- Do not operate the unit if the power cord or high-pressure hose is damaged.
- Keep children and bystanders away from the operating area.
- Always disconnect the power supply before performing any maintenance or cleaning.
- This appliance is equipped with a GFCI plug for electrical safety. Do not bypass or modify it.
- The Total Stop System (TSS) automatically shuts off the pump when the trigger is released, extending pump life and saving energy.
For detailed safety guidelines, refer to local regulations and product labels.
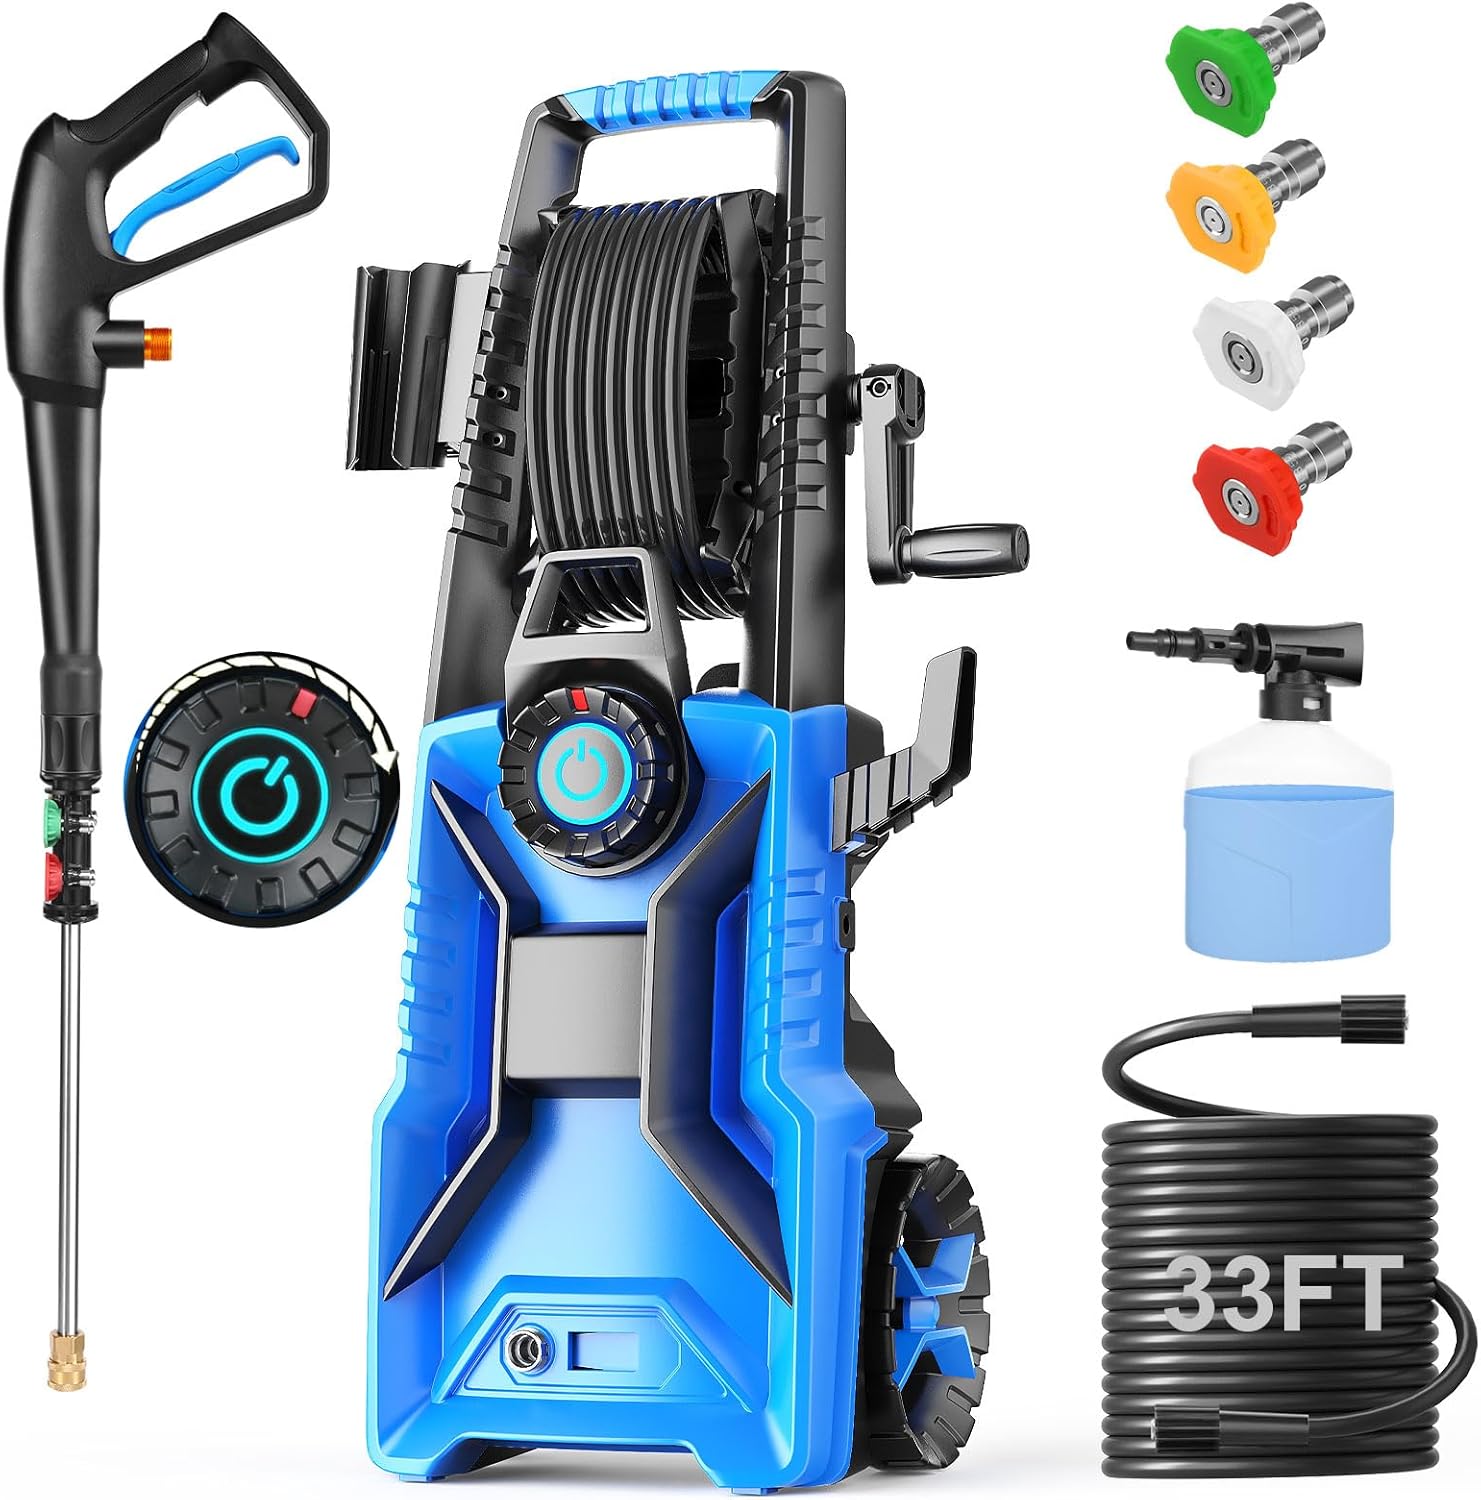
3. Package Contents
Verify that all items listed below are included in your package. If any parts are missing or damaged, contact customer support.
- Imdot X99 Pressure Cleaner Unit
- High-Pressure Spray Gun
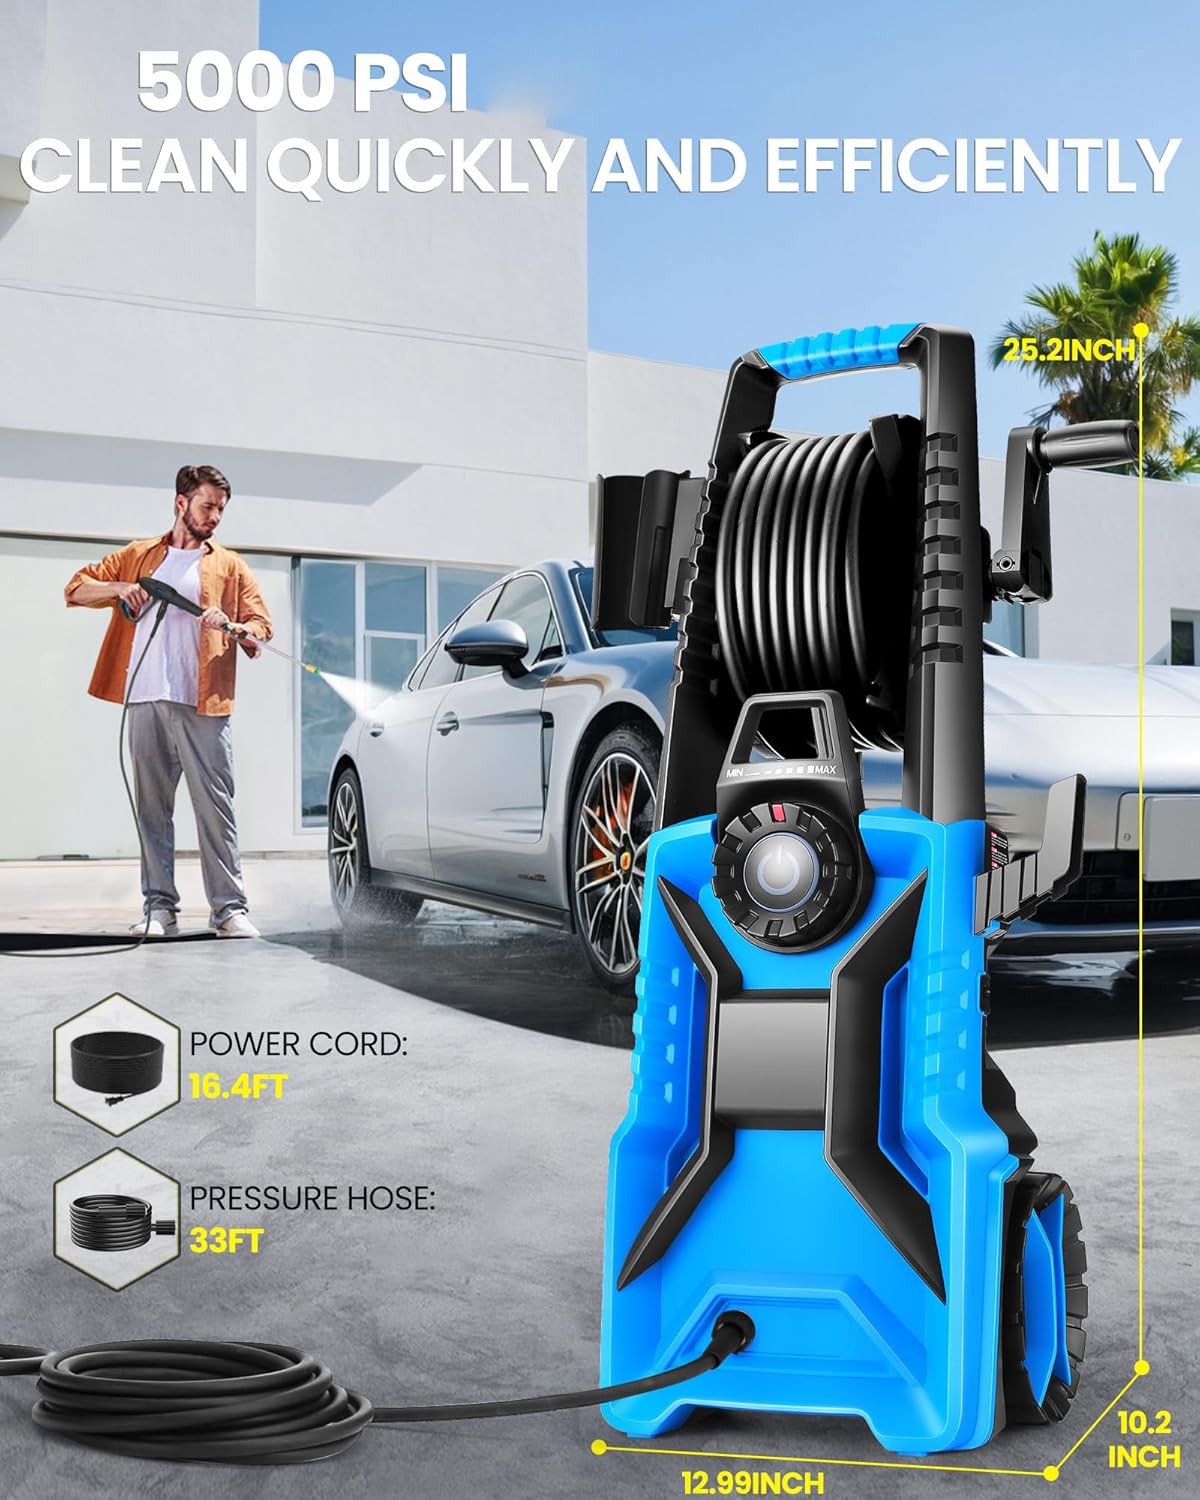
- High-Pressure Hose (33 ft)
- Power Cord with GFCI (16.4 ft)
- Adjustable Nozzles (0°, 15°, 25°, 40°)
- Foam Cannon with 500ml Soap Bottle
- Water Inlet Connector
- User Manual
4. Assembly and Setup
- Attach Wheels and Handle: Secure the wheels and retractable handle to the main unit as per the assembly diagram.
- Connect High-Pressure Hose:
- Connect one end of the 33ft high-pressure hose to the outlet on the pressure cleaner unit.
- Connect the other end of the high-pressure hose to the spray gun. Ensure all connections are hand-tight and secure.
- Connect Water Supply:
- Attach a standard garden hose (not included) to the water inlet connector on the pressure cleaner.
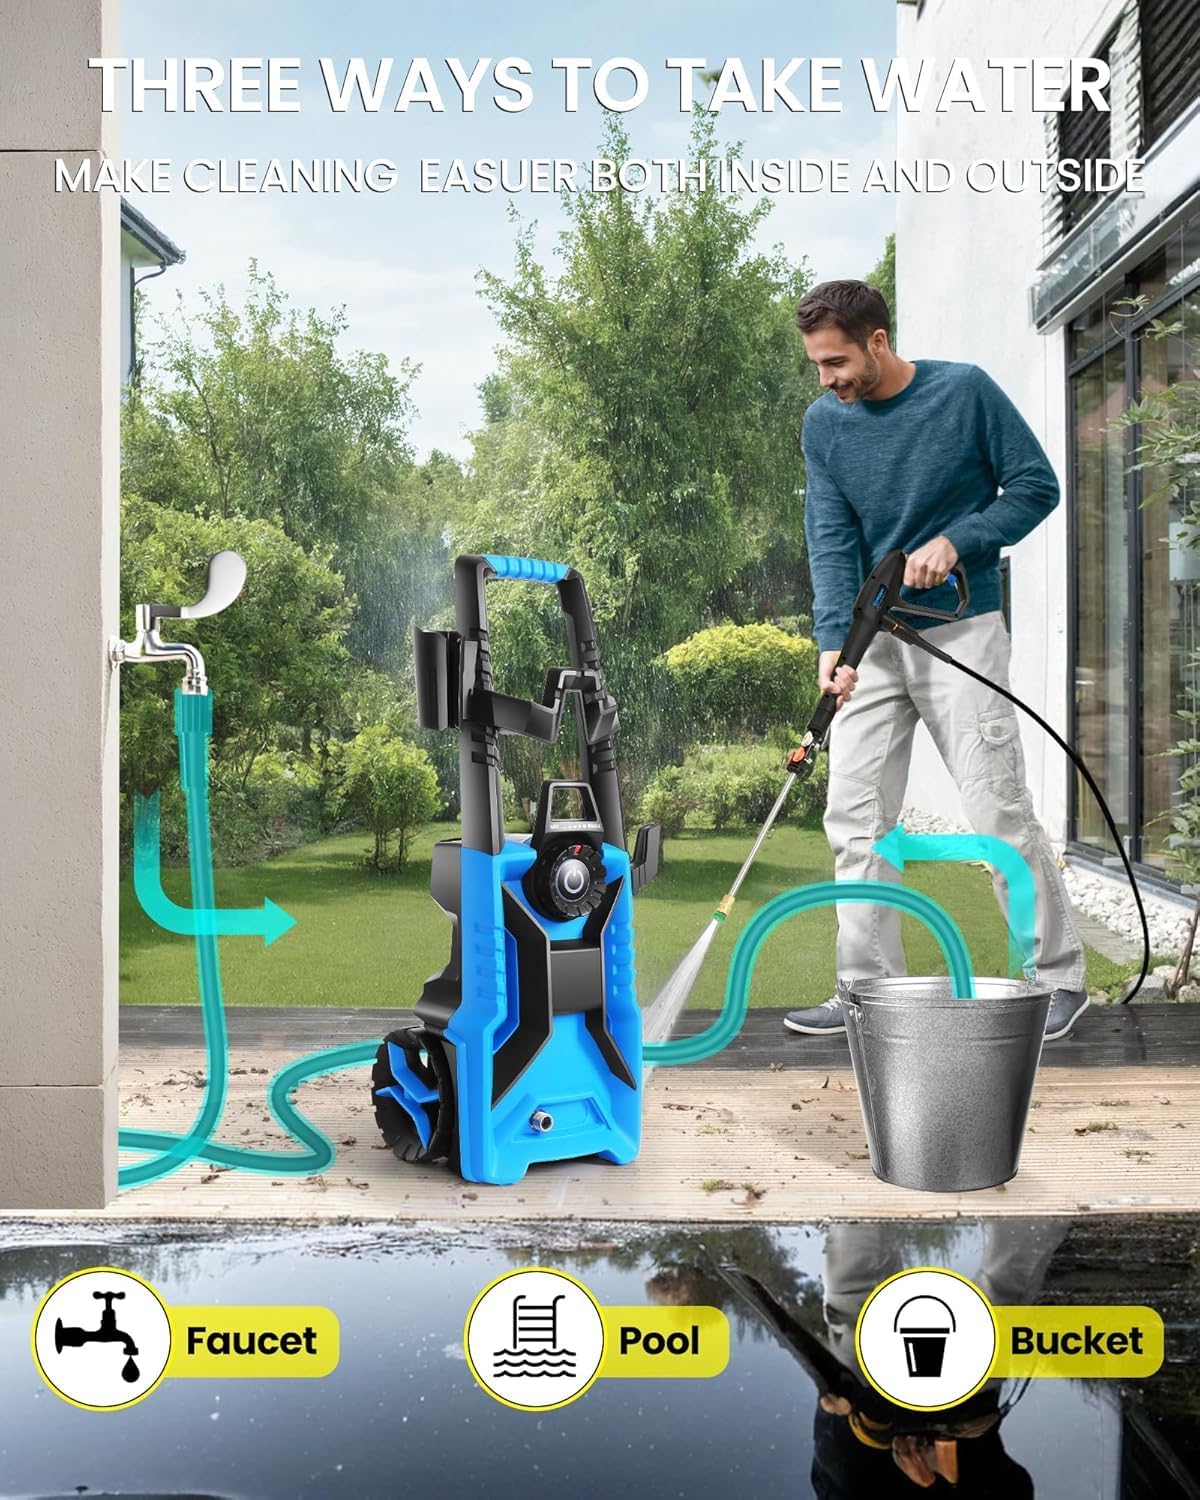
- Connect the garden hose to a water source (faucet, pool, or bucket). Ensure the water supply is turned on fully before starting the unit.
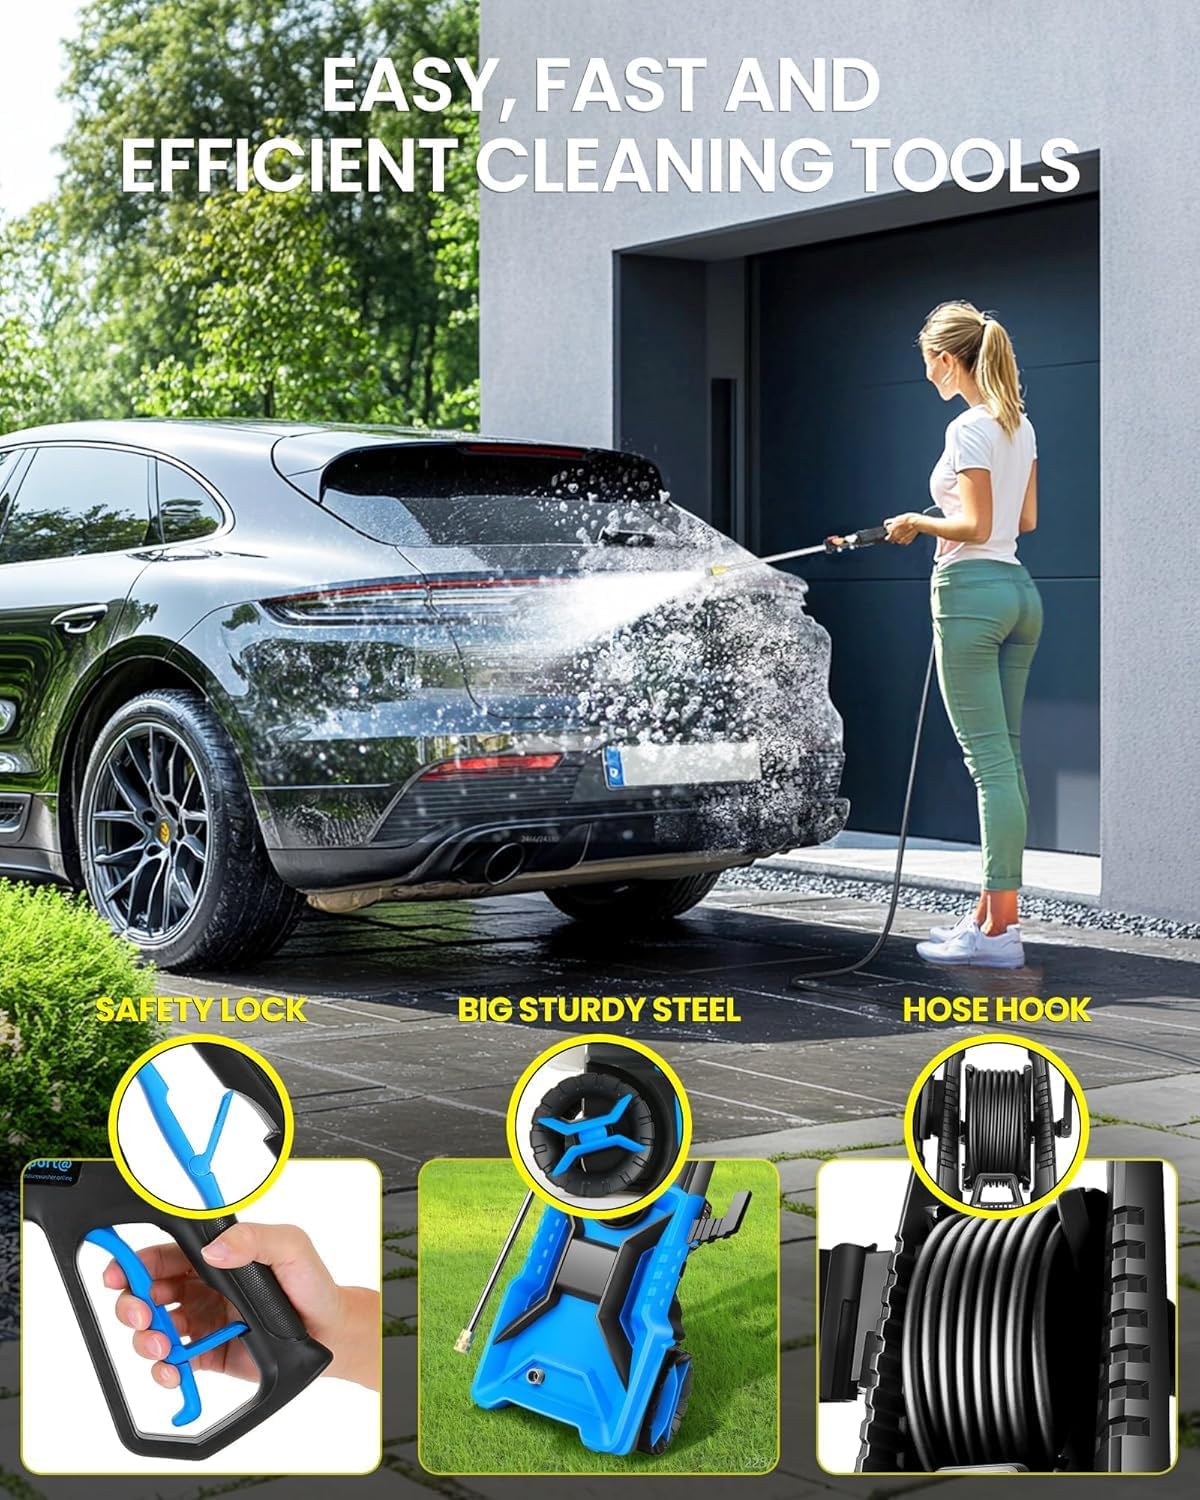
Image 4.1: The pressure cleaner can draw water from a standard faucet or siphon water from a bucket or pool for off-grid use. - Connect Power: Plug the GFCI power cord into a grounded electrical outlet. Press the "RESET" button on the GFCI plug if necessary.
5. Operating Instructions
5.1 Starting the Unit
- Ensure the water supply is fully open and there are no kinks in the hose.
- Squeeze the trigger on the spray gun to purge air from the system until a steady stream of water emerges.
- Turn the power switch on the unit to the "ON" position. The motor will start when the trigger is squeezed and stop when released (Total Stop System - TSS).
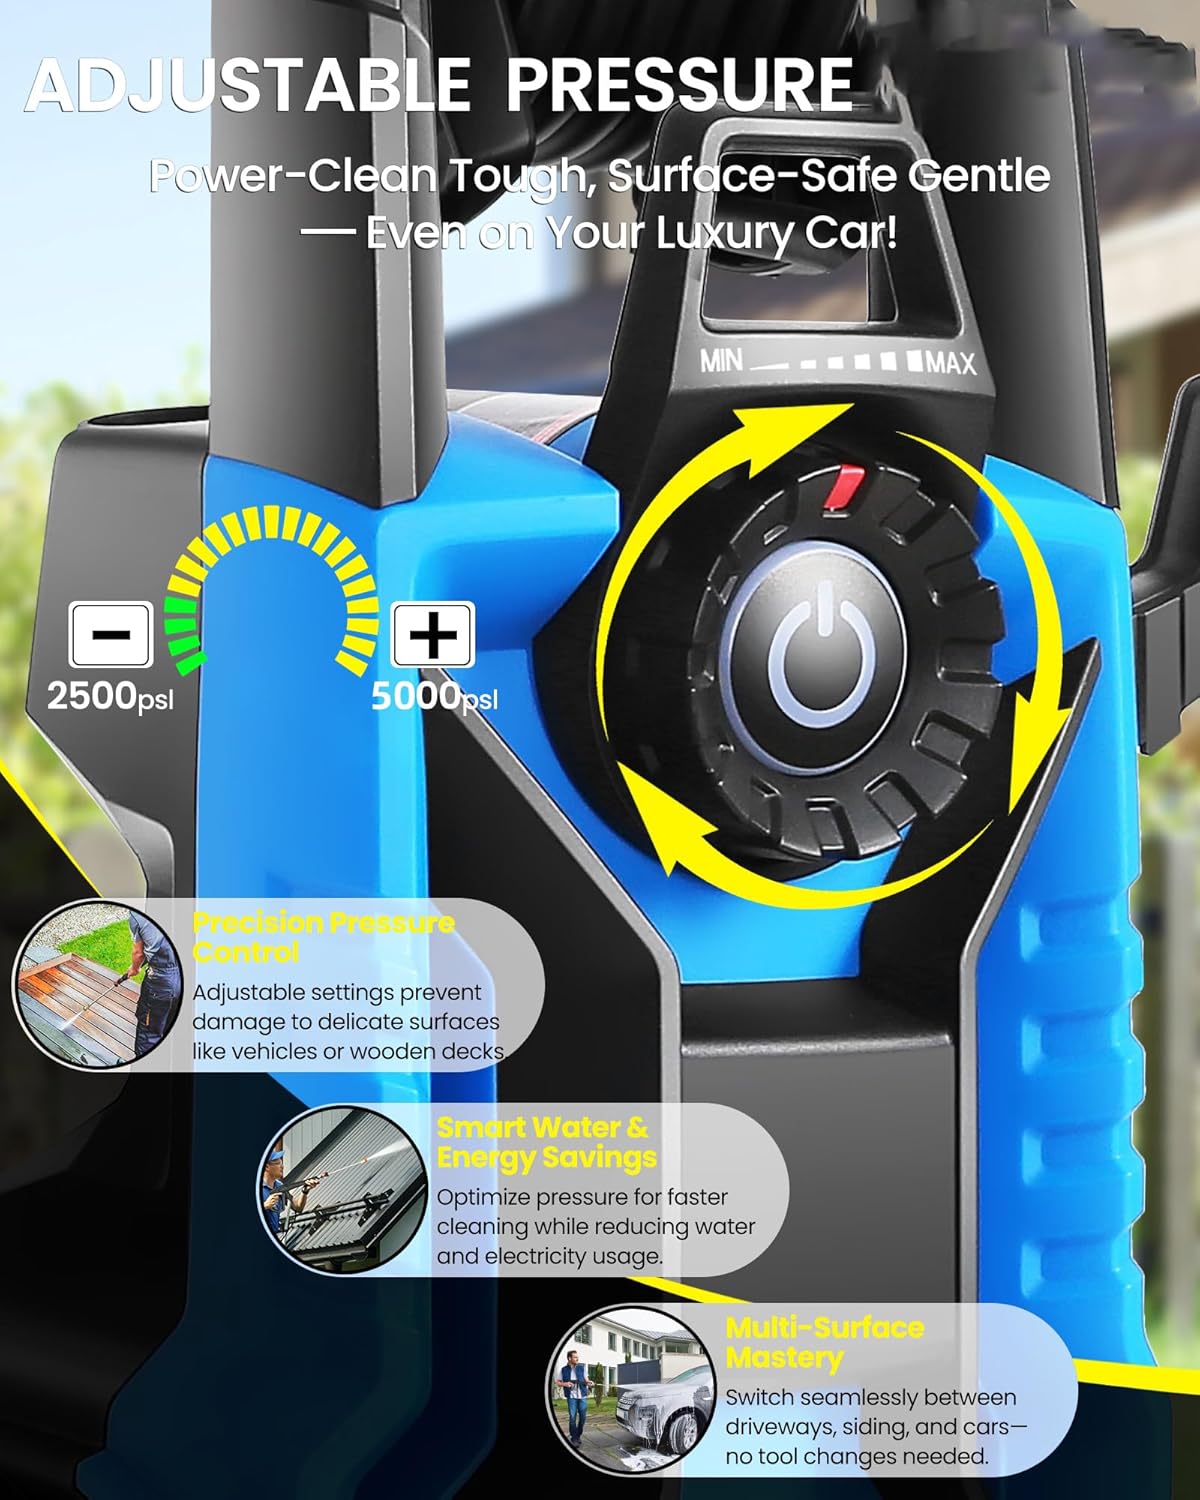
5.2 Adjusting Pressure
The Imdot X99 features an adjustable pressure control via a twist-button on the unit, allowing you to select pressure from 2500 PSI to 5000 PSI.
- Locate the pressure adjustment dial on the front of the unit.
- Rotate the dial towards "MIN" for lower pressure (2500 PSI) suitable for delicate surfaces.
- Rotate the dial towards "MAX" for higher pressure (5000 PSI) for tough cleaning tasks.
- Always start with a lower pressure setting and gradually increase it to prevent surface damage.
5.3 Using Nozzles
The unit includes four quick-connect nozzles for different spray patterns:
- 0° (Red): Pin-point jet for intense cleaning of stubborn stains. Use with extreme caution.
- 15° (Yellow): Narrow spray for concentrated cleaning on hard surfaces.
- 25° (Green): Medium spray for general cleaning of decks, patios, and vehicles.
- 40° (White): Wide spray for gentle rinsing or cleaning large, delicate areas.
- Ensure the pressure cleaner is off and the trigger is locked before changing nozzles.
- Pull back the collar on the spray gun wand and insert the desired nozzle. Release the collar to lock it in place.
- Test the spray pattern on an inconspicuous area first.
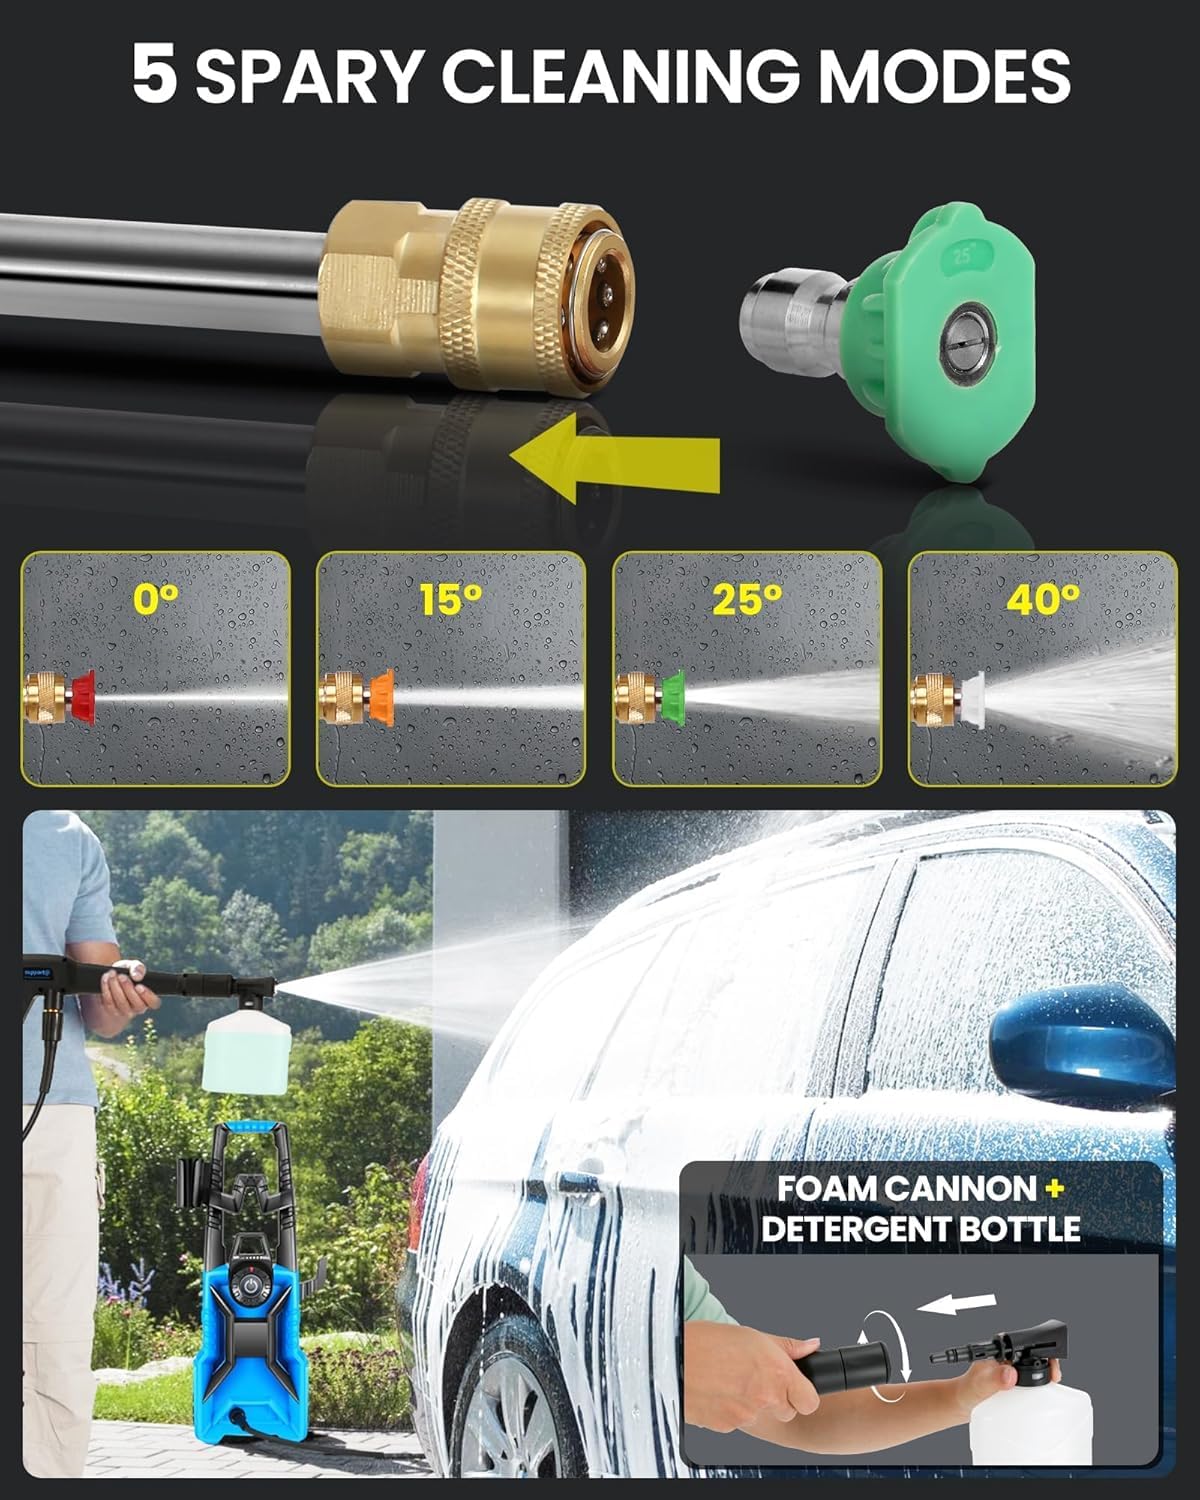
5.4 Using the Foam Cannon
The included foam cannon is ideal for applying detergent or soap for vehicle washing or pre-soaking surfaces.
- Fill the 500ml soap bottle with appropriate pressure washer detergent.
- Attach the foam cannon to the spray gun wand.
- Operate the pressure cleaner. The foam cannon will mix detergent with water to create a rich foam.
- After applying detergent, remove the foam cannon and attach a rinsing nozzle (e.g., 25° or 40°) to rinse the surface thoroughly.
6. Maintenance and Storage
6.1 After Each Use
- Turn off the pressure cleaner and disconnect the power supply.
- Turn off the water supply.
- Squeeze the spray gun trigger to release any remaining pressure in the system.
- Disconnect the high-pressure hose and garden hose.
- Drain any remaining water from the pump and hoses.
- Clean the nozzles and filter screen at the water inlet.
6.2 Storage
- Store the pressure cleaner in a dry, frost-free area.
- Use the integrated cord hook, nozzle storage, and onboard hose reel to keep accessories organized.
- If storing in freezing temperatures, use a pump protector/antifreeze solution to prevent damage.

7. Troubleshooting
| Problem | Possible Cause | Solution |
|---|---|---|
| Unit does not start | No power; GFCI tripped; Power switch off | Check power connection; Reset GFCI; Turn power switch ON |
| Low pressure | Insufficient water supply; Clogged nozzle; Air in pump; Pressure adjustment dial set too low | Ensure full water flow; Clean nozzle; Purge air from system; Adjust pressure dial to higher setting |
| Motor runs continuously when trigger is released | Air in pump; Leak in system | Purge air from system; Check all connections for leaks |
| Water leaks from connections | Loose connections; Damaged O-rings | Tighten connections; Replace O-rings |
8. Product Specifications
| Feature | Specification |
|---|---|
| Brand | Imdot |
| Model Number | X99 |
| Maximum Pressure | 5000 PSI (Adjustable from 2500-5000 PSI) |
| Maximum Flow Rate | 4.0 GPM |
| Power Source | Corded Electric |
| Hose Length | 33 Feet |
| Power Cord Length | 16.4 Feet (with GFCI) |
| Item Weight | 14.32 Pounds |
| Product Dimensions | 12.2"L x 11.02"W x 16.54"H |
| Waterproof Rating | IPX5 |
9. Warranty and Customer Support
For warranty information, technical assistance, or to order replacement parts, please contact Imdot customer support. Refer to your purchase documentation for specific warranty terms and contact details.
You can often find support information on the manufacturer's official website or through the retailer where the product was purchased.


