
1. Introduction
This manual provides detailed instructions for the installation, operation, and maintenance of your Uckazy 15.8 Inch Android Auto Radio. Please read this manual thoroughly before installation and use to ensure proper functionality and to maximize your user experience. Keep this manual for future reference.
2. Compatible Vehicle Models
This device is designed for specific BMW models equipped with the EVO System. Please verify your vehicle's system before installation.
- BMW 1 Series F20 (2017-2019)
- BMW 2 Series F22 (2016-2019)
- BMW 3 Series F30/F31/F34 (2017-2021)
- BMW 4 Series F32/F33/F36 (2017-2021)
Important: This unit only works with the original EVO system. If you are unsure about your vehicle's compatibility, please consult a professional or contact customer support.

Figure 2.1: Compatible BMW models and a visual comparison of the dashboard before and after the Uckazy Android Auto Radio installation. The image also highlights the 6-pin LVDS Port for EVO System and the Media button.
3. Key Features
3.1 Display and Design
The unit features an ultra-narrow 15.8-inch (1920*720) IN-CELL screen with full lamination technology. This design eliminates air gaps between screen layers, resulting in a more transparent display and reduced reflection by 75%. The screen is constructed from zinc alloy material, offering high strength, wear resistance, and improved heat dissipation compared to traditional plastic shells.
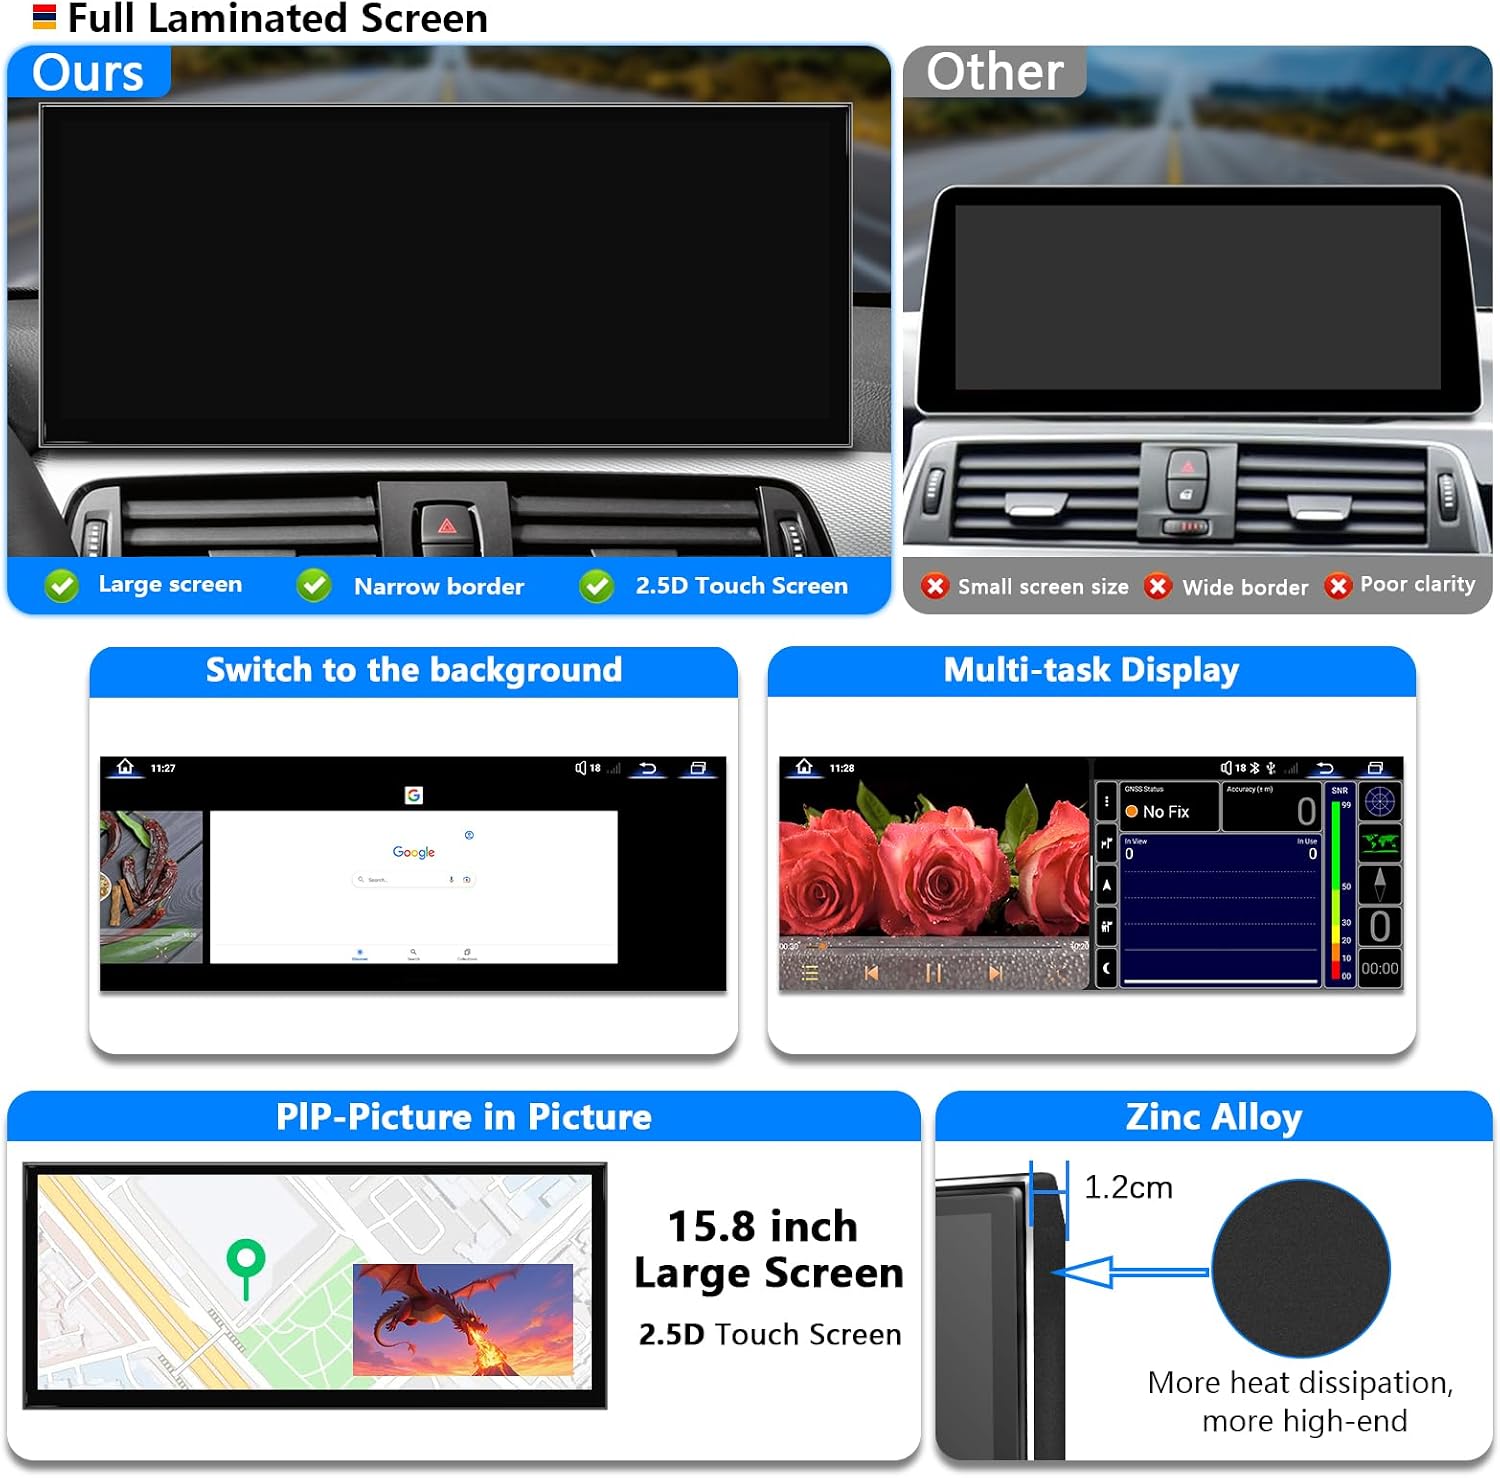
Figure 3.1: Visual representation of the Uckazy screen's features, including full lamination, narrow borders, multi-tasking capabilities, picture-in-picture function, and the durable zinc alloy construction.
3.2 Dual System Functionality
The device supports a one-click switch between the Android system and your original car system. This upgraded capacitive touch screen retains all original vehicle functions while integrating advanced Android features. This includes the original car radio, amplifier function, factory steering wheel controls, original car mouse knob, display of speed, fuel level, oil pressure, safety warnings, and original reverse camera. No software changes are made to the vehicle's control unit.

Figure 3.2: Overview of retained original BMW system functionalities, including iDrive, amplifier, radio, CD player, backup camera, and steering wheel controls.
3.3 Android 14 Operating System
Powered by an 11 NM Qualcomm Snapdragon SM6125 Octa-core processor with an integrated Adreno 610 GPU (4*Cortex A73 2.4GHz + 4*Cortex A53 1.9GHz), this unit runs on Android 14. It features 8GB RAM and 128GB ROM, achieving a running score of up to 300,000+. A built-in DSP with 16 EQ segments enhances audio quality. The system supports 4G and both 2.4G and 5.0G Wi-Fi.
3.4 Network and Connectivity
The unit supports 4G LTE Cat 7 (up to 300Mbps), compatible with 99% of carriers worldwide. It includes a built-in GPS module with pre-installed offline maps (IGO for North America), and allows for downloading other navigation apps like Google Maps. Wireless (and wired) Apple CarPlay, wireless (and wired) Android Auto, and wireless MirrorLink for iOS and Android phones are supported, along with Bluetooth 5.0 and Wi-Fi.

Figure 3.3: Illustration of wireless smartphone integration features, including Android Auto, Apple CarPlay, and Mirror Link, demonstrating navigation and voice control.

Figure 3.4: Connectivity options including 4G LTE and a visual of the 360-degree panoramic camera system.
4. Installation Guide
Proper installation is crucial for the optimal performance of your Android Auto Radio. Please follow these guidelines carefully.
4.1 Wiring and Fiber Optic Connection
Refer to the provided wiring diagram to correctly link the car machine system according to the wire definitions. Carefully review and accurately connect all wires.
- A: 360-DET
- B: ACC-OUT
- C: Rear-Camera-PWR
- D: GND
For fiber optic connection, unplug the 2P fiber optic harness from the original car CD and insert it into the Linux system harness.

Figure 4.1: Detailed wiring diagram and instructions for fiber optic cable connection.
4.2 Wired CarPlay/Android Auto Connection
If you intend to use wired CarPlay or Android Auto, connect your device to USB IN 1. USB IN 1 is designated for data link, while USB IN 2 is for read storage link.

Figure 4.2: Instructions for wired CarPlay/Android Auto connection via USB IN 1 and a troubleshooting tip for distorted audio.
4.3 AUX Audio Connection
Some vehicle models require direct AUX access to the audio amplifier. In such cases, you must plug the audio connection cable (included in the package) into the AUX socket in the armrest compartment to access the Linux audio.
Even if you have adapted the fiber optic harness and selected the AUX menu in the OEM interface, you may still need to connect the audio cable properly between the AUX IN and AUDIO OUT of the armrest center box.

Figure 4.3: Visual guide for connecting the audio harness to the AUX IN port in the armrest.
4.4 Reverse Camera Connection
Follow the wiring diagram to properly connect the reverse camera. When connecting to the reversing camera, ensure the correct wiring is used. For aftermarket cameras, select AHD 720p@25 in the screen settings under Camera Format.
Figure 4.4: Wiring diagram for reverse camera installation and instructions for selecting the correct camera format in the settings.
5. Operating Instructions
5.1 Wireless CarPlay/Android Auto Setup
To use wireless CarPlay or Android Auto:
- Connect your phone via Bluetooth to the unit.
- Allow all necessary permissions on your phone.
- Wait for the connection to establish.

Figure 5.1: Steps for establishing a wireless CarPlay connection.
5.2 AUX Audio Settings
Automatic AUX Switching:
Navigate to Setup > Car Settings > Auto Switch to AUX. Select either 'Harman Head Unit' or 'Alpine Head Unit' based on your vehicle's audio system.
Manual AUX Setting Method:
- Go to the 'Main menu' and select 'Multimedia'.
- Then select 'External devices'.
- Long press the number key '8'. When you hear a tone, the setting is complete.
- Press '8' every time before entering the new system to get CarPlay sound.
First, ensure the stock AUX is plugged in (either in the manual gear position or in the passenger side storage box), then go to settings and turn off the AUX auto switching setting.

Figure 5.2: Instructions for configuring AUX audio settings, both automatically and manually.

Figure 5.3: Location of the stock AUX port and the corresponding setting in the system menu.
5.3 Display and Camera Settings
Setting OEM Resolution:
Refer to Setup > Car Settings > Original Car Screen Resolution. Select the correct resolution for your OEM display. Incorrect resolution may prevent OEM car information from being displayed correctly. If unsure, try each option.
Setting OEM Cameras:
Refer to Setup > Car Settings > Reversing Settings > Camera Type. Select 'Original' or 'Aftermarket' based on your camera type. Selecting the incorrect option will prevent the reverse camera from functioning.

Figure 5.4: Menu options for configuring OEM screen resolution and camera type.
5.4 Day and Night Mode
The unit features automatic light sensitivity adjustment, which switches between day and night modes according to your car's original headlights.
Figure 5.5: Visual demonstration of the automatic day and night mode feature.
5.5 System Switching
The unit allows for one-click switching between the Android (Linux) system and the original car's CCC system.
Figure 5.6: Illustration of the dual system switching capability.
6. Specifications
| Feature | Specification |
|---|---|
| Screen Size | 15.8 inches |
| Screen Resolution | 1920x720 |
| Processor | Qualcomm Snapdragon SM6125 Octa-core |
| Operating System | Android 14 |
| RAM | 8GB |
| ROM | 128GB |
| Connectivity | 4G LTE Cat 7, Wi-Fi (2.4G & 5.0G), Bluetooth 5.0 |
| Special Features | Wireless CarPlay, Wireless Android Auto, MirrorLink, Touchscreen, Built-in DSP, GPS |
| Material | Zinc Alloy (screen frame) |
| Package Dimensions | 22 x 20 x 16 inches |
| Item Weight | 3.4 pounds |
6.1 Included Accessories
- Touch pen
- Install tools
- Power Cable
- USB Cable
- 4G Antenna
- 4G SIM Card Slot
- GPS Antenna

Figure 6.1: Product dimensions and a visual representation of the accessories included with the unit.
7. Troubleshooting
7.1 Distorted Audio (CarPlay/Android Auto)
If the sound from CarPlay or Android Auto is distorted or noisy, you may need to connect the 'AB' wire as indicated in the wiring diagram (Figure 4.2).
7.2 General Issues
Common issues such as installation difficulties, sound problems, CarPlay not functioning, or the original car UI not displaying correctly can often be resolved by reviewing the installation steps and settings in this manual. Ensure all connections are secure and settings are configured according to your vehicle's specifications.
8. Maintenance
To ensure the longevity and optimal performance of your Uckazy Android Auto Radio, follow these maintenance guidelines:
- Cleaning: Use a soft, dry cloth to clean the screen and exterior. Avoid abrasive cleaners or solvents that could damage the surface.
- Software Updates: Periodically check for software updates to ensure you have the latest features and bug fixes. Follow the on-screen prompts or manufacturer's instructions for updating.
- Environmental Conditions: Avoid exposing the unit to extreme temperatures, direct sunlight for prolonged periods, or excessive moisture.
- Connection Checks: Occasionally check that all cables and connections are secure, especially after driving on rough terrain.
9. Warranty and Support
Your Uckazy Android Auto Radio is covered by a 30-day refund/replacement policy from the date of purchase. For any technical assistance, installation queries, or troubleshooting not covered in this manual, please contact Uckazy customer support.
When contacting support, please provide your product model number and a detailed description of the issue.
Figure 9.1: Information on how to access technical support.