
1. Introduction
This manual provides comprehensive instructions for the QIACHIP 4-Channel 433MHz Wireless RF Receiver Relay (Model KR2204) and its accompanying 2 Transmitters (Model 2KT16). This system is designed for remote control of various electrical devices, including garage doors, electric curtains, lights, and motors, operating within an AC 85V-250V range. Please read this manual thoroughly before installation and operation to ensure proper functionality and safety.
2. Product Overview and Features
The QIACHIP KR2204+2KT16 system offers reliable wireless control for a wide range of applications. Key features include:
- 433MHz Radio Frequency: Transmits high-frequency signals capable of passing through walls, floors, and doors, with an effective control range of up to 50 meters in open areas.
- EV1527 Learning Code: Utilizes a secure learning code chip for reliable communication between transmitters and receiver.
- Three Programmable Operation Modes: Supports Momentary, Toggle, and Latched modes, allowing customization for different control needs.
- Four Independent Relay Channels: The receiver features four separate relay channels that can be configured to work together (e.g., for motor reversal) or independently to control multiple devices.
- High Power Relay: Equipped with a 10A relay, suitable for AC 85V~250V voltage applications.
- Transmitter Capacity: Each receiver can store programming for approximately 20 transmitters.
- Versatile Applications: Ideal for controlling garage doors, electric doors, roller shutter doors, retractable doors, electric curtains, fans, lamps, lighting, and ventilation equipment.

Image 2.1: QIACHIP 4-Channel RF Receiver Relay and two 4-button remote transmitters.
3. Specifications
| Feature | Detail |
|---|---|
| Product Dimensions | 2.75 x 1.18 x 1.96 inches |
| Item Model Number | KR2204+2KT16 |
| Batteries | 2 CR2032 batteries required (included for transmitters) |
| Manufacturer | QIACHIP |
| Receiver Voltage | AC 85V~250V |
| Relay Current | 10A |
| RF Frequency | 433MHz |
| Control Range | Up to 50m (open area) |
4. Package Contents
The package includes the following items:
- 1 x RF Receiver (Model KR2204)
- 2 x Remote Transmitters (Model 2KT16)
5. Setup and Installation
Before installation, ensure the power supply to the device you intend to control is disconnected. Wiring should be performed by a qualified individual if you are unsure.
5.1 Wiring the Receiver
The receiver has terminals for power input (AC 85V-250V) and four relay outputs (NO, COM, NC for each channel). Connect the live (L) and neutral (N) wires from your AC power source to the corresponding input terminals on the receiver. Then, connect your device according to the desired operation mode and wiring diagram.

Image 5.1: Example applications and wiring concepts for AC lights, DC motors, and garage doors.
5.2 General Wiring Principles
- NO (Normally Open): The circuit is open (off) when the relay is de-energized and closes (on) when energized.
- NC (Normally Closed): The circuit is closed (on) when the relay is de-energized and opens (off) when energized.
- COM (Common): The common terminal for the relay switch.
Always ensure correct polarity and voltage matching for your connected devices.
6. Operating Instructions
The QIACHIP receiver supports three distinct operating modes: Momentary, Toggle, and Latched. These modes determine how the relay responds to button presses on the transmitter.
6.1 Programming the Receiver
To program a transmitter button to a specific mode, follow these steps:
- Momentary Mode: Press the learning button on the receiver once. The indicator LED on the receiver will light up. Then, press the desired button on your remote transmitter once. The LED will flash and turn off, indicating successful programming. In this mode, the relay activates only while the remote button is held down.
- Toggle Mode: Press the learning button on the receiver twice. The indicator LED will light up. Then, press the desired button on your remote transmitter once. The LED will flash and turn off, indicating successful programming. In this mode, one press turns the relay ON, and another press turns it OFF.
- Latched Mode: Press the learning button on the receiver three times. The indicator LED will light up. Then, press the 'A' button on your remote transmitter once, followed by the 'B' button on the same remote once. The LED will flash and turn off, indicating successful programming. In this mode, pressing 'A' turns the relay ON, and pressing 'B' turns it OFF. For a 4-channel receiver, each pair of channels (e.g., Relay 1/2, Relay 3/4) can be set to Latched mode using two distinct buttons on the remote.
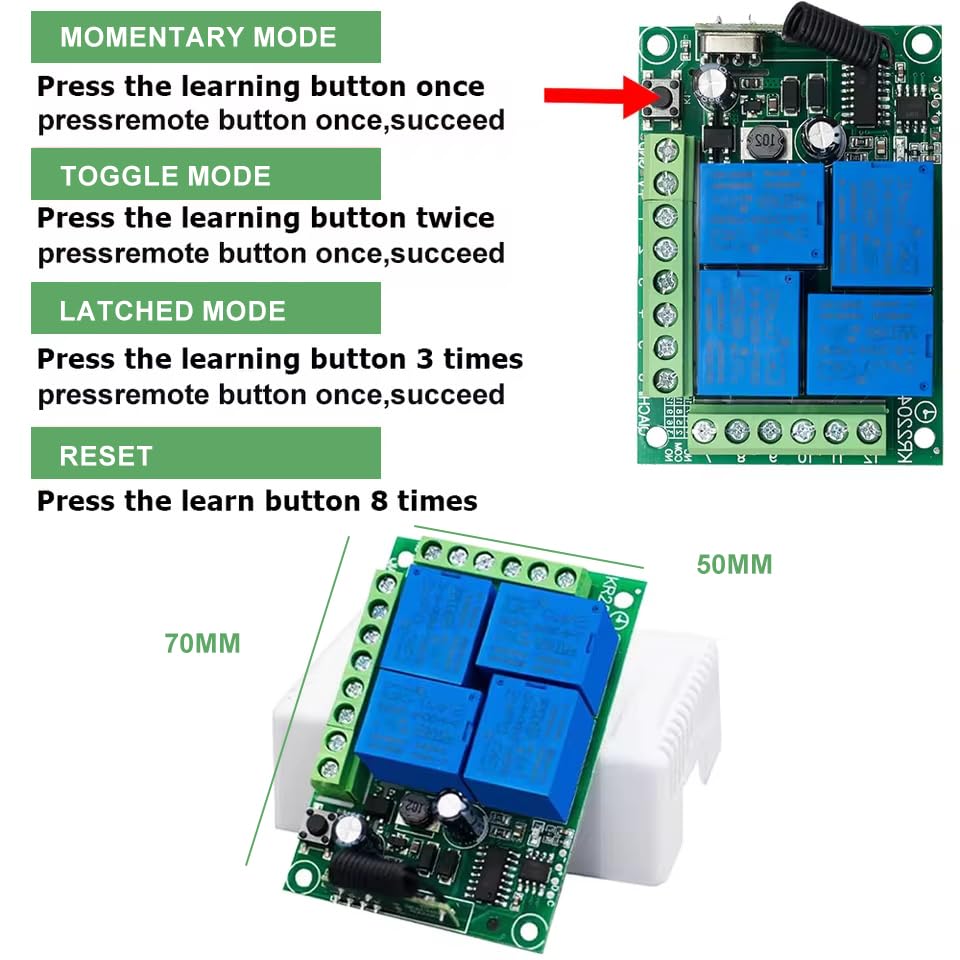
Image 6.1: Programming steps for Momentary, Toggle, and Latched modes, and receiver dimensions.
6.2 Resetting the Receiver
To clear all programmed transmitters from the receiver, press the learning button on the receiver eight times. The indicator LED will flash multiple times and then turn off, indicating that all stored codes have been erased.
6.3 Mode Diagrams
The following diagrams illustrate the behavior of each operating mode:

Image 6.2: Momentary Mode operation.

Image 6.3: Toggle Mode operation.

Image 6.4: Latched Mode operation.
7. Wiring Diagrams for Specific Applications
Refer to the following diagrams for common wiring configurations:
7.1 AC Device Wiring (e.g., Lights)
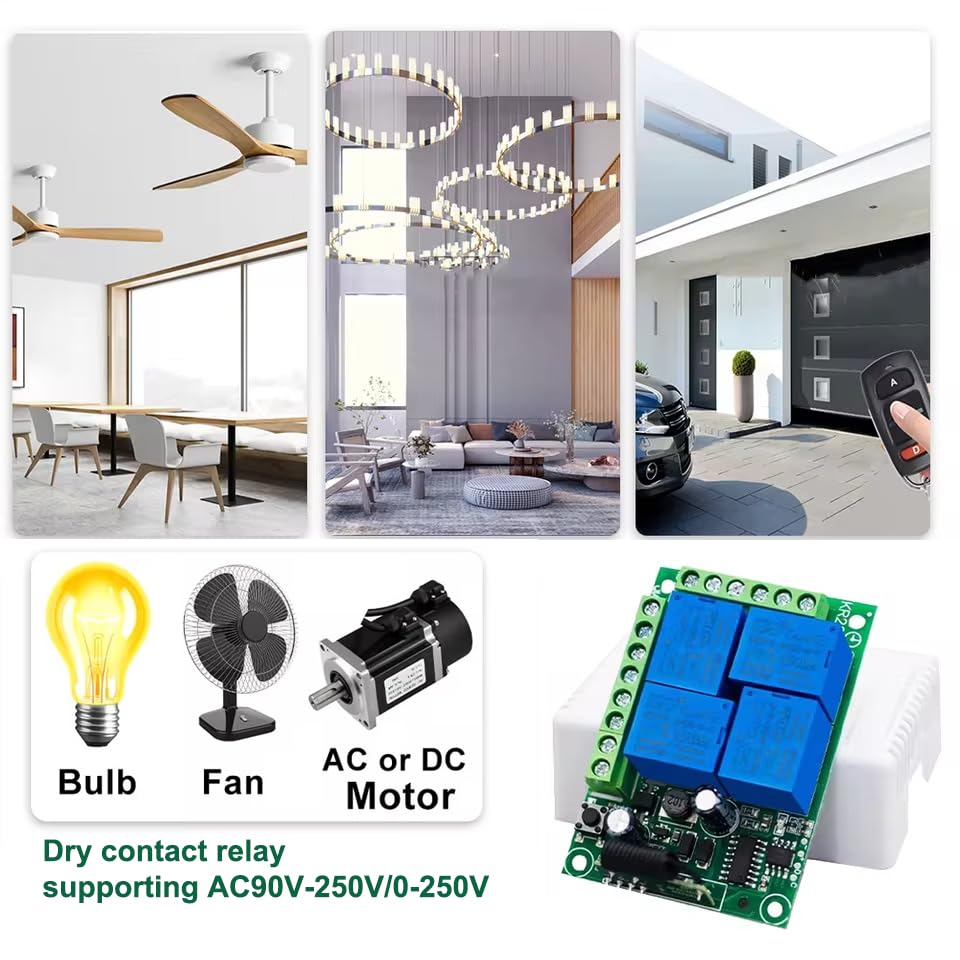
Image 7.1: Wiring an AC light to the receiver.
7.2 DC Motor Wiring

Image 7.2: Wiring a DC motor to the receiver.
7.3 Multiple Device Wiring Examples

Image 7.3: Comprehensive wiring examples for AC devices, AC motors, and DC motors.
8. Troubleshooting
- Device not responding: Ensure the receiver is powered correctly (AC 85V-250V). Check if the transmitter batteries (CR2032) are functional. Verify that the transmitter is correctly programmed to the receiver in the desired mode.
- Limited range: Ensure there are no significant obstructions (thick concrete walls, large metal objects) between the transmitter and receiver. Avoid placing the receiver near strong electromagnetic interference sources.
- Intermittent operation: Check for loose wiring connections. Ensure the receiver's antenna is not obstructed or damaged.
- Accidental activation: If multiple devices are activating unexpectedly, consider resetting the receiver and reprogramming only the intended transmitters.
9. Maintenance
The QIACHIP receiver and transmitters require minimal maintenance. Keep the devices clean and dry. Replace transmitter batteries (CR2032) as needed. Do not attempt to open or repair the receiver or transmitters yourself, as this may void any potential warranty and could lead to electrical hazards.
10. Warranty and Support
For warranty information or technical support, please refer to the product packaging or contact QIACHIP customer service through the retailer where the product was purchased. Keep your purchase receipt as proof of purchase.