
AIRSURE Q26
Contents
AIRSURE Tire Inflator Portable Air Compressor Model Q26 User Manual
Your Guide to Safe and Efficient Tire Inflation
1. Product Overview
The AIRSURE Model Q26 is a compact, portable, and powerful tire inflator designed for quick and efficient inflation of various items, including car tires, motorcycle tires, bicycle tires, and sports balls. Featuring a digital display, auto shut-off, and an integrated LED light, it is an essential tool for roadside emergencies and everyday maintenance.

Image 1.1: The AIRSURE Model Q26 Portable Tire Inflator. This image shows the compact, handheld device with its digital display and control buttons.
2. Package Contents
Please check the package for the following items:
- Tire Inflator (Model Q26) x1
- Air Hose x1
- Storage Bag x1
- Charging Cable x1 (USB-C)
- Inflation Nozzles x4 (Presta valve adapter, ball needle, swimming ring nozzle, etc.)
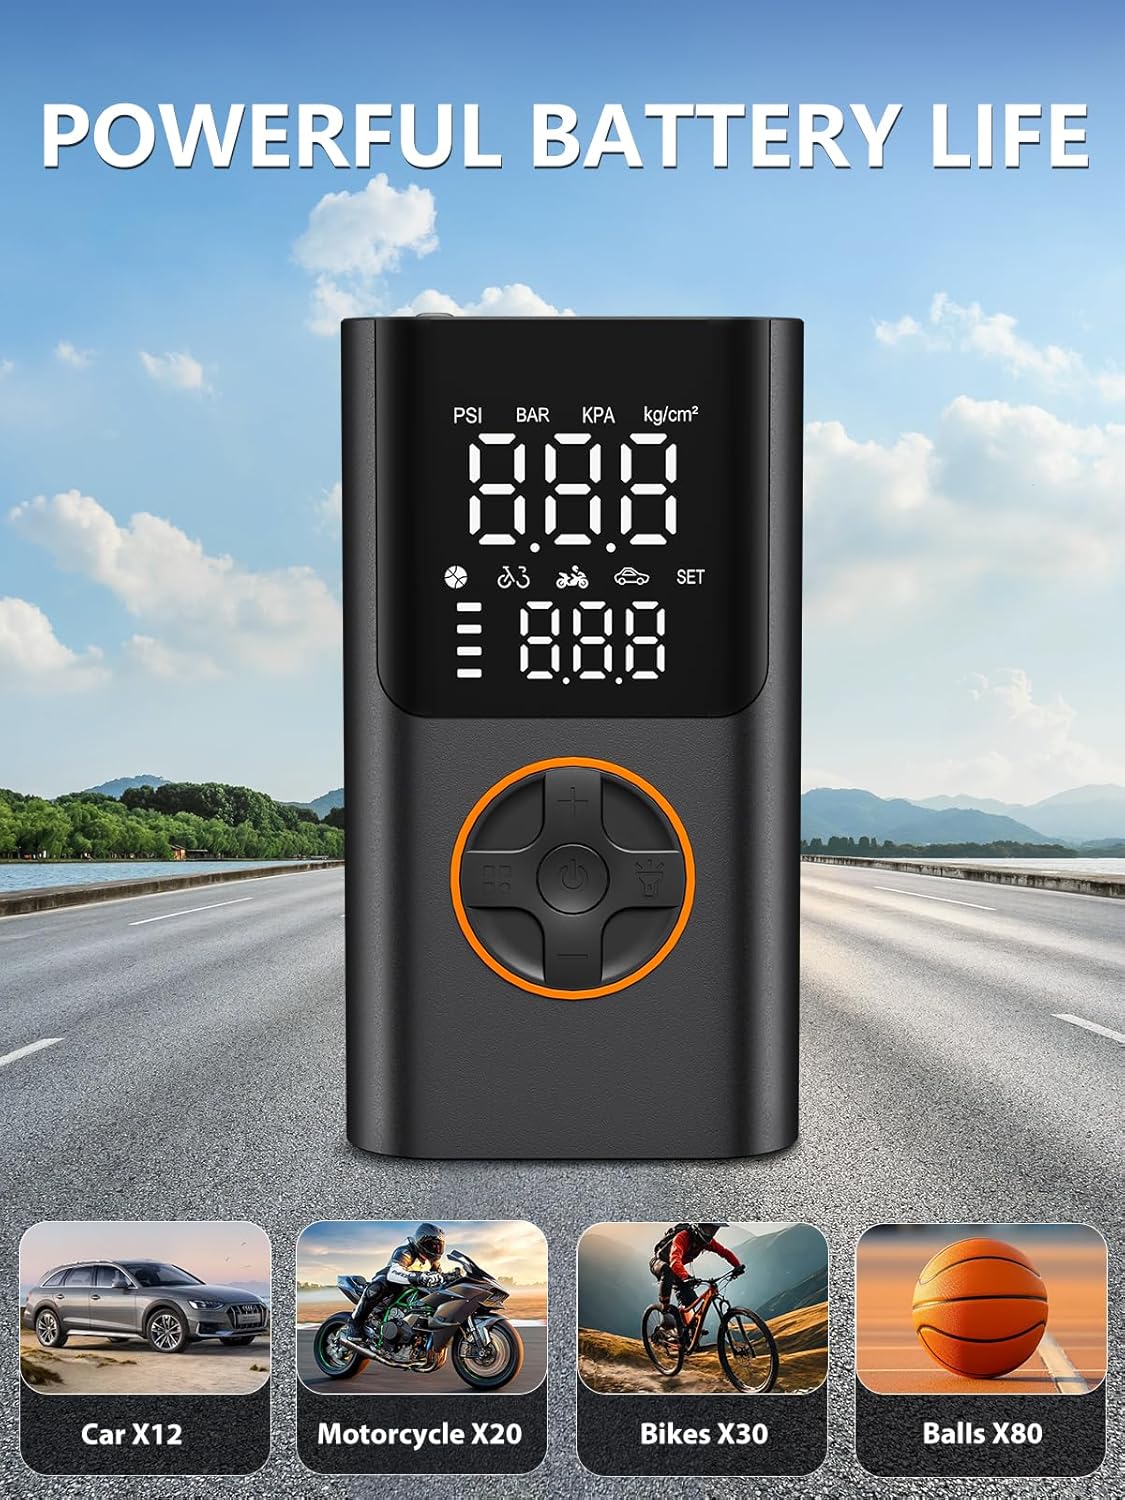
Image 2.1: All components included in the AIRSURE Model Q26 package. This image displays the inflator unit, air hose, charging cable, various nozzles, and a storage bag.
3. Product Features
- Powerful and Fast Inflation: Delivers up to 150 PSI, allowing for rapid inflation of tires and other inflatables.
- Precise Digital Display: Large LCD screen shows real-time pressure and preset values in PSI, BAR, KPA, and KG/CM².
- Auto Shut-Off & Memory Function: Automatically stops inflation once the preset pressure is reached, preventing over-inflation. Remembers the last preset pressure for convenience.
- Emergency Power Bank: Built-in USB output port allows you to charge mobile devices.
- Integrated LED Light: Provides illumination for use in low-light conditions or during nighttime emergencies.
- Versatile Preset Modes: Includes dedicated modes for cars, motorcycles, bicycles, and balls, with customizable pressure settings.
- Compact and Portable: Lightweight design for easy storage and transport.

Image 3.1: Close-up of the AIRSURE Model Q26's digital display. This image highlights the clear, easy-to-read screen showing pressure units and current/target pressure values.
4. Safety Instructions
To ensure safe operation and prevent damage to the device or injury, please read and follow these safety guidelines:
- Always read the entire user manual before operating the device.
- Keep the device out of reach of children.
- Do not leave the inflator unattended while it is operating.
- Avoid over-inflating tires or other items. Always refer to the manufacturer's recommended pressure.
- Do not operate the device in wet conditions or immerse it in water.
- Do not use the device if it is damaged or malfunctioning.
- Ensure the air hose is securely connected to both the inflator and the valve stem before starting inflation.
- The device may become warm during prolonged use. Allow it to cool down before storing.
- Use only the provided charging cable and a compatible USB power adapter (not included).
5. Setup
5.1 Charging the Device
- Connect the provided USB-C charging cable to the charging port on the inflator.
- Connect the other end of the USB cable to a USB power adapter (e.g., phone charger, car USB port, power bank).
- The battery indicator on the display will show charging status. Charge the device fully before first use.
5.2 Attaching the Air Hose
- Screw the air hose securely into the air outlet port on the top of the inflator.
- Ensure it is tightened to prevent air leakage during inflation.
5.3 Selecting the Correct Nozzle
Choose the appropriate nozzle for the item you intend to inflate:
- Schrader Valve: Standard for most car, motorcycle, and some bicycle tires. The air hose connector directly attaches to this.
- Presta Valve Adapter: For road bikes and some mountain bikes. Screw the adapter onto the Presta valve, then attach the air hose connector.
- Ball Needle: For sports balls (basketballs, soccer balls, etc.). Screw the needle onto the air hose connector.
- Swimming Ring Nozzle: For inflatable toys, air mattresses, etc. Push the nozzle onto the air hose connector.
6. Operating Instructions
6.1 Powering On/Off
- To Power On: Press and hold the power button (⏻) for 3 seconds. The display will light up.
- To Power Off: Press and hold the power button (⏻) for 3 seconds. The display will turn off. The device will also automatically power off after a period of inactivity.
6.2 Selecting Measurement Units
With the device powered on, short press the 'M' button to cycle through the pressure units: PSI, BAR, KPA, KG/CM².
6.3 Setting Target Pressure
- Short press the 'M' button to select the desired inflation mode (car, motorcycle, bike, ball, or custom). Each mode has a default preset pressure.
- Use the '+' and '-' buttons to adjust the target pressure value. The value will flash while being adjusted.
- Once the desired pressure is set, stop pressing the buttons. The value will stop flashing, indicating it is set.
6.4 Connecting to the Valve
- Remove the dust cap from the tire valve stem.
- Securely attach the air hose connector (or chosen nozzle) to the valve stem. Ensure a tight seal to prevent air leakage. The display will show the current tire pressure.
6.5 Starting and Stopping Inflation
- Press the power button (⏻) to start inflation. The real-time pressure will be displayed.
- The inflator will automatically stop when the preset target pressure is reached.
- To manually stop inflation at any time, press the power button (⏻) again.
- Once inflation is complete, quickly disconnect the air hose from the valve stem to minimize air loss. Replace the dust cap.

Image 6.1: The AIRSURE Model Q26 in use, inflating a car tire. This image demonstrates the device connected to a tire valve, displaying pressure readings during operation.
6.6 Using the LED Light
With the device powered on, short press the light button (💡) to turn the LED light on. Press again to cycle through different light modes (e.g., steady on, flashing SOS) or to turn it off.
6.7 Using as a Power Bank
- Connect your device's USB charging cable to the USB output port on the inflator.
- The inflator will begin charging your device.
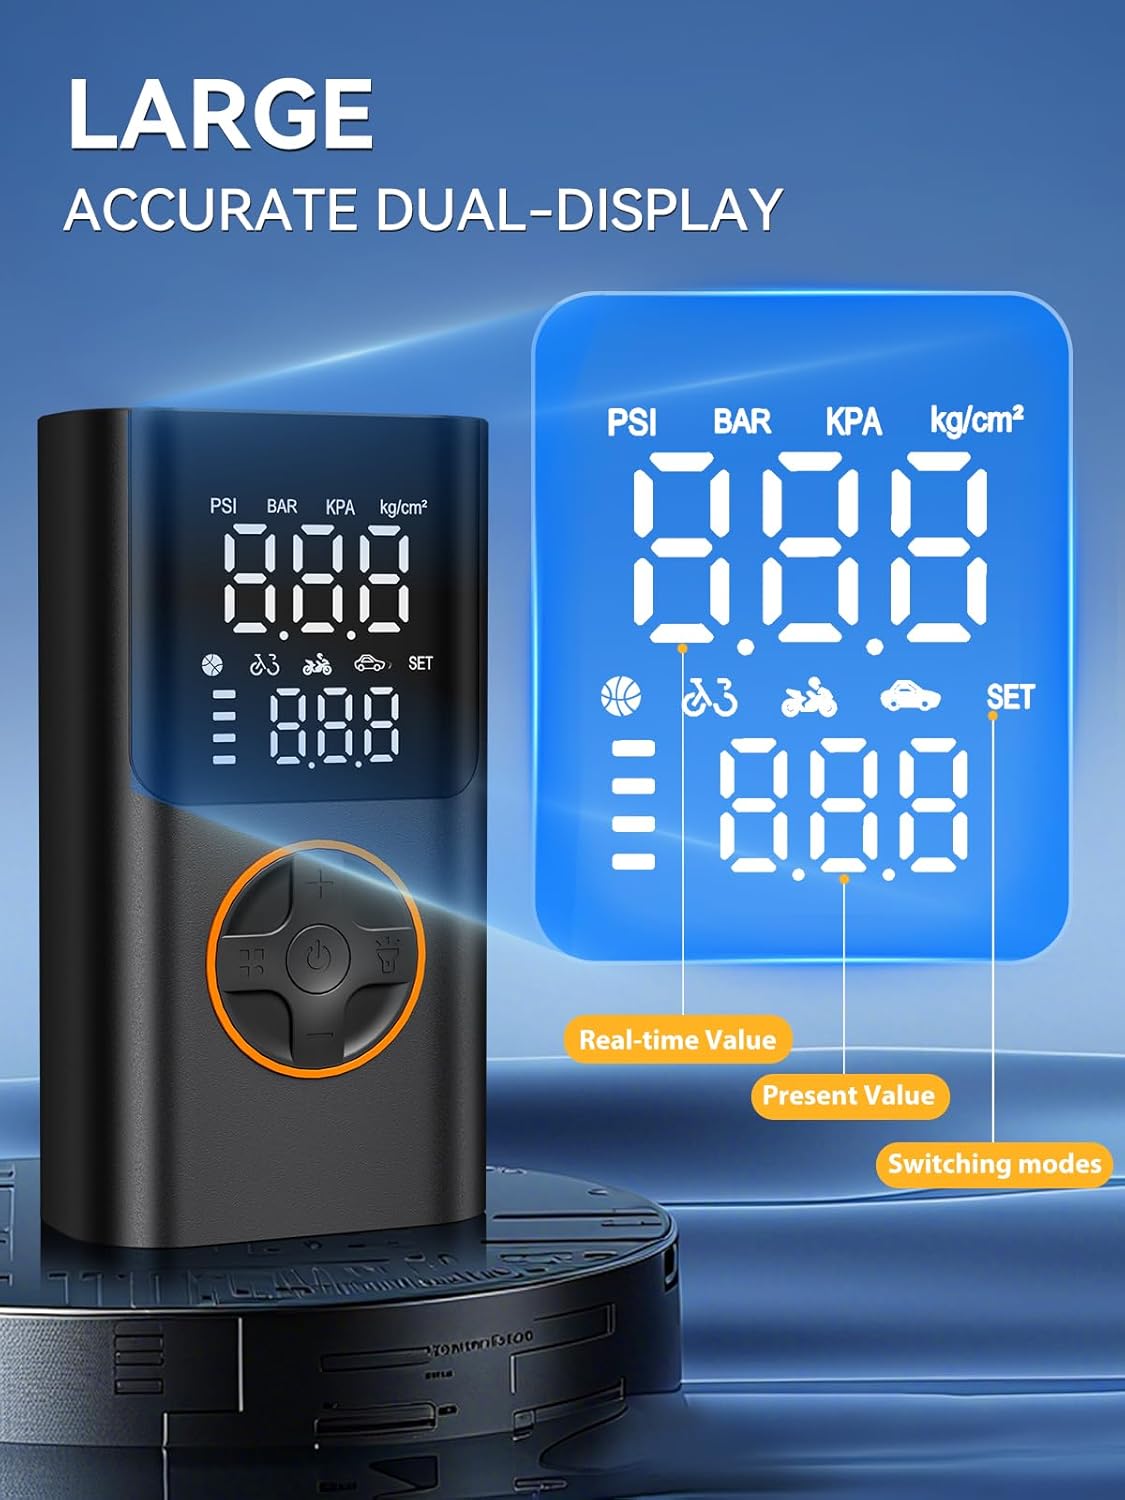
Image 6.2: The AIRSURE Model Q26 functioning as an emergency power bank, charging a smartphone. This image shows a phone connected to the inflator's USB output port.
6.8 Important Note for Small Items
For small items like bicycle tires or sports balls, inflate slowly in short bursts. Check the pressure frequently, especially as it approaches the preset value, to avoid over-inflation. The device has a tolerance of ±1 PSI.
7. Maintenance
- Cleaning: Wipe the device with a soft, damp cloth. Do not use harsh chemicals or abrasive cleaners. Ensure the device is dry before storage.
- Storage: Store the inflator in a cool, dry place, away from direct sunlight and extreme temperatures. Use the provided storage bag to protect it from dust and damage.
- Battery Care: To prolong battery life, charge the device at least once every three months if not in regular use. Avoid fully discharging the battery frequently.
8. Troubleshooting
| Problem | Possible Cause | Solution |
|---|---|---|
| Device does not turn on | Low battery; Device malfunction | Charge the device fully; Contact customer support if issue persists. |
| Inflator not inflating | Air hose not securely connected; Nozzle blocked; Target pressure already reached | Ensure all connections are tight; Check for obstructions in the nozzle/hose; Check current pressure reading. |
| Inaccurate pressure reading | Poor connection to valve; Device needs reset | Ensure a tight seal on the valve; Disconnect and reconnect the hose; If reading seems off, reset the device by powering off and on. |
| Battery not charging | Faulty charging cable/adapter; Charging port damage | Try a different USB-C cable and power adapter; Contact customer support. |
9. Specifications
| Brand | AIRSURE |
| Model Number | Q26 |
| Maximum Pressure | 150 PSI |
| Power Source | Battery Powered (Rechargeable) |
| Special Features | Automatic Shut-Off, Cordless, Digital Display, LED Light, Portable, Quick Inflation |
| Included Components | Tire inflator x1, Air Hose x1, Storage Bag x1, Charging Cable x1, Inflation Nozzles x4 |
| Item Dimensions (L x W x H) | 2.83"L x 1.69"W x 5.11"H |
| Material Type | ABS+PC |
10. Warranty and Support
The AIRSURE Model Q26 Tire Inflator comes with a 2-Year Warranty from the date of purchase. This warranty covers manufacturing defects and workmanship under normal use.
For warranty claims, technical support, or any questions regarding your product, please contact AIRSURE customer service through the retailer where you purchased the product or visit the official AIRSURE website for contact information.
Documents and downloads
Ask a question about this manual
Ask about setup, troubleshooting, compatibility, parts, safety, or missing instructions. Manuals+ will review the question and use this page’s manual context to help answer it.