1. Introduction
The RODEDIO V539 OBD2 Scanner is a diagnostic tool designed to read and clear diagnostic trouble codes (DTCs) from your vehicle's engine control unit (ECU). It supports all OBD2 protocols and is compatible with most vehicles manufactured since 1996. This manual provides detailed instructions on how to use the device for comprehensive vehicle diagnostics, including I/M readiness, live data stream, and battery voltage testing.
2. Safety Information
Please read and understand all safety instructions before operating this device. Failure to do so may result in injury or damage to the device or vehicle.
- Always perform automotive testing in a safe environment.
- Do not wear loose clothing or jewelry when working on a vehicle.
- Keep the scanner away from moisture and extreme temperatures.
- Ensure the vehicle is parked on a level surface with the parking brake engaged.
- Avoid touching hot engine components or moving parts.
- Do not attempt to disassemble the scanner.
3. Product Overview
The RODEDIO V539 features a clear color display and intuitive navigation buttons for ease of use. It connects to your vehicle's OBD2 port via a standard 16-pin connector.

Figure 3.1: RODEDIO V539 OBD2 Scanner and its packaging. This image shows the device's overall design and the box it comes in, highlighting its compact form factor.
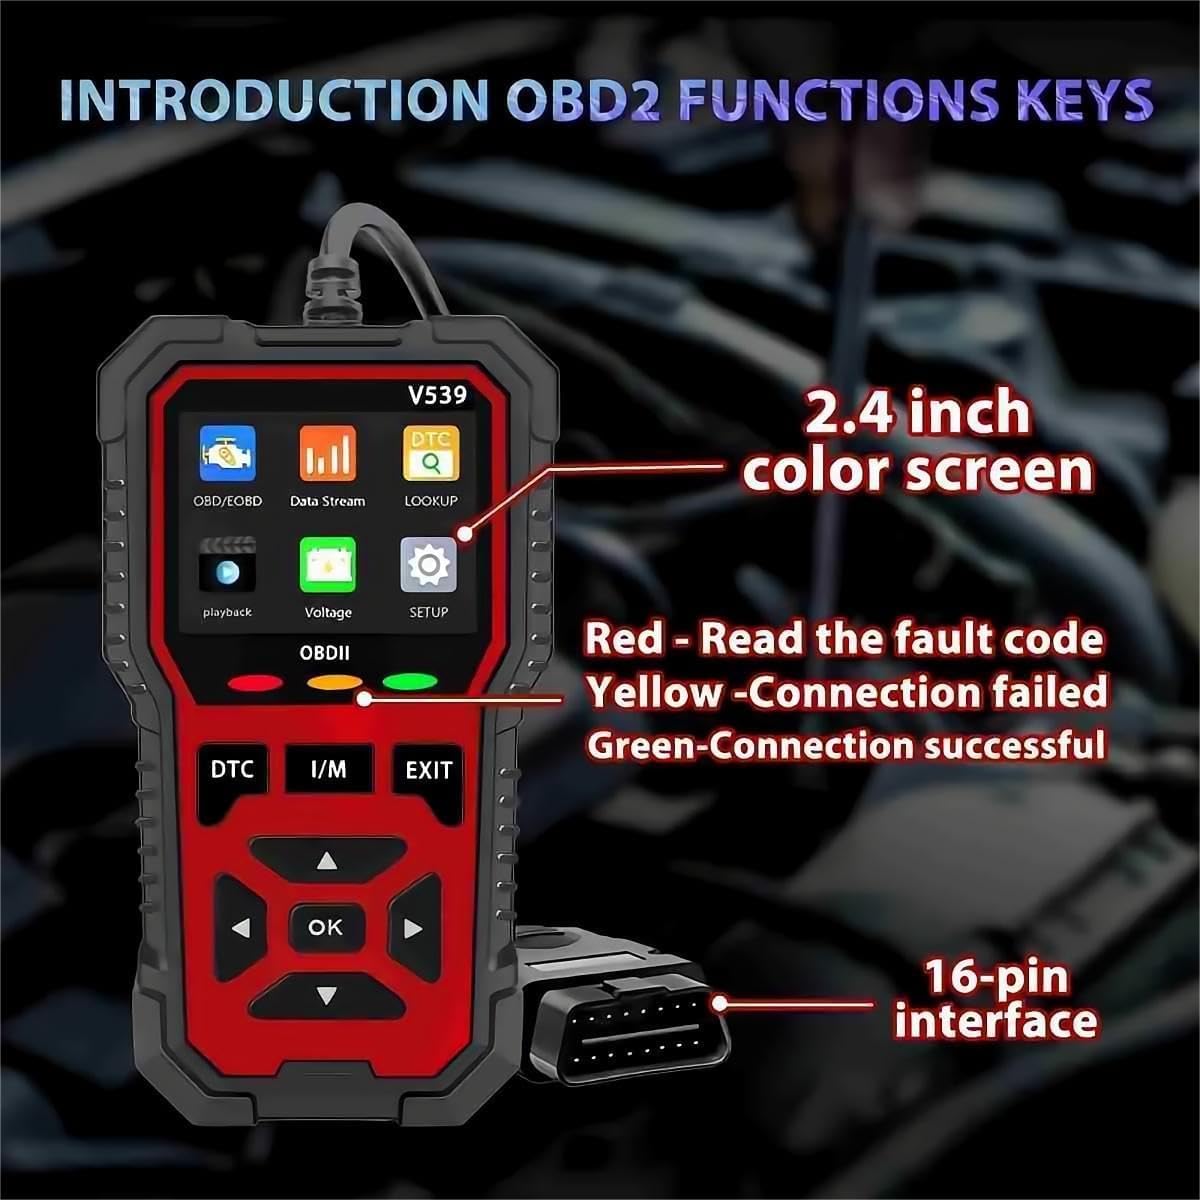
Figure 3.2: Key components and display of the RODEDIO V539 OBD2 Scanner. This image labels the 2.4-inch color screen, the 16-pin interface, and the LED indicators for connection status (Red for fault, Yellow for failed connection, Green for successful connection).
Key Features:
- 2.8-inch Color Display
- 16-pin OBD2 Connector
- DTC (Diagnostic Trouble Code) Button
- I/M (Inspection/Maintenance) Readiness Button
- EXIT Button
- Navigation Buttons (Up, Down, Left, Right, OK)
- LED Indicators for connection status (Red, Yellow, Green)
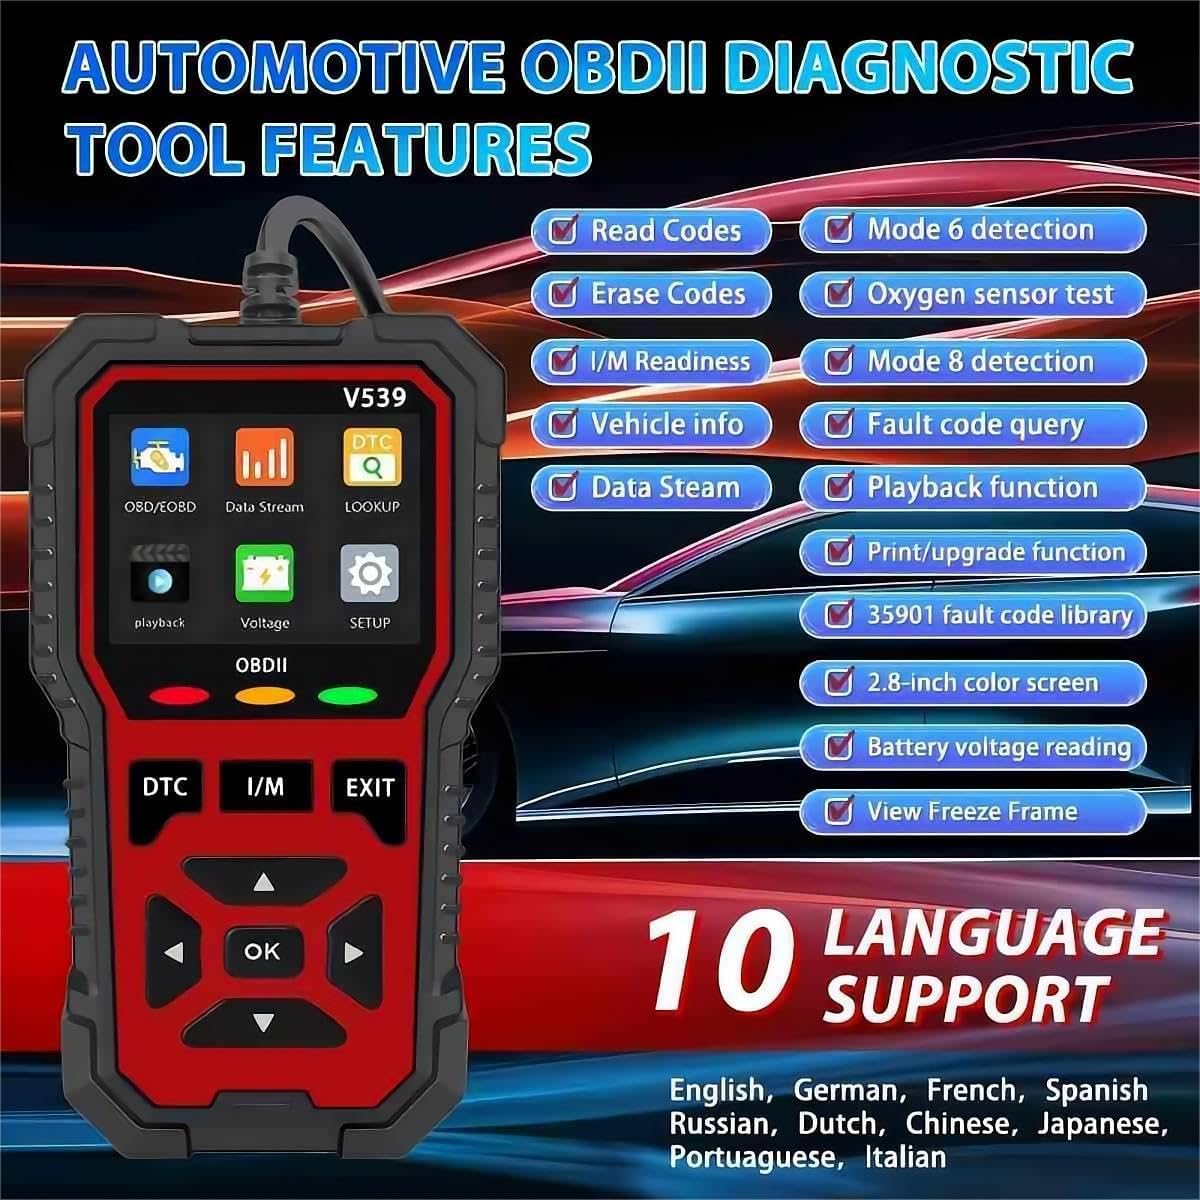
Figure 3.3: Overview of RODEDIO V539 OBD2 Diagnostic Tool features. This image summarizes the tool's capabilities including reading/erasing codes, live data stream, I/M readiness, O2 sensor test, battery voltage reading, and multi-language support.
4. Setup
- Locate the OBD2 Port: The OBD2 port is typically located under the dashboard on the driver's side of the vehicle. Refer to your vehicle's owner's manual if you cannot find it.
- Connect the Scanner: With the vehicle's ignition off, firmly plug the 16-pin connector of the V539 scanner into the vehicle's OBD2 port.
- Power On: Turn the vehicle's ignition to the "ON" position (do not start the engine). The scanner will automatically power on via the vehicle's battery. The green LED indicator should illuminate, indicating a successful connection.
- Language Selection: If prompted, select your preferred language using the navigation buttons and press "OK".
5. Operating Instructions
This section details the various diagnostic functions of the RODEDIO V539 OBD2 Scanner.
5.1. Basic Navigation
Use the Up and Down arrow buttons to scroll through menu options. Press the OK button to confirm a selection. Use the EXIT button to return to the previous menu or the main screen.
5.2. Reading Diagnostic Trouble Codes (DTCs)
This function allows you to retrieve stored, pending, and permanent diagnostic trouble codes from the vehicle's ECU.
- From the main menu, select "OBD/EOBD" or press the DTC button.
- Select "Read Codes".
- The scanner will display any detected DTCs along with their descriptions.
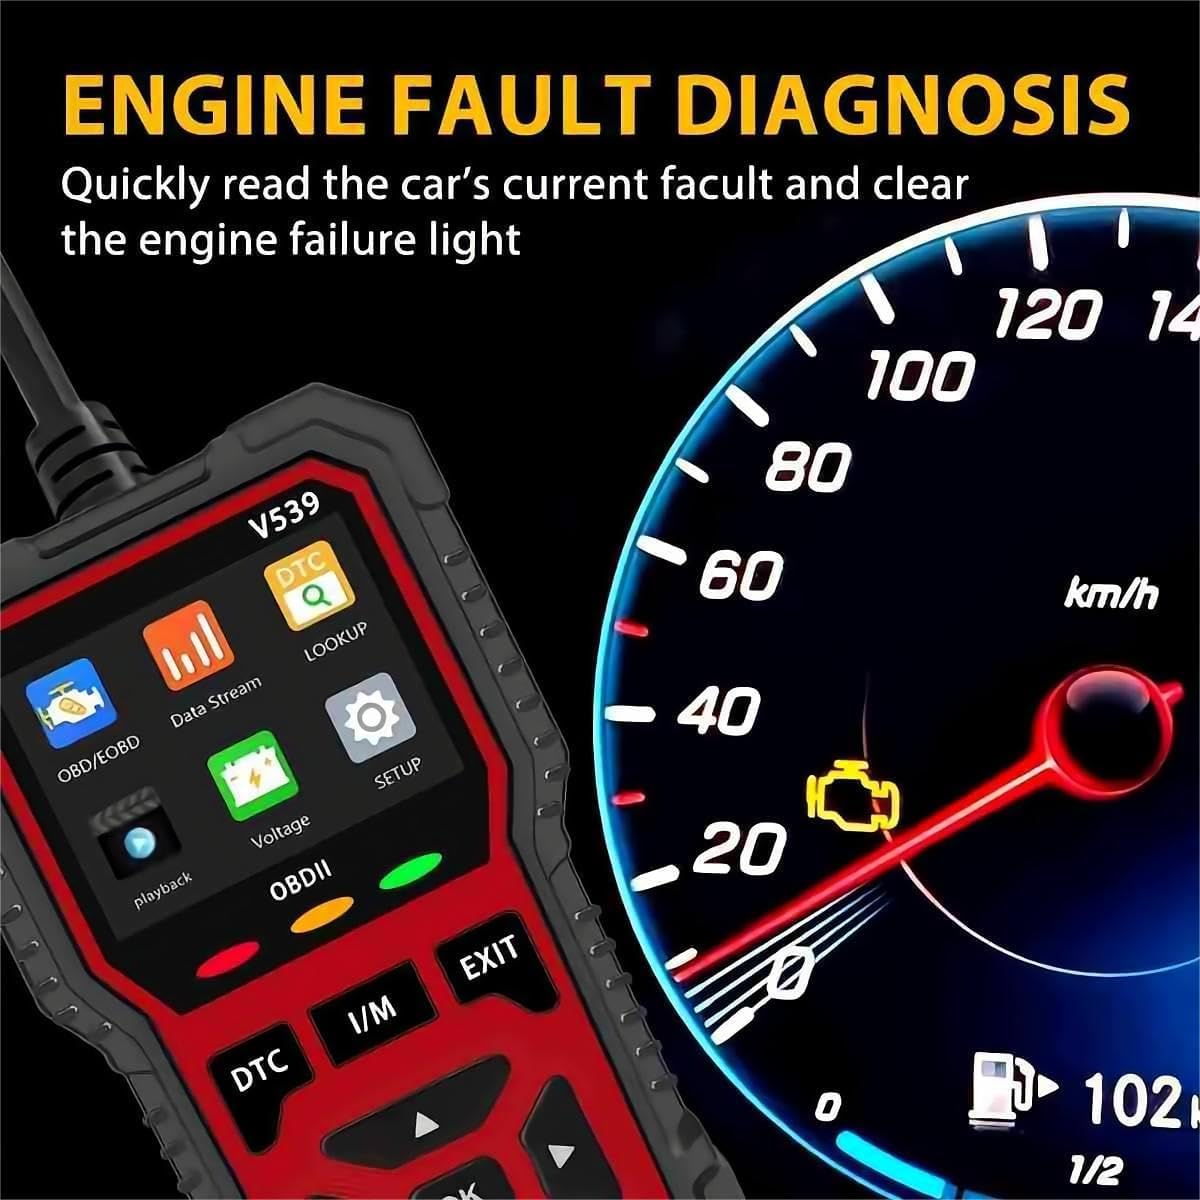
Figure 5.1: Engine fault diagnosis screen on the RODEDIO V539. This image illustrates how the scanner displays fault codes and helps identify the cause of an illuminated check engine light.
5.3. Erasing Diagnostic Trouble Codes (DTCs)
Clearing DTCs will turn off the Check Engine Light (MIL) and reset all monitor status to "Not Ready". It is recommended to fix the underlying issue before clearing codes.
- After reading codes, select "Erase Codes" from the menu.
- Confirm your selection when prompted.
- The Check Engine Light should turn off.
5.4. Live Data Stream
View real-time data from the vehicle's sensors, such as engine RPM, vehicle speed, oxygen sensor readings, and more.
- From the main menu, select "Data Stream".
- Choose the parameters you wish to view.
- The data will be displayed numerically or graphically.
5.5. I/M Readiness Status
This function checks the readiness of the emission-related monitoring systems. It is useful for determining if the vehicle is ready for an emissions test.
- Press the I/M button or select "I/M Readiness" from the menu.
- The scanner will display the status of various monitors (e.g., O2 Sensor Monitor, Catalyst Monitor) as "OK" (ready) or "INC" (incomplete).

Figure 5.2: Freeze Frame and I/M Readiness data displayed on the RODEDIO V539. This image shows how the scanner presents snapshot data at the time of a fault and the status of emission monitors.
5.6. Freeze Frame Data
When an emission-related fault occurs, the ECU stores certain vehicle parameters at that moment. This "Freeze Frame" data can help diagnose the cause of the fault.
- From the main menu, select "Freeze Frame".
- The scanner will display the recorded parameters.
5.7. O2 Sensor Test
Retrieves O2 sensor monitoring test results for the most recently completed tests from the vehicle's on-board computer.
- From the main menu, select "O2 Sensor Test".
- Review the test results.
5.8. On-Board Monitor Test
Retrieves test results for emission-related powertrain components and systems that are not continuously monitored.
- From the main menu, select "On-Board Monitor Test".
- Review the test results.
5.9. Vehicle Information
Displays the Vehicle Identification Number (VIN), Calibration ID (CALID), and Calibration Verification Number (CVN) of the test vehicle.
- From the main menu, select "Vehicle Info".
- The information will be displayed.
5.10. EVAP System Test
Initiates a leak test for the vehicle's Evaporative Emission Control System (EVAP system).
- From the main menu, select "EVAP System Test".
- Follow the on-screen prompts to perform the test.
5.11. Battery Voltage Test
Monitors the vehicle's battery voltage in real-time.
- From the main menu, select "Voltage".
- The current battery voltage will be displayed.
5.12. DTC Lookup
Allows you to manually enter a DTC and view its definition from the scanner's extensive database.
- From the main menu, select "Lookup".
- Enter the DTC using the navigation buttons.
- Press OK to view the definition.
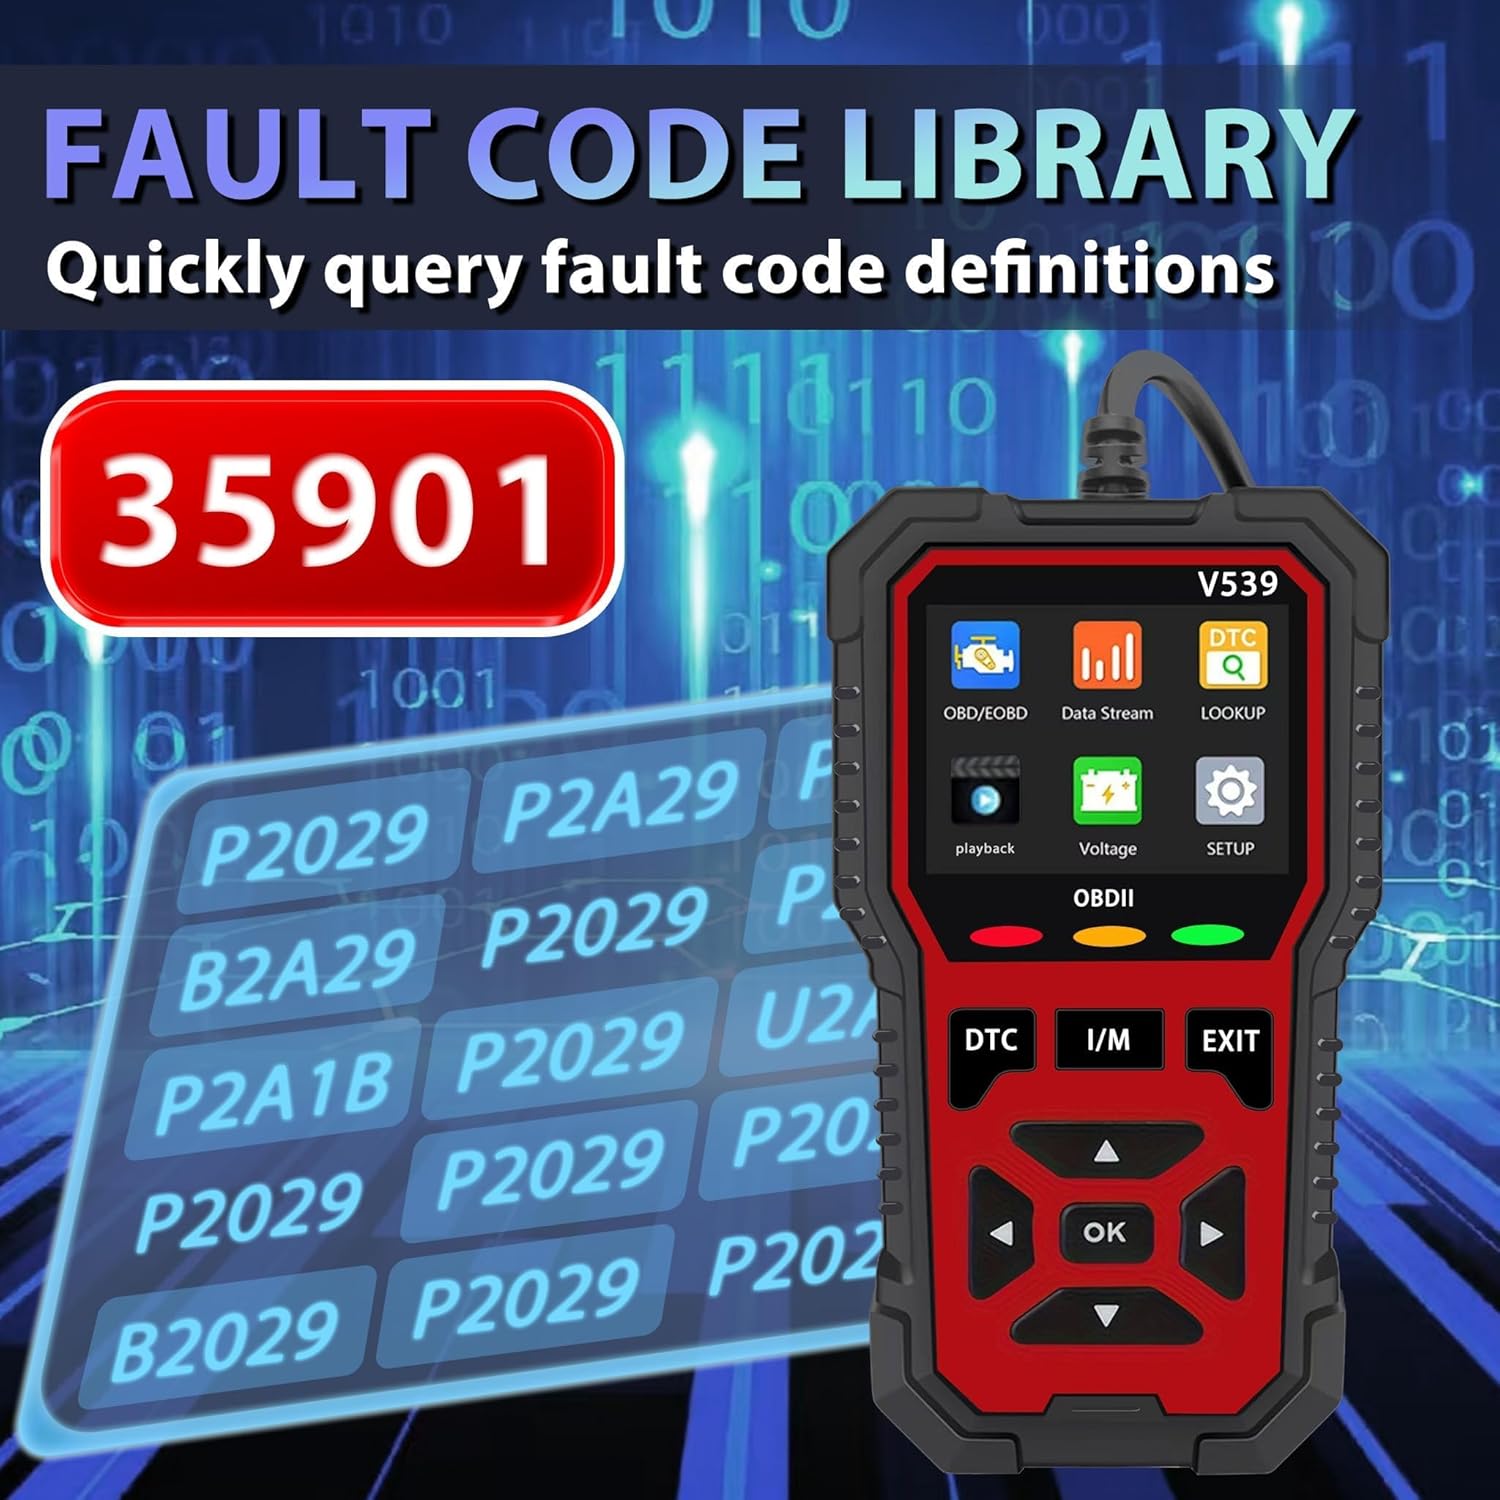
Figure 5.3: Fault code library on the RODEDIO V539. This image highlights the scanner's extensive database of 35,901 diagnostic trouble codes, allowing for quick lookup of code definitions.

Figure 5.4: Overview of all OBDII functions available on the RODEDIO V539. This image visually represents the scanner's capabilities including reading/erasing codes, live data, I/M readiness, freeze frame, O2 sensor test, on-board monitor test, vehicle information, and EVAP system.
6. Maintenance
- Cleaning: Use a soft, dry cloth to clean the scanner's exterior. Do not use abrasive cleaners or solvents.
- Storage: Store the device in a dry, cool place, away from direct sunlight and extreme temperatures.
- Software Updates: Periodically check the manufacturer's website for available software updates to ensure optimal performance and compatibility.
7. Troubleshooting
| Problem | Possible Cause | Solution |
|---|---|---|
| Scanner does not power on. | Loose connection; vehicle ignition off; vehicle battery low. | Ensure secure connection; turn ignition to ON; check vehicle battery. |
| Link error message. | Vehicle not OBD2 compliant; faulty connection; communication error. | Verify vehicle compatibility; check connection; try on another vehicle. |
| Cannot clear codes. | Ignition not ON; underlying fault still present. | Ensure ignition is ON; diagnose and repair the fault before clearing. |
8. Specifications
- Brand: RODEDIO
- Model: V539
- Display: 2.8-inch Color Display
- Connectivity: 16-pin OBD2 Connector, USB
- Operating Voltage: 9-16V (from vehicle OBD2 port)
- Operating Temperature: 0°C to 60°C (32°F to 140°F)
- Storage Temperature: -20°C to 70°C ( -4°F to 158°F)
- Dimensions: 5.1"L x 1.5"W x 7.8"H
- Supported Protocols: All OBD2 protocols (CAN, J1850 PWM, J1850 VPW, ISO9141, KWP2000)
- DTC Database: 35,901 codes
- Supported Languages: English, German, French, Spanish, Russian, Dutch, Chinese, Japanese, Portuguese, Italian

Figure 8.1: Physical dimensions of the RODEDIO V539 OBD2 Scanner. This image provides a visual representation of the device's height (15.7cm / 6.18 inches) and width (8cm / 3.14 inches).
9. Warranty and Support
For warranty information, technical support, or service inquiries, please contact RODEDIO customer support through the retailer where the product was purchased or refer to the official RODEDIO website for contact details. Please have your product model number (V539) and purchase details ready when contacting support.
