
Introduction
Thank you for choosing the Simfer F 9502 SGWIL-SMF01 5-Burner Freestanding Gas Cooker. This manual provides essential information for the safe and efficient installation, operation, maintenance, and troubleshooting of your new appliance. Please read this manual thoroughly before using the cooker and keep it for future reference.
Safety Information
Your safety and the safety of others are paramount. Please observe all safety warnings and instructions provided in this manual. Failure to do so may result in serious injury or property damage.
- Gas Safety: Ensure proper ventilation when using gas burners. Do not store flammable materials near the appliance. In case of a gas leak, immediately shut off the gas supply, open windows, and do not operate any electrical switches or appliances.
- Electrical Safety: Ensure the appliance is properly grounded. Do not use extension cords. Disconnect power before cleaning or servicing.
- Burn Hazard: Surfaces can become hot during use. Use oven mitts and exercise caution. Keep children away from the appliance.
- Installation: Installation must be performed by a qualified technician in accordance with local regulations and this manual.
- Cleaning: Always allow the appliance to cool down before cleaning. Use non-abrasive cleaners.
Product Overview
The Simfer F 9502 SGWIL-SMF01 is a high-efficiency 5-burner freestanding gas cooker designed for modern kitchens. It features a durable stainless steel construction and intuitive knob controls.
Key Features:
- 5 high-efficiency gas burners for versatile cooking.
- Constructed from high-quality stainless steel for durability.
- Freestanding design with a sleek control panel.
- Oven with Closed Door Grill Function.
- Smooth surfaces and removable parts for easy cleaning.
Components and Controls:

Figure 1: Front View. This image shows the front of the Simfer F 9502 SGWIL-SMF01 gas cooker, highlighting the control knobs, oven door, and the overall freestanding design. The oven features a 'Closed Door Grill Function' label.

Figure 2: Hob View. This image displays the top cooking surface with five gas burners, including a central wok burner, and the sturdy pan supports. The glass lid is shown in the open position.

Figure 3: Oven Interior. This image shows the spacious interior of the oven, equipped with multiple rack positions and a baking tray, suitable for various cooking needs.
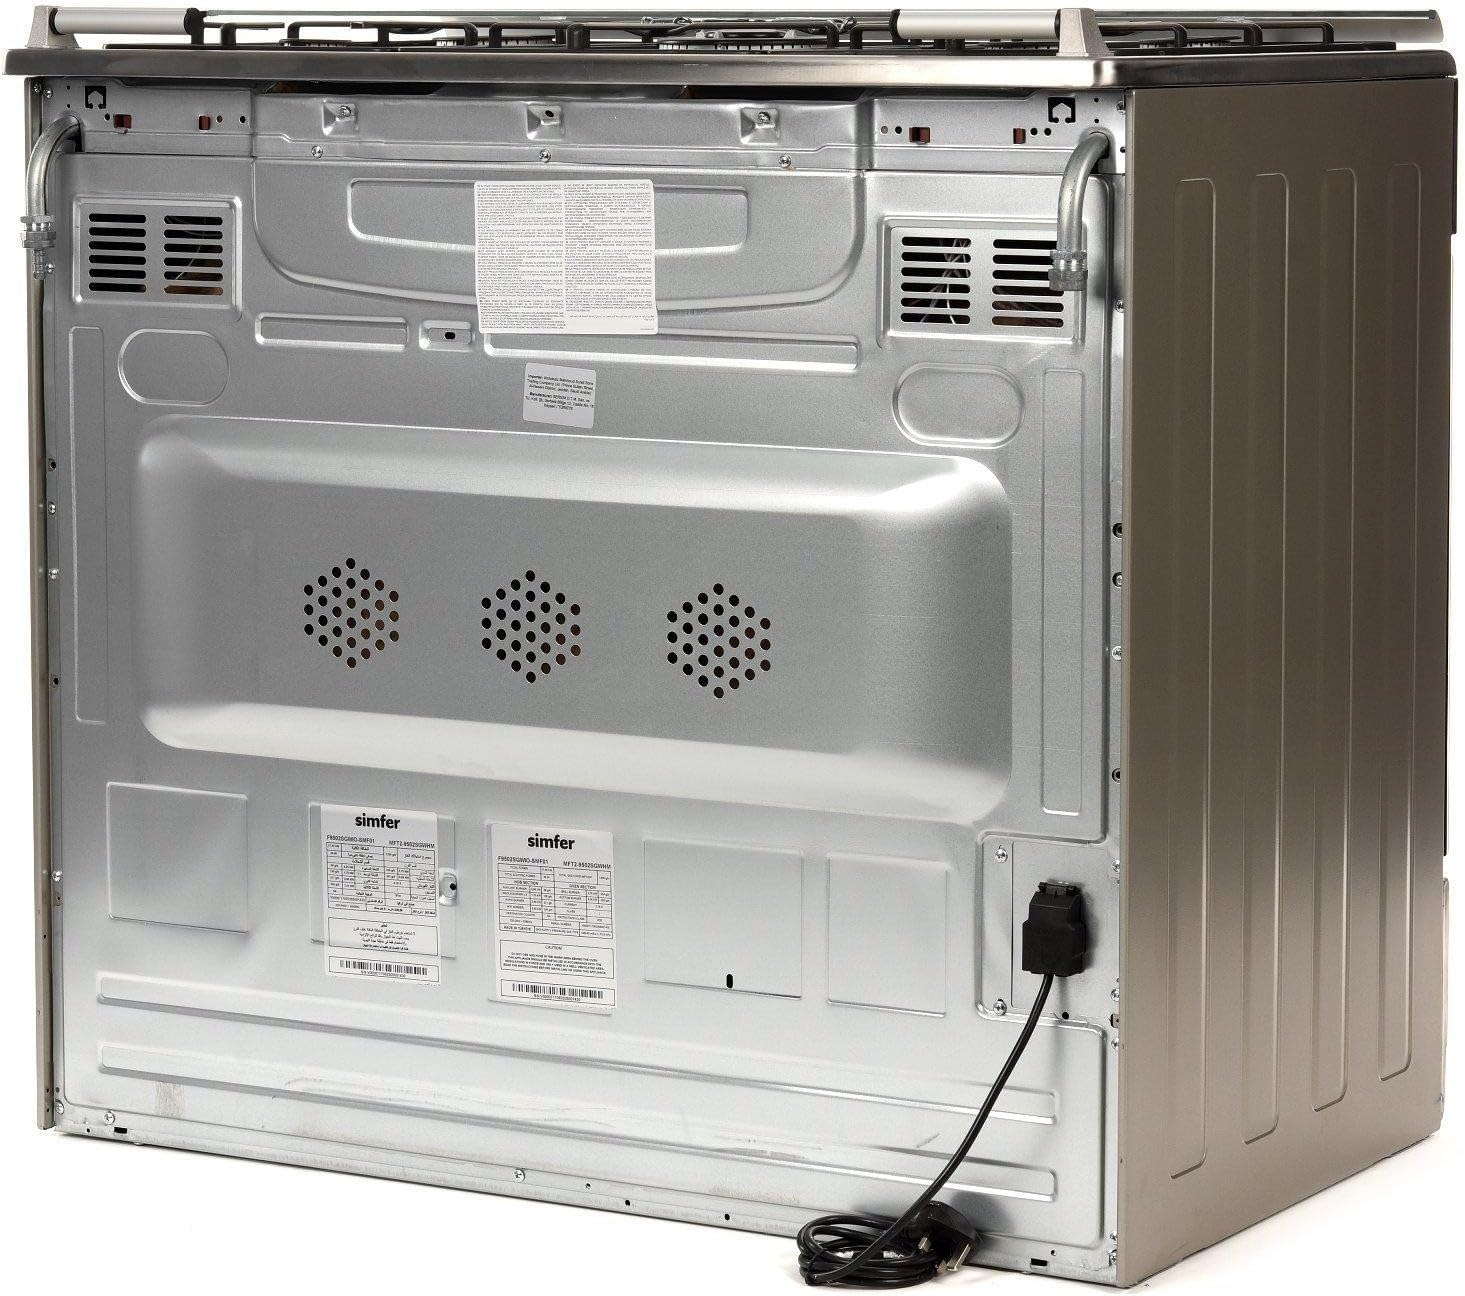
Figure 4: Rear View. This image illustrates the rear panel of the gas cooker, showing the gas inlet, electrical connection point, and ventilation openings. Note the product labels with technical specifications.
Setup and Installation
Proper installation is crucial for the safe and efficient operation of your gas cooker. It is strongly recommended that installation be carried out by a qualified and certified technician.
Unpacking:
- Carefully remove all packaging materials.
- Inspect the appliance for any damage incurred during transit. Report any damage immediately to your retailer.
- Remove all internal packaging and accessories from the oven cavity.
Positioning:
- Place the cooker on a flat, stable surface.
- Ensure adequate clearance from adjacent walls and cabinets as specified in local building codes.
- The appliance is designed as a freestanding unit.
Gas Connection:
The gas connection must be performed by a qualified gas fitter. Ensure the gas type (Natural Gas or LPG) matches the appliance specifications. Use appropriate gas hoses and fittings, checking for leaks after connection.
Electrical Connection:
The electrical connection must be performed by a qualified electrician. Ensure the voltage and frequency match the appliance rating. The appliance must be properly grounded.
Operating Instructions
Familiarize yourself with the control knobs before operating the cooker.
Using the Gas Burners:
- Place a suitable pot or pan centrally on the burner grate.
- Push in and turn the corresponding burner control knob counter-clockwise to the maximum flame setting.
- The burner will ignite automatically (if equipped with automatic ignition). If not, use a match or lighter.
- Hold the knob in for a few seconds after ignition to allow the thermocouple to heat up. Release the knob; if the flame goes out, repeat the process.
- Adjust the flame size by turning the knob between the maximum and minimum settings.
- To turn off, turn the knob clockwise to the 'off' position.
Using the Gas Oven:
- Open the oven door and place food on the appropriate rack.
- Push in and turn the oven control knob to the desired temperature setting.
- The oven burner will ignite. Hold the knob in for a few seconds after ignition.
- Close the oven door. The oven will preheat to the selected temperature.
- Monitor cooking progress through the oven door window.
- To turn off, turn the oven control knob to the 'off' position.
Using the Grill Function:
This cooker features a Closed Door Grill Function, allowing for efficient grilling with the oven door closed.
- Place food on the grill rack in the upper part of the oven.
- Push in and turn the grill control knob to the grill setting.
- The grill element will ignite. Hold the knob in for a few seconds.
- Close the oven door.
- Monitor grilling carefully to prevent burning.
- To turn off, turn the grill control knob to the 'off' position.
Maintenance and Cleaning
Regular cleaning and maintenance will ensure the longevity and optimal performance of your Simfer gas cooker. Always ensure the appliance is cool and disconnected from power before cleaning.
General Cleaning:
- Wipe down exterior surfaces with a soft cloth and mild detergent. Avoid abrasive cleaners or scouring pads, which can scratch the stainless steel finish.
- The smooth surface and removable parts (burner caps, grates) make cleaning easy. These can be washed in warm soapy water.
- For stubborn stains, use a specialized stainless steel cleaner, following the product instructions.
Oven Cleaning:
- Remove oven racks and baking trays. These can be washed in warm soapy water.
- Wipe the interior of the oven with a damp cloth and mild oven cleaner. Follow the cleaner's instructions and ensure good ventilation.
- Do not use harsh abrasive cleaners on the oven interior.
Burner Maintenance:
- Ensure burner caps and rings are clean and dry before reassembling.
- Properly align burner caps and rings to ensure even flame distribution.
Troubleshooting
Before contacting customer service, please refer to the following common issues and their solutions:
| Problem | Possible Cause | Solution |
|---|---|---|
| Burner does not ignite. | No gas supply, igniter dirty/wet, burner cap misaligned. | Check gas supply. Clean and dry igniter and burner cap. Realign burner cap. |
| Oven not heating. | Gas supply issue, oven control knob not set correctly, pilot light (if applicable) out. | Check gas supply. Ensure knob is set to a temperature. Consult a technician if pilot light is an issue. |
| Uneven flame on burner. | Burner ports clogged, burner cap misaligned. | Clean burner ports with a fine wire. Realign burner cap. |
| Strong gas odor. | Gas leak. | Immediately shut off gas supply, open windows, do not operate electrical switches, and contact a qualified gas technician. |
If the problem persists after attempting these solutions, please contact a qualified service technician.
Specifications
Below are the technical specifications for the Simfer F 9502 SGWIL-SMF01 Gas Cooker:
| Feature | Detail |
|---|---|
| Brand Name | Simfer |
| Model Information | F 9502 SGWIL-SMF01 |
| Product Dimensions (D x W x H) | 90 cm x 60 cm x 88 cm |
| Item Weight | 65 Kilograms |
| Installation Type | Freestanding |
| Number of Burners | 5 |
| Hob Type | Open Gas Burners |
| Control Type | Knob |
| Material | Plastic (likely for knobs/trim), Stainless Steel (main body) |
| Color | Black |
| Finish Type | Polished |
| Efficiency | High-efficiency |
| Special Features | Lightweight (relative to size) |
| Included Components | 1 × Freestanding Gas Cooker with 5 Burners |
| Batteries Required? | No |
Warranty and Support
For warranty information and customer support, please refer to the warranty card included with your product or contact your retailer. Keep your purchase receipt as proof of purchase.


