1. Introduction
This manual provides detailed instructions for the installation, operation, maintenance, and troubleshooting of your NKPU 56 Inch Ceiling Fan with Light, Model SY11. Please read this manual thoroughly before installation and use to ensure safe and efficient operation.
The NKPU 56 Inch Ceiling Fan is designed for both indoor and outdoor (covered patio) use, featuring a quiet reversible DC motor, dimmable LED light, and control via remote or mobile application.
2. Safety Information
WARNING: To reduce the risk of fire, electric shock, or personal injury, always follow these basic precautions:
- Read all instructions carefully before beginning installation.
- Ensure the power is turned off at the circuit breaker before installation or servicing.
- All wiring must be in accordance with national and local electrical codes. If you are unfamiliar with wiring, consult a qualified electrician.
- The fan must be mounted to a ceiling joist or support structure capable of supporting a minimum of 35 lbs (15.9 kg).
- Do not operate the fan with damaged blades or housing.
- Avoid placing objects in the path of the fan blades.
- This fan is suitable for damp locations but should not be directly exposed to rain.
3. Package Contents
Verify that all components are present before beginning installation.
- Ceiling Fan Motor Assembly
- Fan Blades (6 double-sided: white/wood grain)
- LED Light Kit
- Remote Control
- Downrods (6-inch and 10-inch)
- Mounting Bracket
- Hardware Pack
- User Manual (this document)
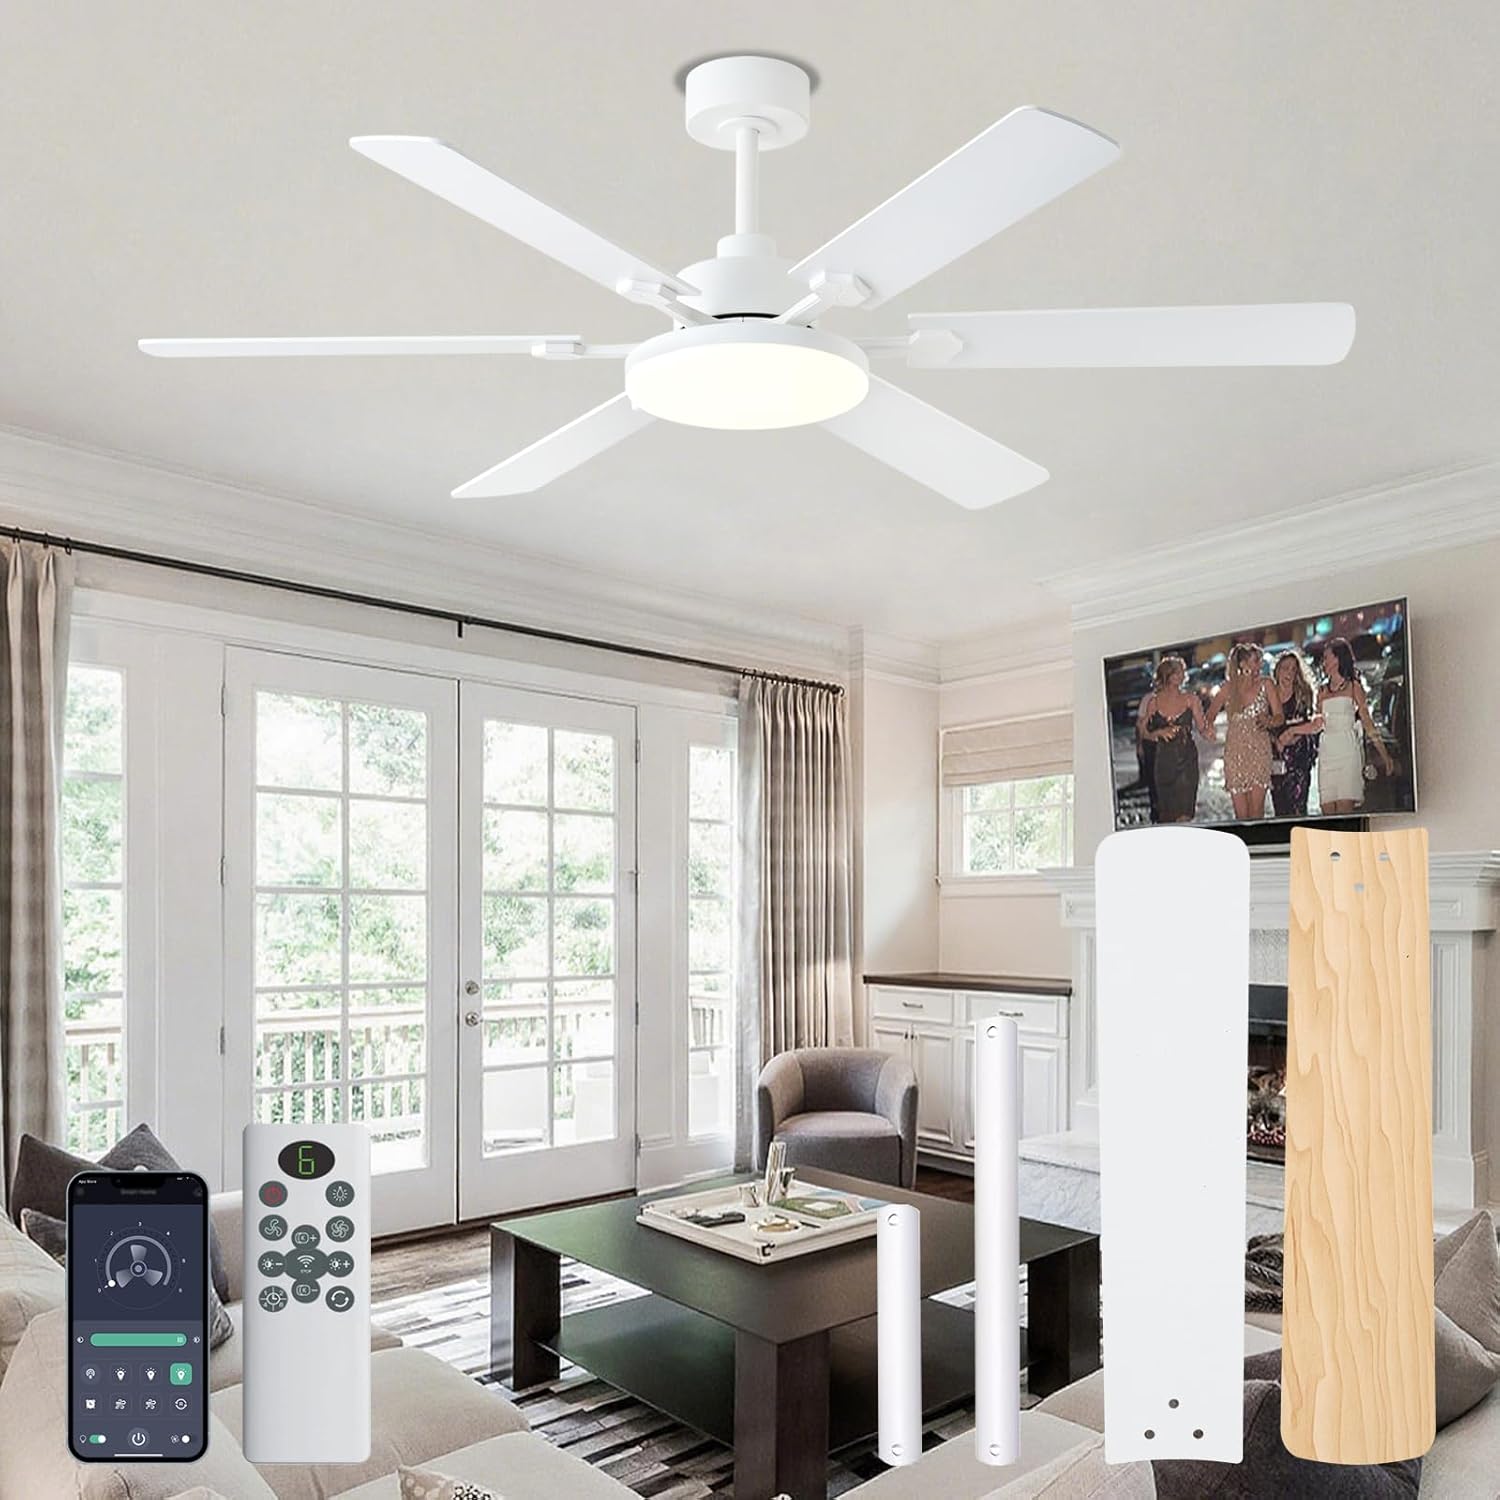
Image: Overview of the NKPU 56 Inch Ceiling Fan, including the motor, blades, remote control, and mobile app interface.
4. Setup and Installation
Follow these steps for proper installation of your ceiling fan. It is recommended to have two people for installation.
4.1 Mounting Options
The fan includes 6-inch and 10-inch downrods to accommodate different ceiling heights. Choose the appropriate downrod for your room size and ceiling height. This fan is suitable for low and high ceilings but not for angled mounts.

Image: Diagram showing fan dimensions (56-inch diameter, 11.4-inch light panel, 13.8-inch/14.1-inch height with different downrods) and suitable mounting options (low ceiling, high ceiling, no angle mount).

Image: Illustration of the two included downrod sizes (6-inch and 10-inch) for varied installation scenarios.
4.2 Installation Steps
- Turn off Power: Before starting, ensure the power supply to the fan location is disconnected at the circuit breaker.
- Mounting Bracket Installation: Secure the mounting bracket to the ceiling joist or a suitable support structure.
- Assemble Downrod and Motor: Attach the chosen downrod to the fan motor assembly. Route the electrical wires through the downrod.
- Hang Fan: Carefully lift the fan assembly and hang it on the mounting bracket.
- Electrical Connections: Connect the electrical wires according to the wiring diagram provided in the full manual (refer to included User Manual for detailed wiring instructions).
- Attach Blades: Securely attach the six double-sided blades to the motor housing. You can choose between the white or wood grain side facing down.
- Install Light Kit: Connect and install the LED light kit to the bottom of the fan motor assembly.
- Final Checks: Ensure all connections are secure and all screws are tightened.

Image: A person installing the fan blades, demonstrating the ease of installation.
For a visual guide, refer to the installation videos available on the product page or contact customer support.
5. Operating Instructions
Your NKPU ceiling fan can be controlled using the included remote control or the "Fan Lamp Pro" mobile application.
5.1 Remote Control Functions

Image: Detailed diagram of the remote control, indicating functions for each button such as fan on/off, speed adjustment, light color temperature, brightness, timer, and steering control.
- Fan On/Off: Press the fan button to turn the fan on or off.
- Fan Speed Adjustment: Use the '+' and '-' buttons to increase or decrease fan speed (6 speeds available).
- Light On/Off: Press the light button to turn the light on or off.
- Color Temperature Adjustment: Adjust the light color temperature (3000K Warm, 4500K Natural, 6000K Cool White).
- Brightness Adjustment: Use the brightness '+' and '-' buttons to adjust light intensity (10%-100% dimmable).
- Timer Settings: Set the fan to turn off automatically after 1, 2, 4, or 8 hours.
- Reversible Motor (Steering Control): Change the fan's rotation direction for summer (downward airflow) or winter (upward airflow for air circulation).
- Clear Code: Short press the switch light button, then long press to clear the code for remote pairing.
Note: One remote control can simultaneously control multiple NKPU ceiling fans with lights if they are paired correctly.

Image: A remote control being used to operate two ceiling fans in a modern living space.
5.2 Mobile Application Control ("Fan Lamp Pro")
- Download App: Scan the QR code provided in the manual or on the product page, or visit jasonghost.com/fanlamppro/ to download the "Fan Lamp Pro" app.
- Add Device: Open the app, click the "+" button to add a new device.
- Pairing: After the device is powered on, if the device flashes or beeps, it means the phone has successfully paired with the device.
- Control: Use the app interface to adjust light brightness, color temperature, fan speed, set timers, and control the fan and light separately.

Image: Screenshots of the "Fan Lamp Pro" mobile application interface, showing the QR code for download, device pairing steps, and control options for the fan and light.

Image: Step-by-step guide for downloading and pairing the "Fan Lamp Pro" mobile application with the ceiling fan.
5.3 Fan Modes and Settings
- Reversible Motor: The DC motor allows for reversible airflow.
- Summer Mode (Downward Airflow): Creates a cooling effect.
- Winter Mode (Upward Airflow): Circulates warm air trapped near the ceiling.
- 6-Speed Settings: Adjust airflow from soft breeze to strong wind.
- 1-2 Speeds: Soft wind for comfortable sleep (8H timer).
- 3-4 Speeds: Natural wind for reading/work (2H/4H timer).
- 5-6 Speeds: Cool wind for exercise (1H timer).
- Dimmable LED Light: The 11.4-inch LED light offers 10%-100% brightness adjustment.
- 3 Color Temperatures: Choose between 3000K (warm), 4500K (natural), and 6000K (cool white) to suit your preference.
- Timing Function: Set the fan to turn off after 1, 2, 4, or 8 hours.

Image: Diagram illustrating the reversible motor function, showing downward airflow for cooling in summer and upward airflow for circulating warm air in winter.

Image: Visual representation of the dimmable LED light feature, showing 3 color temperatures (3000K, 4500K, 6000K) and brightness adjustment from 10% to 100%.

Image: Chart showing recommended fan speeds and timer settings for various activities like sleeping, reading/working, and exercising.
6. Maintenance
Regular maintenance ensures optimal performance and longevity of your ceiling fan.
- Cleaning: Periodically clean the fan blades and motor housing with a soft, damp cloth. Do not use abrasive cleaners or solvents.
- Blade Inspection: Check fan blades for any cracks or damage. Replace damaged blades immediately.
- Tighten Screws: Over time, screws may loosen. Periodically check and tighten all screws on the fan assembly and mounting bracket.
- No Lubrication Required: The DC motor is permanently lubricated and does not require additional oiling.
- LED Light: The LED light source is integrated and designed for long life. If the light fails, contact customer support for assistance.
CAUTION: Always turn off the power at the circuit breaker before performing any cleaning or maintenance.
7. Troubleshooting
Before contacting customer support, refer to the following common issues and solutions:
| Problem | Possible Cause | Solution |
|---|---|---|
| Fan does not start | No power to the fan; Loose wire connections; Remote control battery low or not paired. | Check circuit breaker and wall switch; Verify all wire connections are secure; Replace remote battery or re-pair remote. |
| Light does not work | Loose wire connection to light kit; LED driver issue; Light not turned on via remote/app. | Check light kit wiring; Ensure light is activated; Contact customer support if LED is faulty. |
| Fan wobbles | Loose blades or mounting hardware; Unbalanced blades. | Ensure all blade screws and mounting screws are tight; Use a balancing kit (not included) if necessary. |
| Remote control not working | Low battery; Not paired with fan; Obstruction between remote and receiver. | Replace battery; Re-pair remote control (refer to section 5.1); Ensure clear line of sight. |
| App control not working | App not paired; Wi-Fi connectivity issues; Incorrect app settings. | Re-pair the app with the fan (refer to section 5.2); Check Wi-Fi connection; Ensure app permissions are granted. |
8. Specifications
| Feature | Detail |
|---|---|
| Model | SY11 |
| Brand | NKPU |
| Size | 56 Inch |
| Color | White (Blades are double-sided: White / Wood Grain) |
| Motor Type | DC Reversible Motor |
| Number of Blades | 6 |
| Air Flow Capacity | 8577 CFM |
| Noise Level | ≤35 dB |
| Light Type | Integrated Dimmable LED (11.4-inch, max 3800 lumens) |
| Color Temperatures | 3000K (Warm), 4500K (Natural), 6000K (Cool White) |
| Control Methods | Remote Control, "Fan Lamp Pro" Mobile App |
| Timer Settings | 1H, 2H, 4H, 8H |
| Downrod Lengths | 6 inches, 10 inches |
| Voltage | 110 Volts |
| Wattage | 60 watts |
| Recommended Room Size | 180-240 sq ft (e.g., 12x12 ft to 18x18 ft) |
| Indoor/Outdoor Usage | Indoor, Outdoor (covered patio, not directly exposed to rain) |
9. Warranty and Customer Support
NKPU offers a 2-year after-sales service for this product. In addition, a 30-day no-hassle return policy is available.
If you encounter any issues during installation or operation, or require replacement parts, please contact NKPU customer service. Our dedicated team is ready to assist you.
For support, please refer to the contact information provided with your purchase or visit the official NKPU store on Amazon: NKPU Store.


