
1. Introduction
Thank you for purchasing the DSP KB2173 9.0L Air Fryer. This appliance is designed to provide a healthy and efficient way to cook a variety of meals with minimal oil. Please read this manual thoroughly before operating the appliance and keep it for future reference.
Important Safety Instructions
- Always place the air fryer on a stable, heat-resistant surface.
- Do not immerse the appliance, cord, or plug in water or any other liquid.
- Keep the appliance out of reach of children.
- Ensure the voltage indicated on the appliance corresponds to your local mains voltage before connecting.
- Do not block the air inlet and outlet openings.
- Unplug the appliance when not in use and before cleaning.
- Do not operate the appliance if the plug, power cord, or the appliance itself is damaged.
- The appliance is intended for household use only.
2. Product Overview
The DSP KB2173 Air Fryer features advanced technology for even cooking and ease of use.
Key Features
- Upper and lower heating technology for even heat distribution and perfect cooking in less time.
- 1600 Watt power for strong performance and quick food preparation.
- Color touch screen for complete and easy control of temperature and time.
- 12 preset programs for versatile cooking to suit various needs.
- Temperature control from 80°C to 200°C, ideal for frying, roasting, baking, and grilling.
- Elegant design with a durable metal inner cavity.
- Includes a baking tray for added cooking versatility.
Components
Familiarize yourself with the main parts of your air fryer:
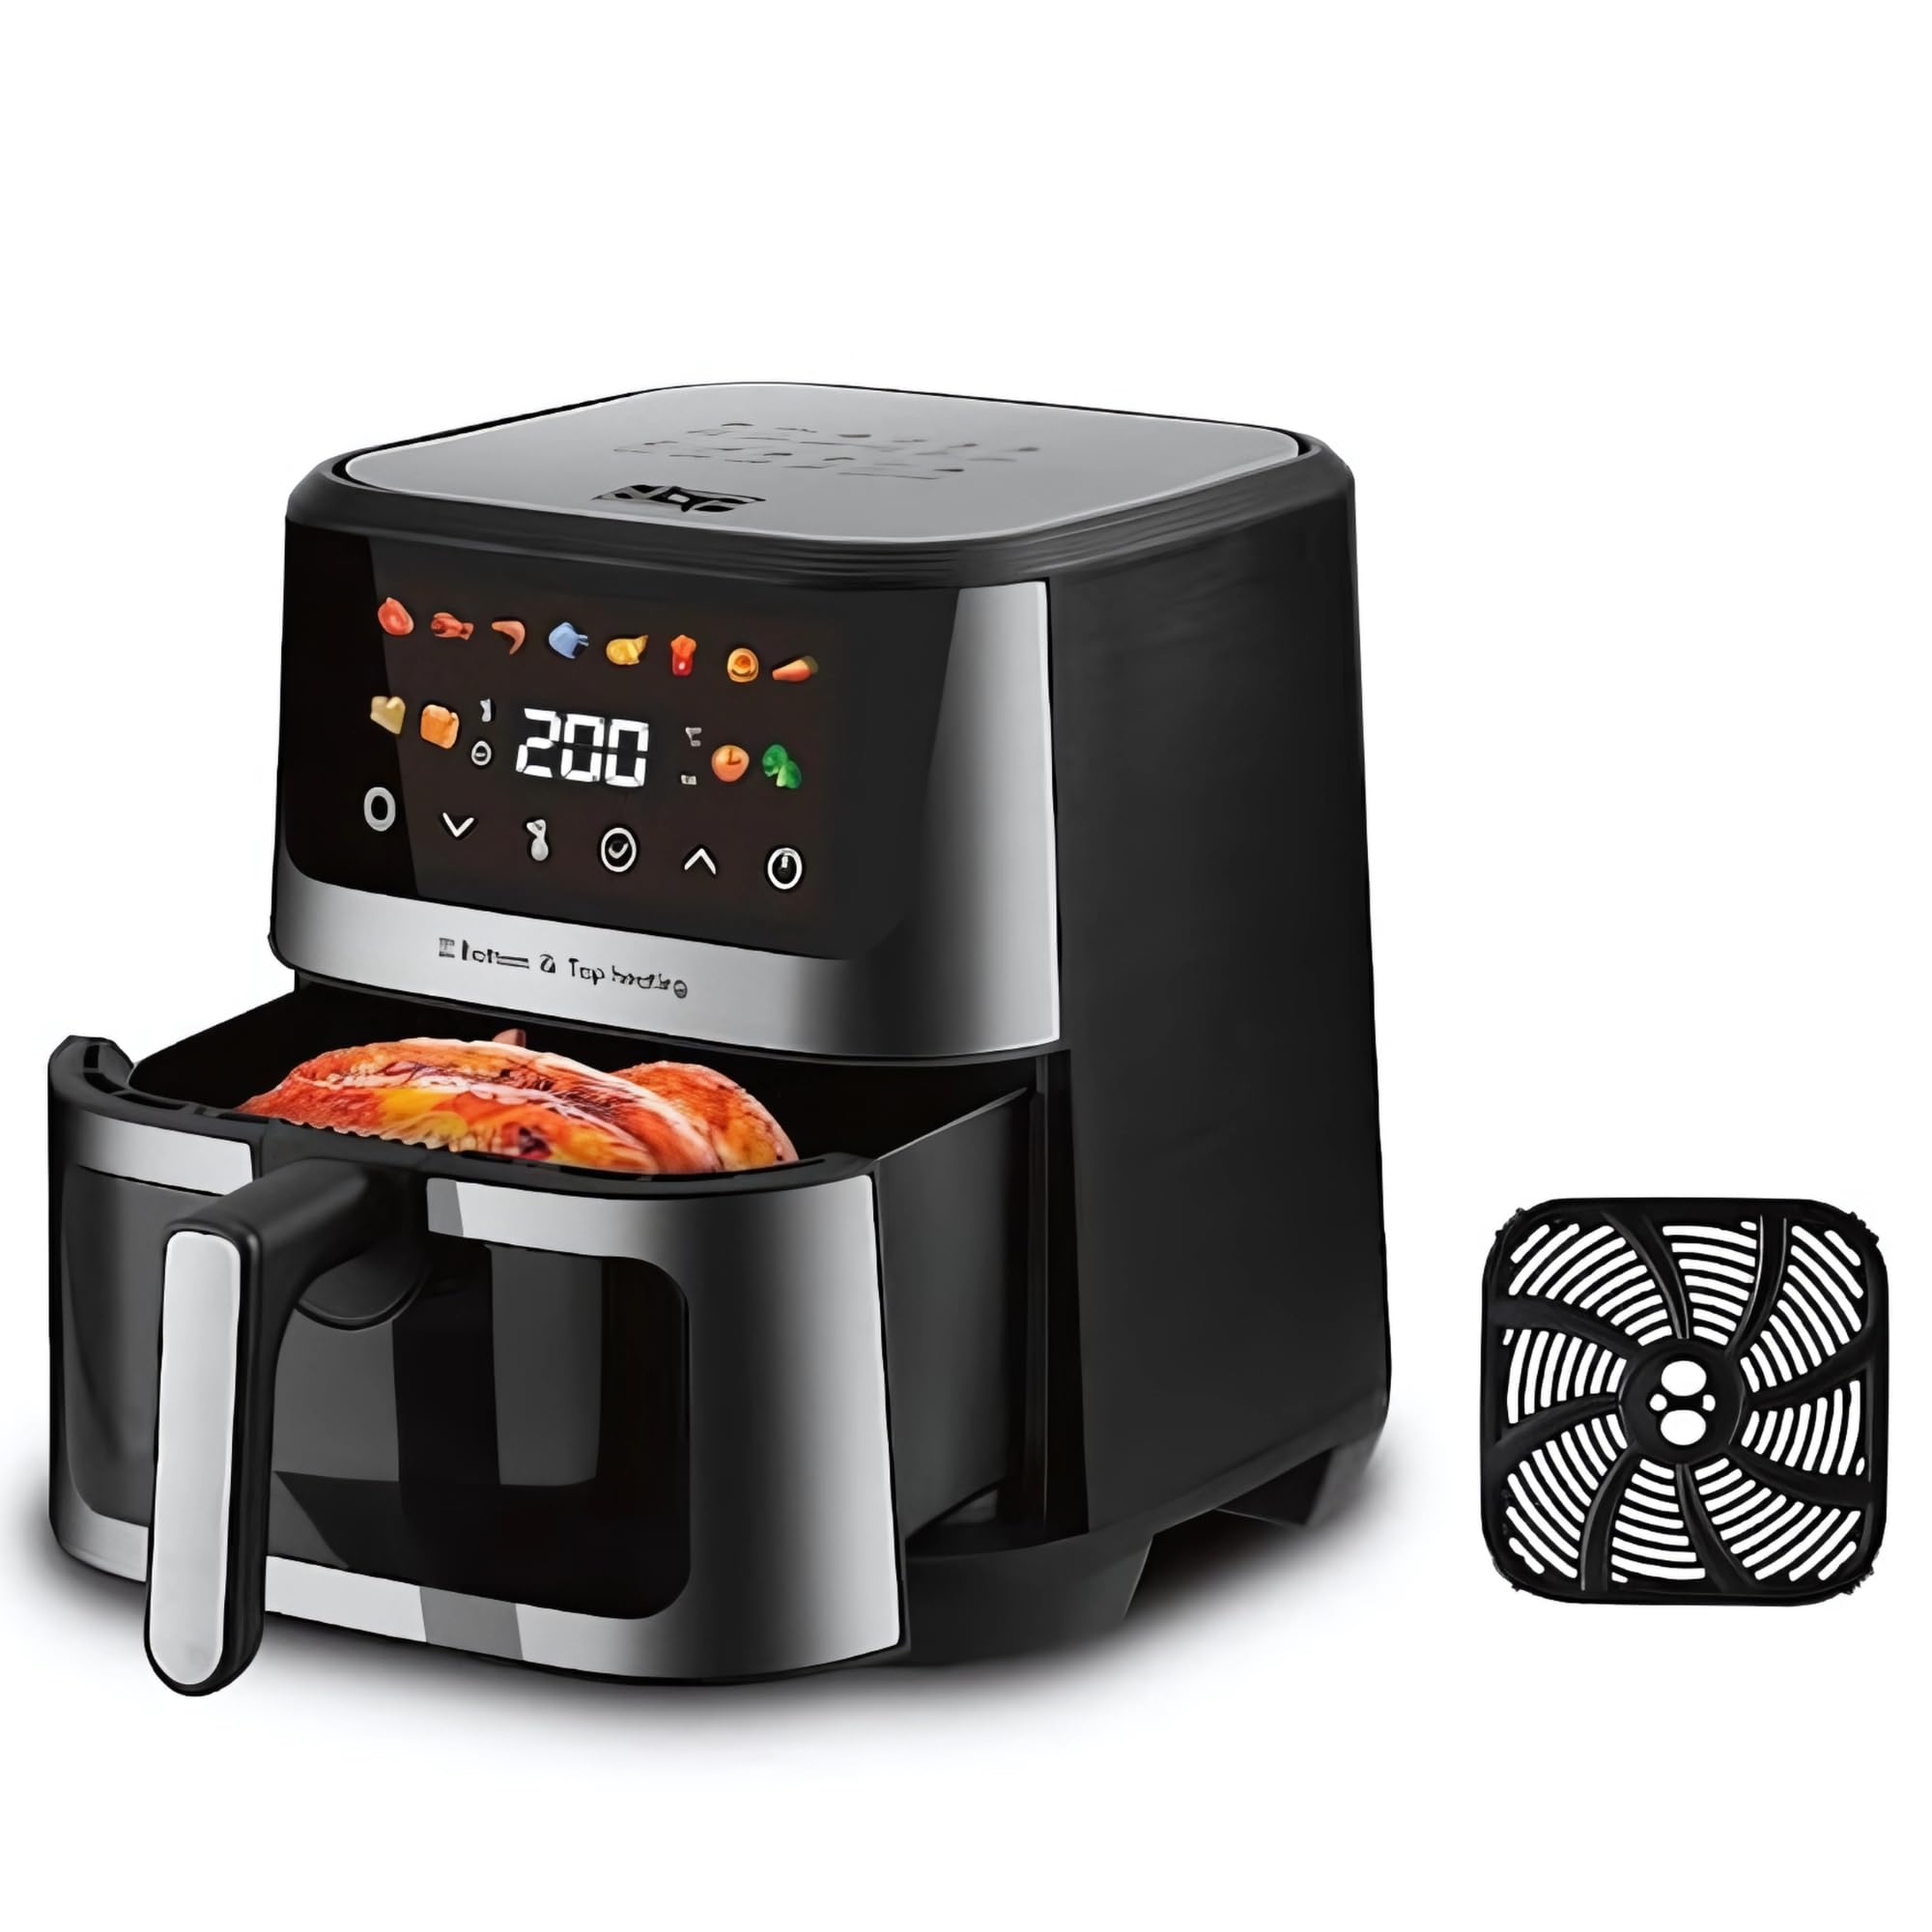
An image showing the DSP KB2173 9.0L Air Fryer, highlighting its sleek design and digital touch screen. The main body is black with a prominent control panel.
- Main Unit with Heating Element
- Control Panel (Touch Screen)
- Frying Basket
- Baking Tray
- Air Inlet and Outlet Vents
3. Setup
Unpacking
- Carefully remove all packaging materials from the air fryer.
- Check for any damage during transit. If damaged, do not use the appliance and contact customer support.
- Remove any stickers or labels.
Placement
- Place the air fryer on a stable, level, and heat-resistant surface.
- Ensure there is at least 10 cm of free space on the back and sides, and 10 cm above the appliance to allow for proper air circulation.
- Do not place the appliance near flammable materials or heat sources.
Initial Cleaning
- Wipe the exterior of the appliance with a damp cloth.
- Clean the frying basket and baking tray with hot water, dish soap, and a non-abrasive sponge.
- Rinse thoroughly and dry all parts completely before first use.
4. Operation
Basic Operation
- Plug the power cord into a grounded wall outlet.
- Pull out the frying basket. Place ingredients into the basket. Do not overfill.
- Slide the frying basket back into the air fryer.
- Press the Power button to turn on the appliance.
- Use the temperature control buttons to set the desired temperature (80°C - 200°C).
- Use the timer control buttons to set the desired cooking time.
- Press the Start/Pause button to begin cooking.
- Some ingredients may require shaking halfway through the cooking time. Pull out the basket, shake, and reinsert. The appliance will resume cooking.
- When the timer reaches zero, the appliance will beep, indicating cooking is complete.
- Carefully pull out the basket and empty the contents. Use tongs for larger items.
Using Preset Programs
The air fryer comes with 12 preset programs for common dishes. To use a preset:
- Prepare your ingredients and place them in the frying basket.
- Turn on the appliance.
- Select the desired preset program from the touch screen. The appliance will automatically set the optimal temperature and time.
- Press the Start/Pause button to begin. You can manually adjust the time and temperature even after selecting a preset.
Cooking Tips
- For crispier results, lightly brush or spray food with oil.
- Smaller ingredients usually require a shorter cooking time than larger ones.
- Shaking smaller ingredients halfway through cooking optimizes the end result and can help prevent unevenly fried ingredients.
- You can also use the air fryer to reheat food. Set the temperature to 150°C for approximately 10 minutes.
5. Maintenance
Cleaning
Clean the air fryer after every use.
- Unplug the appliance and allow it to cool down completely before cleaning.
- Wipe the exterior with a damp cloth.
- Clean the frying basket and baking tray with hot water, dish soap, and a non-abrasive sponge. For stubborn residue, soak in hot water for 10 minutes.
- Clean the interior with a damp cloth and a mild detergent.
- Do not use abrasive cleaning materials or harsh chemicals.
Storage
When not in use, store the air fryer in a cool, dry place, away from direct sunlight and moisture. Ensure all parts are clean and dry before storage.
6. Troubleshooting
If you encounter any issues with your air fryer, refer to the table below for common problems and solutions.
| Problem | Possible Cause | Solution |
|---|---|---|
| Air fryer does not turn on. | Appliance not plugged in. Power outlet not working. | Ensure the power cord is securely plugged in. Test the outlet with another appliance. |
| Food is not cooked evenly. | Basket is overfilled. Food not shaken. | Do not overfill the basket. Shake ingredients halfway through cooking. |
| Food is not crispy. | Not enough oil. Temperature too low. | Lightly brush or spray food with oil. Increase temperature slightly. |
| White smoke comes from the appliance. | Fat residue from previous use. | Clean the basket and heating element thoroughly after each use. |
7. Specifications
Technical details for the DSP KB2173 Air Fryer:
| Specification | Value |
|---|---|
| Model Name | KB2173 |
| Model Number | 070211 |
| Brand | DSP (Generic) |
| Capacity | 9 Liters |
| Wattage / Power Output | 1600 Watts |
| Control Method | Touch Screen |
| Temperature Range | 80°C - 200°C |
| Product Dimensions (Depth x Width x Height) | 10 cm x 15 cm x 15 cm |
| Color | Black |
| Material (Inner) | Metal |
| Non-stick Coating | No |
| Recommended Uses | Frying, Roasting, Baking, Grilling |
8. Warranty and Support
This product comes with a standard manufacturer's warranty. Please refer to the warranty card included in your packaging for specific terms and conditions, including warranty period and coverage details.
For technical support, troubleshooting assistance, or to inquire about replacement parts, please contact the retailer or the manufacturer's customer service department. Keep your purchase receipt as proof of purchase for warranty claims.


