
iScooter DX5
Contents
iScooter DX5 Electric Scooter User Manual
Model: DX5
Brand: iScooter
1. Introduction
This user manual provides essential information for the safe operation, assembly, maintenance, and troubleshooting of your iScooter DX5 Electric Scooter. Please read this manual thoroughly before first use to ensure proper function and safety.
The iScooter DX5 is a powerful electric scooter designed for adults, featuring a 1500W motor, long-range battery, and dual suspension for a comfortable ride. It is equipped with advanced safety features including hydraulic disc brakes and a comprehensive lighting system.
2. Package Contents
Upon unboxing, verify that all components listed below are present and in good condition:
- iScooter DX5 Electric Scooter Main Body
- Front Wheel Assembly
- Handlebar Assembly
- Seat
- Front Fender
- Rear Fender
- Footrests (Pair)
- Rearview Mirrors (Pair)
- Headlight
- Charger
- Tool Kit (Hex wrenches, open-end wrench)
- NFC Smart Cards (2)
- Removable Storage Basket
- Scooter Bag
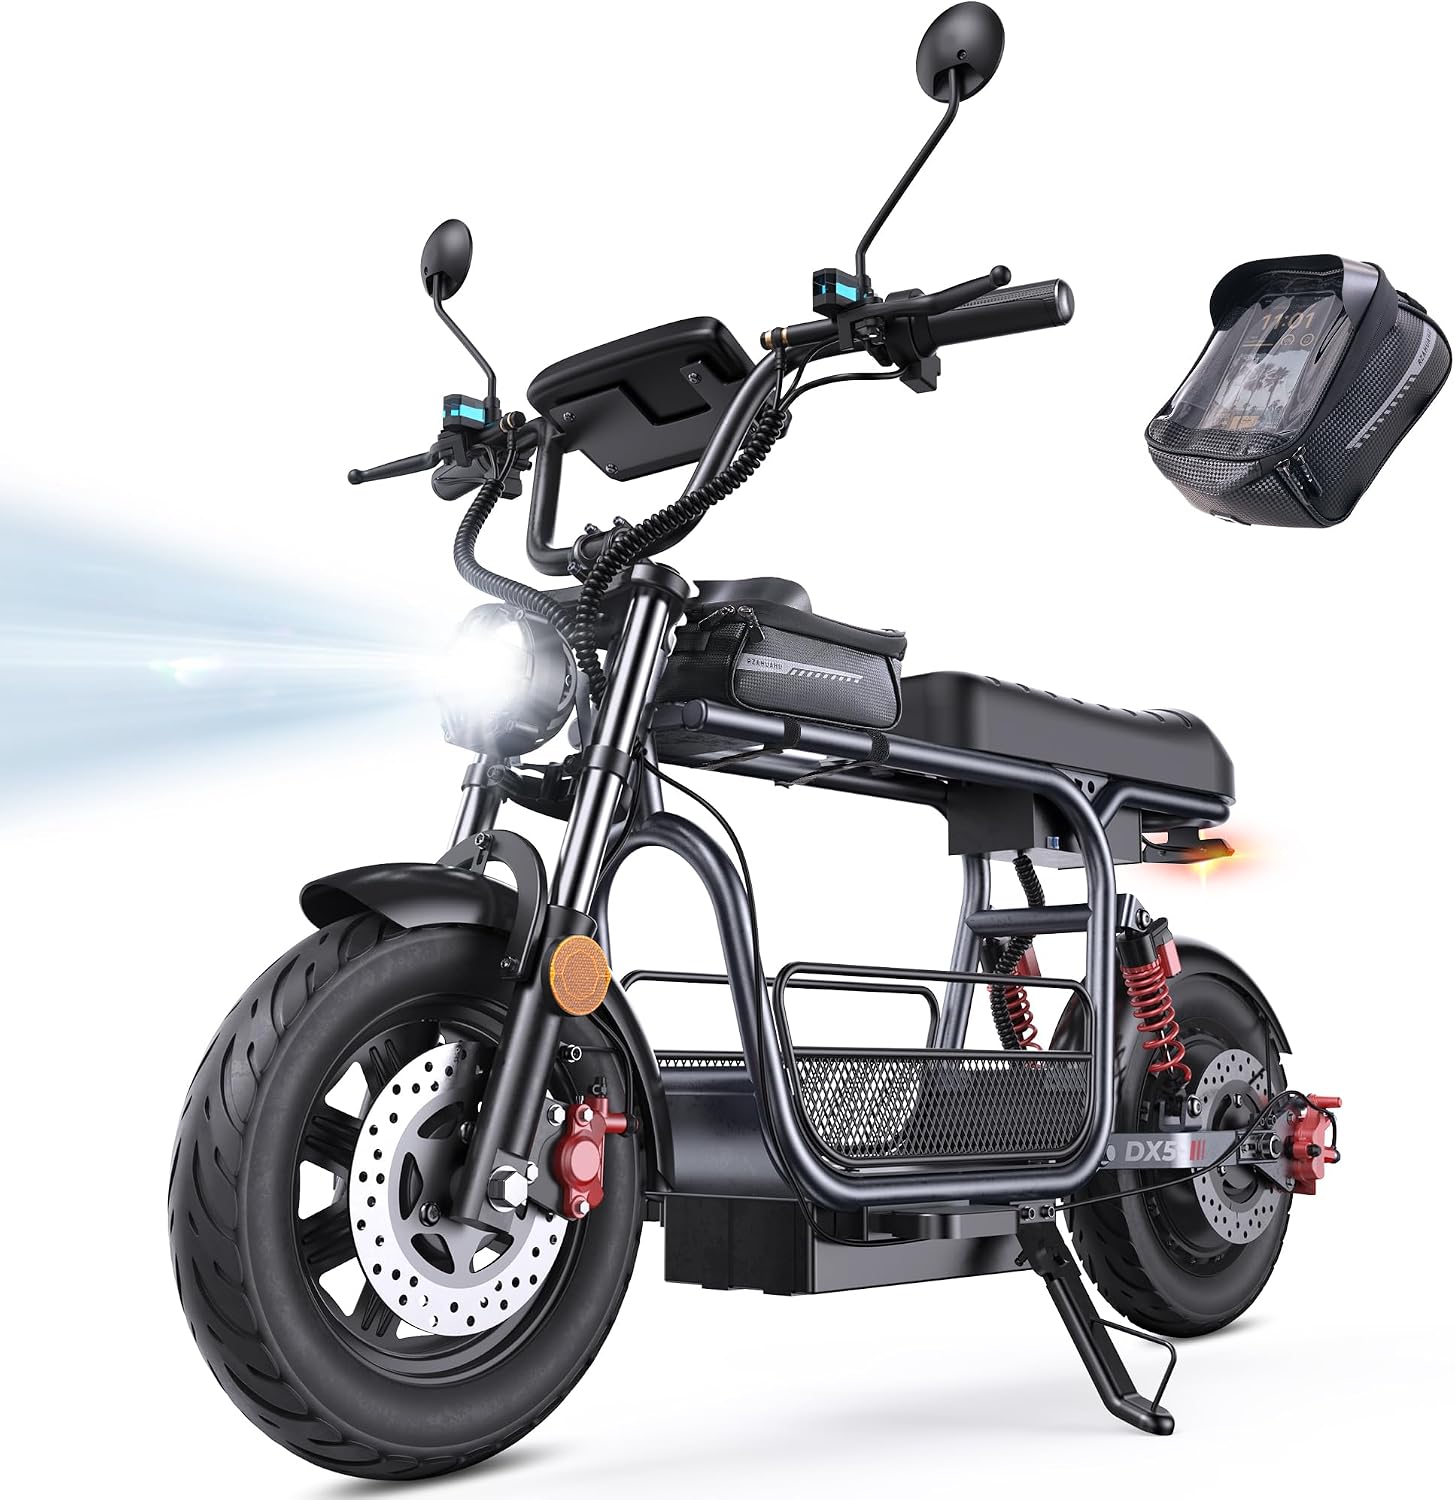
Image: All components of the iScooter DX5 Electric Scooter laid out after unboxing, including the main frame, wheels, seat, and accessories.
3. Assembly Instructions
Follow these steps carefully to assemble your iScooter DX5 Electric Scooter. It is recommended to have a second person assist with some steps.
- Unboxing: Carefully remove all components from the packaging. Keep the packaging for future storage or transport.
- Install Footrests: Attach the footrests to the designated mounting points on the side of the scooter frame using the provided screws and hex wrench.
- Install Handlebar:
- Loosen the bolts on the handlebar stem clamp on the front fork.
- Carefully insert the handlebar into the stem clamp.
- Ensure the handlebar is centered and aligned with the front wheel.
- Tighten the stem clamp bolts securely.
- Connect the electrical cables from the handlebar to the main scooter body. Ensure connections are firm.
- Secure excess cables with zip ties to prevent interference with steering or moving parts.
- Install Brake Levers and Mirrors:
- Attach the brake levers to the handlebar. Ensure the brake fluid reservoirs are upright.
- Secure the brake levers using the appropriate bolts and hex wrench.
- Screw the rearview mirrors into the designated mounting holes on the brake lever assemblies. Tighten with a wrench.
- Install Headlight:
- Attach the headlight bracket to the front fork.
- Connect the headlight electrical cable.
- Secure the headlight to its bracket using the provided screws and hex wrench.
- Install Front Fender: Attach the front fender to the front fork using the provided screws. Ensure the brake cable is routed correctly inside the fender stay.
- Install Rear Shock Absorbers: Attach the bottom end of the rear shock absorbers to the swingarm using the provided bolts and wrenches. Ensure they are securely fastened.
- Install Front Wheel:
- Separate the brake pads on the front brake caliper to create enough space for the brake rotor.
- Carefully align the front wheel's brake rotor with the brake caliper.
- Insert the front axle through the fork and wheel hub.
- Secure the front axle with the nuts on both sides using the appropriate wrench.
- Install Storage Basket and Bag:
- Attach the storage basket to the front of the scooter frame using the provided screws.
- Place the scooter bag on the top frame near the handlebar and secure it with its straps.
- Install Seat: Place the seat onto the rear rack and secure it using the provided screws.
Video: Detailed installation guide for the iScooter DX5 Electric Scooter with Seat, demonstrating each assembly step.

Image: A person securing the handlebar to the scooter's front fork using an Allen wrench.

Image: Hands installing the hydraulic brake lever assembly onto the handlebar, showing the fluid reservoir.

Image: The front wheel being installed, with a focus on aligning the disc brake rotor into the caliper.
4. Basic Operations
Familiarize yourself with the scooter's controls and functions before riding.
- Power On/Off: Locate the main power switch, typically near the battery compartment. Ensure it is in the "ON" position. Use the NFC smart card to unlock and activate the scooter by tapping it on the display.
- Speed Modes: The DX5 offers four speed modes (15/21/28/35 MPH). Use the mode selection button on the handlebar to cycle through these settings.
- 1st Gear Mode: 15 MPH (Easy start, energy-saving)
- 2nd Gear Mode: 21 MPH (Urban commuting, steady speed)
- 3rd Gear Mode: 28 MPH (Balanced power, faster ride)
- 4th Gear Mode: 35 MPH (Turbo sprint, full power)
- Lighting System:
- Headlight: Press the headlight button on the handlebar to turn the front LED headlight on or off.
- Turn Signals: Use the turn signal buttons to indicate left or right turns. Integrated into the taillight for clear visibility.
- Brake Lights: The taillight automatically brightens when braking.
- Anti-theft Alarm: The scooter includes a built-in alarm system. If the scooter is moved or tampered with while locked, the alarm will activate.
- Braking: The dual hydraulic disc brakes provide instant stopping power. Squeeze the brake levers on the handlebar to engage the brakes.

Image: The 9-inch full-color LCD display showing speed, battery level, and system alerts, with NFC unlocking capability.
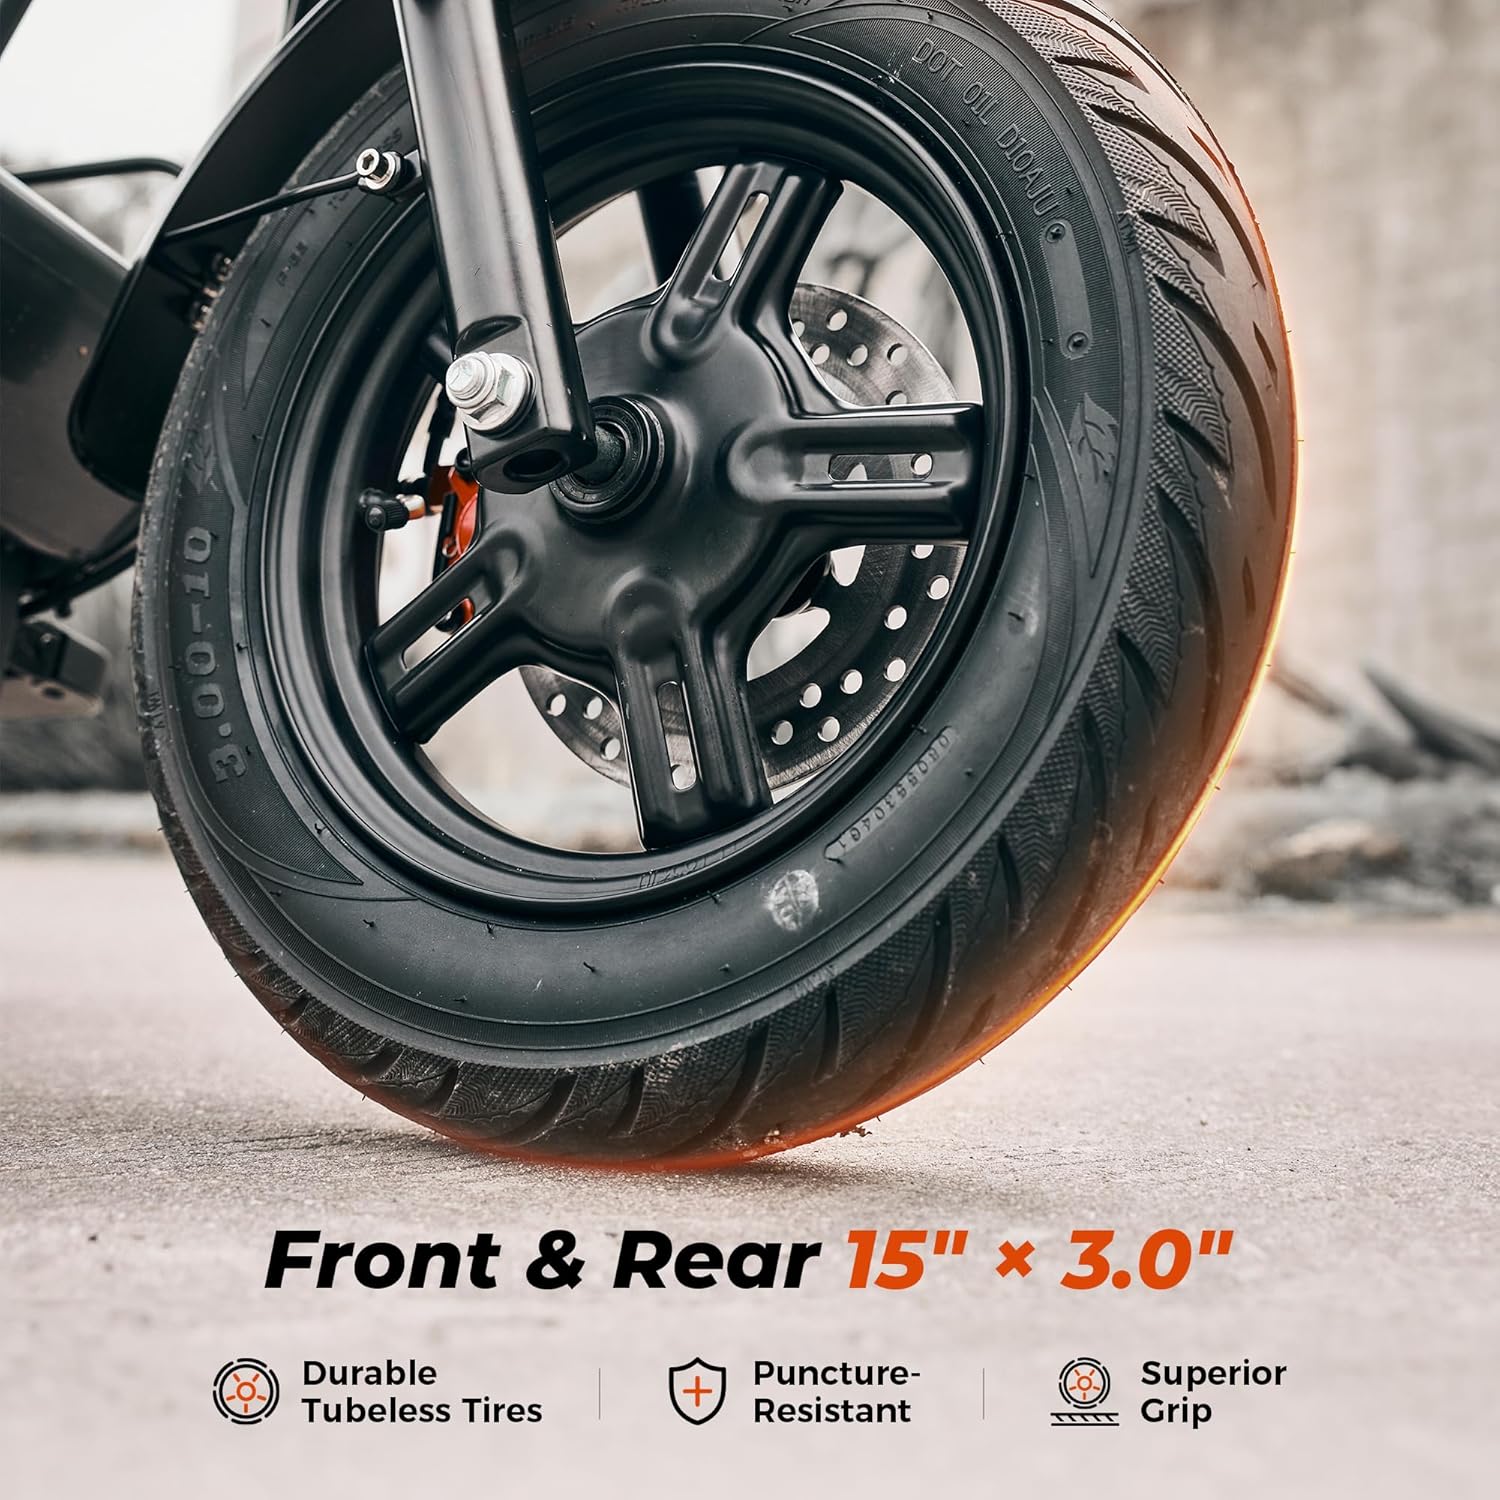
Image: The scooter's lighting system, highlighting the bright front LED headlight and integrated rear turn signals for safe night riding.
5. Charging Operation
To charge your iScooter DX5, follow these steps:
- Ensure the scooter's main power switch is in the "OFF" position before charging.
- Locate the charging port on the side of the scooter, near the battery compartment.
- Connect the charger to a standard electrical outlet. The charger's indicator light will typically turn green.
- Plug the charging cable into the scooter's charging port. The charger's indicator light should turn red, indicating active charging.
- Once fully charged (approximately 6-8 hours), the charger's indicator light will turn green again.
- Disconnect the charger from the scooter first, then from the electrical outlet.
Important: If the scooter is not used for a prolonged period, disconnect the battery to prevent draining.

Image: A hand connecting the charger to the iScooter DX5's charging port, with the charger's indicator light visible.
6. Maintenance
Regular maintenance ensures the longevity and safe operation of your iScooter DX5.
- Tires: The DX5 is equipped with durable 15" x 3.0" vacuum pneumatic e-motorcycle tires. Regularly check tire pressure and inflate to the recommended PSI (refer to tire sidewall for specific pressure).
- Brakes: Periodically inspect the dual hydraulic disc brakes for wear and tear. Ensure the brake levers respond smoothly and provide adequate stopping power. If brake performance degrades, consult a qualified technician.
- Suspension: The advanced front hydraulic suspension and rear air spring suspension require minimal maintenance. Keep the suspension components clean and free from debris.
- Cleaning: Clean the scooter regularly with a damp cloth. Avoid using high-pressure water jets directly on electrical components. The scooter has an IPX4 water resistance rating, suitable for light rain, but not immersion.
- Storage: Store the scooter in a cool, dry place away from direct sunlight and extreme temperatures. If storing for an extended period, ensure the battery is disconnected.

Image: A detailed view of the 15-inch vacuum pneumatic tire, highlighting its durable tread and puncture-resistant design.
7. Troubleshooting
This section addresses common issues you might encounter with your iScooter DX5.
| Problem | Possible Cause | Solution |
|---|---|---|
| Scooter does not power on. | Battery disconnected or low charge; Power switch off; NFC card not detected. | Ensure battery is connected and charged. Turn main power switch ON. Tap NFC card on display. |
| Brakes feel weak or unresponsive. | Low brake fluid; Worn brake pads; Air in brake lines. | Check brake fluid level. Inspect brake pads for wear and replace if necessary. If issue persists, professional bleeding of brake lines may be required. |
| Reduced range or power. | Low battery charge; Overloaded scooter; Riding conditions (hills, wind); Tire pressure. | Fully charge the battery. Ensure load capacity is within 330 lbs. Check tire pressure. Adjust riding style for efficiency. |
| Unusual noises during operation. | Loose components; Debris in wheels/brakes; Worn bearings. | Inspect all visible bolts and tighten if loose. Check for and remove any debris. If noise persists, professional inspection is recommended. |
8. Specifications
Key technical specifications for the iScooter DX5 Electric Scooter:
| Feature | Specification |
|---|---|
| Motor Power | 1500W Peak (1000W Rated) Brushless Motor |
| Battery Capacity | 48V 15.6Ah (748.8Wh) Lithium Battery |
| Max Range | Up to 45 Miles |
| Top Speed | 35 MPH (Four Speed Settings: 15/21/28/35 MPH) |
| Tire Size | 15" x 3.0" Vacuum Pneumatic E-Motorcycle Tires |
| Brake System | Dual Hydraulic Disc Brakes |
| Suspension | Front Hydraulic Suspension & Rear Air Spring Suspension |
| Max Load Capacity | 330 lbs |
| Water Resistance Rating | IPX4 |
| Dimensions (LxWxH) | 46.5 x 26.8 x 58.3 inches |
| Item Weight | 100 Pounds |
| Certifications | UL2272 Certified |
9. Warranty & Support
Your iScooter DX5 Electric Scooter comes with a manufacturer's warranty. For specific warranty details and duration, please refer to the warranty card included in your package or contact iScooter customer support directly.
For technical assistance, troubleshooting not covered in this manual, or parts replacement, please contact the seller:
- Seller Name: iScooter Center
- Seller Support: Visit iScooter Center on Amazon
Please retain your proof of purchase for warranty claims.
Ask a question about this manual
Ask about setup, troubleshooting, compatibility, parts, safety, or missing instructions. Manuals+ will review the question and use this page’s manual context to help answer it.