1. Introduction
This manual provides detailed instructions for the installation, operation, and maintenance of your Emiif Electric Bike LCD Display. This display is designed to provide essential riding metrics for electric bikes, scooters, and electric tricycles, compatible with 48V, 60V, and 72V systems.
Key Features:
- Comprehensive Digital Display: Provides clear visibility of speed, battery level, and other essential riding metrics.
- High-Quality Construction: Made with premium materials for durability and performance in various weather conditions.
- Wide Temperature Tolerance: Operates reliably from -20°C to 150°C (-4°F to 302°F).
- Easy Installation: Features a 6-pin interface with color-coded wires for straightforward setup.
- Enhanced Visibility (Optional): Available with an optional windshield cover for protection against debris, rain, and glare.
- Multi-Vehicle Compatibility: Suitable for electric bikes, scooters, and electric tricycles.
2. Package Contents
Please verify that all items are present in your package:
- 1x Emiif Electric Bike LCD Display
- Optional: 1x Windshield (if purchased with windshield option)
- Mounting brackets and screws

Figure 2.1: Emiif Electric Bike LCD Display with included mounting hardware.
3. Specifications
| Parameter | Value |
|---|---|
| Type | Ebike LCD Display |
| Color | Black |
| Interface | 6-pin |
| Working Voltage | 48V, 60V, 72V |
| Temperature Range | -20°C to 150°C (-4°F to 302°F) |
| Line Length | Approx. 26 cm |
| Item Dimensions (LxWxH) | 7.87 x 3.94 x 1.18 inches |
| Item Weight | 342 Grams |
4. Setup and Installation
Follow these steps to properly install your Emiif LCD Display:
- Prepare for Installation: Ensure your electric bike/scooter is powered off before beginning installation. Gather necessary tools (e.g., screwdriver).
- Mount the Display:
- Attach the mounting brackets to your handlebar or desired location using the provided screws.
- Secure the LCD display to the mounted brackets. Ensure it is firmly in place and visible from your riding position.
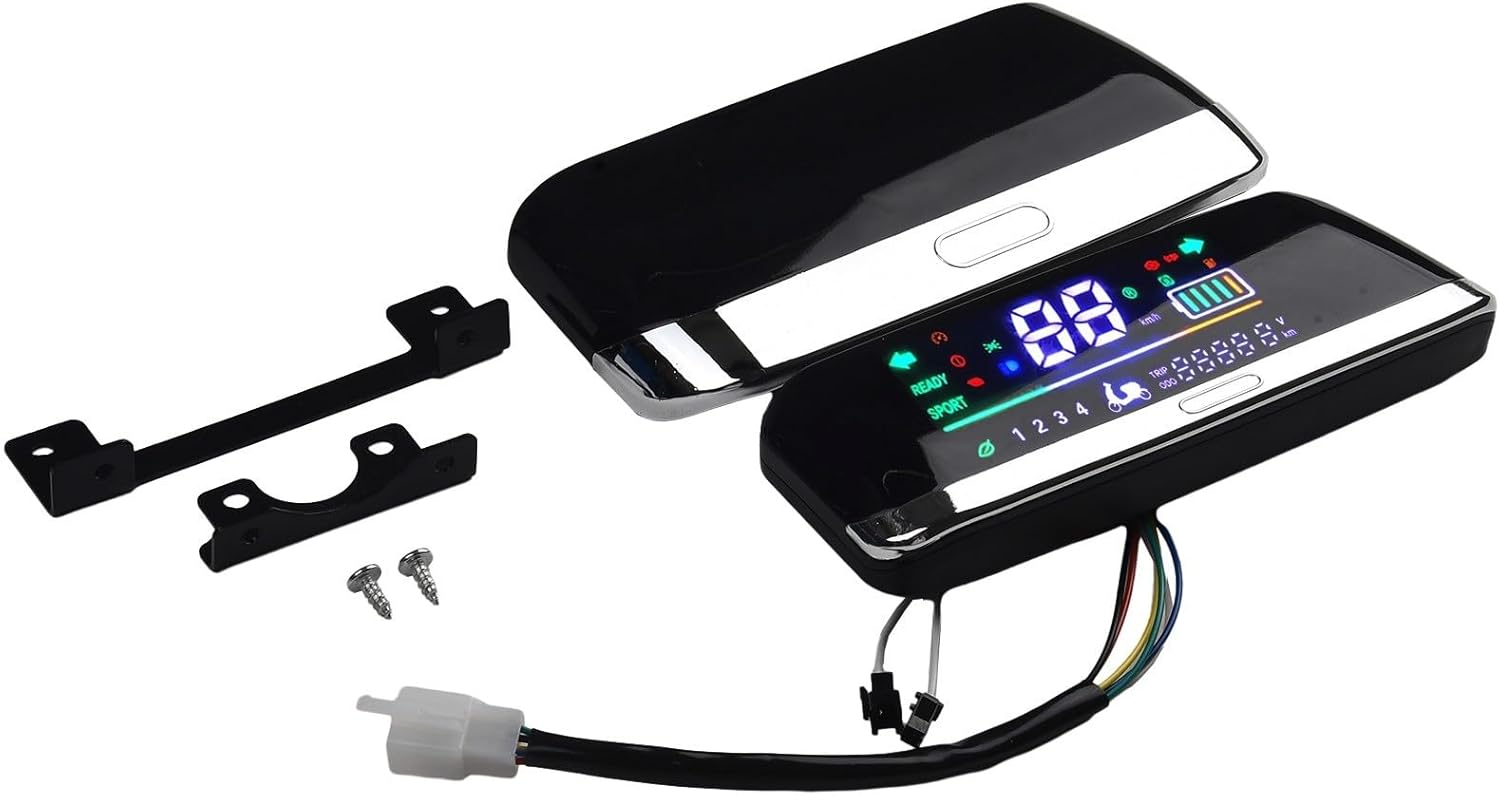
Figure 4.1: Angled view of the display and mounting hardware.
- Connect the Wiring (6-Pin Interface): The display features a 6-pin interface with color-coded wires for easy connection. Match the wires according to the definitions below. The wire length is approximately 26 cm.
Wire Color Function Blue Line Turn Left Signal Green Line Turn Right Signal Red Line Positive Electrode (Power +) Black Line Negative Electrode (Ground -) Yellow Line Velocity Signal White Line Headlight Signal 
Figure 4.2: Rear view of the display showing the wiring harness.

Figure 4.3: Side view of the display with wiring.
- Secure Connections: Ensure all connections are secure and protected from moisture and physical damage.
- Optional Windshield Installation: If your package includes a windshield, carefully attach it to the display according to its design. This provides additional protection.

Figure 4.4: Display with optional windshield cover.
5. Operating Instructions
Once installed and connected, the Emiif LCD Display will power on with your electric bike/scooter. The display provides real-time information to enhance your riding experience.
Display Information:
- Speedometer: Displays current riding speed (km/h).
- Battery Level Indicator: Shows the remaining battery charge.
- Turn Signal Indicators: Lights up when left or right turn signals are active.
- Headlight Indicator: Illuminates when the headlight is on.
- Odometer/Trip Meter: Displays total distance traveled (ODO) and trip distance (TRIP).
- Voltage Indicator: Shows the current system voltage (V).
- Gear/Mode Indicator: (If applicable) Shows current riding mode or gear.

Figure 5.1: Illuminated display showing various indicators.
Basic Operation:
The display is designed for automatic operation upon vehicle power-on. Specific button functions (if any) for cycling through trip data or adjusting settings will depend on your vehicle's integrated controls. Refer to your electric bike/scooter's main manual for details on interacting with the display's functions.
6. Maintenance and Care
To ensure the longevity and optimal performance of your LCD display, follow these maintenance guidelines:
- Cleaning: Use a soft, damp cloth to wipe the display screen. Avoid abrasive cleaners or solvents that could damage the screen surface.
- Protection: If your display has a windshield, ensure it is clean and free of scratches to maintain visibility.
- Environmental Exposure: While designed for outdoor use, prolonged exposure to extreme weather conditions (e.g., heavy rain, direct sunlight for extended periods) should be minimized when possible.
- Wiring Inspection: Periodically check the wiring connections for any signs of wear, corrosion, or looseness. Ensure they remain securely connected.
- Storage: If storing your vehicle for an extended period, ensure the display is clean and stored in a dry, temperate environment.
7. Troubleshooting
If you encounter issues with your Emiif LCD Display, refer to the following common problems and solutions:
| Problem | Possible Cause | Solution |
|---|---|---|
| Display does not power on. | No power supply; loose wiring connection; incorrect voltage. |
|
| Speed reading is inaccurate or absent. | Loose or incorrect Yellow (velocity) wire connection; faulty speed sensor on vehicle. |
|
| Turn signals or headlight indicators not working. | Loose or incorrect Blue (left turn), Green (right turn), or White (headlight) wire connections. |
|
| Display screen is dim or flickering. | Low battery voltage; unstable power supply; internal display issue. |
|
If the problem persists after attempting these solutions, please contact Emiif customer support for further assistance.
8. Warranty and Support
For warranty information and customer support, please refer to the documentation provided with your purchase or visit the official Emiif website. Keep your purchase receipt as proof of purchase for any warranty claims.
Contact Information:
- Manufacturer: Emiif
- Website: Emiif Brand Page on Amazon (for general brand information)
- For specific product support, please use the contact methods provided by your retailer or the manufacturer's official support channels.