1. Introduction
This manual provides essential information for the safe and efficient operation of your Anern FGI-DU4200 Dual Voltage Hybrid Solar Inverter. Please read this manual thoroughly before installation and use, and retain it for future reference. This inverter is designed to provide reliable power for various applications, integrating solar charging, AC utility charging, and inverter output functions.
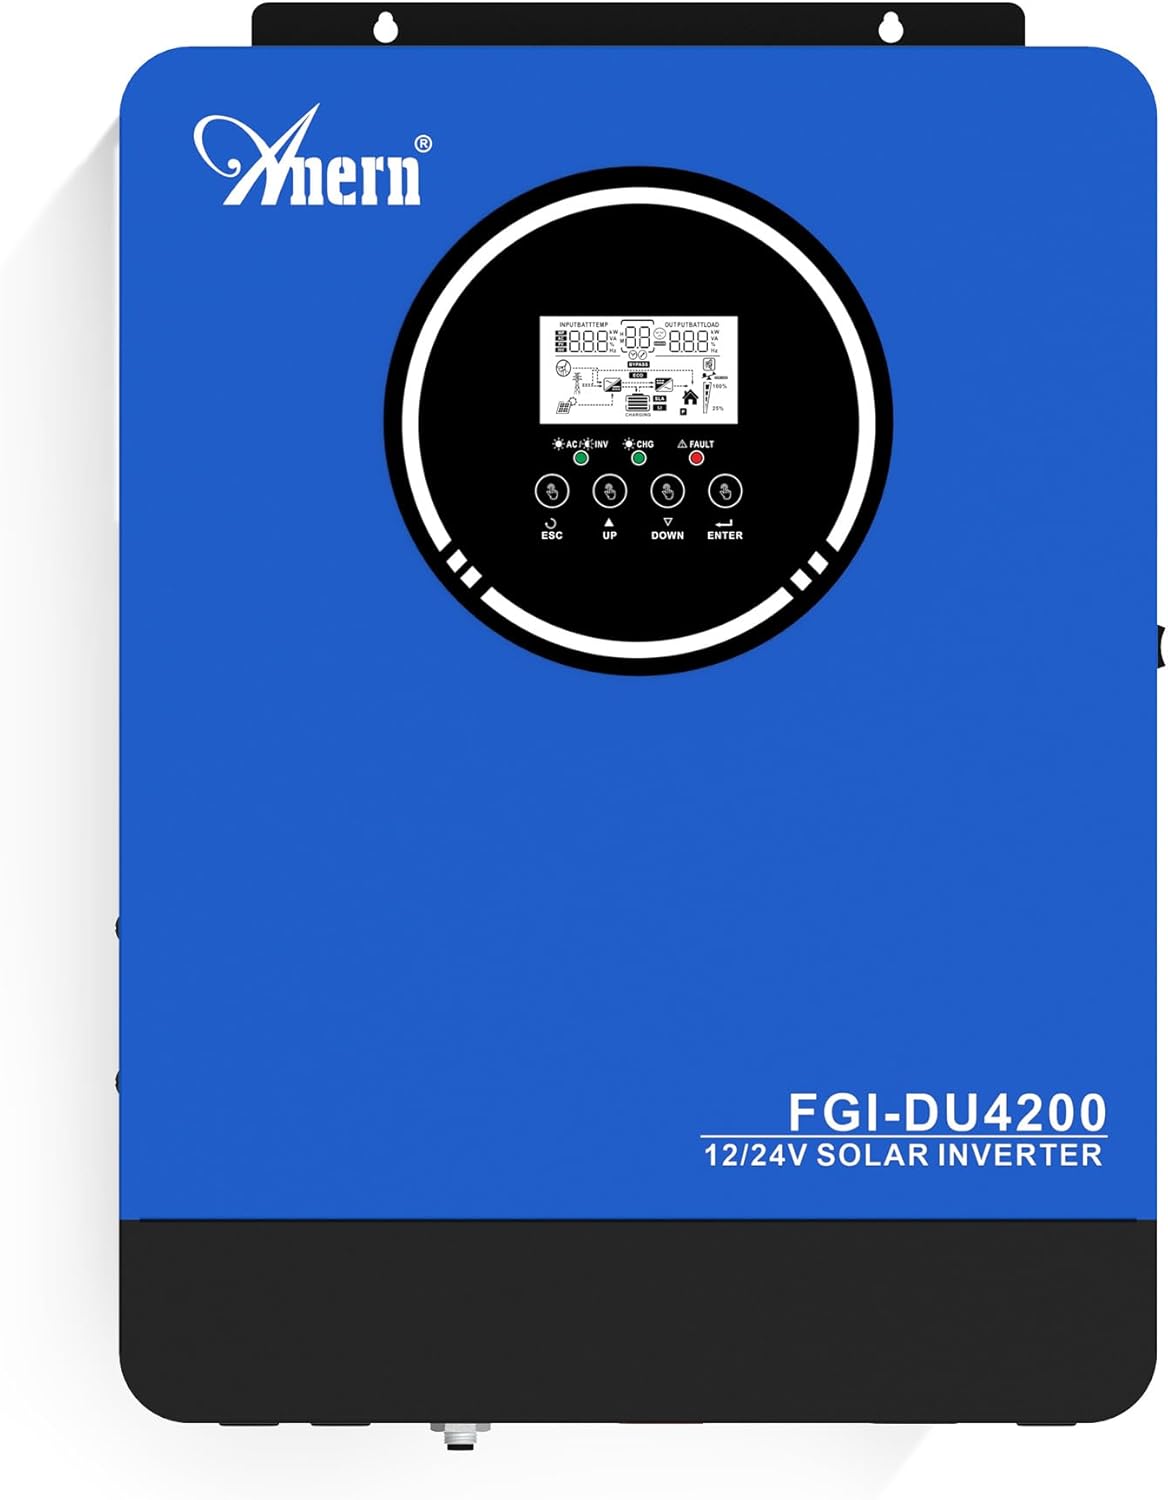
Figure 1: Anern FGI-DU4200 Dual Voltage Hybrid Solar Inverter. This image shows the front panel of the inverter, featuring the display screen and control buttons.
2. Safety Instructions
Please observe the following safety precautions to prevent injury and damage to the inverter or connected equipment:
- Installation must be performed by qualified personnel in accordance with local electrical codes.
- Ensure all wiring is correctly sized and properly connected.
- Do not disassemble the inverter. There are no user-serviceable parts inside.
- Keep the inverter away from flammable materials, moisture, and direct sunlight.
- Ensure adequate ventilation around the inverter to prevent overheating.
- Always disconnect all power sources (solar, battery, utility) before performing any maintenance or wiring.
- Wear appropriate personal protective equipment (PPE) during installation and maintenance.
3. Product Overview and Features
The Anern FGI-DU4200 is a versatile hybrid solar inverter designed for both on-grid and off-grid applications. It features automatic dual-voltage operation and a 120A MPPT solar charge controller.
Key Features:
- Automatic Dual-Voltage Operation: Automatically recognizes 12VDC (2300W output) or 24VDC (4200W output) battery systems.
- High-Efficiency Pure Sine Wave Output: Provides stable 220-230VAC ±5% output (50Hz) with 90% efficiency.
- Integrated 120A MPPT Solar Charge Controller: Maximizes solar power harvesting.
- Multiple Charging Modes: Solar, Solar and Utility, Solar Priority.
- Multiple Output Modes: Solar Priority, Utility Priority, SBU (Solar-Battery-Utility) Mode.
- Seamless Transfer: Grid/generator transfer time less than 20ms for critical loads.
- Comprehensive Protection: Overload, over-temperature, and short-circuit protection.
- Battery Compatibility: Supports 12V/24V Lithium, Lead-Acid, and Gel batteries.
- Cold Start Capability: Ensures operation in extreme conditions.
- Wi-Fi Monitoring: Allows system operation control via mobile phone (requires optional Wi-Fi module).

Figure 2: Overview of key features including frequency range, waveform, charging currents, battery voltage, and protection mechanisms.

Figure 3: Illustration of the inverter's dual voltage capability, supporting 4.2KW at 24V and 2.3KW at 12V battery systems.
4. Setup and Installation
4.1 Unpacking and Inspection
Upon receiving the inverter, carefully unpack it and inspect for any shipping damage. Ensure all components listed in the packing list are present. If any damage or missing parts are found, contact your dealer immediately.
4.2 Mounting the Inverter
Mount the inverter vertically on a sturdy wall or surface. Ensure there is sufficient clearance around the unit for proper ventilation (at least 20 cm on all sides). Avoid mounting in direct sunlight, near heat sources, or in areas with excessive dust or moisture.
4.3 Wiring Connections
All wiring must comply with local electrical codes. Use appropriate wire gauges for all connections to prevent overheating and ensure efficient power transfer.
4.3.1 Battery Connection
The inverter supports both 12VDC and 24VDC battery systems. The inverter automatically detects the battery voltage. Ensure correct polarity when connecting batteries. For 12V systems, batteries are typically connected in parallel. For 24V systems, batteries are typically connected in series.

Figure 4: Wiring diagram illustrating parallel connection for 12V battery systems (2300W output) and series connection for 24V battery systems (4200W output).

Figure 5: The inverter is compatible with various battery types, including Gel, AGM, Flooded (FLD), Lithium (LI), and Sealed Lead-Acid (SLD) batteries.
4.3.2 Solar Panel Connection
Connect your solar panels to the designated PV input terminals. Ensure the open circuit voltage (Voc) of your solar array does not exceed the inverter's maximum PV input voltage (500Vdc). Observe correct polarity.
4.3.3 AC Input Connection (Utility/Generator)
Connect the AC utility grid or a compatible generator to the AC input terminals. The inverter supports 220-230VAC input. Ensure proper grounding.
4.3.4 AC Output Connection (Loads)
Connect your household or office loads to the AC output terminals. The inverter provides a pure sine wave output suitable for sensitive electronics. Do not exceed the rated output power of the inverter (2300W for 12VDC systems, 4200W for 24VDC systems).
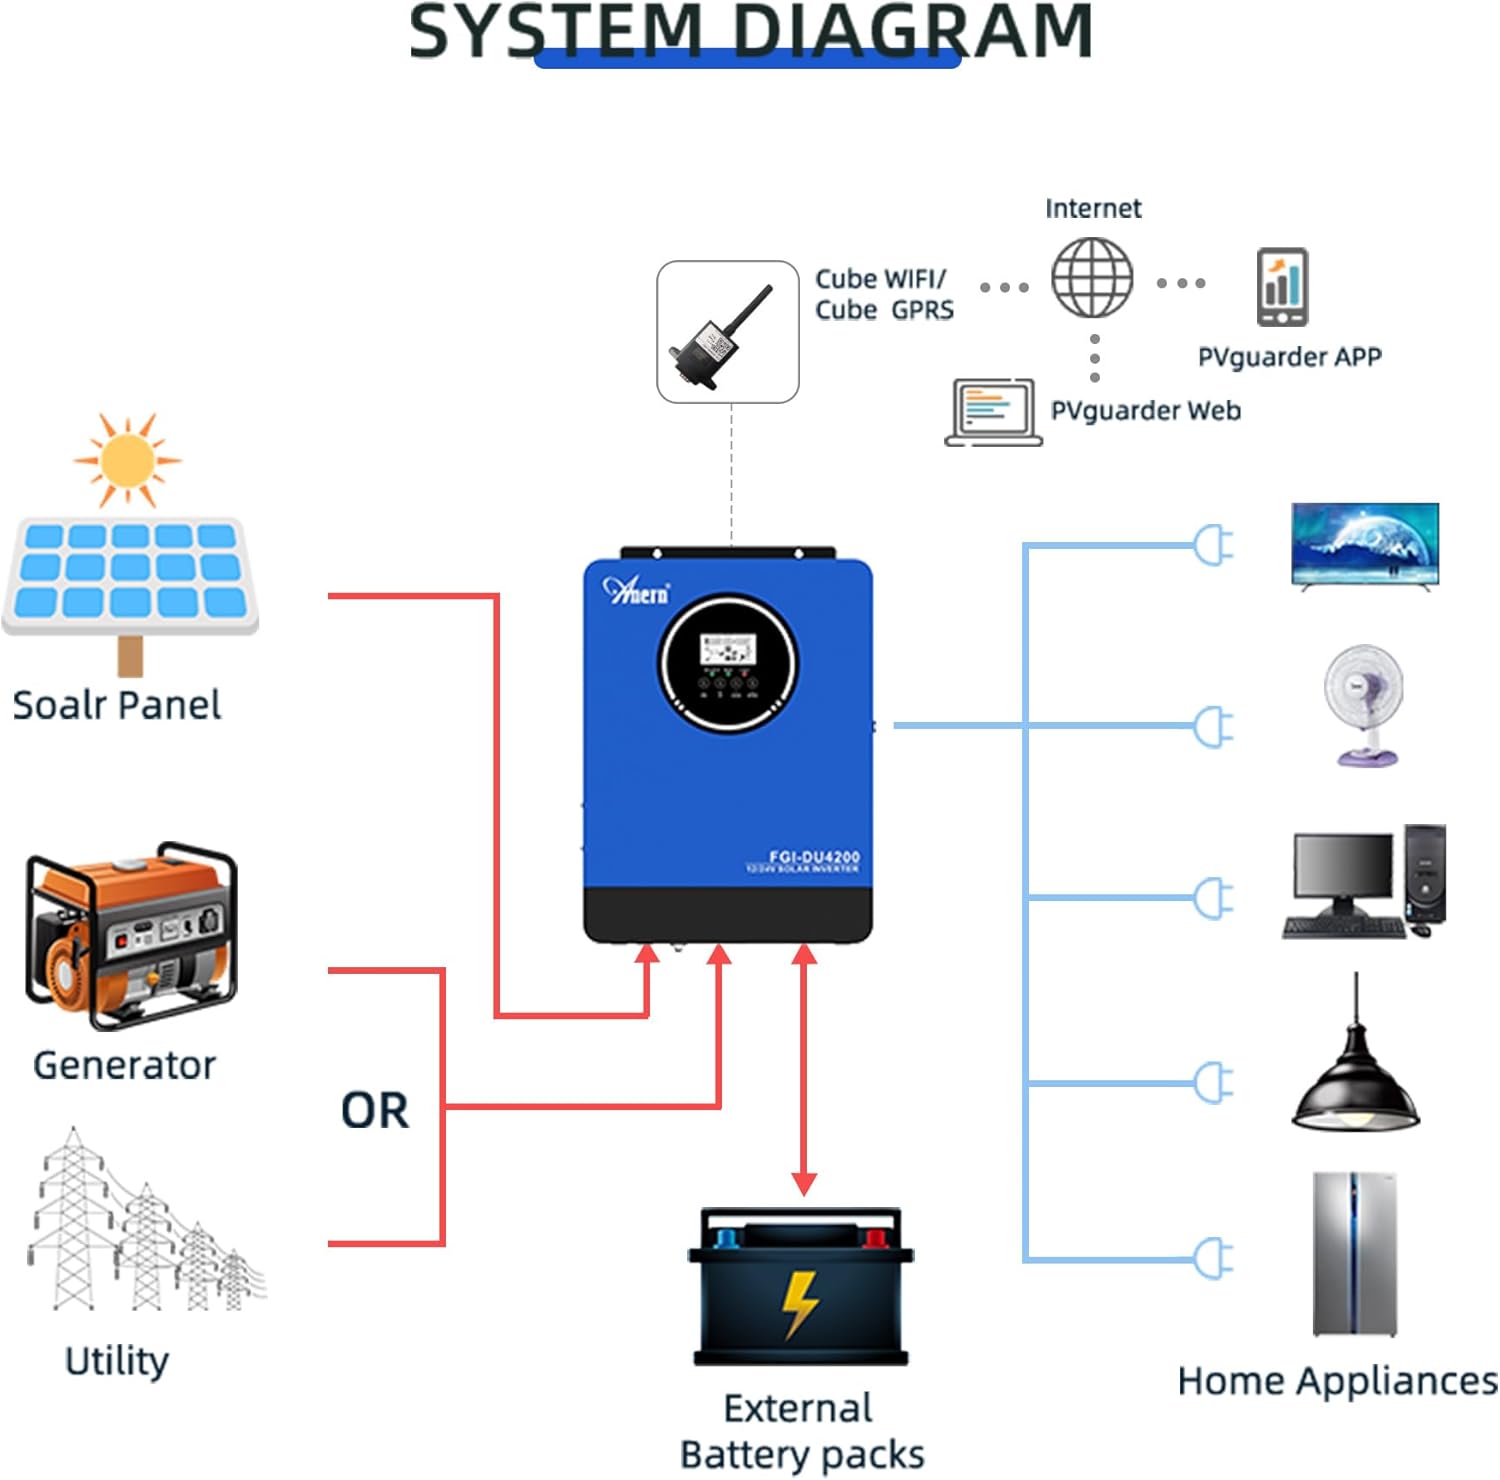
Figure 6: Comprehensive system diagram showing connections for solar panels, generator/utility, external battery packs, and various home appliances.

Figure 7: Example of an outdoor installation of the Anern FGI-DU4200 inverter, demonstrating its integration into a home solar power system.
5. Operating Instructions
5.1 Powering On/Off
After all connections are securely made, switch on the battery breaker first, then the solar array breaker, and finally the AC input breaker (if connected). Press the power button on the inverter to turn it on. To power off, reverse the sequence: turn off AC input, then solar, then battery, and finally the inverter power button.
5.2 LCD Display and Control Buttons
The inverter features an LCD display that shows real-time operating status, input/output voltages, battery status, and error codes. Use the control buttons (ESC, UP, DOWN, ENTER) to navigate through menus and adjust settings.
5.3 Charging Modes
The inverter offers four selectable charging modes:
- Solar Priority: Solar power charges the battery first. If solar is insufficient, utility power supplements.
- Utility Priority: Utility power charges the battery first. Solar power supplements if utility is unavailable.
- Solar Only: Only solar power charges the battery.
- Solar and Utility: Both solar and utility power charge the battery simultaneously.
5.4 Output Modes
The inverter offers three selectable output modes:
- Utility Priority: Loads are primarily powered by utility. If utility fails, the inverter switches to battery power.
- Solar Priority: Loads are primarily powered by solar. If solar is insufficient, battery power is used. If both are insufficient, utility power is used (if connected).
- SBU (Solar-Battery-Utility) Mode: Loads are powered by solar first, then battery, and finally utility if both solar and battery are depleted or unavailable.
5.5 Wi-Fi Monitoring (Optional)
If equipped with the optional Wi-Fi module, the inverter can be monitored and controlled via a mobile application. Connect the Wi-Fi module to the designated port on the inverter and follow the instructions provided with the module for setup.

Figure 8: Diagram illustrating the connection of an optional Wi-Fi module for remote monitoring and control of the inverter system via a mobile application or web interface.
6. Maintenance
Regular maintenance ensures the longevity and optimal performance of your inverter.
- Cleaning: Periodically clean the inverter's exterior with a dry cloth. Ensure ventilation openings are free from dust and debris.
- Connections: Annually check all electrical connections for tightness and corrosion. Re-tighten if necessary.
- Battery Inspection: For lead-acid batteries, check electrolyte levels and terminal condition as per battery manufacturer guidelines.
- Environment: Ensure the operating environment remains within specified temperature and humidity ranges.
7. Troubleshooting
This section provides solutions to common issues. For problems not listed here, contact technical support.
| Problem | Possible Cause | Solution |
|---|---|---|
| Inverter not turning on | No battery connection; Battery voltage too low; Power button not pressed. | Check battery connections and voltage; Charge battery; Press and hold power button. |
| No AC output | Overload; Short circuit; Battery low; Inverter fault. | Reduce load; Check for short circuits; Charge battery; Restart inverter. |
| Solar charging not working | Solar panels disconnected; Insufficient sunlight; PV voltage too low/high; MPPT fault. | Check PV connections; Ensure adequate sunlight; Verify PV voltage within range. |
| Error code displayed | Specific fault detected by the inverter. | Refer to the inverter's LCD display for the specific error code and consult the full manual (if available) or contact support for detailed interpretation and resolution. |
8. Specifications
| Parameter | Value |
|---|---|
| Model | FGI-DU4200 |
| Rated Power (12VDC) | 2300W |
| Rated Power (24VDC) | 4200W |
| Battery Voltage | 12VDC / 24VDC (Auto-sensing) |
| Output Voltage | 220-230VAC ±5% (50Hz) |
| Waveform | Pure Sine Wave |
| MPPT Solar Charge Controller Current | 120A |
| Max PV Array Open Circuit Voltage | 500Vdc |
| AC Charging Current | 60A |
| Efficiency | 90% |
| Transfer Time | <20ms |
| Product Dimensions | 16.9 x 8.27 x 21.6 inches |
| Item Weight | 19.14 pounds |
| Manufacturer | Anern |
9. Warranty and Support
Anern products are designed for reliability and performance. For warranty information, please refer to the warranty card included with your product or visit the official Anern website. For technical support, troubleshooting assistance, or spare parts, please contact Anern customer service through their official channels. Please have your model number (FGI-DU4200) and purchase date ready when contacting support.
Contact Information: Refer to your product packaging or the official Anern website for the most up-to-date contact details.


