
1. Introduction
The HITBOX MIG250 is a professional 6-in-1 multi-process welding machine designed for versatility and performance. It supports MIG MIX, MIG CO₂, Flux Cored, Lift TIG, MMA, and Aluminum welding modes. Featuring advanced IGBT technology and synergistic control, this machine allows for easy parameter adjustment, delivering clean, precise, and stable welds suitable for both beginners and experienced professionals.
This manual provides essential information for the safe and efficient operation, setup, and maintenance of your HITBOX MIG250 welding machine. Please read it thoroughly before use.
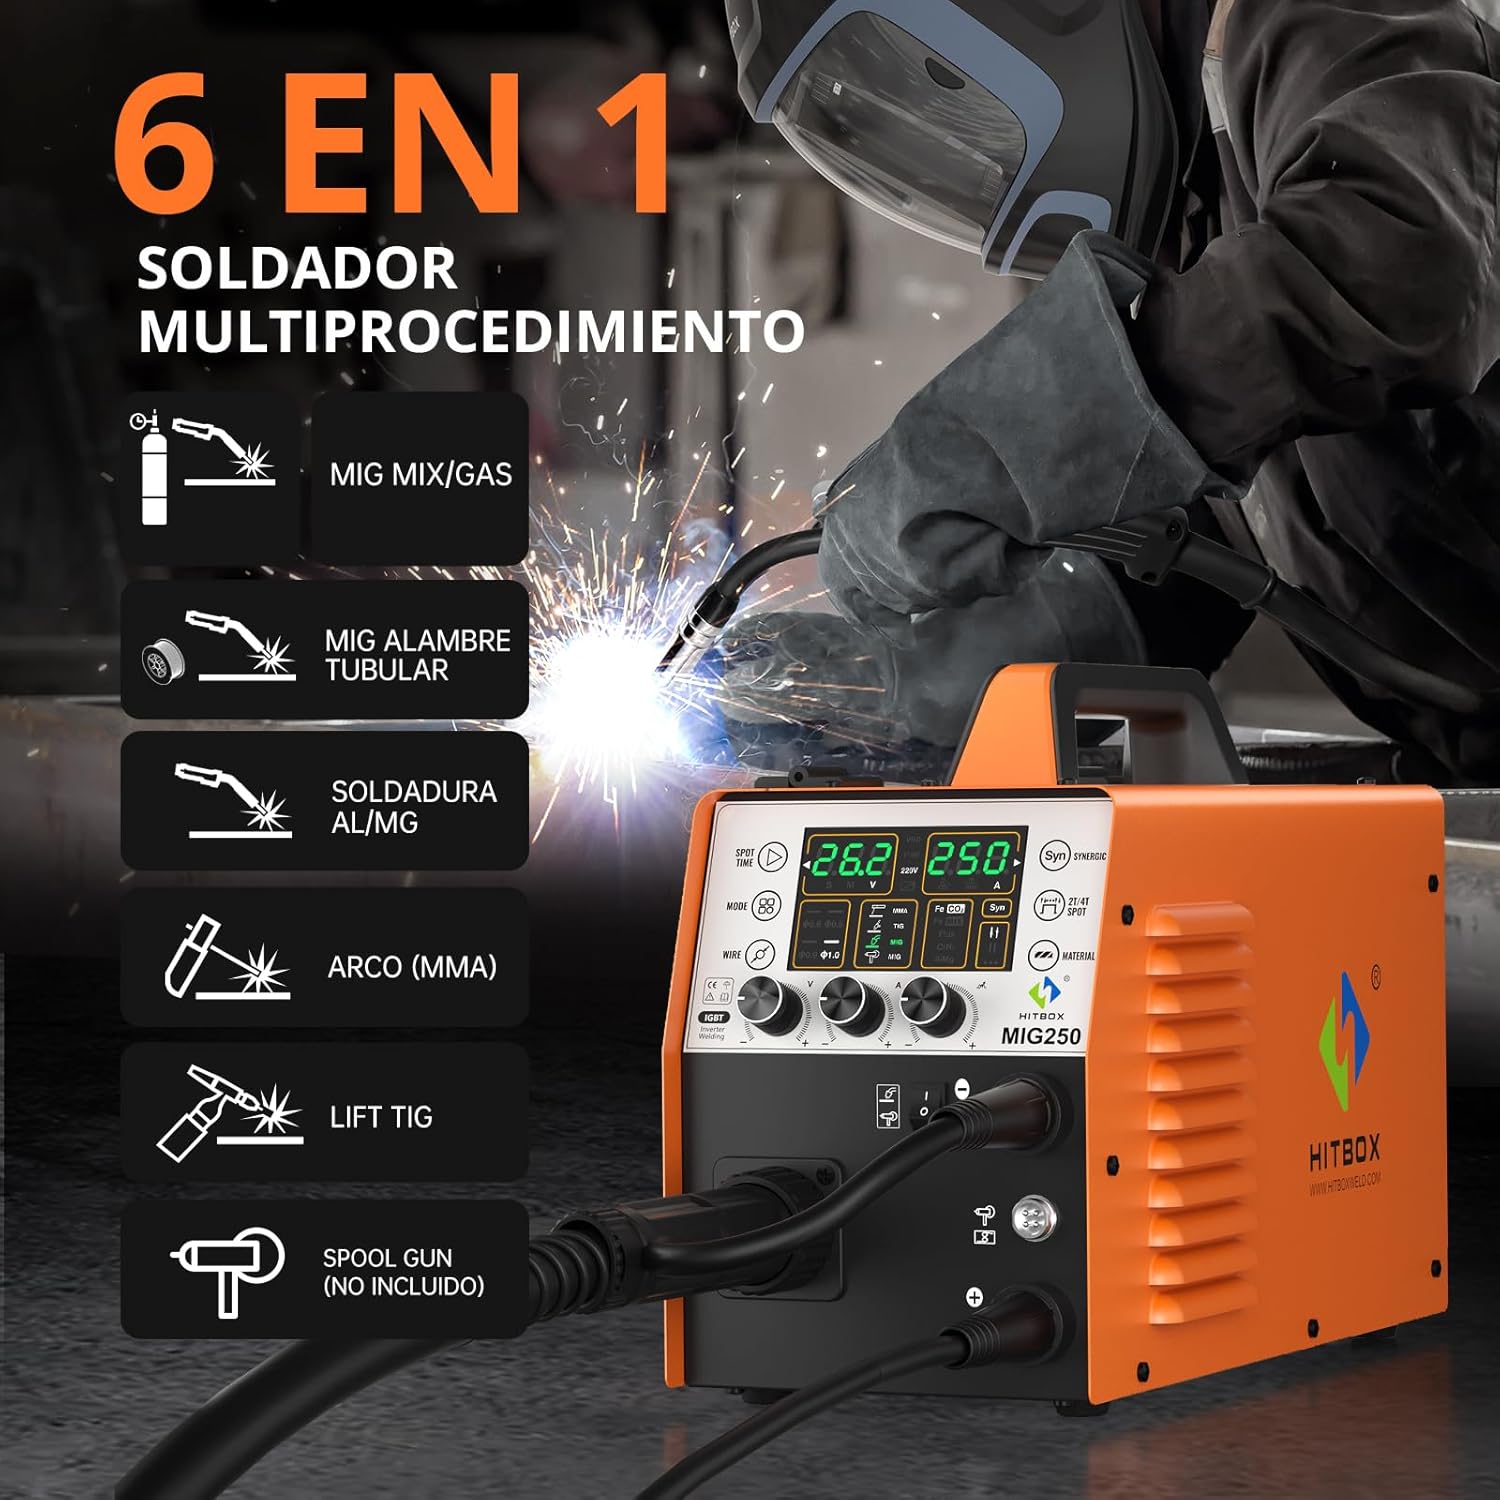
Figure 1: Overview of the HITBOX MIG250's 6-in-1 welding functions.
2. Safety Information
Always prioritize safety when operating welding equipment. Failure to follow safety guidelines can result in serious injury or damage to the equipment.
- Ensure proper ventilation to avoid inhaling welding fumes.
- Wear appropriate personal protective equipment (PPE), including a welding helmet with suitable shade, welding gloves, protective clothing, and safety shoes.
- Do not operate the machine in damp or wet conditions.
- Ensure the workpiece is properly grounded.
- Keep children and unauthorized personnel away from the welding area.
- Disconnect power before performing any maintenance or changing accessories.
The HITBOX MIG250 includes an integrated Voltage Reduction Device (VRD) for enhanced safety. This feature reduces the open-circuit voltage to a safe level when the machine is idle, minimizing the risk of electric shock, especially in damp or hazardous environments. In LIFT TIG mode, the VRD indicator illuminates. In MMA mode, VRD is active even if the indicator does not light up.

Figure 2: Safety and reliability features of the HITBOX MIG250.
3. Package Contents
Upon unpacking your HITBOX MIG250, verify that all components listed below are present and undamaged. If any items are missing or damaged, contact your supplier immediately.
- 1 x HITBOX MIG250 Welding Machine
- 1 x MB15 MIG Torch
- 1 x Wire Feed Wheel (0.6-0.8 mm)
- 1 x Wire Feed Wheel (0.8-1.0 mm)
- 2 x MIG Nozzles
- 2 x Headbands (likely referring to welding helmet headgear, but context suggests accessories for the machine)
- 1 x Gas Hose
- 1 x Ground Clamp
- 1 x Electrode Holder (for MMA welding)
- 1 x User Manual
Note: The TIG torch is not included and must be purchased separately for Lift TIG welding.
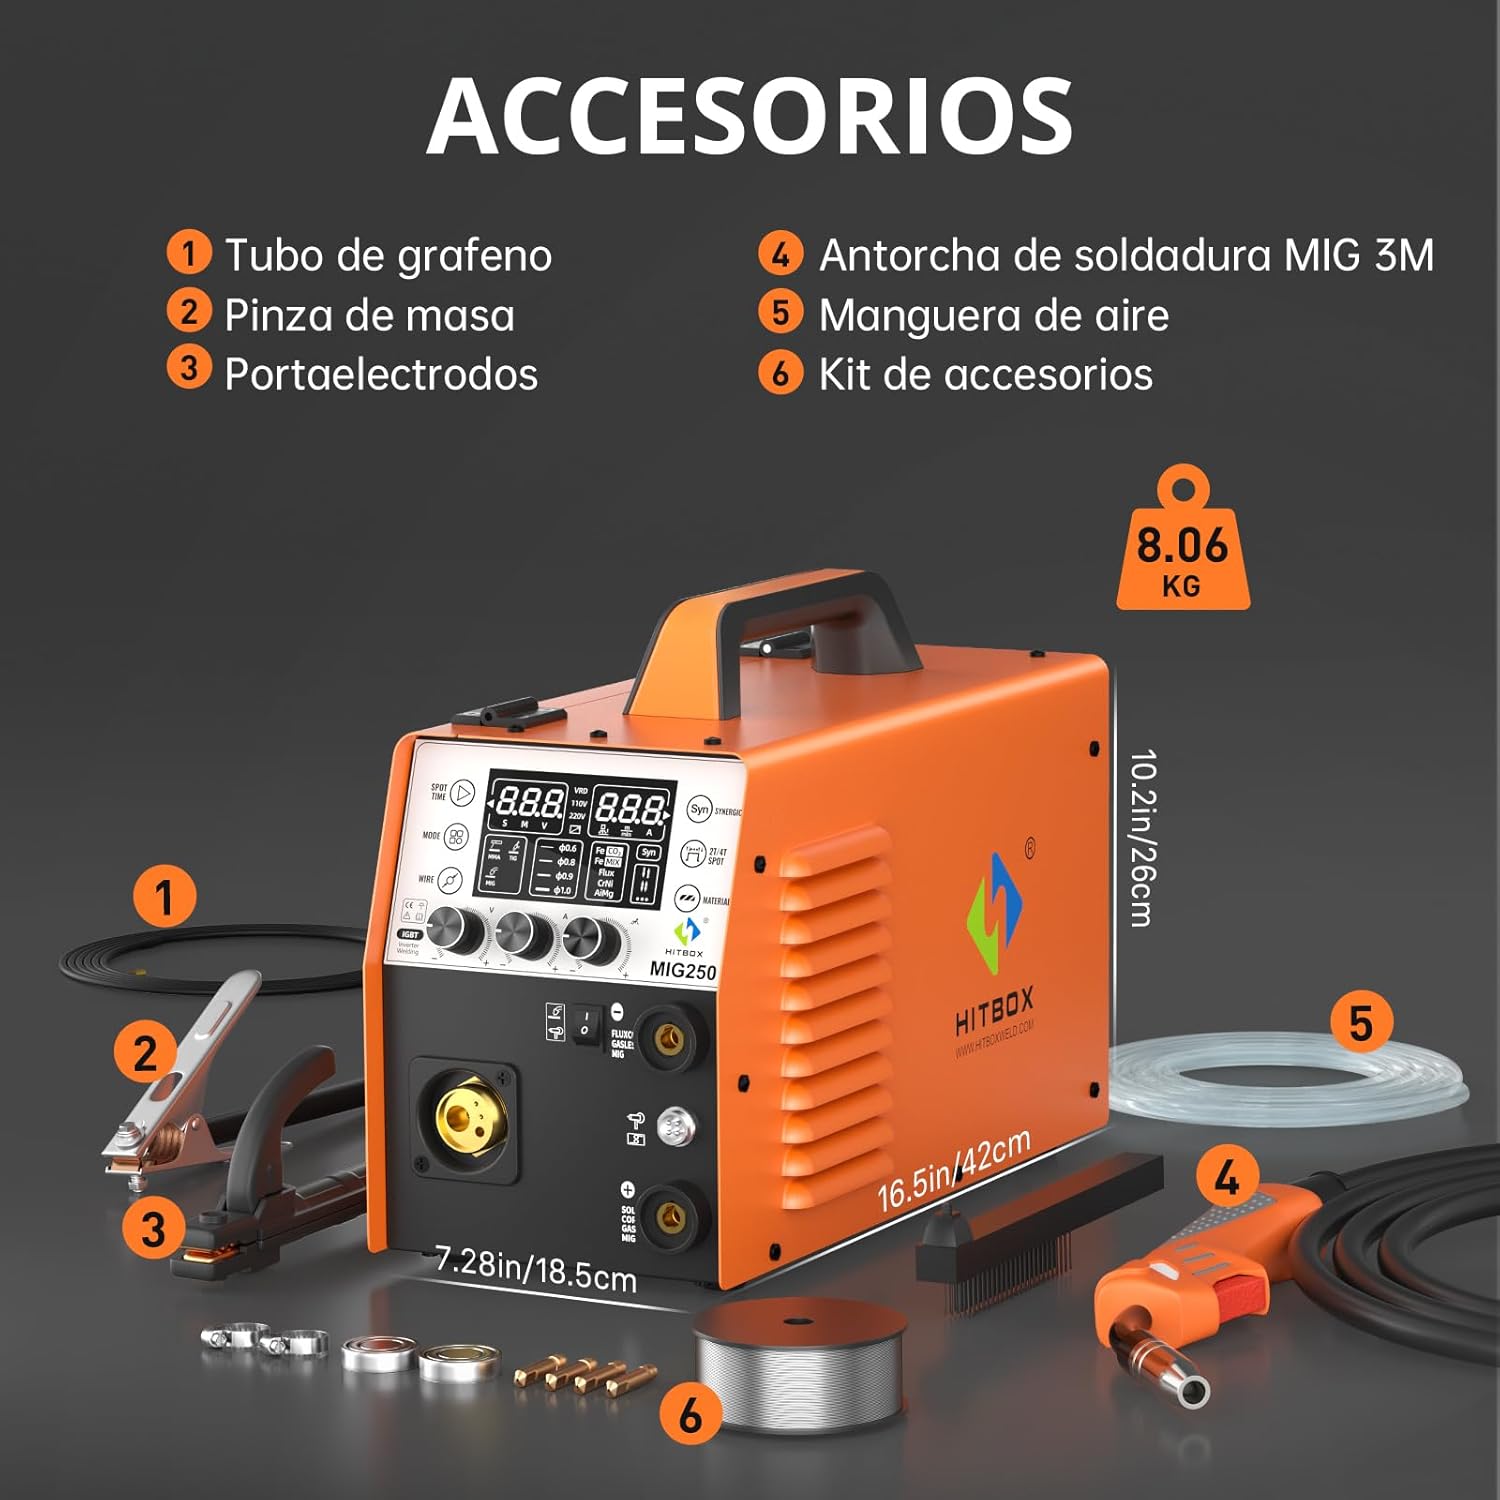
Figure 3: Included accessories and machine dimensions.
4. Setup
4.1 Connecting Power
Connect the welding machine to a suitable 230V AC power supply. Ensure the power outlet is properly grounded and can handle the machine's maximum input current of 26.2A. Use an appropriate circuit breaker.
4.2 Installing Welding Wire
- Open the wire feeder compartment.
- Place the welding wire spool onto the spindle, ensuring it rotates freely. The machine supports 1kg or 5kg spools.
- Thread the welding wire through the wire guide and into the drive roller mechanism.
- Adjust the tension of the drive roller to ensure smooth wire feeding without slippage or crushing.
- Close the wire feeder compartment.

Figure 4: Wire feeder mechanism for stable and smooth wire feeding.
4.3 Gas Connection (for MIG MIX/CO₂ welding)
For MIG welding with shielding gas, connect the gas hose from your gas cylinder regulator to the gas inlet on the rear of the welding machine. Ensure all connections are secure and leak-free. Use appropriate shielding gas for your chosen welding process (e.g., Argon/CO₂ mix for MIG MIX, 100% CO₂ for MIG CO₂).
4.4 Torch and Ground Clamp Connection
- Connect the MB15 MIG torch to the appropriate connector on the front panel.
- Connect the ground clamp cable to the negative (-) terminal and securely attach the clamp to the workpiece or welding table, ensuring good electrical contact.
- For MMA welding, connect the electrode holder to the positive (+) terminal and the ground clamp to the negative (-) terminal.
- For Lift TIG welding, connect the TIG torch (not included) to the negative (-) terminal and the ground clamp to the positive (+) terminal.
5. Operating Instructions
5.1 Control Panel Overview
The HITBOX MIG250 features a large LED display and intuitive controls for easy operation. The display shows welding parameters such as current, voltage, and wire feed speed.
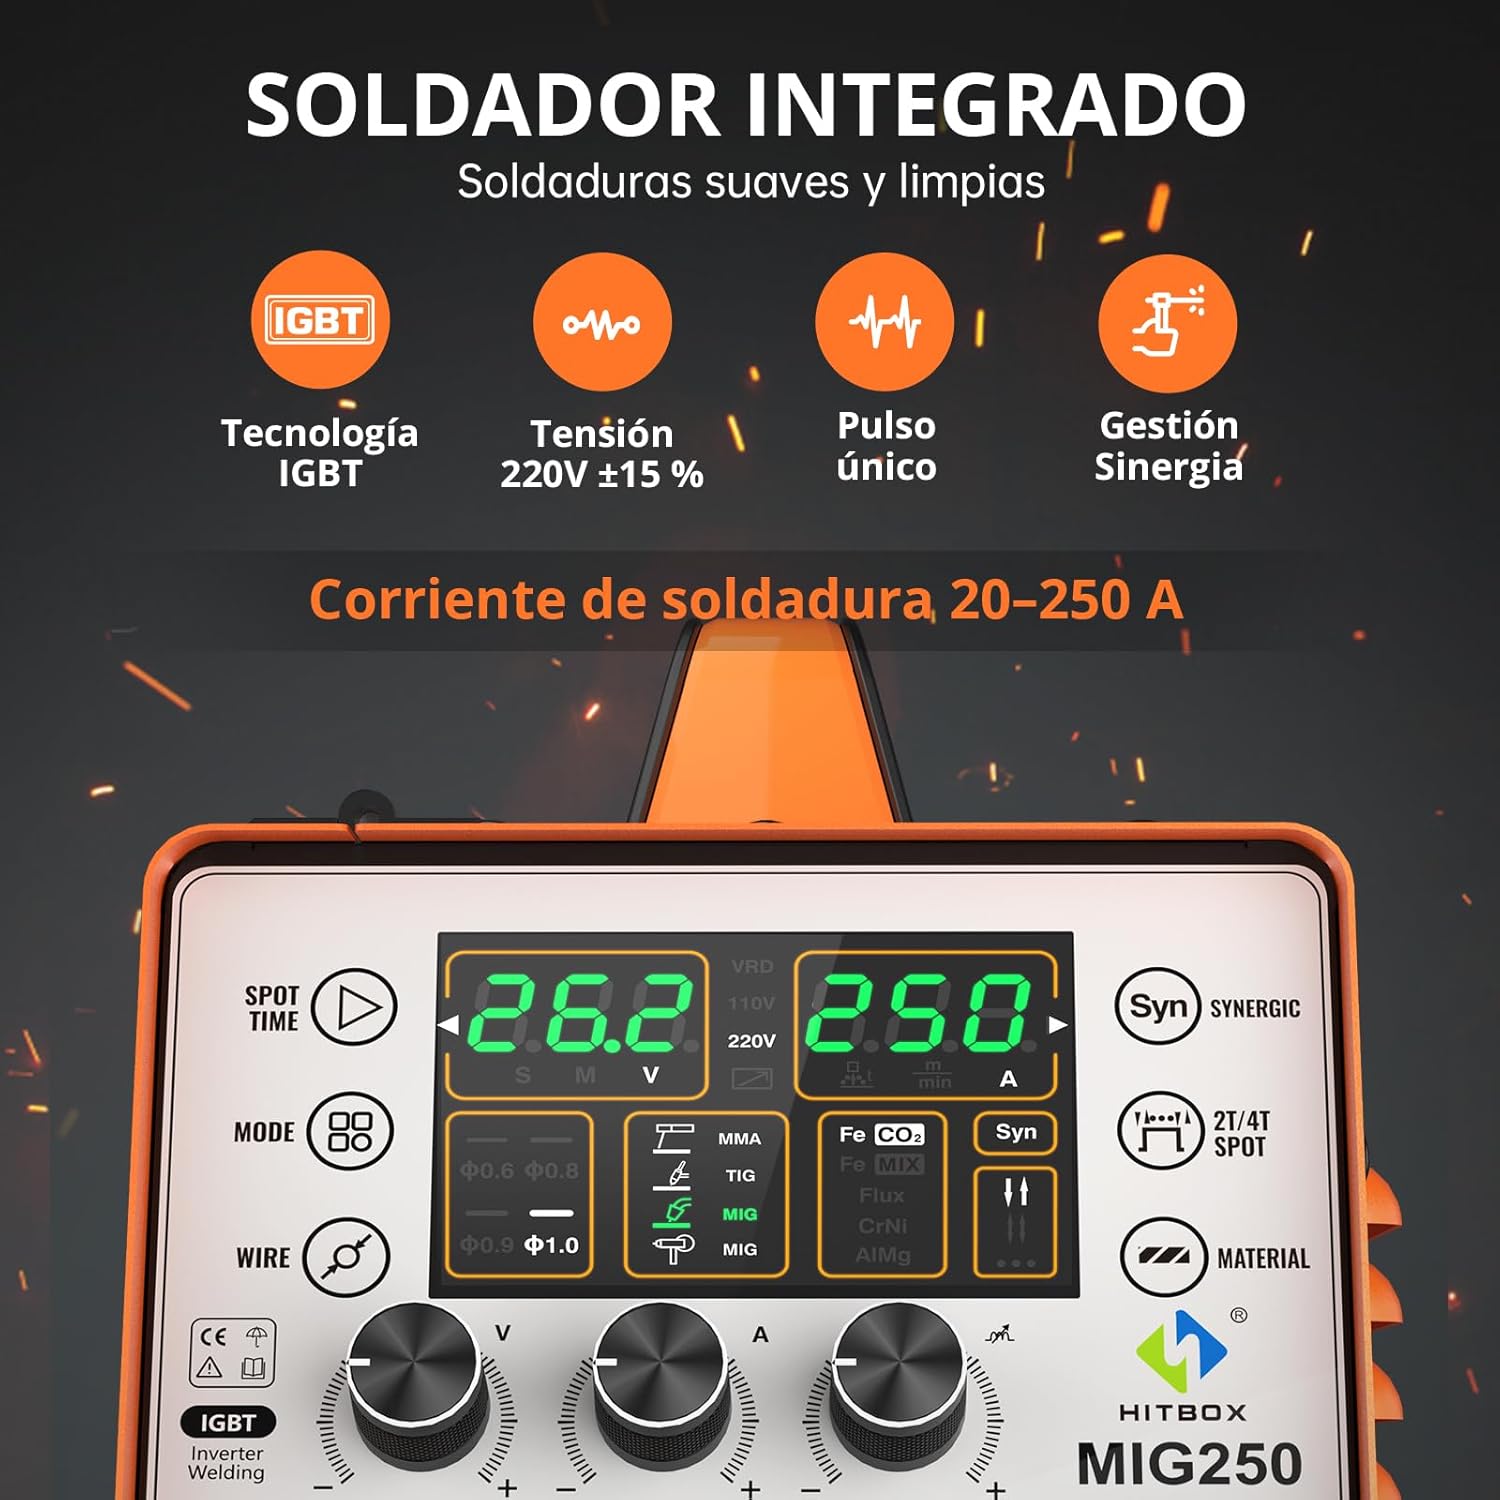
Figure 5: Integrated welder control panel with LED display.
5.2 Mode Selection
Use the MODE button to cycle through the available welding processes:
- MIG MIX: Gas-shielded MIG welding with mixed gas (e.g., Argon/CO₂).
- MIG CO₂: Gas-shielded MIG welding with 100% CO₂ gas.
- FLUX CORED: Gasless welding using flux-cored wire.
- LIFT TIG: DC Lift TIG welding (requires separate TIG torch).
- MMA (ARC): Shielded Metal Arc Welding (Stick welding).
- Aluminum Welding: Specific settings for MIG welding aluminum (requires appropriate wire and gas).
5.3 Synergic vs. Manual Control
The MIG250 offers both synergistic and manual control. In synergistic mode, the machine automatically adjusts parameters like wire feed speed based on your selected voltage and current, simplifying setup. For more experienced users, manual mode allows independent adjustment of all parameters for fine-tuning.
5.4 Parameter Adjustment
Use the adjustment knobs to set welding parameters:
- Current (A): Controls the welding amperage.
- Voltage (V): Controls the welding voltage (primarily for MIG).
- Wire Feed Speed: Controls how fast the welding wire is fed (automatically adjusted in synergic mode).
- Inductance: Adjusts the arc width and weld bead quality, providing a smoother arc and reducing spatter.
5.5 2T/4T Modes
The machine supports 2T (Two-Touch) and 4T (Four-Touch) trigger modes:
- 2T Mode: Press and hold the torch trigger to weld; release to stop. Ideal for short welds.
- 4T Mode: Press and release the trigger to start welding; press and release again to stop. Suitable for long, continuous welds, reducing operator fatigue.
5.6 Pre-gas and Post-gas Settings
For cleaner and more controlled welds, the machine supports pre-gas and post-gas settings. These control the flow of shielding gas before and after the arc, protecting the weld puddle from atmospheric contamination.

Figure 6: Superior welding performance features.

Figure 7: Presets and data storage capabilities.
6. Maintenance
Regular maintenance ensures the longevity and optimal performance of your welding machine.
- Cleaning: Periodically clean the machine's exterior with a dry cloth. Use compressed air to clear dust from internal components, ensuring proper airflow for cooling.
- Wire Feeder: Inspect the wire drive rollers for wear and cleanliness. Remove any metal dust or debris that could impede wire feeding. Replace worn rollers as needed.
- Torch and Consumables: Regularly check the MIG torch nozzle, contact tip, and diffuser for wear and spatter buildup. Clean or replace them as necessary to maintain arc stability and weld quality.
- Smart Fan: The intelligent cooling fan operates only when necessary, reducing noise and extending the fan's lifespan. Ensure the air vents are not obstructed.
7. Troubleshooting
This section addresses common issues you might encounter. For problems not listed here, contact customer support.
| Problem | Possible Cause | Solution |
|---|---|---|
| No power | Power cable disconnected, circuit breaker tripped, machine fault | Check power connections, reset circuit breaker, contact support if issue persists |
| No arc | Poor ground connection, incorrect settings, worn contact tip, VRD active | Ensure good ground, verify settings, replace contact tip, check VRD indicator |
| Wire feeding issues | Incorrect drive roller tension, clogged liner, wrong wire size, tangled wire | Adjust tension, clean liner, use correct wire, untangle wire spool |
| Poor weld quality | Incorrect parameters, insufficient gas shielding, dirty workpiece, wrong technique | Adjust settings, check gas flow, clean workpiece, refine welding technique |
| Overheat protection activated | Exceeded duty cycle, blocked ventilation | Allow machine to cool down, ensure clear airflow to vents |
8. Specifications
The following table details the technical specifications of the HITBOX MIG250 welding machine.
| Feature | Specification |
|---|---|
| Welding Functions | MIG Gasless, MIG CO₂, LIFT TIG, MMA |
| Wire Diameter | 0.6 / 0.8 / 0.9 / 1.0 mm |
| Electrode Diameter (MMA) | Ø1.6 - 4.0 mm |
| Maximum Current | 250 A |
| Applicable Metals | Iron, Stainless Steel, Alloy Steel, Carbon Steel, Copper-Nickel, Light Alloys |
| Rated Input Power | 5.9 kW |
| Rated Input Current | 26.2 A |
| Current Range (MMA) | 30 - 250 A |
| Current Range (TIG) | 20 - 250 A |
| Voltage Range (MIG) | 11 - 26 V |
| Overall Efficiency | 75 % |
| Insulation Class | H |
| Protection Level | IP21S |
| Compatible Wire Types | Solid and Flux-cored wire (0.6 - 1.0 mm), 1/5 kg spool |
| Transistor Type | IGBT Inverter |
| Compatible Electrodes | E6013, E7018 |
| Dimensions (Package) | 48.5 x 34.4 x 32.2 cm |
| Weight | 8 kg |

Figure 8: Detailed technical specifications.
9. Warranty and Support
The HITBOX MIG250 welding machine comes with a 2-year manufacturer's warranty, covering defects in materials and workmanship under normal use.
HITBOX has specialized in welding equipment for over 15 years, ensuring product quality and reliable customer service. For technical assistance, troubleshooting, or warranty claims, please contact HITBOX customer support. Our online support is available 24/7 to assist you.
For further assistance, please visit the official HITBOX store: HITBOX Official Store


