1. Introduction and Overview
The VEVOR Propane Outdoor Pizza Oven is designed for outdoor cooking, offering a convenient way to bake pizzas and other dishes. This gas-powered unit provides consistent, controllable heat for efficient cooking. Its portable design makes it suitable for various outdoor settings, including backyards, patios, and camping trips.
Key features include:
- 12-inch Pizza Capacity: Accommodates pizzas up to 12 inches in diameter.
- Rapid Heating: Preheats to 600°F (315°C) in approximately 15 minutes, reaching a maximum temperature of 1000°F (540°C).
- Efficient Cooking: Bakes pizzas in as little as 90 seconds.
- Durable Construction: Features a 3-layer design with an iron spray black shell, thick insulation cotton, and a 430 stainless steel inner frame for heat retention and durability.
- Simple Operation: Intuitive knob controls for precise temperature management and easy ignition.
- Portability: Compact and lightweight design with foldable legs, includes a carry bag for easy transport.
- Versatile Cooking: Suitable for pizzas, vegetables, steaks, and wings.

Image 1.1: The VEVOR Propane Outdoor Pizza Oven in use, showcasing its compact design and a freshly baked pizza.
2. Safety Information
WARNING: For outdoor use only. Read all instructions before operating this appliance.
- Always operate the oven in a well-ventilated outdoor area. Never use indoors or in enclosed spaces.
- Keep the oven away from combustible materials, structures, and surfaces. Maintain adequate clearance from walls and ceilings.
- Ensure the oven is placed on a stable, level, non-combustible surface.
- Do not store or use gasoline or other flammable vapors and liquids in the vicinity of this or any other appliance.
- Check for gas leaks before each use. Apply soapy water to connections; bubbles indicate a leak. Tighten connections or replace parts as needed.
- Always connect the propane tank outdoors.
- Do not leave the oven unattended while in operation.
- Keep children and pets away from the oven during use and while it is cooling down.
- Wear heat-resistant gloves when handling hot components or food.
- Allow the oven to cool completely before cleaning or storing.
- Ensure the gas supply is turned off at the propane tank when the oven is not in use.
3. Package Contents
Verify that all components are present and undamaged before assembly and operation.
- VEVOR Propane Outdoor Pizza Oven Unit
- Pizza Stone (Thickened)
- Gas Regulator and Hose
- Carry Bag
- Heat-Resistant Glove
- Wrench for assembly
- User Manual
- Motor for rotating tray (requires 2 D batteries, not included)

Image 3.1: Unboxed components of the VEVOR pizza oven, including the main unit, gas hose, pizza stone, and accessories.
4. Setup
Follow these steps to set up your VEVOR Propane Outdoor Pizza Oven:
- Unpack and Inspect: Carefully remove all components from the packaging. Inspect for any damage.
- Position the Oven: Place the oven on a stable, level, non-combustible outdoor surface. Ensure the foldable legs are fully extended and locked into place.
- Install the Rotating Motor: Locate the motor compartment on the underside of the oven. Insert 2 D batteries (not included) into the motor. Slide the motor into its designated slot on the oven's underside. Secure it with the provided pin to prevent it from sliding out.
- Connect the Gas Regulator and Hose:
- Ensure the plastic washer is properly seated inside the gas hose connector.
- Attach the gas hose to the oven's gas inlet. Use the provided wrench to tighten the connection securely, but do not overtighten.
- Connect the other end of the gas hose to your propane tank. Ensure the tank valve is closed before connecting.
- Insert the Rotating Tray: Place the metal rotating tray inside the oven, aligning it with the central spindle.
- Place the Pizza Stone: Carefully place the thickened pizza stone on top of the rotating metal tray. Ensure it is centered and stable.
Video 4.1: This video demonstrates the unboxing, assembly, and initial setup of the VEVOR Propane Portable Pizza Maker, including connecting the gas line and installing the rotating mechanism.

Image 4.1: Visual guide illustrating the easy operation steps, from connecting the gas pipe to enjoying a cooked pizza.
5. Operating Instructions
Operating your VEVOR pizza oven for optimal results:
- Initial Burn-Off (Curing): Before first use, operate the oven at its highest temperature for 30-60 minutes to burn off any manufacturing residues or oils. This process is crucial for food safety and to remove any initial odors.
- Gas Connection and Leak Check:
- Open the valve on your propane tank slowly.
- Perform a leak check by applying a soapy water solution to all gas connections. If bubbles appear, tighten the connection or replace the faulty part. Do not operate if a leak is detected.
- Ignition:
- Push and turn the control knob counter-clockwise to the "ON" position. You should hear a clicking sound, indicating the igniter is sparking.
- Hold the knob in for a few seconds after ignition to allow the thermocouple to heat up and maintain the flame.
- If the oven does not ignite, turn the knob to "OFF", wait 5 minutes, and repeat the ignition process.
- Preheating: Allow the oven to preheat for approximately 15 minutes to reach the desired temperature (around 600°F / 315°C for pizza). The pizza stone needs to be thoroughly heated for a crispy crust.
- Activating Rotation: Turn on the rotating motor (if batteries are installed) to ensure even cooking.
- Cooking Pizza:
- Prepare your pizza on a pizza peel.
- Carefully slide the pizza onto the hot pizza stone inside the oven.
- The rotating stone will ensure even cooking. Monitor the pizza closely.
- Pizzas typically cook in 90 seconds to 3 minutes, depending on the temperature and desired crispiness.
- Use the pizza peel to remove the cooked pizza.
- Cooking Other Foods: The oven can also cook other items like vegetables, steaks, and wings. Adjust temperature and cooking times as needed.
- Shutting Down: When finished cooking, turn the control knob to "OFF" and close the valve on the propane tank. Allow the oven to cool completely before handling.

Image 5.1: A user connecting the gas line to the VEVOR pizza oven, highlighting the gas-powered feature.
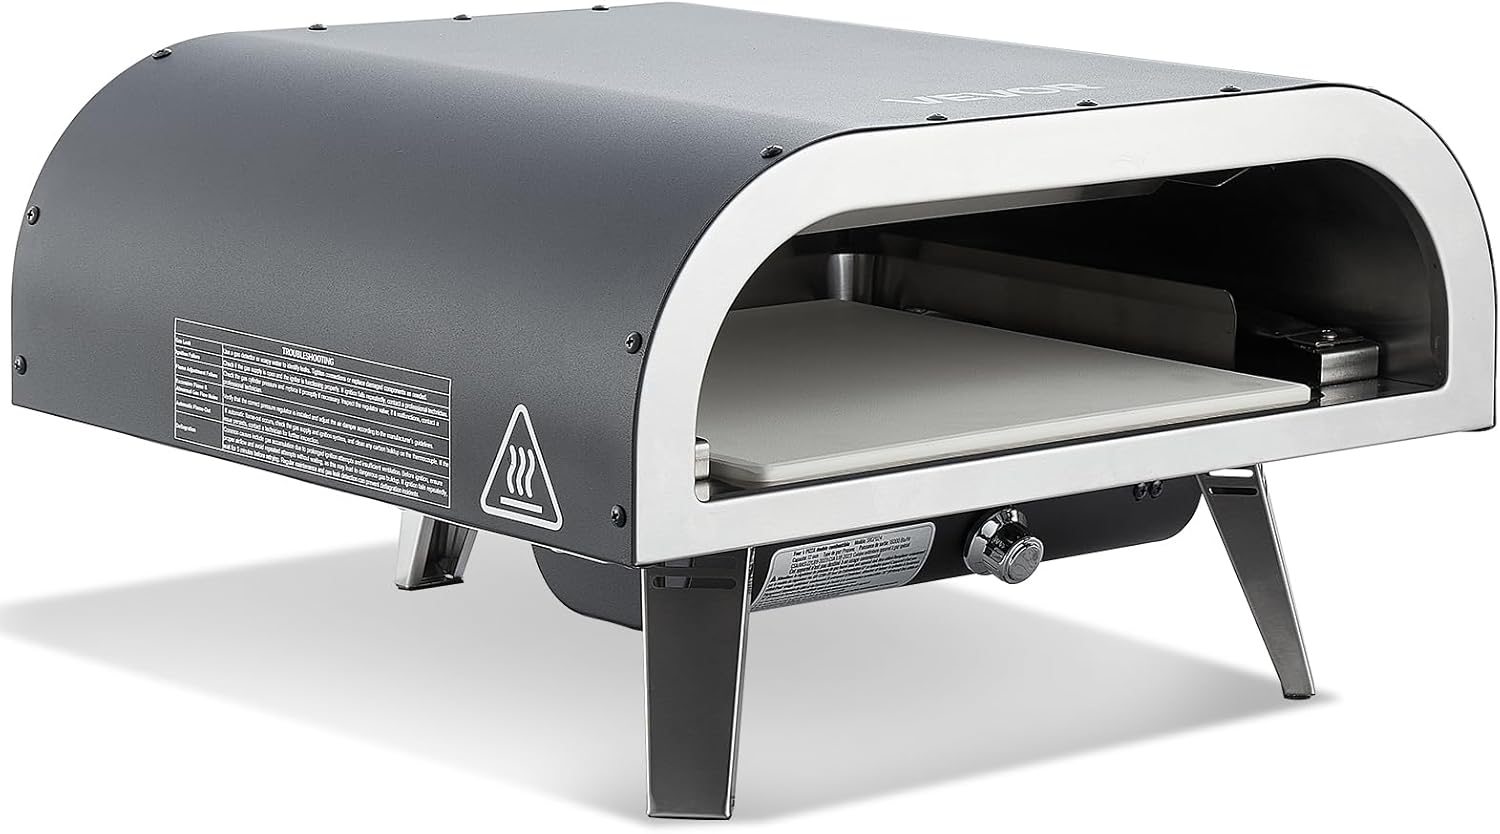
Image 5.2: A close-up of the oven's interior, showing the pizza stone rotating, which ensures even cooking.
6. Maintenance
Proper maintenance ensures the longevity and performance of your pizza oven:
- Cleaning the Pizza Stone: Allow the stone to cool completely. Scrape off any burnt food residue with a spatula or stiff brush. Do not use soap or detergents, as they can be absorbed by the porous stone and affect food taste. For stubborn stains, heat the stone in the oven to burn off residue.
- Cleaning the Oven Interior: Once cooled, wipe down the stainless steel interior with a damp cloth. For tougher grease, use a mild degreaser designed for stainless steel.
- Cleaning the Oven Exterior: Wipe the exterior with a damp cloth and mild detergent. Dry thoroughly.
- Storage: Ensure the oven is completely cool and clean before storing. Disconnect the propane tank. Fold the legs and place the oven in its carry bag for protection against dust and weather. Store in a dry, sheltered location.
- Gas Hose and Regulator: Periodically inspect the gas hose and regulator for cracks, cuts, or damage. Replace immediately if any damage is found.

Image 6.1: The VEVOR pizza oven being carried in its included bag, emphasizing its portable design for easy storage and transport.
7. Troubleshooting
Refer to this section for common issues and their solutions:
| Problem | Possible Cause | Solution |
|---|---|---|
| Oven not igniting | No gas flow, igniter issue, low propane tank. | Check propane tank level and connections. Ensure tank valve is fully open. Check for gas leaks. Verify igniter spark. |
| Uneven cooking | Pizza stone not fully preheated, rotating motor off, inconsistent flame. | Allow longer preheat time for the stone. Ensure rotating motor is on and functioning. Check gas flow for consistent flame. |
| Gas smell/leak | Loose connections, damaged hose/regulator. | Immediately turn off gas supply. Perform a soapy water leak test. Tighten all connections. Replace damaged components. Do not operate if a leak persists. |
| Pizza sticking to stone | Stone not hot enough, too much moisture on dough, insufficient flour/semolina on peel. | Ensure stone is fully preheated. Use adequate flour or semolina on the pizza peel. Avoid overly wet dough. |
8. Specifications
| Feature | Detail |
|---|---|
| Item Model Number | SRGP024 |
| Product Dimensions | 18.5 x 17.91 x 10.63 inches (470 x 455 x 270 mm) |
| Item Weight | 21.4 pounds (9.8 kg) |
| Main Material | Iron Spray Black Shell |
| Color | Black |
| Finish Type | Polished |
| Fuel Type | Natural Gas (Note: Product description states Propane, please verify compatibility with your gas supply) |
| Max Temperature | 1000°F / 540°C |
| Pizza Stone Size | 12 x 12 inches |
| Gas Fitting Specification | American Standard 6.3 mm |

Image 8.1: A detailed diagram illustrating the product dimensions and key specifications of the VEVOR pizza oven.
9. Warranty and Support
For warranty information, product support, or to purchase replacement parts, please refer to the contact information provided in your product packaging or visit the official VEVOR website. Keep your purchase receipt as proof of purchase for any warranty claims.
VEVOR is committed to providing quality products and customer satisfaction. For further assistance, please reach out to VEVOR customer service.