
1. Product Overview
The Mercusys MS124GS is a 24-port Gigabit Ethernet switch designed for expanding your wired network. It features 24 auto-negotiating 10/100/1000 Mbps RJ45 ports with Auto-MDI/MDIX support, ensuring seamless connectivity for various devices. Its durable metal casing provides efficient heat dissipation and a long operational life. The switch supports multiple modes including Isolation Mode and Loop Prevention, enhancing network security and stability.

Figure 1: Front view of the Mercusys MS124GS 24-Port Gigabit Switch, showing all 24 Ethernet ports and status indicators.
Key Features:
- 24 Gigabit Ports: Provides 24 RJ45 ports for high-speed wired connections.
- Plug and Play: Requires no configuration for quick and easy setup.
- Isolation Mode: Separates client traffic for improved security and performance.
- Loop Prevention: Detects and prevents network loops to avoid disruptions.
- Durable Metal Casing: Ensures efficient heat dissipation and product longevity.
- Silent Operation: Fanless design for quiet performance.
2. Package Contents
Verify that your package contains the following items:
- Mercusys MS124GS 24-Port Gigabit Switch
- Power Adapter/Cable
- Rubber Feet
- Rackmount Kit
- Quick Installation Guide
3. Setup Instructions
The MS124GS switch is designed for simple Plug and Play installation. No software configuration is required.
3.1 Physical Installation
- Placement: Place the switch on a stable, flat surface (desktop) or install it in a standard 19-inch equipment rack using the provided rackmount kit. Ensure adequate ventilation around the switch.
- Attach Rubber Feet (Desktop Use): If placing on a desktop, attach the included rubber feet to the bottom corners of the switch to prevent scratching and provide stability.
- Connect Power: Connect the provided power cable to the power port on the rear panel of the switch and then to a power outlet. The power LED on the front panel will illuminate.

Figure 2: Rear view of the MS124GS switch, showing the power input and ventilation.
3.2 Network Connection
- Connect Devices: Use standard Ethernet cables (Cat5e or higher recommended) to connect your network devices (computers, printers, servers, IP cameras, gaming consoles, etc.) to any of the 24 RJ45 ports on the front panel of the switch.
- Verify Connection: Once a device is connected, the corresponding Link/Act LED on the switch's front panel will light up, indicating an active connection. A blinking LED indicates data transmission.

Figure 3: Front view of the MS124GS switch, highlighting the 24 Gigabit Ethernet ports.
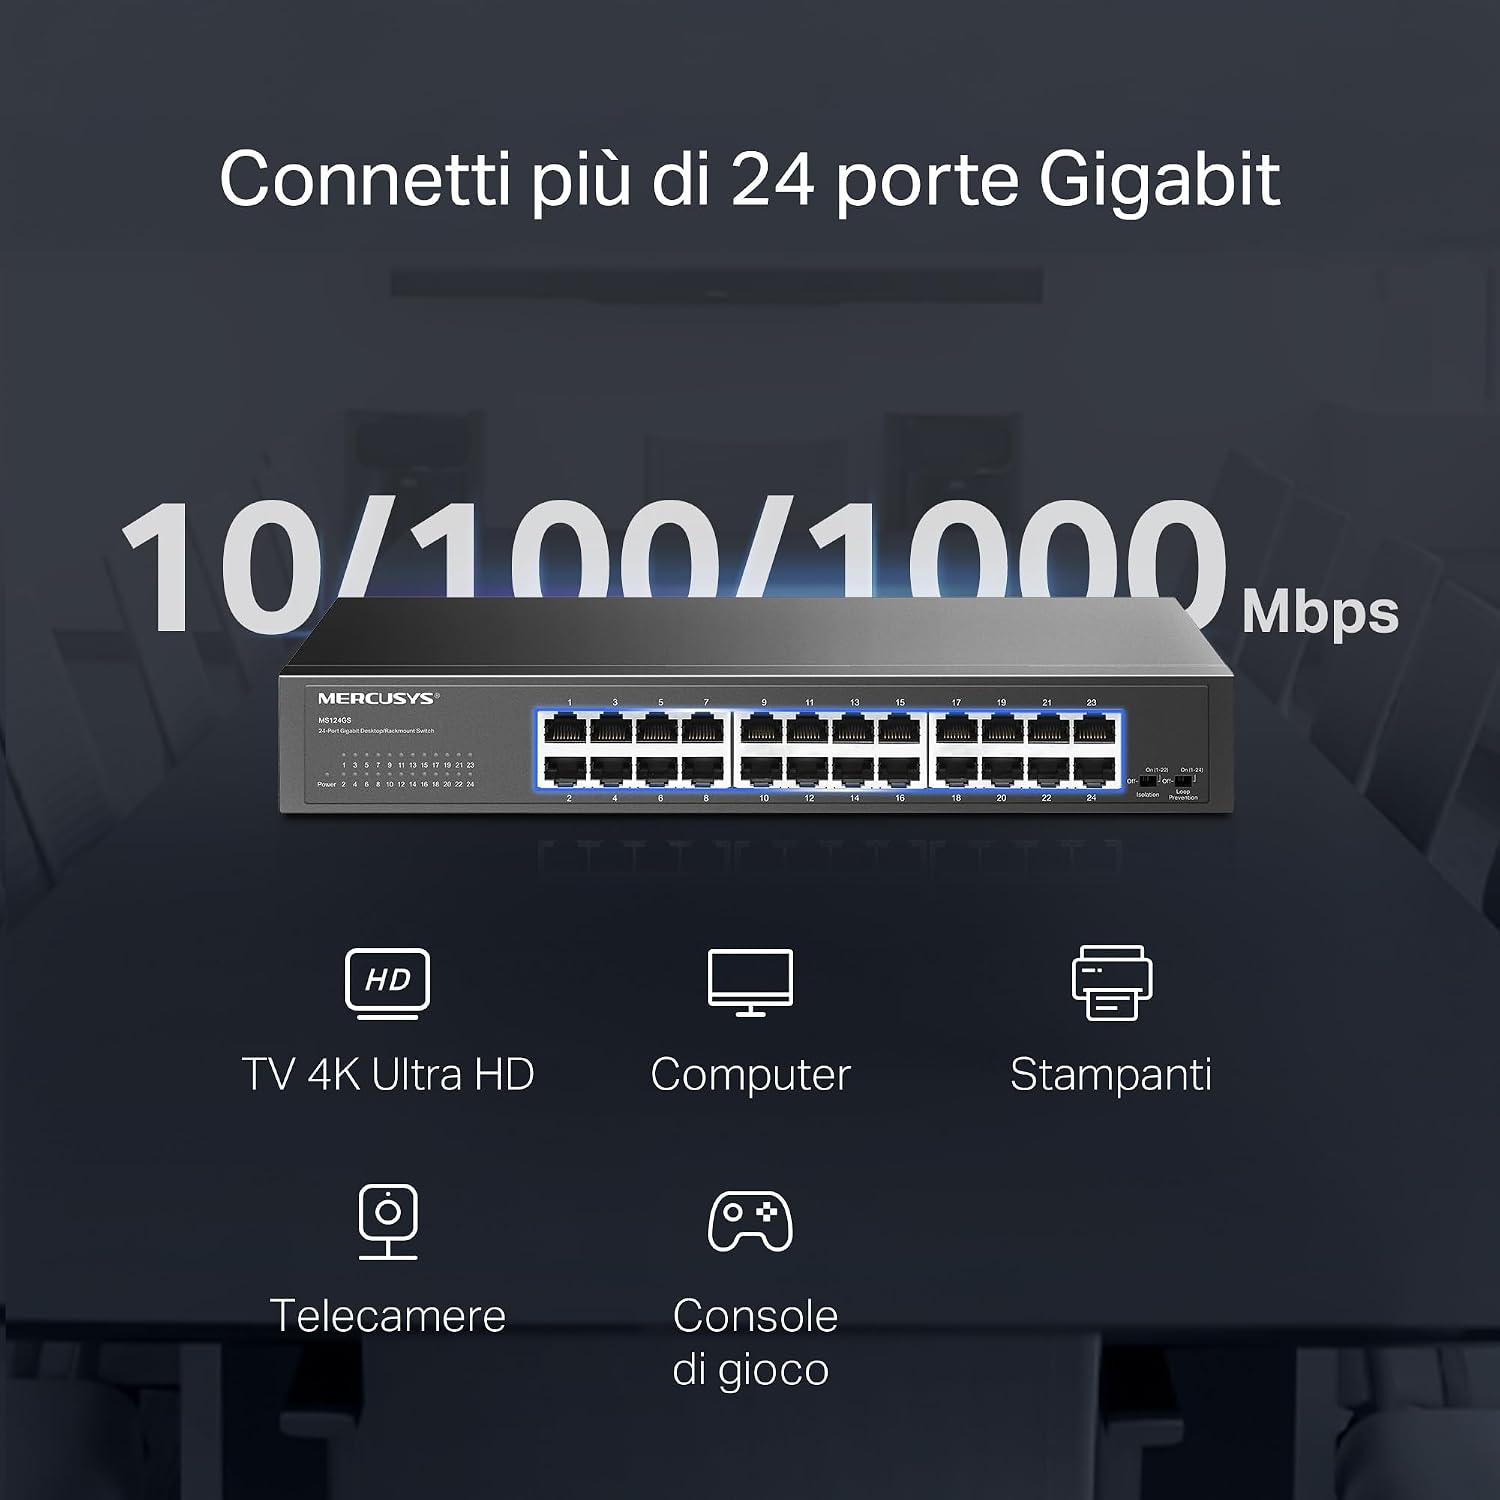
Figure 4: Illustration of various devices such as 4K TVs, computers, printers, IP cameras, and gaming consoles connected to the 24 Gigabit ports of the MS124GS switch.
4. Operating the Switch
The Mercusys MS124GS is an unmanaged switch, meaning it operates automatically without requiring complex configuration. However, it includes specific modes to optimize network performance and security.
4.1 Default Mode
In Default Mode, all ports operate as standard Gigabit Ethernet ports, allowing all connected devices to communicate freely within the network.
4.2 Isolation Mode
Isolation Mode enhances security by separating client traffic. When activated, ports 1-22 are isolated from each other but can still communicate with ports 23-24 (uplink ports). This prevents client devices from directly accessing each other, which is useful in environments like offices or public networks.
- Activation: Locate the 'Isolation' switch on the front panel and set it to the 'On' position.
4.3 Loop Prevention Mode
Loop Prevention Mode automatically detects and prevents network loops. A network loop occurs when there are multiple paths between two network devices, which can cause broadcast storms and network instability. This mode helps maintain network reliability.
- Activation: Locate the 'Loop Prevention' switch on the front panel and set it to the 'On' position.

Figure 5: Detailed diagrams showing how to activate Isolation Mode and Loop Prevention Mode using the switches on the front panel, and their respective network effects.
5. Maintenance
To ensure optimal performance and longevity of your Mercusys MS124GS switch, follow these maintenance guidelines:
- Ventilation: Ensure the switch is placed in a well-ventilated area. Do not block the ventilation holes on the sides or rear of the device.
- Cleaning: Periodically clean the exterior of the switch with a soft, dry cloth. Avoid using liquid or aerosol cleaners.
- Cable Management: Keep network cables organized and free from kinks or excessive bends to prevent signal degradation.
- Power Supply: Use only the power adapter provided with the switch. Disconnect power during electrical storms or when the device will be unused for extended periods.
- Temperature: Operate the switch within its specified temperature range (0°C to 40°C).

Figure 6: The MS124GS switch mounted in a metal rack, demonstrating its durable metal casing and suitability for rack installation.
6. Troubleshooting
If you encounter issues with your Mercusys MS124GS switch, refer to the following troubleshooting tips:
6.1 No Power
- Ensure the power cable is securely connected to both the switch and a working power outlet.
- Verify that the power outlet is functional by plugging in another device.
- Check the power LED on the front panel of the switch. If it is off, contact support.
6.2 No Link/Activity on a Port
- Check if the Ethernet cable is securely connected to both the switch port and the device.
- Try a different Ethernet cable to rule out a faulty cable.
- Ensure the connected device is powered on and its network adapter is functioning correctly.
- If using Isolation Mode, ensure the connected device is on a port that can communicate with the desired destination (e.g., ports 23-24 for uplink).
6.3 Network Slowdown or Instability
- Activate Loop Prevention Mode to check if a network loop is causing the issue.
- Ensure all cables are in good condition and properly connected.
- Check for excessive network traffic or bandwidth-intensive applications on connected devices.
- Restart the switch by disconnecting and reconnecting the power cable.
7. Specifications
| Feature | Detail |
|---|---|
| Brand | MERCUSYS |
| Model Number | MS124GS |
| Number of Ports | 24 |
| Interface | 24x 10/100/1000 Mbps RJ45 Ports (Auto-Negotiation, Auto-MDI/MDIX) |
| Data Transfer Speed | 1000 Megabits per second (Gigabit) |
| Switch Type | Unmanaged (with Smart Features: Isolation Mode, Loop Prevention) |
| Case Material | Metal |
| Mounting Options | Desktop, Rackmount |
| Max Operating Temperature | 40 Degrees Celsius |
| Compatible Devices | Desktop computers, Gaming consoles, Cameras, Laptops, Smartphones, Printers, Tablets |
| Platform Compatibility | All operating systems |
8. Warranty Information
The Mercusys MS124GS 24-Port Gigabit Switch comes with a 2-year warranty from the date of purchase. This warranty covers defects in materials and workmanship under normal use. Please retain your proof of purchase for warranty claims. For detailed warranty terms and conditions, refer to the official Mercusys website or the warranty card included in your package.
9. Support
For further assistance, technical support, or to download the latest firmware and documentation, please visit the official Mercusys website:
You can also find contact information for customer service and support in your region on the website.


