1. Introduction
This manual provides essential information for setting up, operating, and maintaining your ACEMAGIC K1 Mini PC. Please read this manual thoroughly before using the device to ensure proper functionality and to prevent damage.
2. Package Contents
Verify that all items are present in the package:
- ACEMAGIC K1 Mini PC
- Power Adapter
- HDMI Cable
- VESA Mount with Screws
- User Manual (this document)
3. Product Overview
The ACEMAGIC K1 is a compact mini PC designed for various computing tasks, from office work to light gaming. It features a robust AMD Ryzen 7 5700U processor and versatile connectivity options.
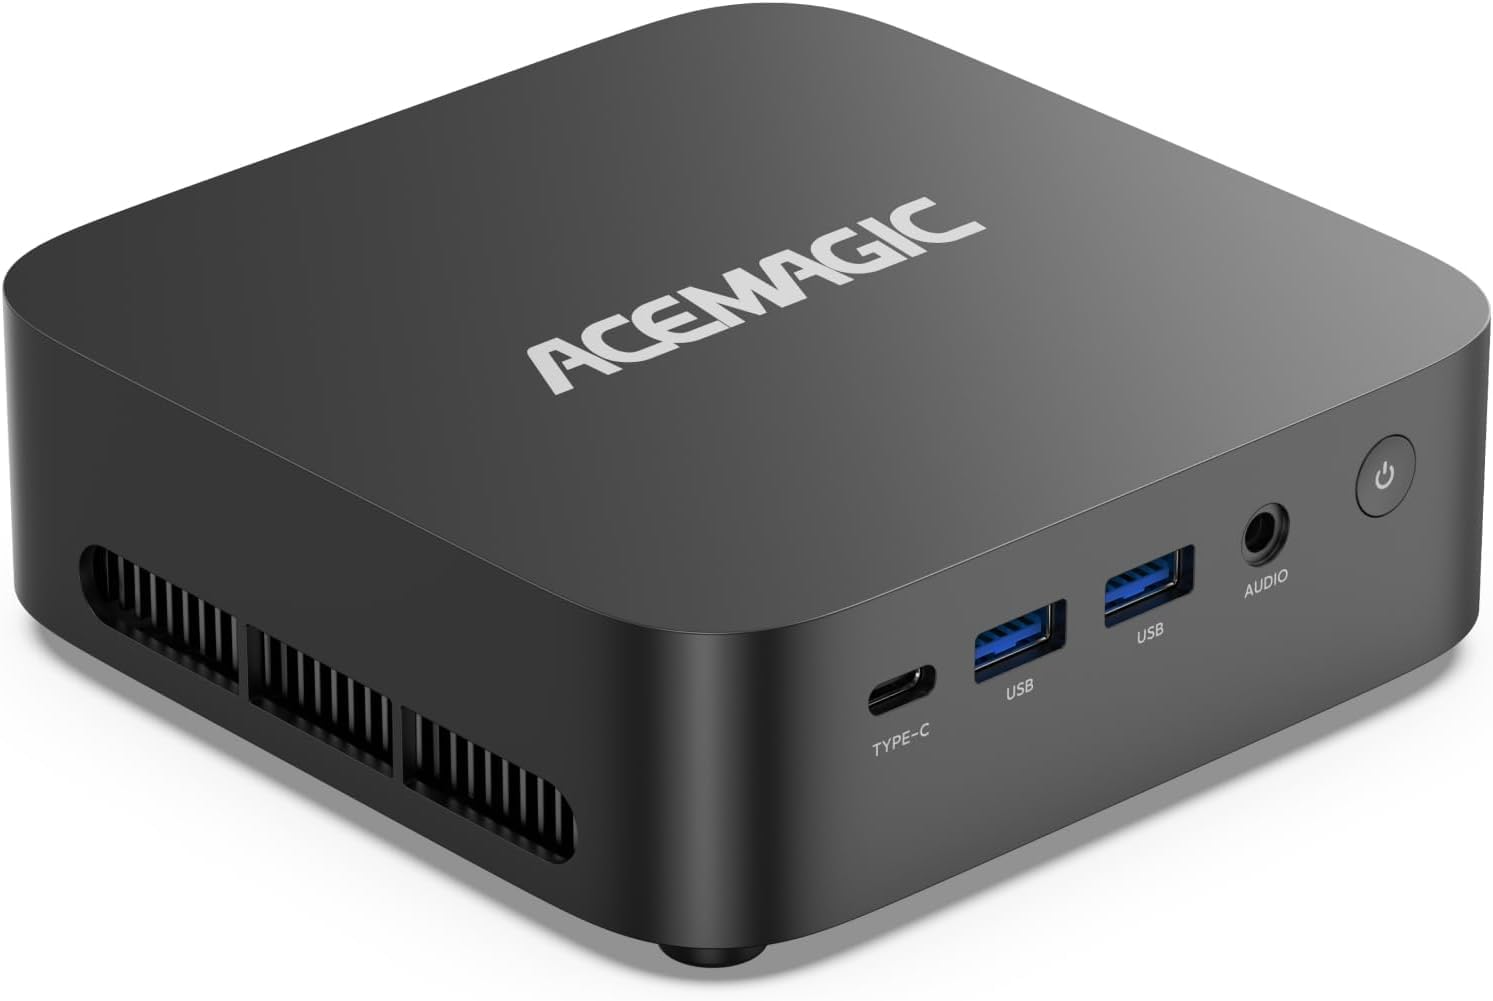
Image: Front view of the ACEMAGIC K1 Mini PC, showing the power button, USB ports, and audio jack.
3.1. Ports and Connectors
Familiarize yourself with the available ports on your ACEMAGIC K1 Mini PC.

Image: Diagram illustrating the front and rear ports of the ACEMAGIC K1 Mini PC.
Front Panel:
- Power Button: To turn the PC on or off.
- USB 3.2 Gen2 Type-C (x1): For data transfer and display output.
- USB 3.2 Gen2 (x2): High-speed data transfer ports.
- 3.5mm Audio Jack: For headphones or microphones.
Rear Panel:
- HDMI 2.0 (x1): For connecting to a display.
- DisplayPort 1.4 (x1): For connecting to a display.
- LAN (RJ45) (x1): For wired network connection.
- USB 3.2 Gen1 (x4): Standard data transfer ports.
- DC Power Input: For connecting the power adapter.
3.2. Key Features
- Processor: AMD Ryzen 7 5700U 8-Core Processor (up to 4.3GHz).
- Graphics: Integrated AMD Radeon RX Vega 8.
- Memory: 16GB DDR4 SO-DIMM RAM (expandable up to 64GB).
- Storage: 512GB PCIe 3.0x4 SSD (Dual NVMe M.2 2280 SSD Slots, supports up to 4TB expansion).
- Operating System: Pre-installed Windows 11 Pro.
- Wireless Connectivity: WiFi 6 and Bluetooth 5.2.
- Display Support: Triple 4K@60Hz display output via HDMI 2.0, DisplayPort 1.4, and USB 3.2 Gen2 Type-C.

Image: Overview of the ACEMAGIC K1 Mini PC's key features, including processor, graphics, memory, storage, ports, and cooling system.
4. Setup Guide
Follow these steps to set up your ACEMAGIC K1 Mini PC.
4.1. Connecting Peripherals
- Connect Display: Use the provided HDMI cable or your own DisplayPort cable to connect your monitor(s) to the HDMI 2.0, DisplayPort 1.4, or USB-C ports on the Mini PC. For triple display setup, use all three available display outputs.
- Connect Keyboard and Mouse: Plug your USB keyboard and mouse into any of the available USB ports on the Mini PC.
- Connect Network (Optional): For a wired internet connection, connect an Ethernet cable from your router or modem to the LAN port on the Mini PC. For wireless connection, WiFi 6 is supported.
- Connect Power: Plug the power adapter into the DC power input port on the Mini PC, then plug the adapter into a power outlet.
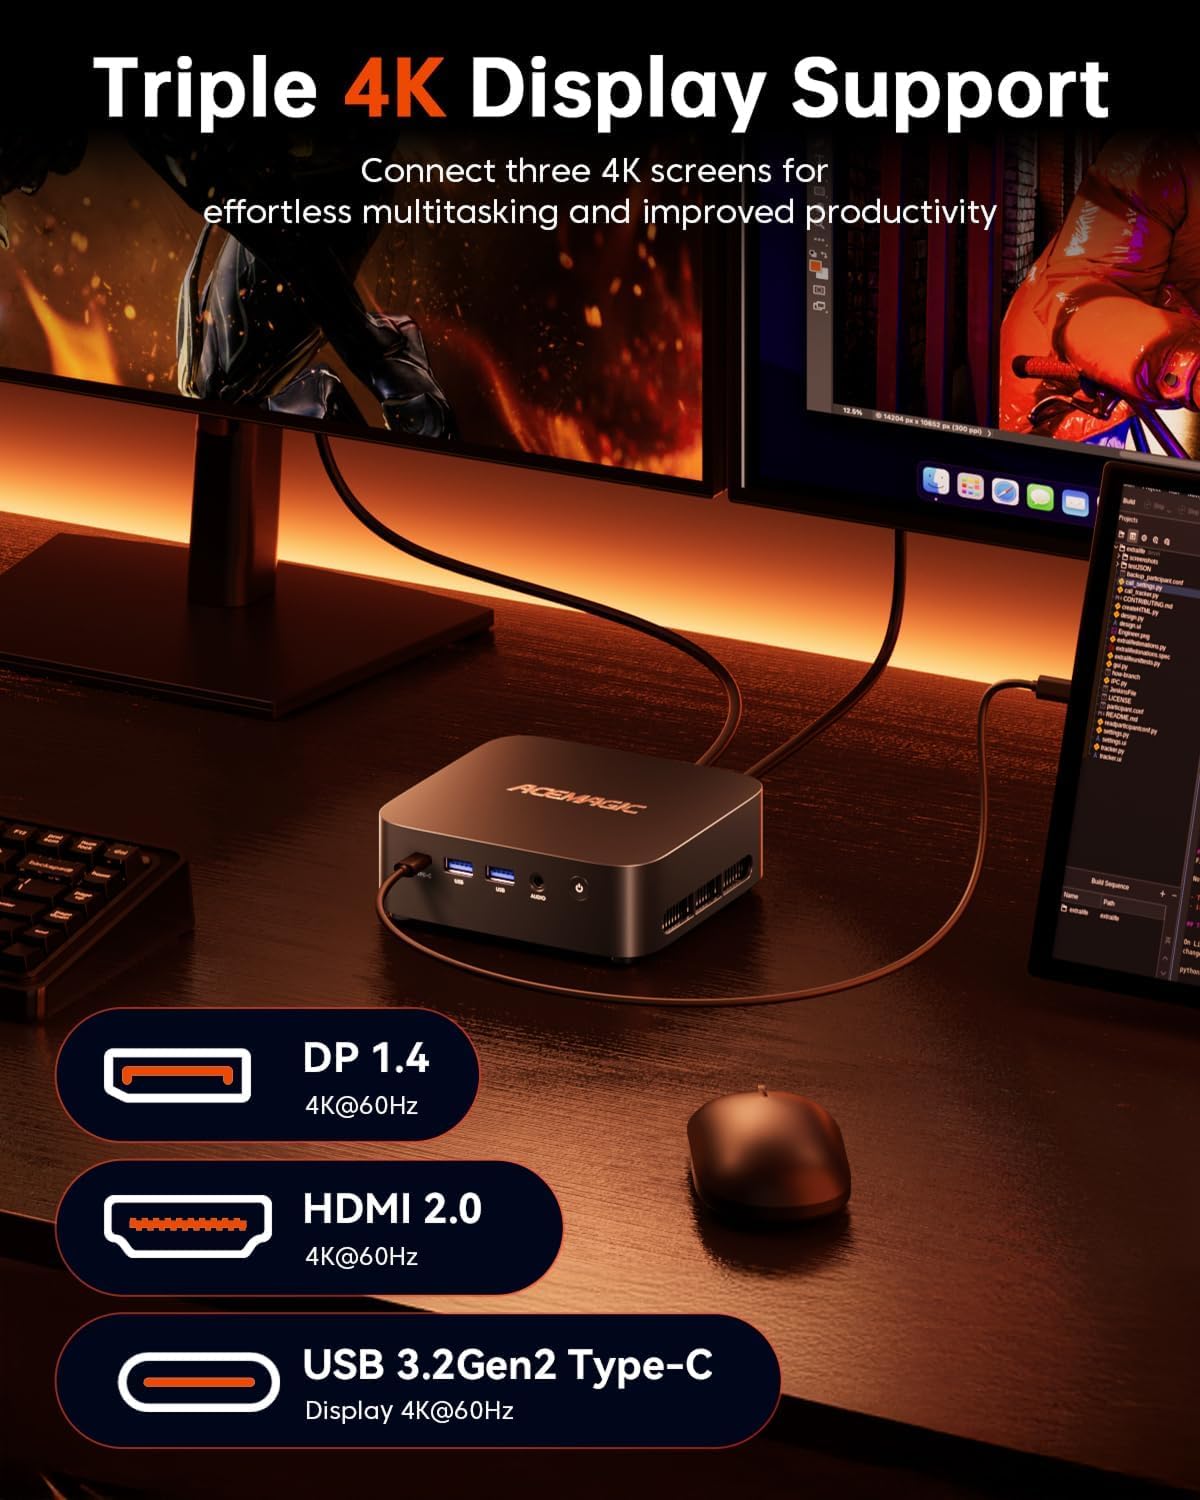
Image: The ACEMAGIC K1 Mini PC connected to three external monitors, demonstrating its triple 4K display support.
4.2. Initial Power On and Windows Setup
- Press the Power Button on the front panel of the Mini PC. The power indicator light will illuminate.
- The PC will boot into the pre-installed Windows 11 Pro operating system.
- Follow the on-screen instructions to complete the initial Windows setup, including language selection, region, network connection, and user account creation.
5. Operating Instructions
5.1. Basic Operation
- Power On: Press the power button.
- Power Off: Click the Start button in Windows, then select Power > Shut down. Alternatively, press and hold the power button for 4 seconds to force a shutdown (not recommended for regular use).
- Restart: Click the Start button in Windows, then select Power > Restart.
- Sleep: Click the Start button in Windows, then select Power > Sleep.
5.2. Network Connectivity
Wired Connection:
If you connected an Ethernet cable during setup, your PC should automatically connect to the internet. Verify the connection status in Windows network settings.
Wireless Connection (WiFi 6):
- In Windows, click the network icon in the taskbar.
- Select your desired WiFi network from the list.
- Enter the network password if prompted and click Connect.

Image: Visual representation highlighting the high-speed wireless connectivity features, WiFi 6 and Bluetooth 5.2, of the ACEMAGIC K1 Mini PC.
5.3. Display Configuration
The ACEMAGIC K1 supports up to three 4K@60Hz displays simultaneously. After connecting your monitors, Windows should automatically detect them. You can configure display settings:
- Right-click on the desktop and select Display settings.
- Here you can arrange your displays, change resolution, and set display modes (e.g., Extend, Duplicate).
6. Maintenance
6.1. Cleaning
- Ensure the device is powered off and unplugged before cleaning.
- Use a soft, dry cloth to wipe the exterior of the Mini PC.
- For dust accumulation in vents, use compressed air. Do not insert objects into the vents.
6.2. Storage and RAM Upgrades
The ACEMAGIC K1 Mini PC allows for storage and RAM upgrades. It features dual NVMe M.2 2280 SSD slots for storage expansion up to 4TB and supports DDR4 SO-DIMM memory expandable up to 64GB.
Caution:
- Opening the device for upgrades may require removing rubber feet to access screws. Proceed with caution to avoid damaging the device or voiding the warranty.
- If you are unsure about performing an upgrade, it is recommended to seek professional assistance.
7. Troubleshooting
If you encounter issues with your ACEMAGIC K1 Mini PC, refer to the following common solutions:
| Issue | Possible Solution |
|---|---|
| No display output |
|
| PC does not power on |
|
| Slow performance |
|
| No internet connection |
|
If the issue persists, please contact ACEMAGIC customer support for further assistance.
8. Specifications
| Component | Detail |
|---|---|
| Processor | AMD Ryzen 7 5700U (8 Cores, 16 Threads, up to 4.3GHz) |
| Graphics | AMD Radeon RX Vega 8 (Integrated) |
| RAM | 16GB DDR4 SO-DIMM (Expandable up to 64GB) |
| Storage | 512GB PCIe 3.0x4 SSD (Dual NVMe M.2 2280 slots, supports up to 4TB) |
| Operating System | Windows 11 Pro |
| Wireless Connectivity | WiFi 6, Bluetooth 5.2 |
| Video Output | 1x HDMI 2.0 (4K@60Hz), 1x DisplayPort 1.4 (4K@60Hz), 1x USB 3.2 Gen2 Type-C (4K@60Hz) |
| USB Ports | 2x USB 3.2 Gen2 (Front), 1x USB 3.2 Gen2 Type-C (Front), 4x USB 3.2 Gen1 (Rear) |
| Audio | 1x 3.5mm Audio Jack (Front) |
| Network | 1x Gigabit Ethernet (RJ45) |
| Dimensions | Approximately 6.3 x 6.3 x 4.6 inches (Package Dimensions) |
| Weight | Approximately 2.56 pounds |

Image: Detailed specifications of the AMD Ryzen 7 5700U processor, including clock speed, core count, and TDP.

Image: Specifications of the integrated AMD Radeon RX Vega 8 graphics, including GPU cores and frequency.

Image: Internal view of the ACEMAGIC K1 Mini PC, highlighting the 16GB DDR4 RAM and 512GB M.2 SSD, and showing the dual M.2 2280 SSD slots.
9. Warranty and Support
The ACEMAGIC K1 Mini PC comes with a 3-year warranty. For technical assistance or warranty claims, please contact ACEMAGIC customer support. 24/7 tech support is available to assist you with any product-related inquiries or issues.
For the most up-to-date support information, please visit the official ACEMAGIC website or refer to the contact details provided with your purchase documentation.


