
1. Introduction
The FLSUN S1 Pro is an advanced FDM Delta 3D printer designed for high-speed and high-precision additive manufacturing. It features an ultra-fast printing speed of up to 1200mm/s and an acceleration of 40,000mm/s², significantly reducing print times. Equipped with Klipper firmware, a 7-inch smart touch screen, and a 350℃ all-metal hotend, the S1 Pro supports a wide range of filaments, including high-performance engineering materials. Its large build volume of Φ320*320*430 mm³ accommodates substantial projects. This manual provides essential information for setting up, operating, maintaining, and troubleshooting your FLSUN S1 Pro 3D Printer.
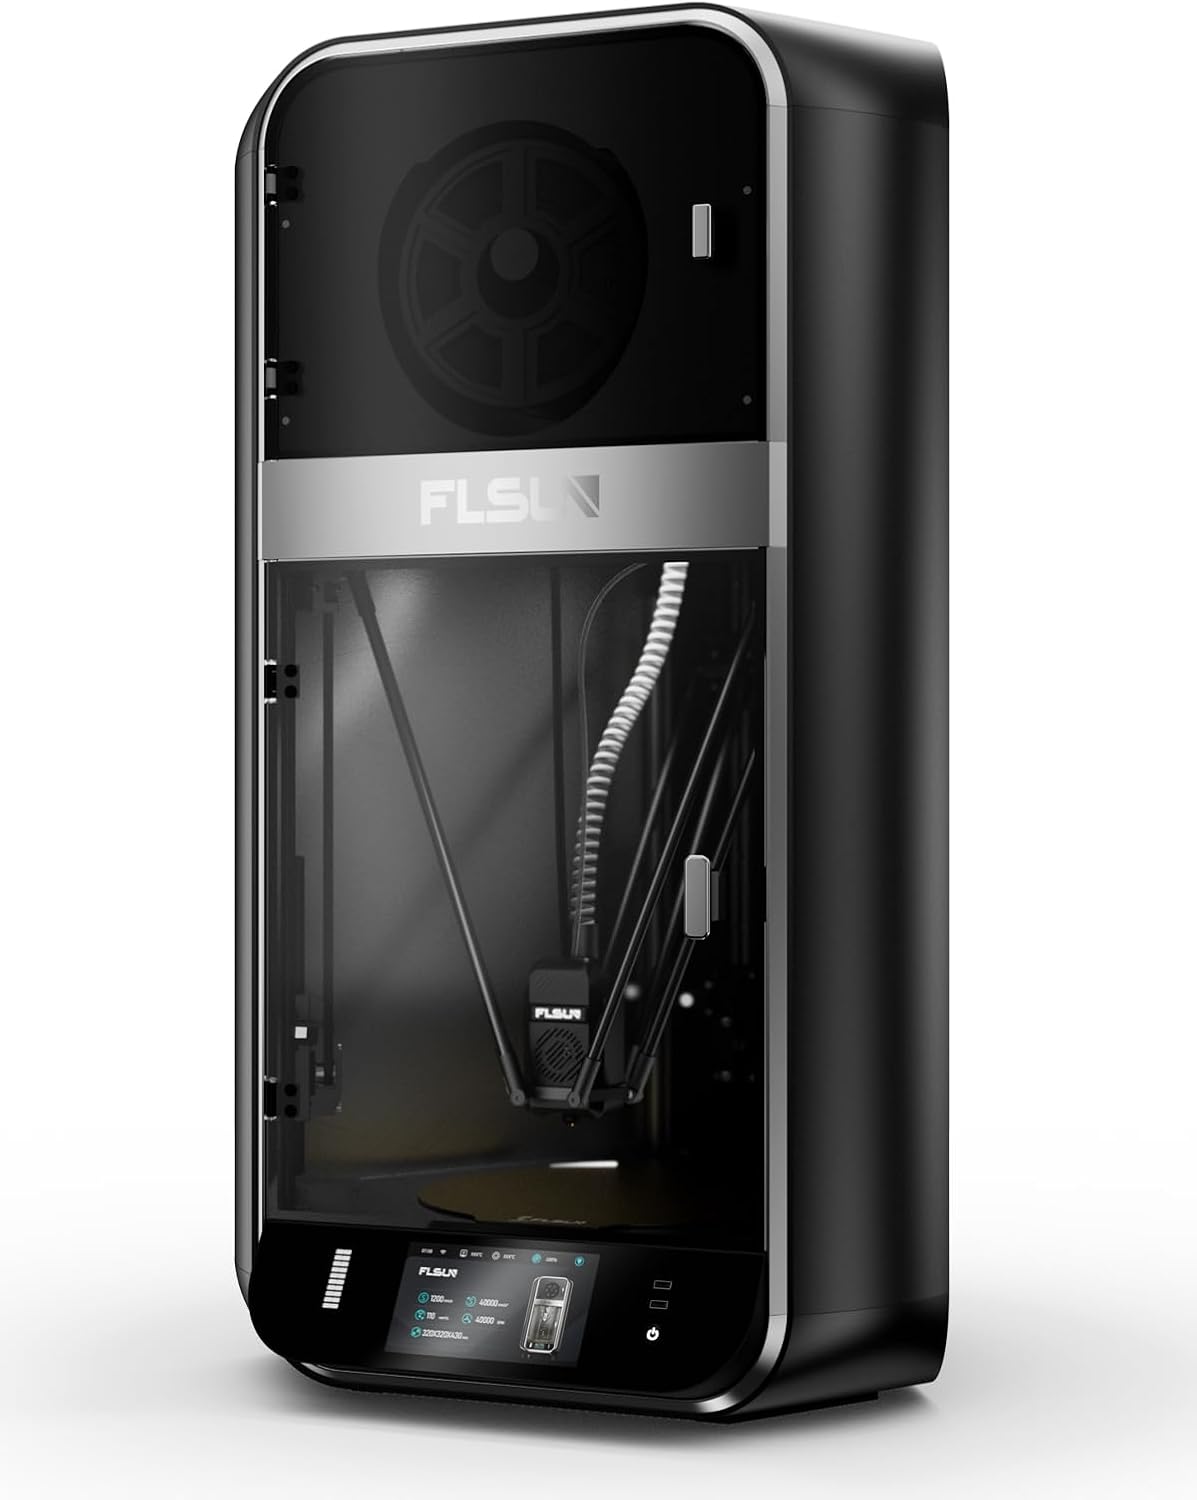
Image 1.1: Front view of the FLSUN S1 Pro 3D Printer, showcasing its sleek design and enclosed build chamber.
2. What's in the Box
Upon unpacking, please verify that all components are present:
- FLSUN S1 Pro 3D Printer (main unit)
- Filament Dryer Box
- Power Cable
- USB Cable
- Tool Kit (various wrenches, screwdrivers, etc.)
- Sample Filament
- User Manual (this document)
- Quick Start Guide

Image 2.1: The FLSUN S1 Pro 3D Printer and its included accessories, demonstrating its 95% pre-assembled state.
3. Setup Instructions
The FLSUN S1 Pro is designed for quick setup, being 95% pre-assembled. The initial setup typically takes less than 10 minutes.
- Unpacking: Carefully remove the printer and all accessories from the packaging.
- Placement: Place the printer on a stable, level surface in a well-ventilated area.
- Assembly: Install the door and glass panels as per the instructions in the detailed Installation Manual (PDF).
- Power Connection: Connect the power cable to the printer and a suitable power outlet.
- Initial Power On: Turn on the printer using the main power switch. The device will perform self-checks to ensure stability.
- Automatic Leveling: The printer features automatic leveling. Follow the on-screen prompts on the 7-inch touch screen to initiate and complete the leveling process. This ensures optimal print bed calibration.
- Filament Loading: Load your desired filament into the filament dryer box and then guide it into the extruder as instructed on the display.
- Network Connection: Connect the printer to your local Wi-Fi network via the touch screen interface for remote monitoring and control.
For detailed visual instructions, please refer to the official Installation Manual (PDF).
4. Operating Instructions
4.1 User Interface and Control
The FLSUN S1 Pro utilizes a 7-inch Klipper firmware smart touch screen for intuitive control. The visual operation interface allows for smart adjustment and monitoring directly from the printer. Additionally, with advanced Microtac radar control and Wi-Fi connectivity, you can monitor and control your printer in real-time from mobile phones and PCs.

Image 4.1: Remote control and monitoring capabilities via the FLSUN World app on a mobile device.
- Remote Control: Manage your printers remotely from anywhere.
- Tap it, Print it, Like it: Start printing tasks with a quick tap on the FLSUN World app, utilizing cloud storage for G-code files.
- Monitor in Pocket: Real-time checking of your printing progress.
- Smart Reminder: Receive notifications when print errors occur.
4.2 Printing Process
- Prepare Model: Use compatible slicing software (FLSUN Slicer V2.0 or other slicers like PrusaSlicer, Cura) to prepare your 3D model. Ensure settings are optimized for the S1 Pro's capabilities, including its high speed and acceleration.
- Transfer File: Transfer the sliced G-code file to the printer via USB or Wi-Fi (FLSUN World app).
- Start Print: Select the file on the touch screen or through the app and initiate the print.
- Monitoring: Utilize the built-in camera for real-time monitoring and time-lapse recording. The printer's low noise level (55dB) ensures a quiet operating environment.
- Power-Off Resume: In case of power interruption, the printer supports power-off continuous printing, resuming from where it left off. Vibration compensation further ensures print quality.

Image 4.2: Illustration of the FLSUN S1 Pro's epic speed capabilities: 1200mm/s max printing speed, 40000mm/s² max acceleration, and 110mm³/s peak flow rate.

Image 4.3: Key features for smooth and consistent printing, including AI-powered functions, auto-leveling, spaghetti detection, and perfect first layer adhesion.

Image 4.4: Advanced features like the Air Filter, Filament Dryer, Built-in camera, Intelligent Zoned Heating, and 16GB EMMC storage.
5. Maintenance
Regular maintenance ensures the longevity and optimal performance of your FLSUN S1 Pro 3D Printer.
- Cleaning: Regularly clean the print bed, nozzle, and internal components to prevent debris buildup. Use a soft cloth and appropriate cleaning solutions.
- Air Filter: The printer is equipped with a combined HEPA + activated carbon air filter. Check and replace the filter periodically as needed to maintain air quality and prevent odors.
- Filament Dryer Box: Ensure the filament dryer box is functioning correctly to keep your filament dry, which is crucial for print quality.
- Nozzle Inspection: Periodically inspect the 0.4mm hardened steel nozzle for wear or clogs. Replace if necessary. The all-metal hot end can reach up to 350°C, supporting various high-temperature filaments.
- Lubrication: Refer to the detailed manual for any lubrication requirements for moving parts.

Image 5.1: Diagram illustrating the 350°C hotend, 50°C chamber, and 120°C hot bed for optimal material handling.
6. Troubleshooting
This section addresses common issues you might encounter during operation.
| Problem | Possible Cause | Solution |
|---|---|---|
| Print Not Sticking to Bed | Improper bed leveling, dirty print surface, incorrect bed temperature. | Re-run auto-leveling. Clean the print surface with isopropyl alcohol. Adjust hot bed temperature according to filament type (Max 120°C). |
| Filament Clogging | Dust in filament, incorrect hotend temperature, worn nozzle, heat creep. | Ensure filament is dry (use filament dryer). Verify hotend temperature (Max 350°C). Clean or replace nozzle. Check cooling fan operation. |
| "Spaghetti" Prints | Poor bed adhesion, model detaching, extrusion issues. | The S1 Pro features Spaghetti Detection. Ensure proper bed adhesion. Monitor print progress via the built-in camera. |
| Printer Not Responding | Software glitch, loose connection, power issue. | Restart the printer. Check all cable connections. Ensure stable power supply. |
| Poor Print Quality | Incorrect slicing settings, worn nozzle, vibration, wet filament. | Optimize slicing parameters. Replace nozzle if worn. The printer has Vibration Compensation; ensure it's active. Use filament dryer. |

Image 6.1: Features like the 55dB quiet fan and Power Off Resume Print (UPS) contribute to a reliable printing experience.
7. Technical Specifications
| Category | Specification | Details |
|---|---|---|
| General | Max Printing Speed | 1200mm/s |
| Max Acceleration | 40000mm/s² | |
| Peak Flow Rate | 110mm³/s | |
| Build Volume | Φ320*320*430 mm³ (Maximum height of the cylinder: 383mm) | |
| Chamber | Closed | |
| Noise Level | 55dB | |
| Tool Head | Nozzle | 0.4mm Hardened Steel Nozzle (supports various nozzle sizes) |
| Max Hot End Temp | 350℃ | |
| Filament Diameter | 1.75mm | |
| Filament | Supported Filament | Ideal: PLA, PETG, TPU. Satisfactory: ABS, ASA, PA, PC, PET. Capable: Carbon/Glass Fiber Reinforced PLA, PPS-CF, PPA-CF/GF. |
| Active Heating Dry Box | Yes | |
| Filament Clog Detection | Yes | |
| Heatbed | Build Plate | Textured PEI Plate |
| Max Build Plate Temp | 120℃ | |
| Smart Zone Heating | Inner Circle Ø220mm, Outer Ring 220-320mm | |
| Electronics | Display | 7" Color Touch Screen |
| Storage | 16GB EMMC, 32GB USB Flash | |
| Power Supply | 110-240V, 50/60Hz | |
| On-mode Power Consumption | 400 watts | |
| Software | Firmware Upgrade | OTA (Over-The-Air) |
| Slicing Software | FLSUN Slicer V2.0, Other Slicers | |
| Supported OS | MacOS, Windows | |
| Features | Monitoring Camera | Realtime, Timelapse |
| Filament Detection | Yes | |
| Vibration Compensation | Yes | |
| Debris Detection | Yes | |
| Spaghetti Detection | Yes | |
| Screen Auto Sleep | Yes | |
| Printer Auto Power Off | Yes | |
| Auto-Leveling | Yes | |
| Power Loss Recover | Yes (Z lift, Backup Battery) | |
| Air Filter | HEPA + Activated Carbon | |
| Physical Dimensions | Product Dimensions (D x W x H) | 23.62"D x 34.25"W x 9.45"H (600mm x 870mm x 240mm approx.) |
| Physical Dimension (Printer) | 550*596*1030mm | |
| Item Weight | 113 pounds (approx. 51.2 kg) | |
| Color | Black |

Image 7.1: Comprehensive technical specifications for the FLSUN S1 Pro 3D Printer.
8. Warranty and Support
FLSUN is committed to providing reliable products and excellent customer service.
- Returns: The product is eligible for 30-day easy returns. Please refer to the retailer's return policy for specific details.
- Customer Support: For technical assistance, troubleshooting, or warranty inquiries, please contact FLSUN Customer Support. You can often find support resources and contact information on the official FLSUN website or through the retailer where the product was purchased.
- Protection Plans: Extended protection plans, such as a 4-Year Protection Plan, may be available for purchase separately to provide additional coverage beyond the standard warranty.
- Online Resources: Visit the FLSUN Store on Amazon for additional product information, FAQs, and support.


