1. Introduction
Thank you for purchasing the WISHOLY Mini Projector. This device is designed to provide a versatile and immersive viewing experience with its built-in Google TV, Wi-Fi, and Bluetooth capabilities. This manual provides essential information for safe and effective use of your projector.

Image 1.1: WISHOLY Mini Projector in operation, displaying various streaming service logos.
2. Safety Information
- Do not look directly into the projector lens when the lamp is on.
- Ensure proper ventilation around the projector to prevent overheating.
- Avoid placing objects on the projector that may obstruct airflow.
- Keep the projector away from water or other liquids.
- Do not attempt to open or repair the projector yourself. Refer to qualified service personnel.
- Use only the provided power adapter.
3. Package Contents
Verify that all items are present in the package:
- WISHOLY Mini Projector
- Remote Control
- Power Adapter
- Instruction Manual
4. Product Overview
The WISHOLY Mini Projector features a compact design and a 180° rotatable stand for flexible projection. It includes various ports for connectivity and integrated smart features.
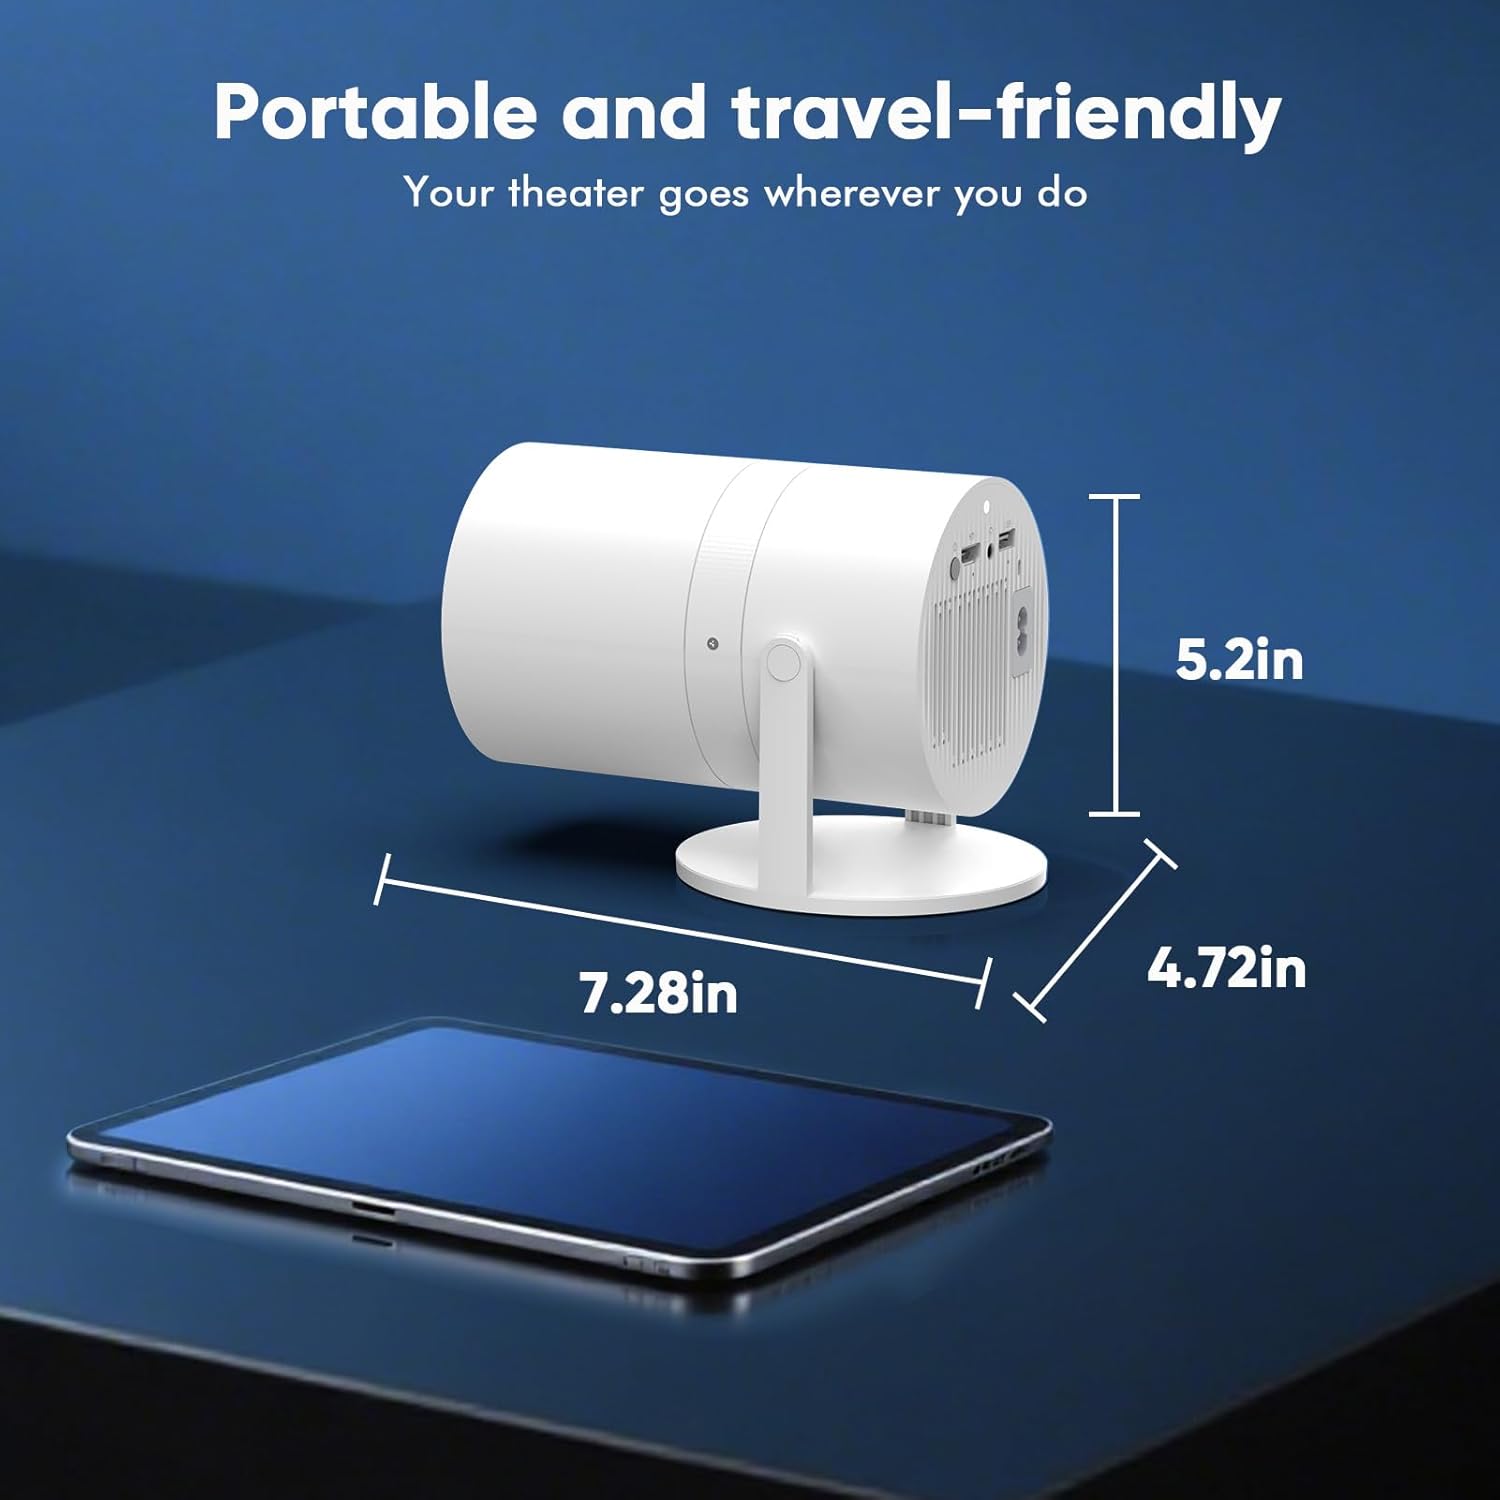
Image 4.1: Compact dimensions of the WISHOLY Mini Projector.
4.1 Ports and Controls
- HDMI Input: For connecting external devices like laptops or gaming consoles.
- USB Port: For connecting USB storage devices.
- 3.5mm Audio Jack: For connecting external audio devices or headphones.
- Power Input: For connecting the power adapter.
- Power Button: To turn the projector on/off.
- Focus/Keystone Controls: Accessible via the remote control for image adjustment.
5. Setup
5.1 Power Connection
- Connect the power adapter to the projector's power input port.
- Plug the power adapter into a wall outlet.
- Press the Power Button on the projector or remote control to turn on the device.
5.2 Placement and Projection
The projector features a 180° rotatable stand, allowing flexible placement and projection onto various surfaces.

Image 5.1: Projector demonstrating 180° rotation for various projection angles.
- Place the projector on a stable surface.
- Adjust the 180° rotatable stand to direct the projection onto your desired wall, ceiling, or screen.
5.3 Initial Configuration (Electric Focus & Auto Keystone)
The projector is equipped with electric focus and auto vertical keystone correction for a clear and aligned image.

Image 5.2: Automatic focus and keystone correction for optimal image clarity.
- Upon startup, the projector will automatically adjust the image focus and vertical keystone.
- If manual adjustment is needed, use the remote control's focus buttons (F+/F-) to fine-tune the image clarity.
5.4 Network Connection (Wi-Fi)
- Navigate to the 'Settings' menu on the projector's home screen.
- Select 'Network' and then 'Wi-Fi'.
- Choose your Wi-Fi network from the list and enter the password.
- Once connected, you can access online streaming services and apps.
6. Operation
6.1 Google TV & Streaming Apps
The projector comes with built-in Google TV, providing access to a wide range of streaming applications.

Image 6.1: Google TV interface with pre-installed streaming applications.
- From the home screen, select your desired streaming app (e.g., Netflix, YouTube, Prime Video).
- Log in with your account credentials to start streaming.
- Additional apps can be downloaded from the Google Play Store.
6.2 Google Voice Assistant
Control your projector and search for content using voice commands.

Image 6.2: Using the Google Voice Assistant for hands-free control.
- Press the Google Assistant button on your remote control.
- Speak your command (e.g., "Search for movies," "Open Netflix," "Adjust settings").
6.3 Bluetooth Audio Connection
Connect external Bluetooth speakers or headphones for enhanced audio. Note: The Bluetooth function is for audio devices only and does not support smartphone screen mirroring.
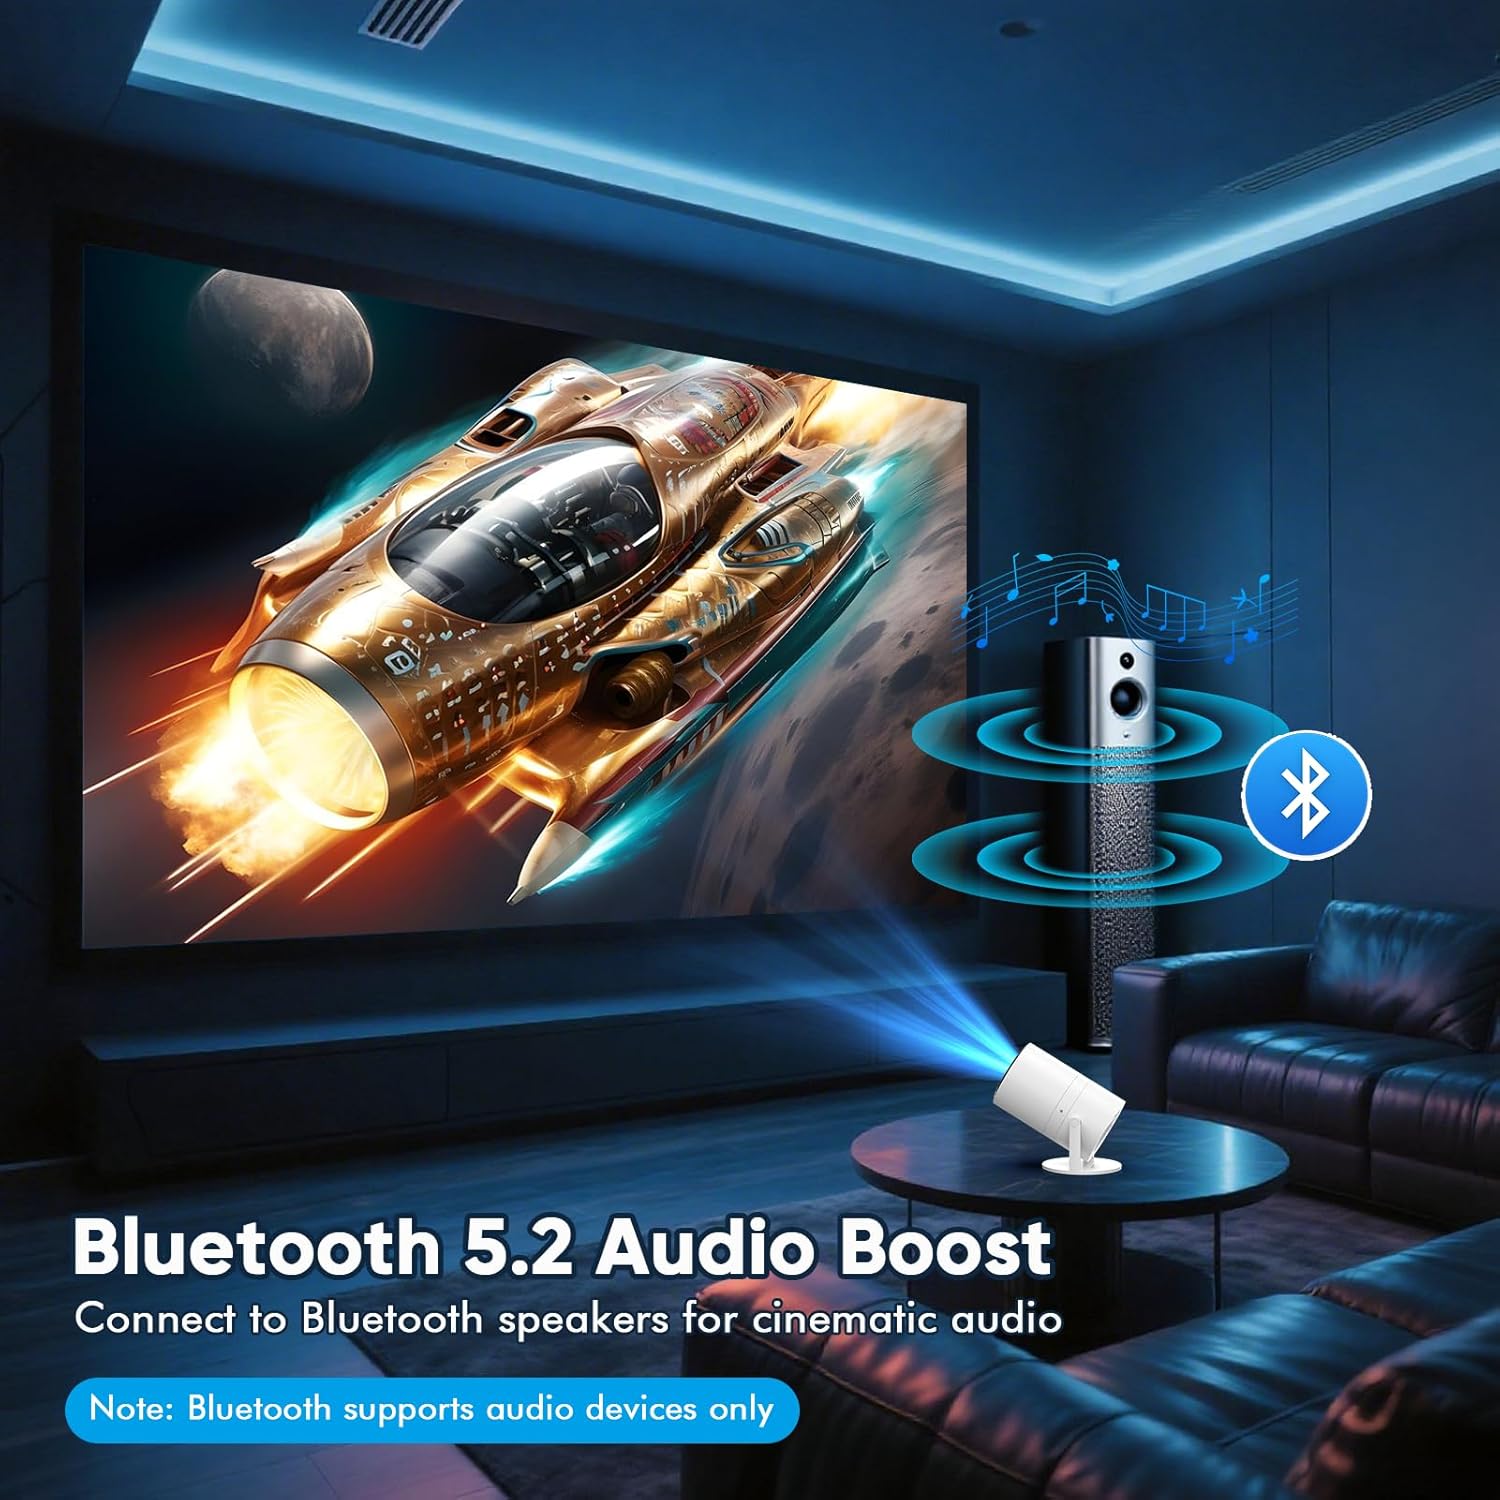
Image 6.3: Connecting to external Bluetooth speakers.
- Ensure your Bluetooth audio device is in pairing mode.
- On the projector, go to 'Settings' > 'Bluetooth'.
- Select your device from the list to pair.
6.4 Screen Mirroring (Phone Projector)
Mirror your smartphone screen to the projector via Wi-Fi. Note: A compatible casting app must be installed on the projector first.
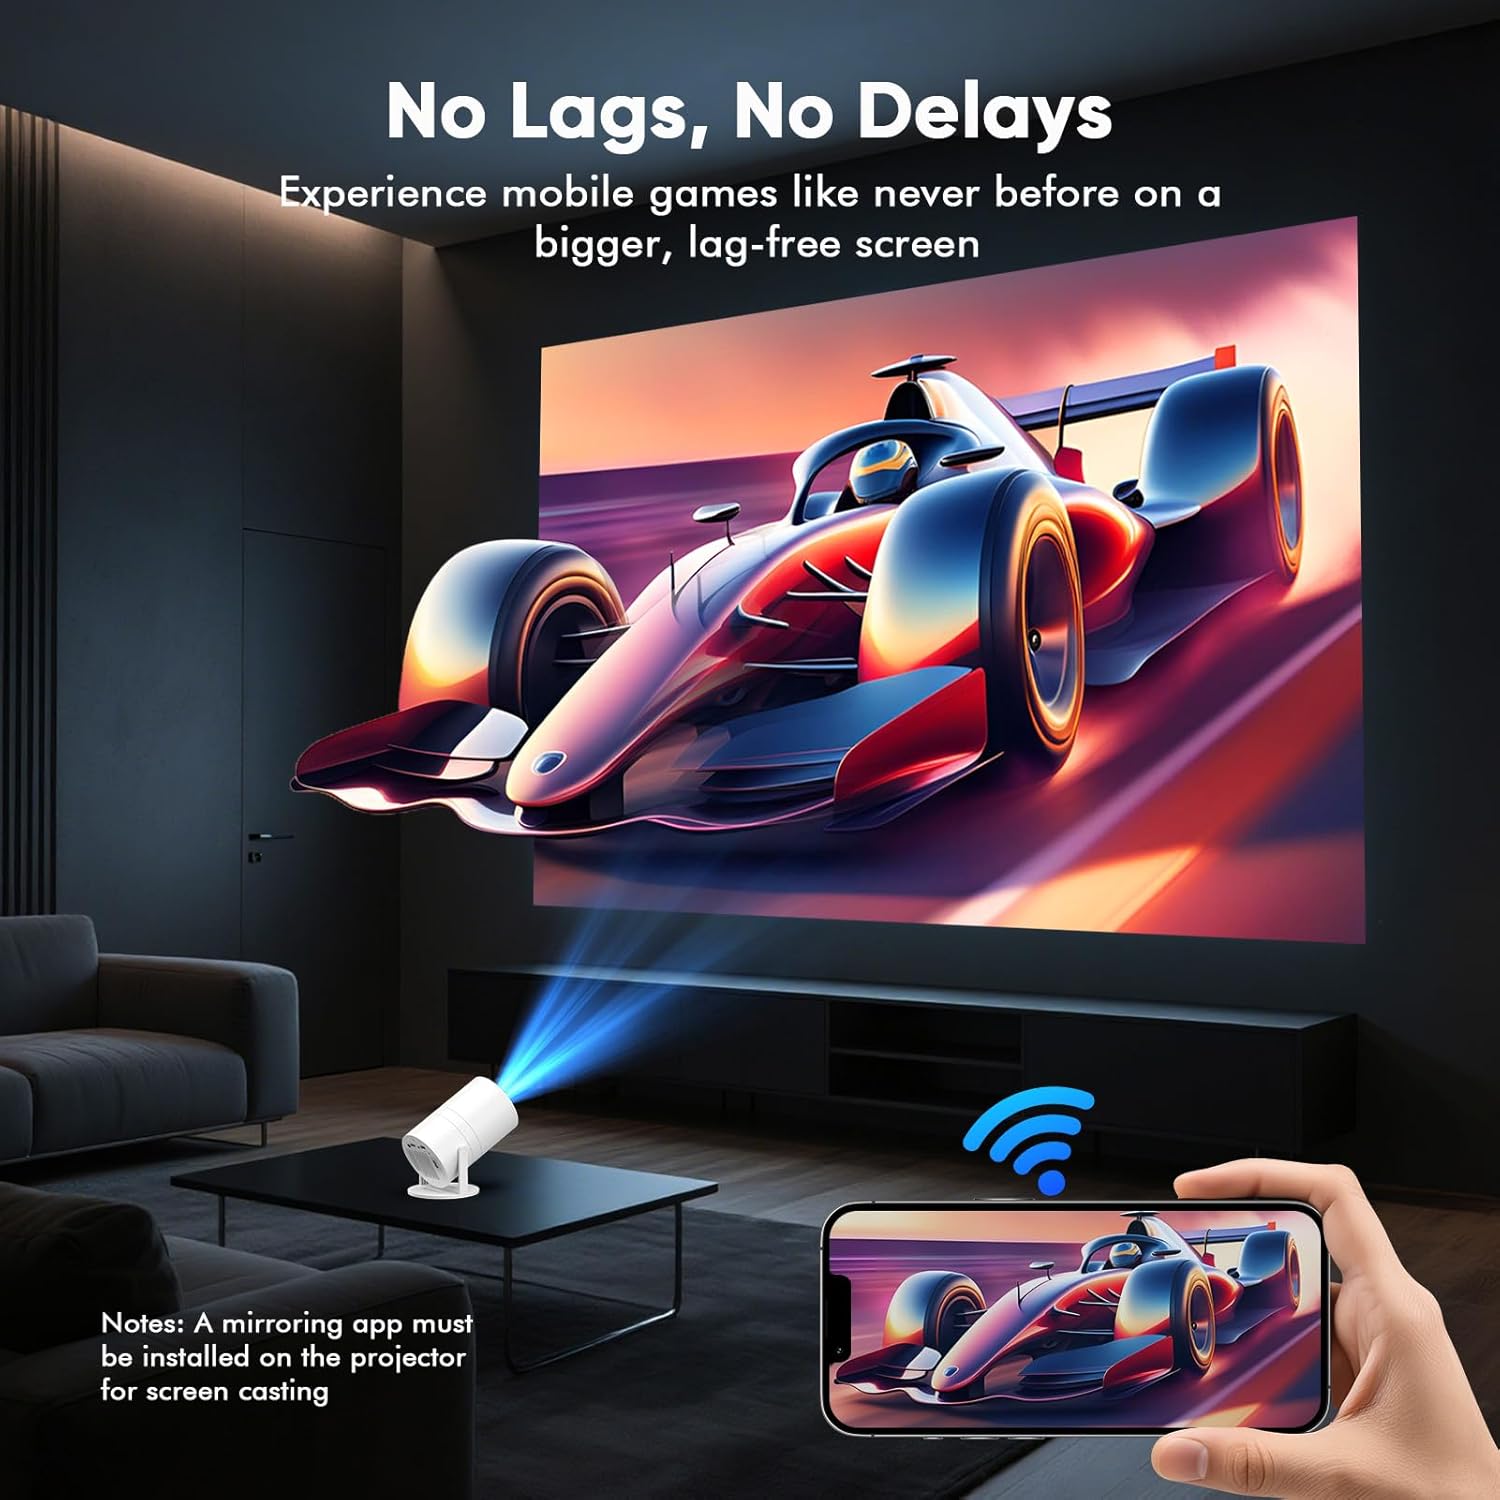
Image 6.4: Wireless screen mirroring from a smartphone.
- Ensure both your smartphone and the projector are connected to the same Wi-Fi network.
- Install a compatible screen mirroring/casting app on the projector (if not pre-installed).
- Open the casting app on the projector and follow the on-screen instructions to connect your smartphone.
6.5 HDMI and USB Input
Connect external devices directly using HDMI or USB ports.
- Connect your device to the projector using an HDMI cable or insert a USB storage device into the USB port.
- On the projector's home screen, select the corresponding input source (HDMI or Udisk/USB).
7. Maintenance
- Cleaning the Lens: Use a soft, lint-free cloth specifically designed for optical lenses. Do not use abrasive cleaners.
- Cleaning the Exterior: Wipe the projector's exterior with a soft, dry cloth. Avoid harsh chemicals.
- Ventilation: Ensure the projector's vents are clear of dust and obstructions to maintain optimal performance and prevent overheating.
- Storage: When not in use, store the projector in a cool, dry place away from direct sunlight and extreme temperatures.
8. Troubleshooting
8.1 No Signal (HDMI/USB)
- Return to the home page and re-select the HDMI/USB signal source.
- Check the HDMI cable for damage and ensure it is securely connected to both the projector and the source device.
- Ensure the source device (e.g., laptop) is powered on and configured to output to an external display.
8.2 Blurry Image
- Use the remote control's focus buttons (F+/F-) to manually adjust the image clarity.
- Ensure the projector is placed on a stable surface and the projection surface is flat.
8.3 Overheating
If the projector overheats, it may shut down automatically.
- Ensure the inlet and outlet vents are not obstructed.
- Allow the machine to rest for 20 minutes after 2 hours of continuous use to prevent overheating.
9. Specifications
| Feature | Detail |
|---|---|
| Brand | WISHOLY |
| Model | B0FJ89DT3K |
| Display Resolution | 1280 x 720 |
| Connectivity Technology | 3.5mm Jack, Bluetooth, HDMI, USB, Wi-Fi |
| Special Features | Built-In Cooling System, Built-In Media Player, Built-In Speaker, Built-In Wi-Fi, Portable |
| Item Weight | 2.44 pounds |
| Package Dimensions | 8.78 x 7.09 x 5.94 inches |
| Recommended Uses | Business, Education, Gaming, Home Cinema |
10. Warranty and Support
For warranty information or technical support, please contact WISHOLY customer service. Refer to the product packaging or the official WISHOLY website for the most up-to-date contact details.
11. Official Product Video
Watch this official video from the seller for a demonstration of the WISHOLY Mini Projector's features, including Google TV integration.
Video 11.1: Overview of the WISHOLY G3 Google TV Projector by Yangsen Shop.


