
Introduction
This manual provides detailed instructions for the Cadmos G60 Wooden Digital Alarm Clock. It covers setup, operation, maintenance, and troubleshooting to ensure optimal performance of your device. This alarm clock features a sleek wooden design, large 1.8-inch LED digits, adjustable brightness, a loud alarm with adjustable volume, a snooze function, and a convenient USB charging port.
Setup
1. Power Connection
Connect the provided USB power adapter to the clock and plug it into a standard electrical outlet. The display will light up once connected. Note: The display only lights up when the clock is plugged into an outlet.
2. Battery Backup Installation
For battery backup, insert 2 AAA batteries (not included) into the battery compartment located on the back of the clock. The battery backup preserves time settings during power outages but does not power the main display.

Image: Battery backup compartment and power accessories.
3. Initial Time Setting
Upon first power-up, the clock may display a default time. To set the correct time:
- Press and hold the Time Setting button (usually labeled with a clock icon) for 3 seconds until the hour digits begin to flash.
- Use the +/- buttons to adjust the hour.
- Press the Time Setting button again to confirm the hour and move to minute adjustment.
- Use the +/- buttons to adjust the minutes.
- Press the Time Setting button one more time to save the time and exit setting mode.
Operating Instructions
1. Setting the Alarm
The clock supports dual alarms. To set an alarm:
- Press and hold the Tap on/off alarm button (usually labeled with an alarm icon) for 3 seconds until the alarm hour digits flash.
- Use the +/- buttons to adjust the alarm hour.
- Press the Tap on/off alarm button again to confirm the hour and move to minute adjustment.
- Use the +/- buttons to adjust the alarm minutes.
- Press the Tap on/off alarm button one more time to save the alarm and exit setting mode.
- To activate/deactivate an alarm, short press the Tap on/off alarm button. An alarm icon will appear/disappear on the display.
2. Snooze Function
When the alarm sounds, press the large SNOOZE/DIMMER button on top of the clock to activate the 9-minute snooze function. The alarm will sound again after 9 minutes.
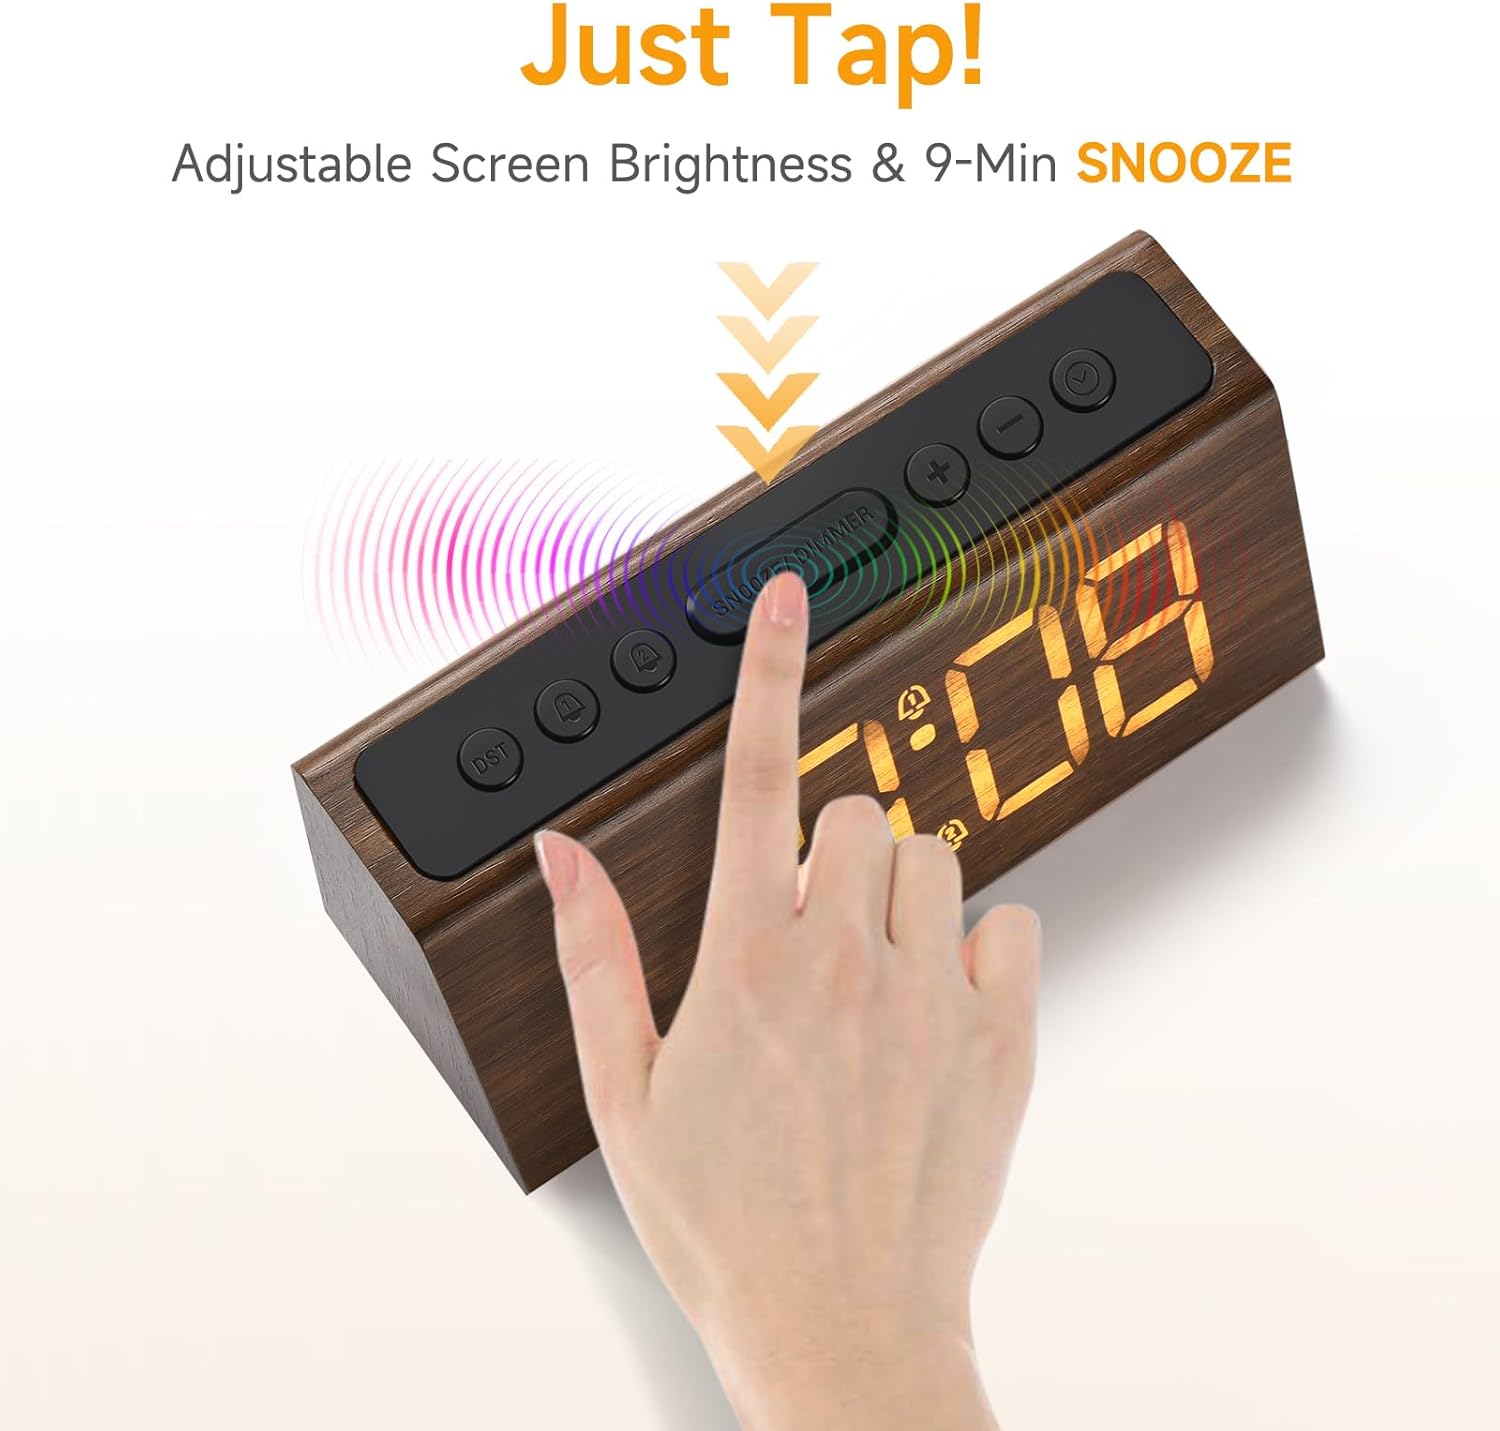
Image: Activating the snooze function.
3. Display Brightness Adjustment
The clock features 4 levels of adjustable brightness, including an OFF setting. To adjust the brightness, short press the SNOOZE/DIMMER button. Each press cycles through the brightness levels (L3, L2, L1, OFF).
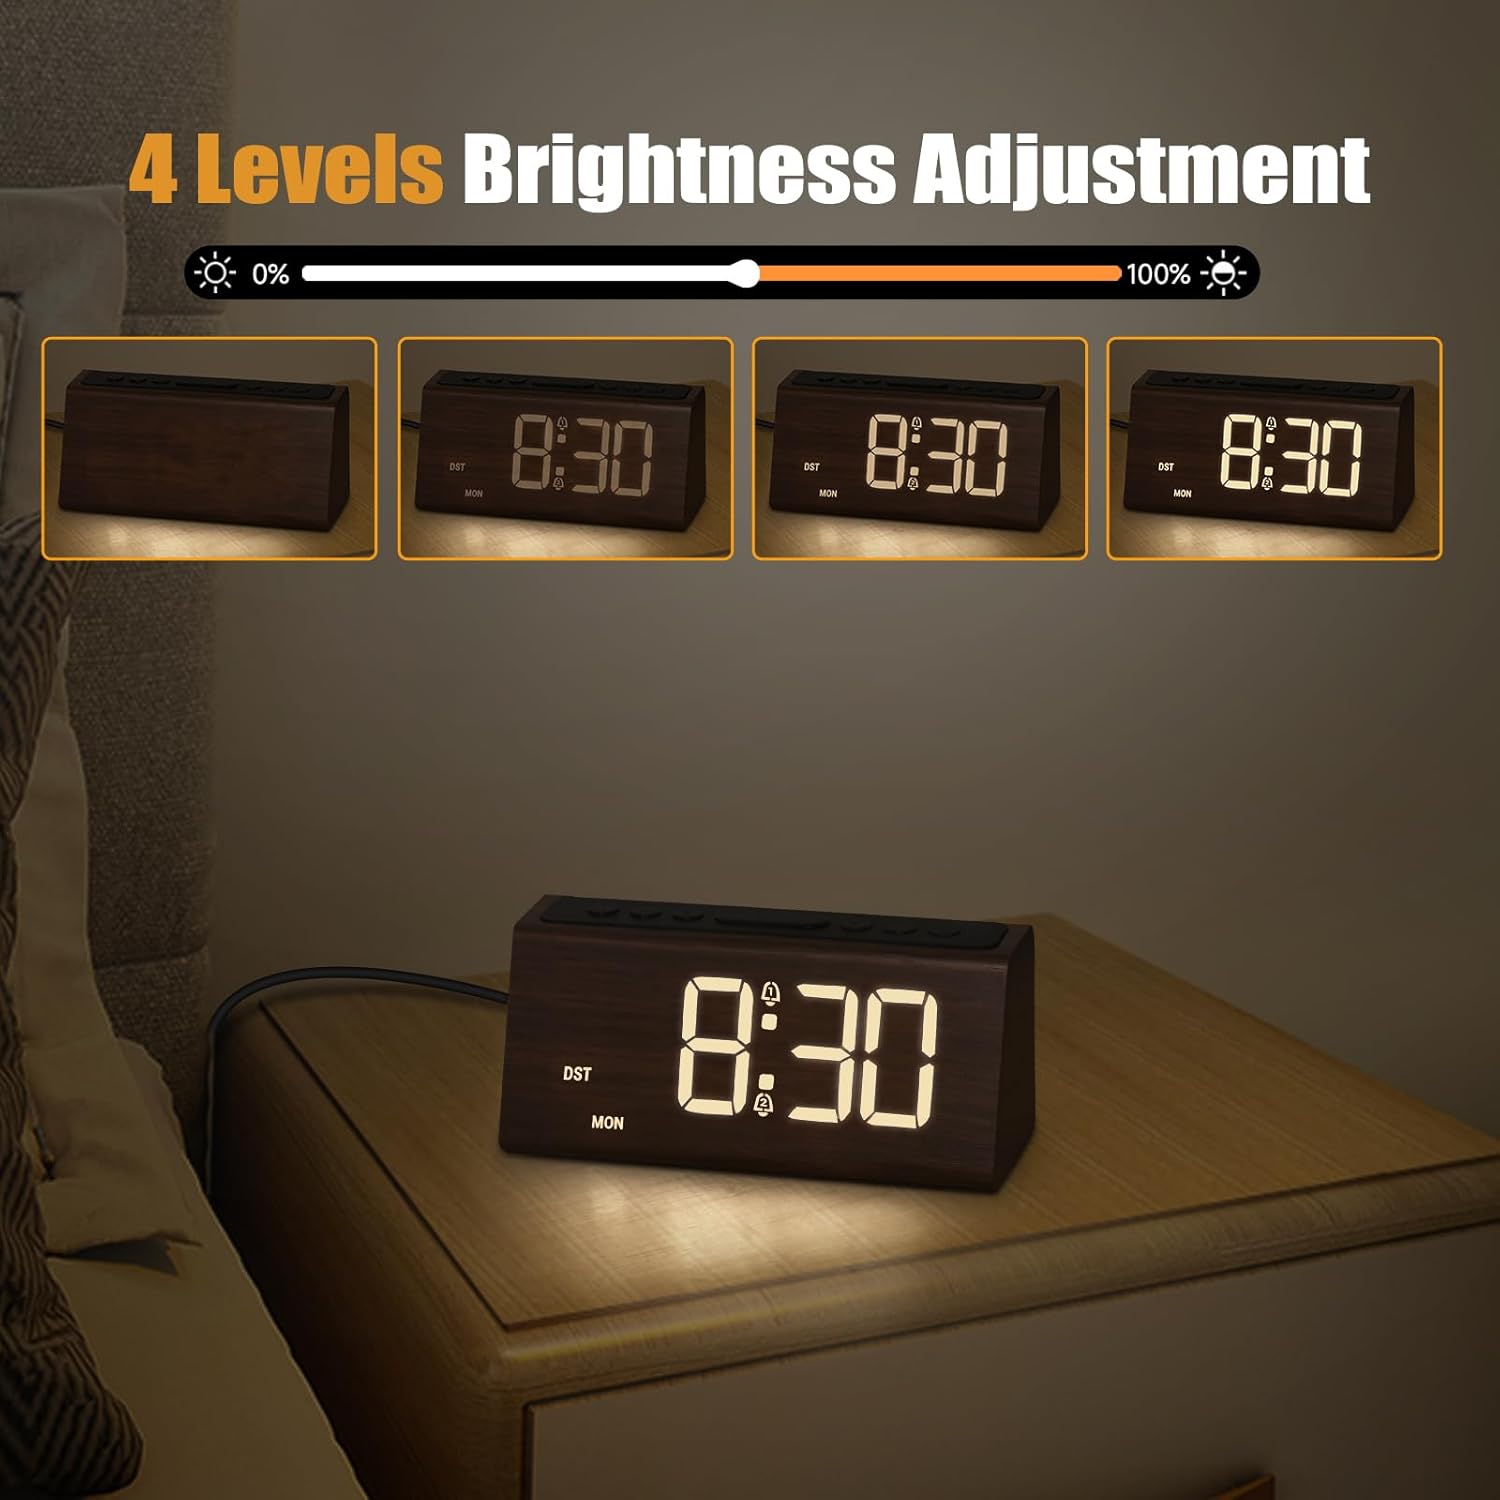
Image: Four levels of display brightness adjustment.
4. Alarm Volume Adjustment
The alarm volume can be adjusted with 5 levels, up to 95dB. To adjust the volume, press the Volume button (usually labeled with a speaker icon) repeatedly to cycle through the available volume levels.
5. 12/24-Hour Format and DST
To switch between 12-hour and 24-hour time formats, or to activate/deactivate Daylight Saving Time (DST), refer to the specific instructions in your product packaging. These settings are typically adjusted by a dedicated button or a combination of buttons.
6. USB Charging Port
The clock includes a USB charging port (DC 5V/1A output) on the back. You can use this port to conveniently charge small electronic devices like smartphones or tablets.

Image: USB charging port in use.
Maintenance
Cleaning
To clean the clock, gently wipe the surface with a soft, dry cloth. Avoid using abrasive cleaners, solvents, or excessive moisture, as these can damage the wooden finish and electronic components.
Battery Replacement
If the clock loses time during a power outage, the AAA backup batteries may need to be replaced. Open the battery compartment on the back, remove the old batteries, and insert new ones, ensuring correct polarity.
Troubleshooting
- Display is off: Ensure the clock is properly plugged into a working electrical outlet. The display requires continuous power from the adapter.
- Alarm does not sound: Check if the alarm is activated (alarm icon visible on display). Ensure the alarm volume is not set to the lowest level.
- Time is not saved during power outage: Replace the 2 AAA backup batteries in the battery compartment.
- Display flickers when dimmed: Some users have reported flickering at the lowest brightness setting, especially when the color is changing (if applicable to your model). If this is disruptive, try using a slightly higher brightness level.
- USB charging port not working: Ensure the clock is powered on and connected to an outlet. Check the charging cable and the device being charged.
Specifications
| Brand | Cadmos |
| Model Number | G60 |
| Product Dimensions | 6.3"W x 2.7"H |
| Display Type | LED |
| Material | Wood |
| Power Source | Corded Electric |
| Battery Backup | 2 AAA batteries required (not included) |
| Special Features | Adjustable Brightness, Adjustable Volume, Charging Port, LED Display, Loud Alarm |

Image: Product dimensions.
Warranty
This Cadmos G60 Wooden Digital Alarm Clock comes with a Limited Warranty. For specific details regarding the warranty period, coverage, and terms, please refer to the warranty information included with your product packaging or visit the official Cadmos website.
Support
If you encounter any issues or have questions not covered in this manual, please contact Cadmos customer support. You can typically find contact information on the product packaging, the manufacturer's website, or through the retailer where you purchased the product.