1. Introduction
This manual provides detailed instructions for the proper setup, operation, and maintenance of your Hayve DM13 10.1 Inch LCD Digital Microscope. Designed for precision tasks such as electronics repair, soldering, coin inspection, and general observation, this device offers high-resolution imaging and versatile magnification capabilities. Please read this manual thoroughly before using the microscope to ensure optimal performance and longevity.

Image 1.1: The Hayve DM13 Digital Microscope, featuring its 10.1-inch LCD screen, adjustable stand, dual gooseneck LED lights, a wireless remote control, and an included 32GB TF card.
2. Package Contents
Verify that all items listed below are included in your package:
- Hayve DM13 Digital Microscope Unit (with 10.1-inch LCD screen)
- Adjustable Metal Stand
- Wireless Remote Control
- 32GB TF Card
- USB Cable (Type-C)
- Power Adapter
- Calibration Ruler
- User Manual

Image 2.1: The microscope's TF card slot, illustrating the inclusion of a 32GB TF card for storage of captured photos and videos.
3. Product Overview
Familiarize yourself with the various components and controls of your Hayve DM13 Digital Microscope.

Image 3.1: Labeled diagram of the Hayve DM13 Digital Microscope components, including the Up/OK/Down/Menu buttons, Power on/off, Reset Button, Type-C Interface, TF Card slot, Lights wheel, LED Lights, Left/Right-side lights, Base light, Indicator light, and Infrared receiver tube.
- 10.1-inch IPS HD Display: Provides a wide viewing angle and clear, vibrant images.
- Microscope Lens: Captures magnified images of the specimen.
- Focus Wheel: Adjusts the focus for clear observation.
- LED Lights: Eight adjustable LED lights around the lens and two flexible gooseneck auxiliary lights illuminate the observation area.
- Control Buttons: Power, Menu, OK, Up, Down buttons for on-device control.
- TF Card Slot: For inserting the included 32GB TF card to store photos and videos.
- Type-C Interface: For power supply and data connection to a computer.
- Wireless Remote Control: Allows for hands-free operation, including capturing photos, recording videos, and adjusting zoom.
4. Setup
4.1 Assembly
Follow these steps to assemble your digital microscope:
- Carefully unpack all components from the box.
- Attach the microscope unit to the adjustable metal stand, ensuring it is securely fastened.
- Position the two flexible gooseneck LED lights as desired for optimal illumination.
- Insert the provided 32GB TF card into the TF card slot on the side of the microscope unit.
4.2 Powering On
- Connect the microscope to a power source using the provided USB Type-C cable and power adapter.
- Press and hold the Power On/Off button located on the microscope unit until the screen illuminates.
- The microscope has a built-in 3000mAh lithium battery, providing up to 3 hours of working time on a full charge.

Image 4.1: A visual guide demonstrating the basic setup and operation steps: 1. Turn on the microscope. 2. Adjust the distance between the object and the microscope lens. 3. Rotate the focus wheel to focus. 4. Screen is rotatable. 5. Observe the details of an object on the HD IPS screen.
5. Operating Instructions
5.1 Basic Operation
- Place the object you wish to observe on the base plate directly beneath the microscope lens.
- Adjust the height of the microscope unit on the stand to bring the object into approximate view.
- Rotate the focus wheel on the microscope unit until the image on the 10.1-inch screen is clear and sharp.
- The microscope offers 50X to 2000X magnification. Adjust the distance and focus to achieve the desired magnification level.

Image 5.1: Visual representation of the microscope's magnification range, showing an object at 50X, 1000X, and 2000X zoom.
5.2 Lighting Adjustment
The microscope is equipped with 8 adjustable LED lights around the lens and 2 flexible gooseneck auxiliary lights to ensure optimal illumination.
- Use the 'Lights wheel' on the microscope unit to adjust the brightness of the main LED lights.
- Manually position the two gooseneck lights to eliminate shadows and glare on your specimen.

Image 5.2: The microscope's lighting system, featuring 8 adjustable LED lights and 2 flexible gooseneck lights, with controls for brightness adjustment.
5.3 Capturing Photos and Videos
Use the wireless remote control for convenient, shake-free capture of images and videos.
- Press the Photo/OK button on the remote to capture a still image.
- Press the Video button to start recording. Press it again to stop recording.
- Use the Zoom In/Out buttons on the remote to adjust magnification during observation or recording.
- The Playback button allows you to review captured media directly on the screen.
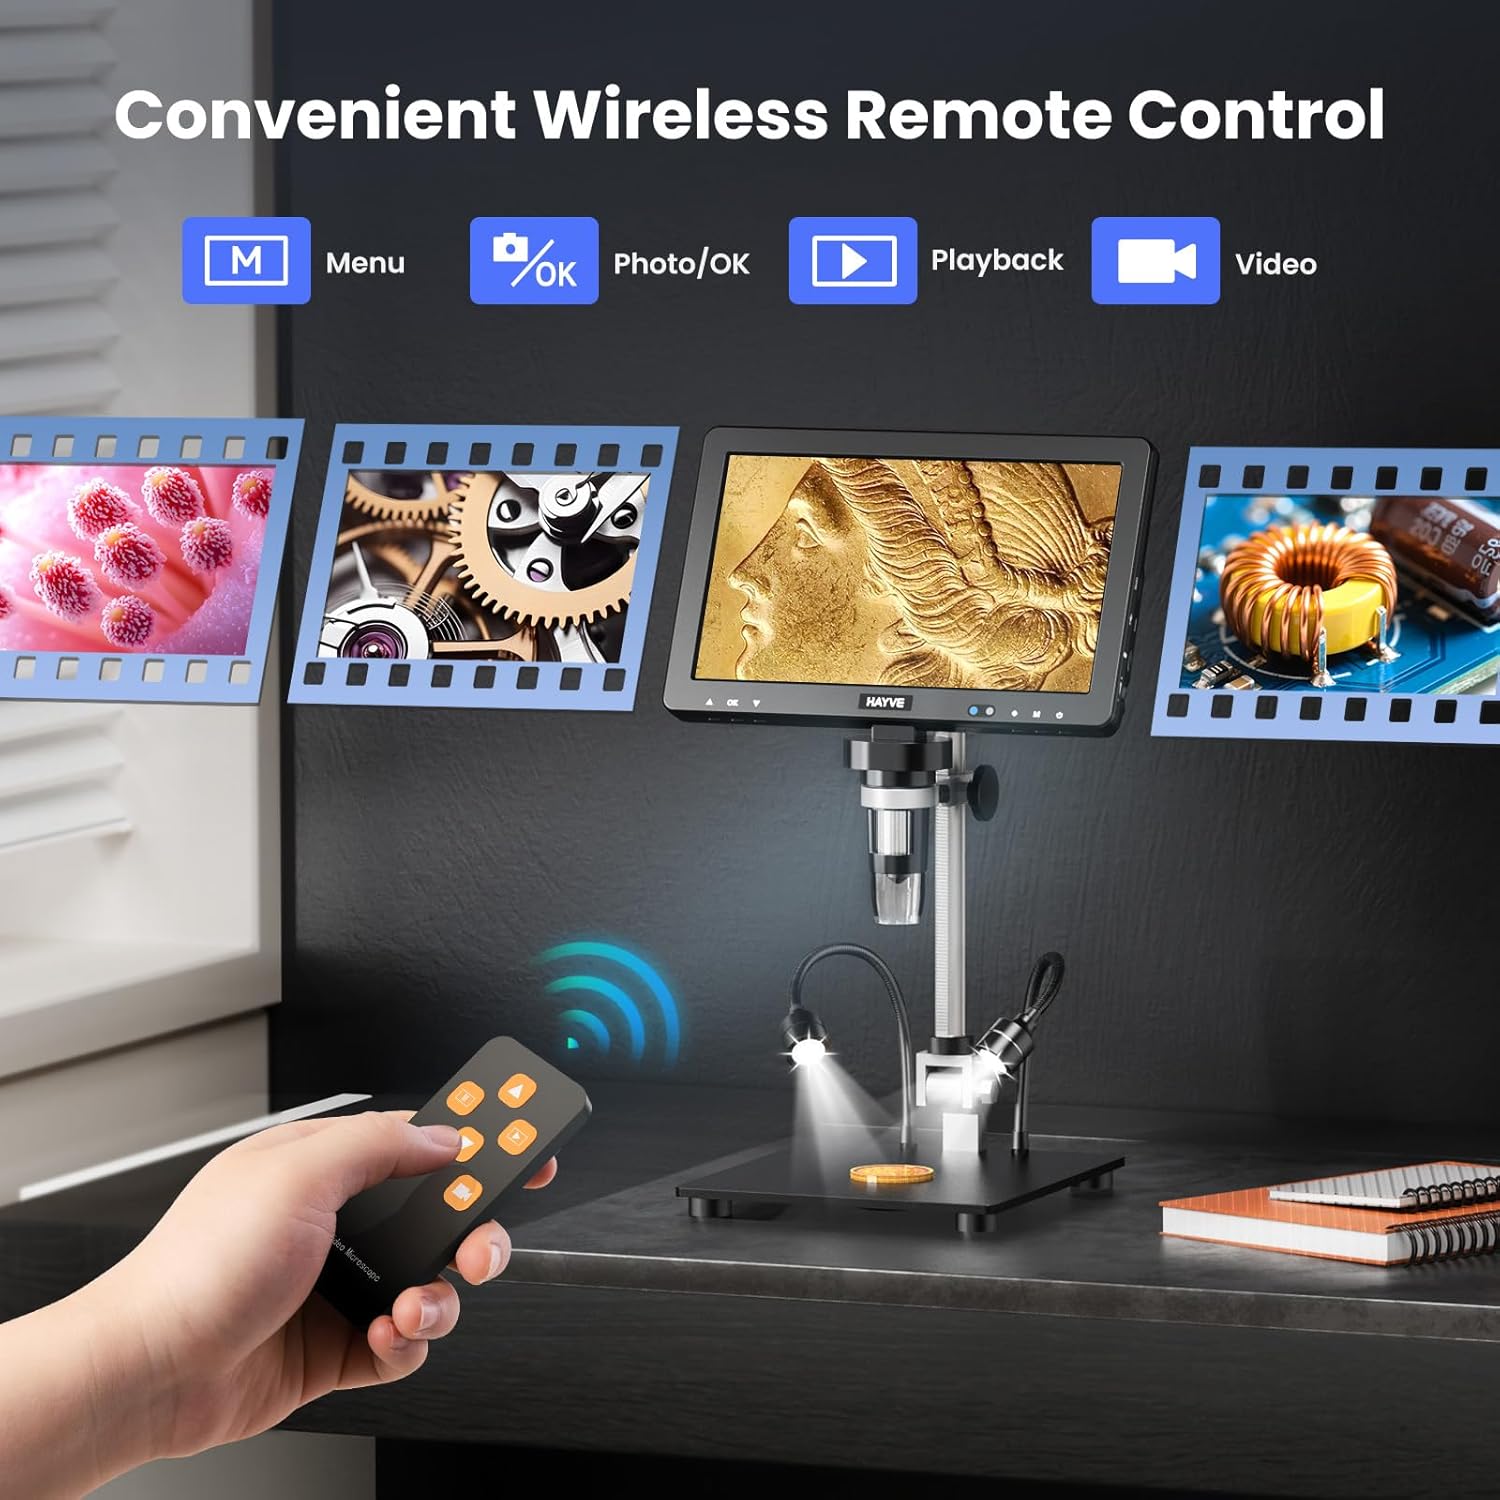
Image 5.3: The wireless remote control, illustrating its functions for menu navigation, photo capture, video recording, and playback.
5.4 PC Connection
Connect the microscope to a Windows PC or Mac for a larger viewing experience and collaborative analysis.
- Ensure the microscope is powered on.
- Connect the microscope to your computer using the provided USB Type-C cable.
- The microscope should be recognized as a webcam or storage device. Follow on-screen prompts or use appropriate software (e.g., default camera application) to view the live feed.

Image 5.4: The microscope connected to a PC and Mac, demonstrating the ability to display the magnified view on a larger external screen for enhanced observation and sharing.
6. Maintenance
6.1 Cleaning
- Always power off and unplug the microscope before cleaning.
- Use a soft, dry cloth to clean the exterior of the microscope.
- For the lens and screen, use a specialized lens cleaning cloth and solution to avoid scratches. Do not use abrasive cleaners.
6.2 Storage
- Store the microscope in a cool, dry place away from direct sunlight and extreme temperatures.
- Keep the lens covered when not in use to prevent dust accumulation.
6.3 Battery Care
- Charge the built-in lithium battery regularly, even if not in frequent use, to maintain battery health.
- Avoid fully discharging the battery for extended periods.

Image 6.1: The microscope charging, highlighting its 3000mAh built-in lithium battery which provides up to 3 hours of continuous operation.
7. Troubleshooting
If you encounter issues with your Hayve DM13 microscope, refer to the following common problems and solutions:
- No Power:
- Ensure the power adapter is securely connected and the outlet is functional.
- Check if the battery is charged. Connect to power and allow it to charge for a period.
- Blurry Image:
- Adjust the focus wheel carefully until the image is sharp.
- Ensure the object is within the microscope's working distance. Adjust the stand height if necessary.
- Clean the lens if there is dust or smudges.
- Screen Not Displaying:
- Verify the microscope is powered on.
- If connected to a PC, ensure the correct display mode or software is selected.
- Remote Control Not Responding:
- Ensure there are no obstructions between the remote and the microscope's infrared receiver.
- Check the remote control's battery.
- Cannot Connect to PC:
- Ensure the USB cable is properly connected to both the microscope and the computer.
- Try a different USB port on your computer.
- Restart both the microscope and the computer.
8. Specifications
| Feature | Specification |
|---|---|
| Model Name | DM13 |
| Display Size | 10.1 inches IPS HD |
| Magnification Range | 50X - 2000X |
| Image Sensor | 16MP |
| Light Source | 8 adjustable LED lights + 2 flexible gooseneck auxiliary lights |
| Storage | 32GB TF Card (included) |
| Connectivity | USB Type-C (PC/Mac compatible) |
| Battery | 3000mAh Lithium Polymer (up to 3 hours working time) |
| Item Weight | 4.16 pounds |
| Package Dimensions | 12.24 x 11.42 x 4.21 inches |
| Material | Metal |
| Color | Black |
| Real Angle of View | 178 Degrees |
9. Warranty and Support Information
Your Hayve DM13 Digital Microscope is covered by a manufacturer's warranty against defects in materials and workmanship. Please refer to the warranty card included in your package for specific terms and conditions.
For technical support, troubleshooting assistance, or warranty claims, please contact Hayve customer service through the retailer's platform or the official Hayve website. When contacting support, please have your product model number (DM13) and purchase information readily available.


