1. Introduction
Thank you for choosing the VANNECT X390AS 4-in-1 Foldable Treadmill. This manual provides essential information for the safe and effective use, setup, operation, and maintenance of your new fitness equipment. Please read this manual thoroughly before first use and keep it for future reference.
1.1 Safety Information
- Ensure the treadmill is placed on a flat, stable surface.
- Keep children and pets away from the treadmill during operation.
- Do not use the treadmill if you weigh more than 150 kg (330 lbs).
- Wear appropriate athletic footwear.
- Always use the safety key during operation.
- Unplug the treadmill when not in use or before cleaning/maintenance.
- Consult a physician before starting any new exercise program.
2. Setup and Initial Use
The VANNECT X390AS treadmill is designed for quick and easy setup, requiring no assembly. It arrives 100% pre-assembled and ready for use in seconds.
2.1 Unboxing and Placement
- Carefully remove the treadmill from its packaging.
- Place the treadmill on a clear, level surface, ensuring adequate space around it for safe operation.
- Unfold the treadmill if it is in its compact storage position.
- Connect the power cord to a grounded electrical outlet.

Image: Steps for unboxing and preparing the treadmill for use. The image shows three steps: 1) Unpack the box, 2) Prepare the treadmill by unfolding it, and 3) Step onto the treadmill to begin.
2.2 Portability and Storage
The treadmill features integrated transport wheels for easy relocation and a foldable design for compact storage. It can be easily stored under a bed or sofa, occupying minimal space.

Image: Demonstrates the treadmill's portability and compact storage options, showing it stored under a sofa and a bed, along with a close-up of the transport wheels.

Image: Illustrates the ease of moving the treadmill using its integrated transport wheels and its compact dimensions (116 cm x 50 cm x 12.5 cm) when folded for storage.
3. Operation
The VANNECT X390AS offers versatile exercise modes with easy controls.
3.1 Power On/Off and Safety Key
- To power on, ensure the treadmill is plugged in and the main power switch (usually located near the power cord inlet) is in the 'ON' position.
- Attach the safety key to your clothing and place the magnetic end onto the designated area on the treadmill console. The treadmill will not operate without the safety key in place.
- To stop the treadmill quickly in an emergency, pull the safety key off the console.
- To power off, remove the safety key, then switch off the main power switch and unplug the unit.
3.2 Speed Adjustment
The treadmill offers a speed range of 1 to 10 km/h, suitable for various activities:
- 1-3 km/h: Ideal for working or light activity.
- 4-6 km/h: Suitable for brisk walking.
- 7-10 km/h: For running or more intense cardio.
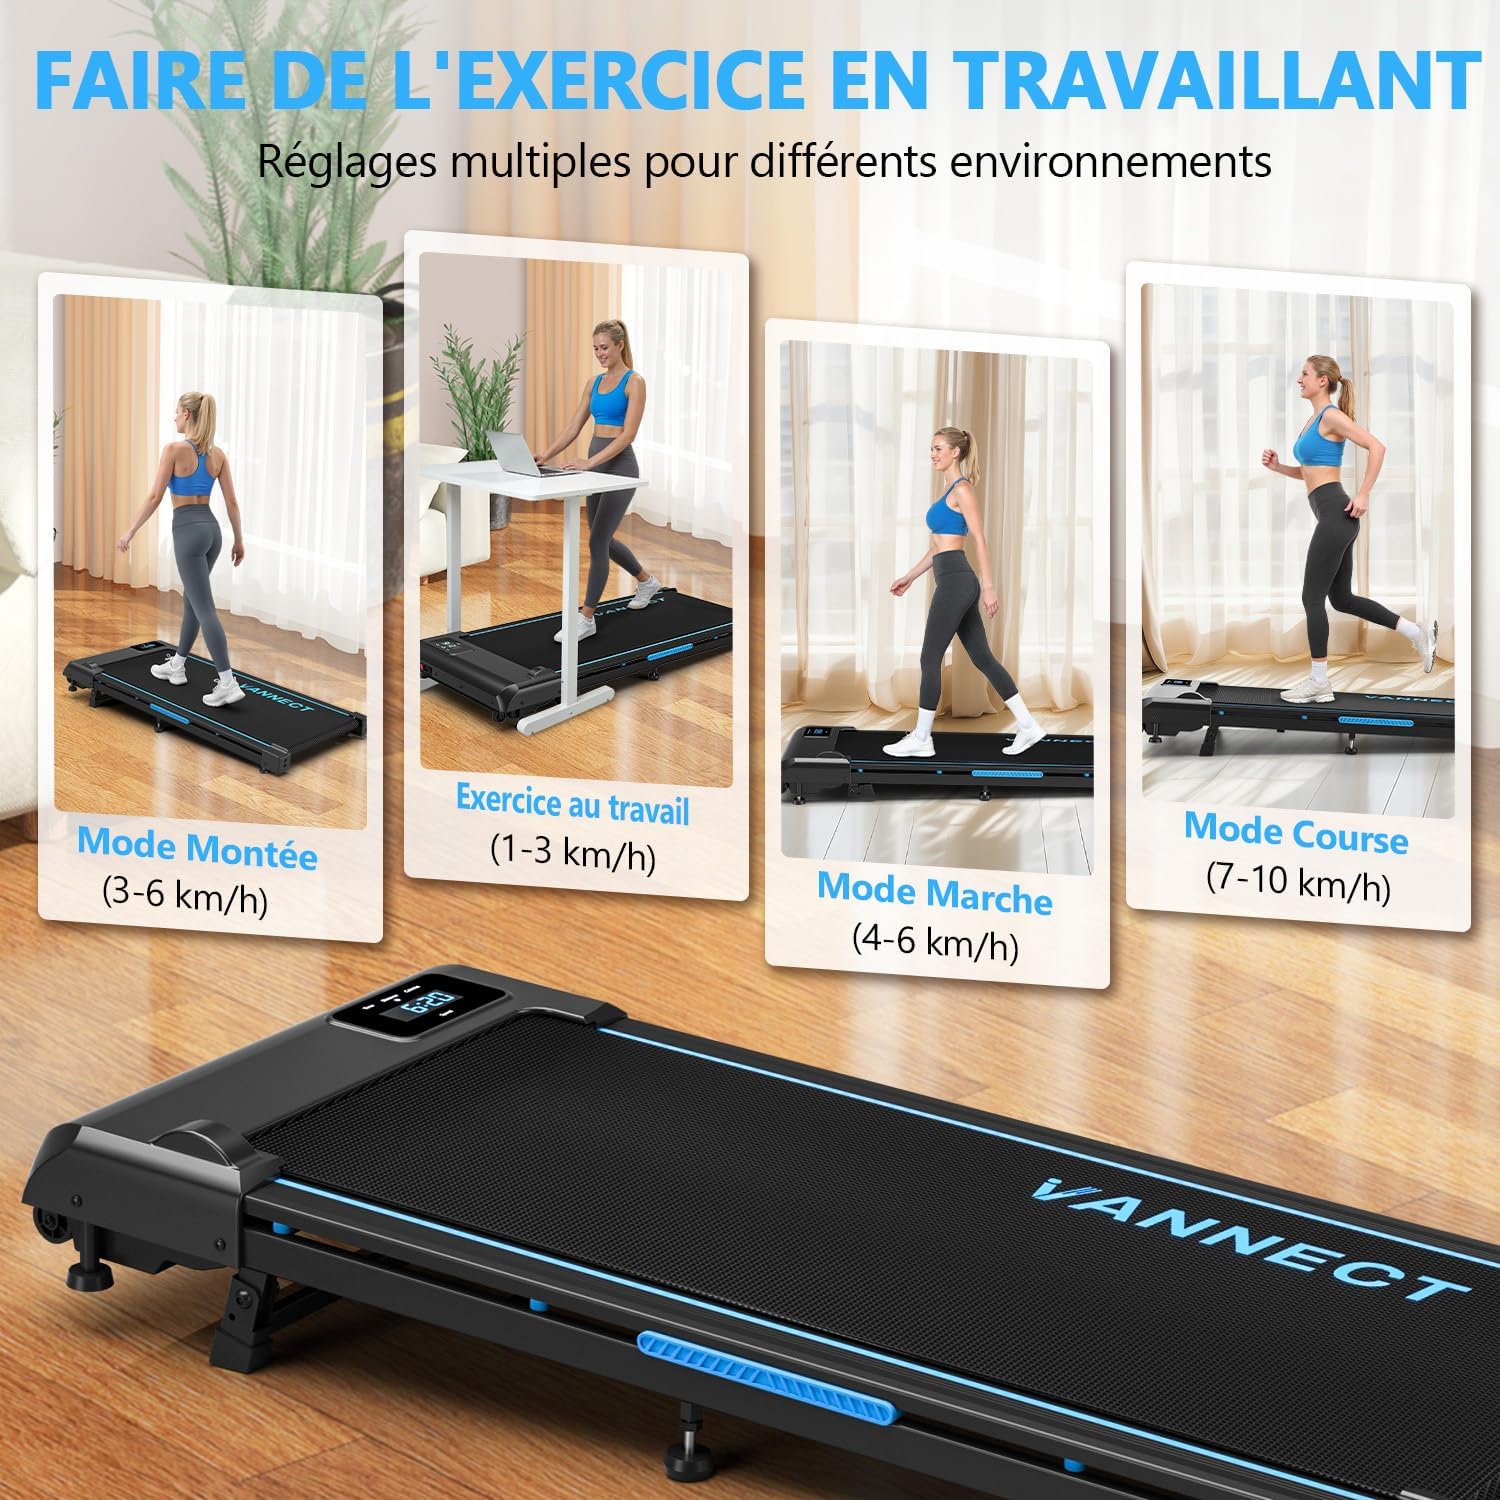
Image: Illustrates the various modes of use, including incline mode (3-6 km/h), exercise at work (1-3 km/h), walking mode (4-6 km/h), and running mode (7-10 km/h).
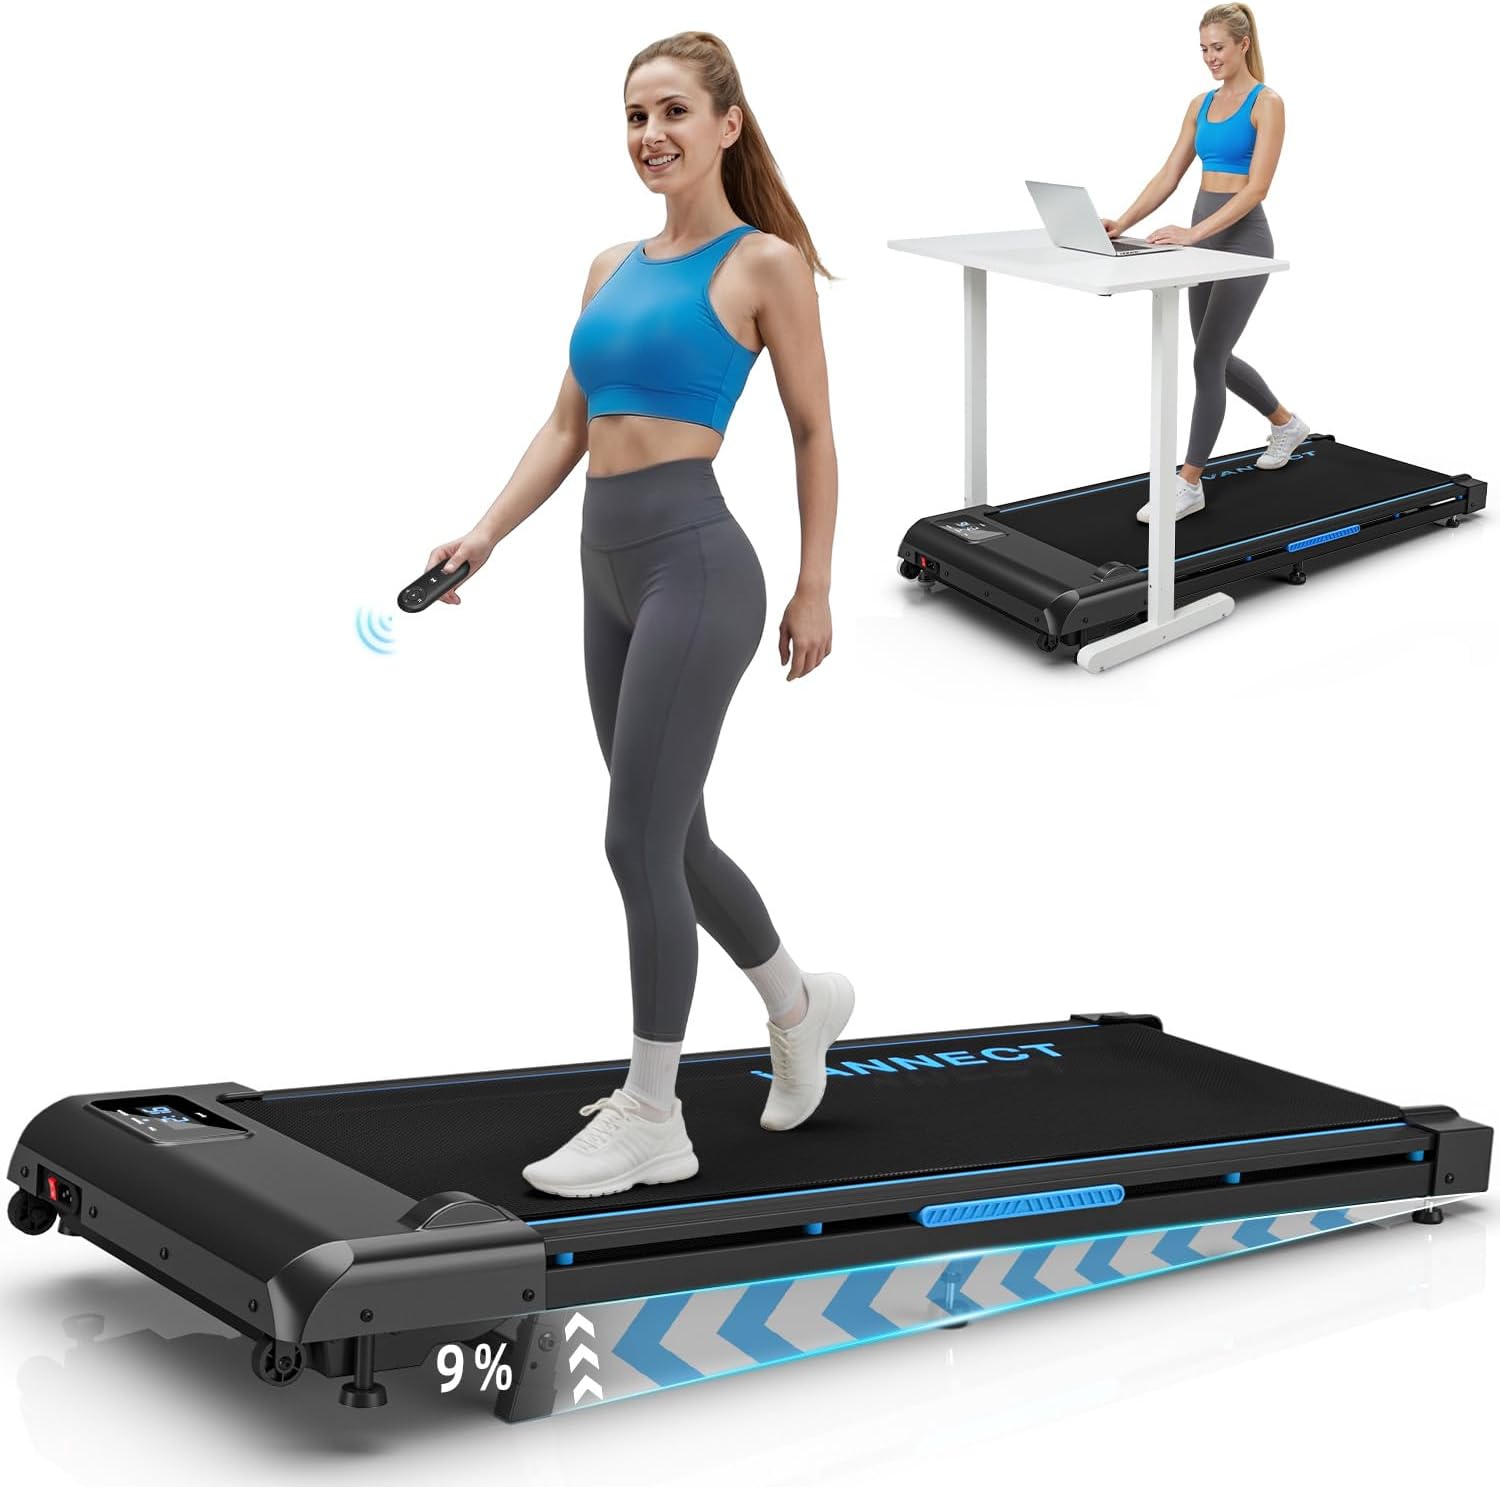
Image: A woman walking on the treadmill, holding the remote control. The image highlights the 9% incline capability of the treadmill.
3.3 Incline Adjustment
The treadmill features a manual 9% incline adjustment. This allows for increased calorie burn and muscle engagement, simulating uphill walking or running.
- To adjust the incline, ensure the treadmill is stopped and unplugged.
- Manually lift or lower the rear of the treadmill to engage the incline mechanism. Refer to the specific instructions in the quick start guide for detailed steps on adjusting the incline.
- Always ensure the incline is securely locked in place before resuming exercise.

Image: Compares the effectiveness of exercise at 0% incline (200 Kcal/h) versus 9% manual incline (360 Kcal/h), demonstrating increased calorie burn with incline.
3.4 LED Display and Remote Control
The integrated LED display shows real-time workout data, and a convenient remote control allows for easy adjustments.
- LED Display: Tracks time, speed, distance, and calories burned.
- Remote Control: Adjust speed and pause/resume your workout without touching the main unit. The remote control is magnetic and can be stored on the side of the treadmill to prevent loss.

Image: Close-up of the treadmill's LED screen displaying workout metrics (distance, speed, time, calories) and the wireless remote control.

Image: Detailed view of the LED display showing real-time training data, including calories, speed, time, and distance, for clear progress tracking.

Image: Shows the magnetic remote control storage on the side of the treadmill, ensuring it is always accessible and not easily lost.
4. Maintenance
Regular maintenance ensures the longevity and optimal performance of your treadmill.
4.1 Lubrication
Proper lubrication of the running belt is crucial. Use the provided silicone oil and follow the schedule below:
| Usage Frequency | Maintenance Frequency (Lubrication) |
|---|---|
| Less than 3 hours/week | Every 2 months |
| 4-7 hours/week | Every 1 month |
| 8 hours/week or more | Every 2 weeks |

Image: A table illustrating the recommended lubrication schedule for the treadmill belt based on weekly usage hours.
4.2 Belt Adjustment
If the running belt becomes misaligned or too loose/tight, it may need adjustment. Use the tool provided to adjust the belt tension or centering as necessary. Refer to the detailed instructions in the quick start guide for precise adjustment procedures.

Image: A hand using a tool to adjust the running belt, demonstrating that the belt is adjustable if needed.
4.3 Cleaning
- Wipe down the treadmill surfaces with a damp cloth after each use to remove sweat and dust.
- Do not use abrasive cleaners or solvents.
- Ensure the treadmill is unplugged before cleaning.
5. Troubleshooting
This section addresses common issues you might encounter with your treadmill.
| Problem | Possible Cause | Solution |
|---|---|---|
| Treadmill does not power on. | Power cord not plugged in, main switch off, safety key not in place. | Check power connection, ensure main switch is ON, place safety key on console. |
| Running belt slips or hesitates. | Belt too loose, insufficient lubrication. | Adjust belt tension (refer to Section 4.2), lubricate the belt (refer to Section 4.1). |
| Unusual noise during operation. | Loose components, lack of lubrication, foreign object. | Inspect for loose parts and tighten, lubricate belt, check for obstructions under the belt. |
| Remote control not responding. | Battery low or depleted, remote out of range. | Replace remote control battery, ensure remote is pointed towards the treadmill's receiver. |
6. Specifications
| Feature | Detail |
|---|---|
| Model Number | X390AS |
| Brand | VANNECT |
| Color | Blue (Enhanced 4-in-1) |
| Dimensions (L x W x H) | 116 x 50 x 12.5 cm |
| Weight | 20 kg |
| Material | High-carbon steel frame |
| Motor Power | 2.75 HP (Peak) |
| Speed Range | 1-10 km/h |
| Maximum Incline | 9% (Manual) |
| Maximum User Weight | 150 kg |
| Running Surface | 100 x 40 cm (approx.) |
| Noise Level | Less than 40 dB |
| Special Features | Shock absorber, Integrated wheels, LED display, Remote control, 5-layer anti-slip belt |

Image: Highlights the treadmill's reinforced steel structure, powerful 2.75 HP motor, 150 kg weight capacity, 10 km/h maximum speed, and silent operation (less than 40 dB).

Image: Shows the flat running surface with dimensions of 116 cm in length and 50 cm in width, indicating a 150 kg weight capacity.

Image: Illustrates the 5-layer anti-slip running belt and the integrated shock absorption system, designed to reduce pressure on knees and ankles.

Image: Emphasizes the treadmill's 150 kg weight capacity, the durable 5-layer anti-slip running belt, and the 10 integrated shock absorbers for joint protection.

Image: Details the silent brushless motor, highlighting its 1-10 km/h speed range, noise level below 40 dB, and extended lifespan.
7. Warranty and Support
7.1 Warranty Information
VANNECT offers a 5-year free warranty for this product. Please retain your proof of purchase for warranty claims.
Note: The visible line on the running belt is the belt's junction, which is normal and not a defect or damage.
7.2 Customer Support
For any questions, technical assistance, or warranty claims, please contact VANNECT customer service. Our engineers can provide video assistance if needed.
Contact information can typically be found on the product packaging, the official VANNECT website, or through your purchase platform (e.g., Amazon seller page).


