
1. Product Overview
The Philco 1012BT-GR is a versatile FM Bluetooth Alarm Clock Radio designed for convenience and functionality. It features a modern black design, a clear digital display, and essential functions including dual alarms, FM radio, Bluetooth connectivity for audio streaming, and a USB port for charging devices or playing music. Its bivolt automatic power supply ensures compatibility with various electrical systems, and an internal battery maintains time settings during power outages.
Key Features:
- FM Stereo Radio for listening to your favorite stations.
- Digital Clock with Dual Alarm functionality for setting two distinct wake-up times.
- Bluetooth Connectivity for wireless audio streaming from smartphones or other compatible devices.
- USB Port for charging mobile devices or playing music from a USB drive.
- LED Display with adjustable brightness for comfortable viewing day or night.
- Internal Battery Backup to preserve time settings during power interruptions.
- Automatic Bivolt (110V/220V) operation for broad compatibility.
2. Package Contents
Please check your product packaging for the complete list of included items. Typically, the package contains:
- Philco 1012BT-GR Alarm Clock Radio Unit
- Power Cable
- User Manual
3. Product Layout and Controls
Familiarize yourself with the various parts and controls of your Philco Alarm Clock Radio.
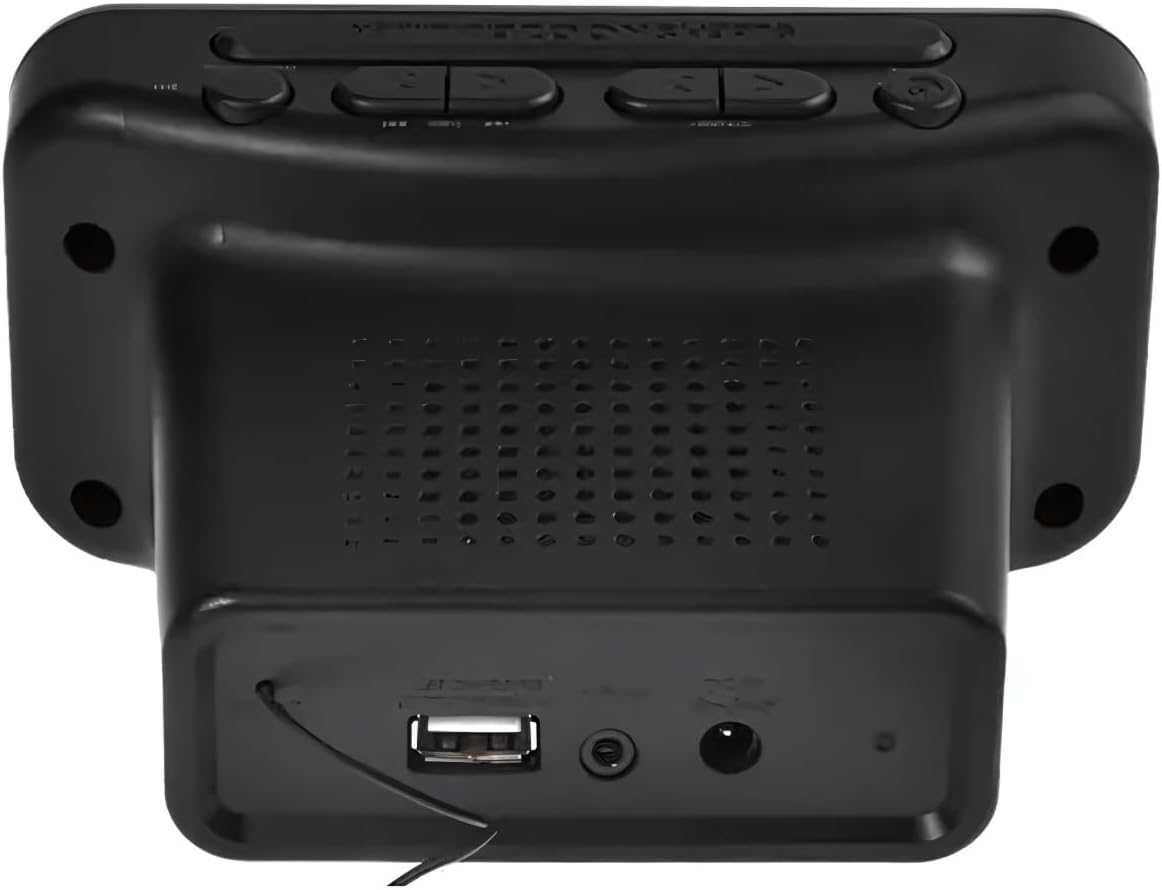
Image 1: Front view of the Philco 1012BT-GR Alarm Clock Radio. This image displays the main digital clock, the Philco brand logo, and the control buttons located on the top panel, including buttons for time setting, alarm, radio tuning, and volume.
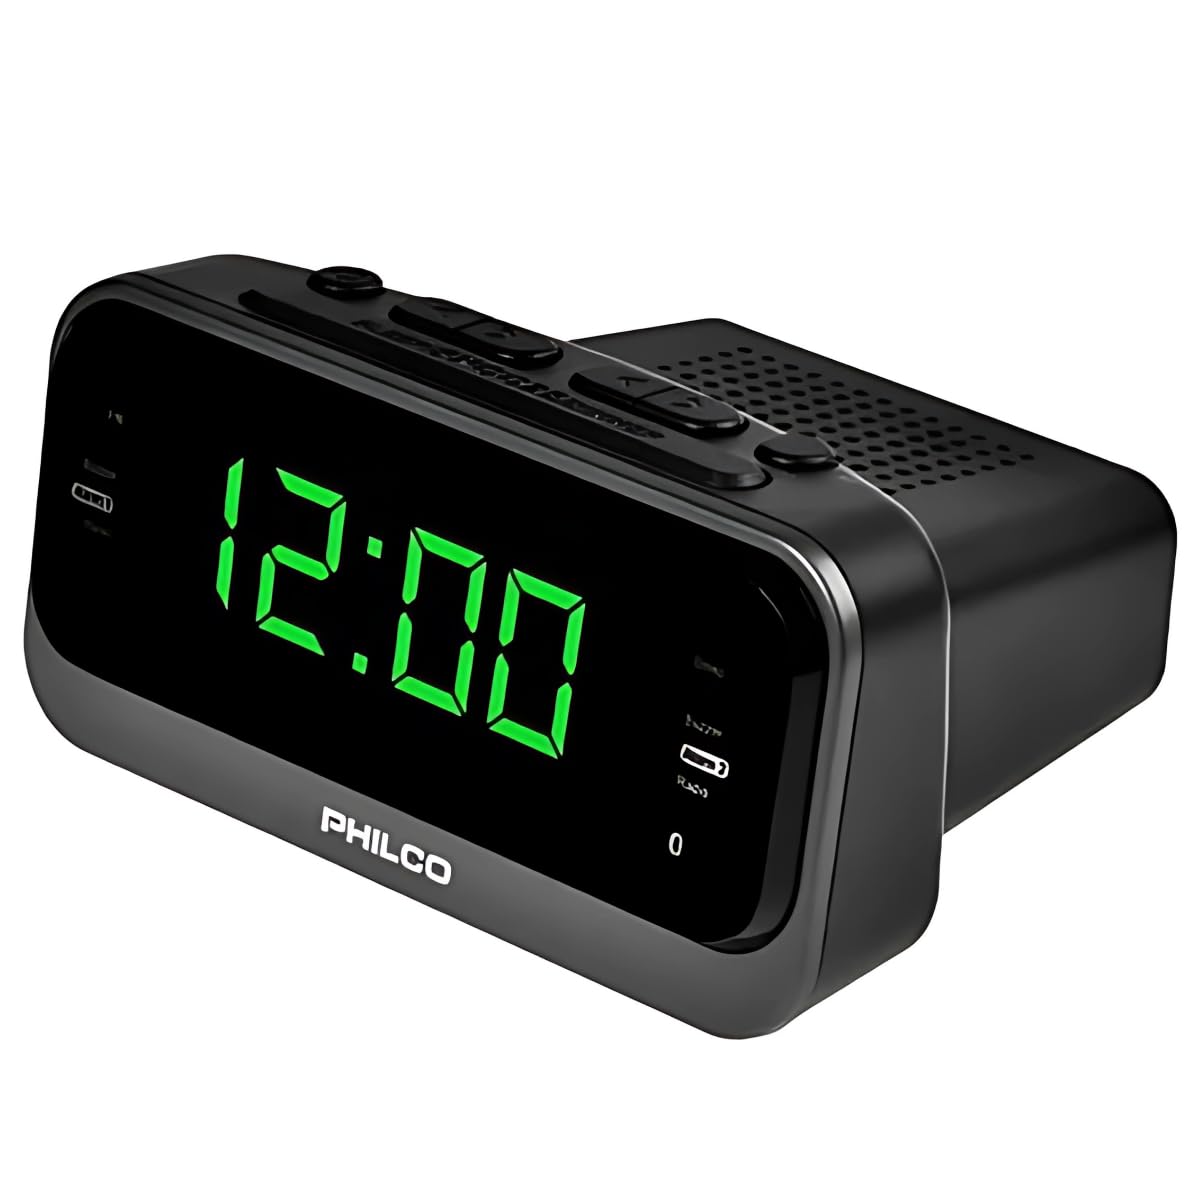
Image 2: Rear view of the Philco 1012BT-GR Alarm Clock Radio. This image highlights the rear panel, featuring the USB port for charging or music playback, the DC power input jack, and the integrated speaker grille.
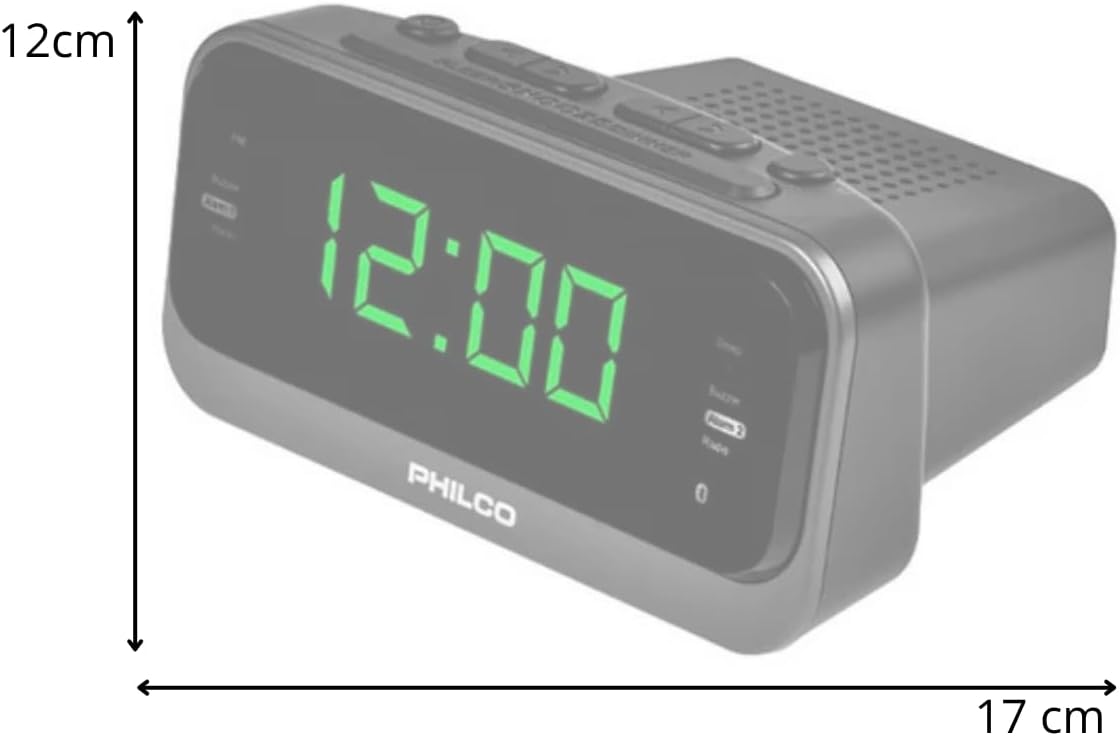
Image 3: Side view of the Philco 1012BT-GR Alarm Clock Radio with approximate dimensions. The image indicates a width of 17 cm and a height of 12 cm, providing a visual reference for the product's size.
4. Setup
4.1 Power Connection
- Ensure the alarm clock radio is placed on a stable, flat surface.
- Connect the power cable to the DC input port on the back of the unit.
- Plug the other end of the power cable into a standard electrical outlet. The unit is bivolt (110V/220V) and will automatically adapt to the voltage.
- The display should illuminate, indicating the unit is powered on.
4.2 Internal Battery Backup
The Philco 1012BT-GR includes an internal battery. This battery is designed to maintain the time and alarm settings in the event of a power outage, ensuring you do not lose your configurations. The unit requires continuous AC power for full operation (display, radio, Bluetooth, USB functions).
5. Operating Instructions
5.1 Setting the Time
- Press and hold the TIME SET button (or equivalent button, refer to physical unit for exact label).
- Use the HOUR and MINUTE buttons to adjust the current time.
- Press TIME SET again to confirm and exit time setting mode.
5.2 Setting Alarms (Dual Alarm)
The unit supports two independent alarms (Alarm 1 and Alarm 2).
- Press and hold the ALARM 1 button.
- Use the HOUR and MINUTE buttons to set the desired wake-up time for Alarm 1.
- Press ALARM 1 again to confirm. You may then select the alarm source (e.g., FM radio or buzzer) and volume.
- Repeat the process for ALARM 2 using the ALARM 2 button.
- To activate/deactivate an alarm, briefly press the corresponding ALARM button until the alarm indicator appears/disappears on the display.
5.3 Snooze Function
When an alarm sounds, press the SNOOZE button (usually a large button on top) to temporarily silence the alarm for a few minutes. The alarm will sound again after the snooze period.
5.4 FM Radio Operation
- Press the MODE button to switch to FM radio mode.
- Use the TUNE +/- buttons to manually tune to a station.
- Press and hold TUNE +/- for automatic scanning to the next available station.
- To save a station, press and hold the PRESET button, then use TUNE +/- to select a preset number, and press PRESET again to confirm.
- Use the VOLUME +/- buttons to adjust the radio volume.
5.5 Bluetooth Pairing
- Press the MODE button to switch to Bluetooth mode. The display will show "BT" or a Bluetooth icon, and the unit will enter pairing mode.
- On your mobile device, enable Bluetooth and search for available devices.
- Select "Philco 1012BT-GR" (or similar name) from the list of devices.
- Once paired, you can stream audio from your device to the alarm clock radio.
- Use your mobile device or the unit's VOLUME +/- buttons to control playback volume.
5.6 USB Playback and Charging
- For Music Playback: Insert a USB flash drive containing compatible audio files (e.g., MP3) into the USB port on the back of the unit. Press the MODE button to select USB mode. The unit will automatically begin playing music.
- For Device Charging: Connect your mobile phone or other compatible device to the USB port using its charging cable. The unit will provide power to charge your device.
5.7 Display Brightness Adjustment
To adjust the brightness of the LED display, locate the DIMMER or BRIGHTNESS button (refer to physical unit for exact label) and press it repeatedly to cycle through different brightness levels.
6. Maintenance
6.1 Cleaning
- Always unplug the unit from the power outlet before cleaning.
- Use a soft, dry cloth to wipe the exterior surfaces.
- Do not use abrasive cleaners, waxes, or solvents as they may damage the finish.
- Avoid spraying liquids directly onto the unit.
6.2 Storage
If storing the unit for an extended period, unplug it and store it in a cool, dry place away from direct sunlight and extreme temperatures.
6.3 Safety Precautions
- Do not expose the unit to water or excessive moisture.
- Do not block ventilation openings.
- Do not attempt to disassemble or repair the unit yourself. Refer all servicing to qualified personnel.
- Keep the unit away from heat sources such as radiators, heat registers, stoves, or other apparatus (including amplifiers) that produce heat.
7. Troubleshooting
- Unit does not power on: Ensure the power cable is securely connected to both the unit and a working electrical outlet.
- Time/Alarm settings lost after power outage: The internal battery backup should retain settings. If not, ensure the unit was plugged in for a sufficient period to charge the internal battery.
- No sound from FM radio: Check the volume level. Ensure the unit is in FM mode and tuned to an active station. Extend the FM antenna (if applicable) for better reception.
- Bluetooth device cannot pair: Ensure the unit is in Bluetooth pairing mode. Make sure Bluetooth is enabled on your mobile device and it is within range. Try restarting both devices.
- USB charging not working: Ensure the USB cable is properly connected. Some devices may require more power than the USB port can provide, or the device may already be fully charged.
- USB music playback not working: Ensure the USB drive is formatted correctly and contains compatible audio files (e.g., MP3). Try a different USB drive.
- Display too bright/dim: Use the brightness adjustment button (DIMMER) to cycle through different levels.
- Alarm volume too low/high: The alarm volume can be adjusted. Refer to the operating instructions for setting alarm preferences.
- No headphone jack: This model does not feature a headphone output.
8. Specifications
| Feature | Specification |
|---|---|
| Brand | Philco |
| Model | 1012BT-GR |
| Color | Black |
| Voltage | Automatic Bivolt (110V/220V) |
| Functions | FM Stereo Radio, Digital Clock, Dual Alarm, Bluetooth, USB (Charging/Music) |
| Display | LED with adjustable brightness |
| Power Source | Cable, Internal Battery (for time backup) |
| Approximate Dimensions (W x H x D) | 17 cm x 12 cm x 7 cm |
| Approximate Weight | 450g |
9. Warranty and Support
9.1 Manufacturer's Warranty
This product comes with a 1-month manufacturer's warranty from the date of purchase. Please retain your proof of purchase for warranty claims. The warranty covers manufacturing defects under normal use. It does not cover damage caused by misuse, accidents, unauthorized modifications, or normal wear and tear.
9.2 Customer Support
For technical assistance, warranty inquiries, or service requests, please contact your retailer or the Philco customer support line. Refer to the product packaging or Philco's official website for the most current contact information.


