
1. Important Safety Instructions
Please read all instructions and cautionary markings on the unit and in this manual before installation and operation. Failure to follow these instructions may result in electric shock, fire, or serious injury.
- Electrical installations must be performed by qualified personnel in accordance with all local and national electrical codes.
- This inverter is designed for specific voltage requirements (220-240V AC output). Always verify local voltage requirements before connection.
- Ensure proper grounding of the inverter.
- Do not disassemble the unit. There are no user-serviceable parts inside.
- Disconnect all power sources (AC input, PV input, and battery) before performing any maintenance or servicing.
- Use appropriate wiring and circuit breakers as specified in this manual.
2. Product Overview
The PowMr 4200W Solar Inverter is an all-in-one hybrid inverter designed to provide uninterruptible power. It integrates a pure sine wave inverter, a solar charger, and a battery charger into a single compact unit, suitable for home, RV, and off-grid applications.
2.1 Key Features
- 4200W Pure Sine Wave AC Output: Provides stable 220V/230VAC power for sensitive electronics.
- Built-in 120A MPPT Solar Charge Controller: Maximizes power harvest from solar panels.
- Max PV Array Power: Supports up to 6200W of solar input.
- Max PV Open Circuit Voltage: Up to 500VDC.
- Battery Compatibility: Works with 24V Lead-Acid and Lithium Batteries.
- Dual AC Output: Features a main 4200W output and a secondary 840W-2940W output.
- Multiple Charging Modes: Offers Utility priority, Solar priority, Hybrid, and Battery+Solar charging options.
- Comprehensive 360° Protection: Includes safeguards against short-circuit, over-current, over-voltage, under-voltage, overload, over-temperature, backfeed, and over-charge.
- One-Click Restore: Allows restoring default settings in case of configuration errors.
- Battery Cold Start Function: Enables starting the system with a battery voltage as low as 23V.
- Automatic Restart: Recovers automatically when AC power is restored.
- Remote Monitoring: Optional remote monitoring and control via the "SMARTESS" app (requires separate WiFi module).
3. Product Components and Interface
Familiarize yourself with the various components and connection points of the inverter for proper installation and operation.
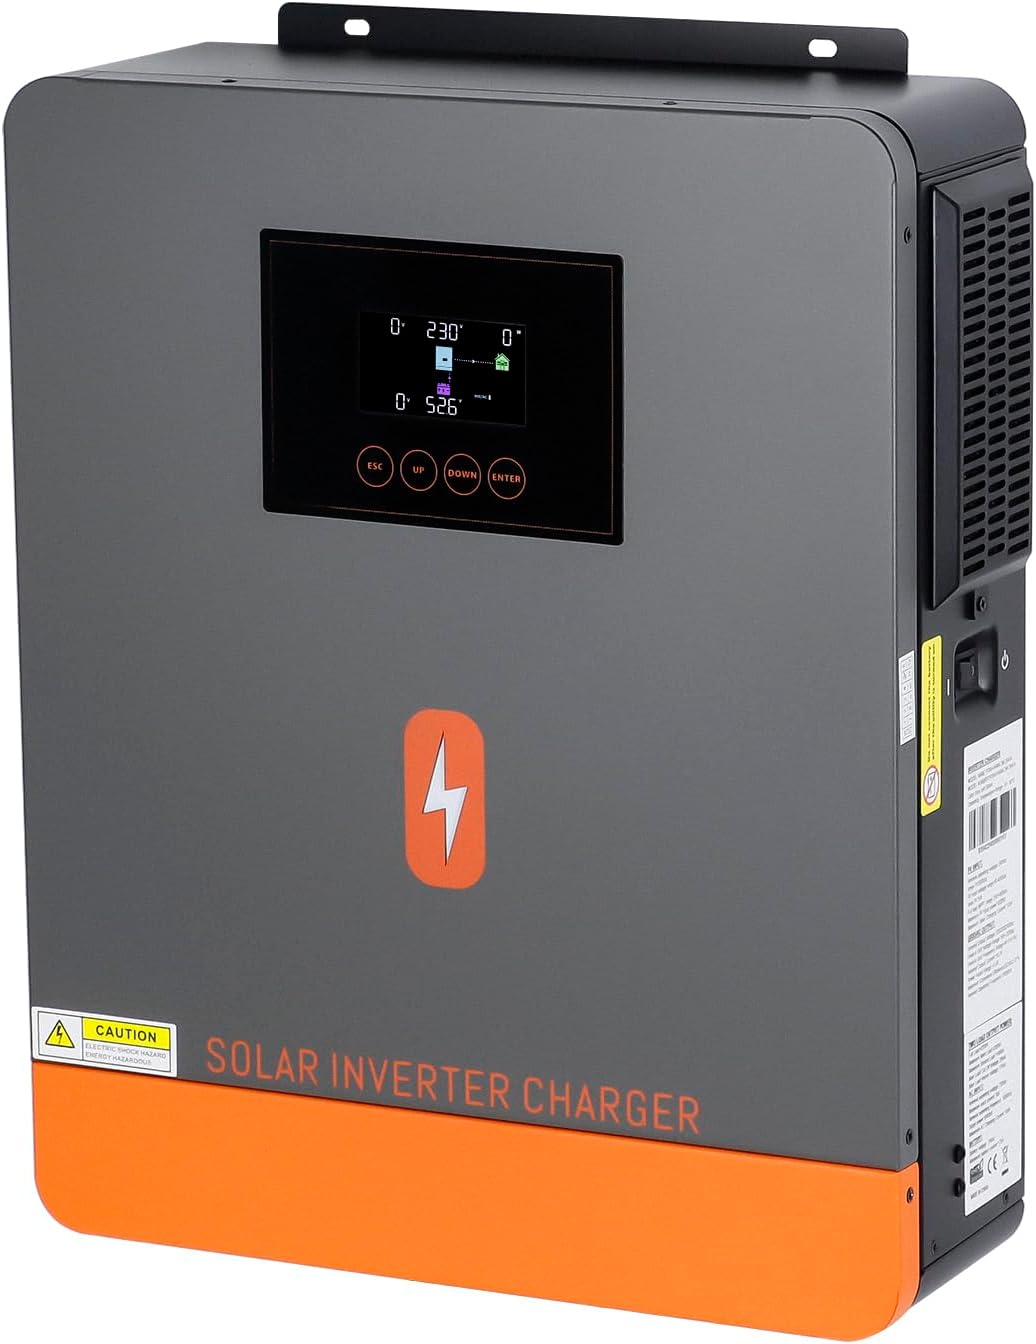

| No. | Component | No. | Component |
|---|---|---|---|
| 1 | LCD display | 8 | Main output |
| 2 | Status indicator | 9 | Second output |
| 3 | Charging indicator | 10 | PV 1 and PV 2 input |
| 4 | Fault indicator | 11 | RS232/WIFI/Remote LCD Communication Port |
| 5 | Touch Function buttons | 12 | Battery input |
| 6 | Power ON/OFF switch | 13 | Anti dust cover |
| 7 | AC input |
4. Setup and Installation
Proper installation is crucial for the safe and efficient operation of your solar inverter. Consult a qualified electrician if you are unsure about any steps.
4.1 Site Selection
- Install the inverter indoors, away from direct sunlight, heat sources, and moisture.
- Ensure adequate ventilation around the unit to prevent overheating.
- Mount the inverter vertically on a sturdy, non-flammable surface.
4.2 Wiring Connections
Follow the wiring diagram carefully. All connections must be secure and correctly polarized. Incorrect wiring can damage the inverter and connected devices.

- Battery Connection: Connect the 24V battery bank (lead-acid or lithium) to the battery input terminals (12). Ensure correct polarity (+ to + and - to -). Recommended battery wire size: 12AWG.
- PV Array Connection: Connect your solar panels to the PV 1 and PV 2 input terminals (10). Ensure the total PV array power does not exceed 6200W and the open circuit voltage is within the 60Vdc-500Vdc MPPT range. Starting voltage must be >150V.
- AC Input Connection: Connect the main utility power or a generator to the AC input terminal (7). Max AC input: 300Vac, Frequency: 50Hz/60Hz, Nominal input voltage: 230Vac. Recommended AC wire: 12AWG, Breaker: 32A.
- AC Output Connection: Connect your household appliances to the Main output (8) and Second output (9). Rated Output Power: 4200W, Output voltage: 230V±5%. Recommended AC wire: 12AWG, Breaker: 32A.
- Grounding: Ensure the inverter chassis is properly grounded according to local electrical codes.
Important Notes:
- This is a single-phase 220-240V output inverter. If your local voltage is 110V, a step-down transformer is required for conversion to 110V output.
- For lithium batteries, when solar energy is present, setting the battery type to LIB will activate the battery after 3 seconds.
5. Operating Instructions
5.1 Powering On/Off
- Ensure all wiring connections are secure and correct.
- Turn on the battery breaker first.
- Turn on the PV array breaker (if applicable).
- Turn on the AC input breaker (if applicable).
- Press the Power ON/OFF switch (6) on the inverter to power on the unit.
- To power off, reverse the sequence: turn off AC input, then PV, then battery, then press the Power ON/OFF switch.
5.2 LCD Display and Control
The LCD display (1) shows operational status, system parameters, and allows access to settings. Use the Touch Function buttons (5) (ESC, UP, DOWN, ENTER) to navigate menus and adjust settings.
5.3 LED Indicators
The inverter's logo light changes color to indicate its current working mode, providing a quick visual status check.

- PV Mode: Purple Light (Inverter is primarily drawing power from solar panels).
- Utility Mode: Blue Light (Inverter is primarily drawing power from the utility grid).
- Battery Mode: Red Light (Inverter is primarily drawing power from the battery).
- Stationary Mode: (Refer to the inverter's specific manual for exact color/status, typically indicates standby or no active power flow).
5.4 Charging Mode Configuration
The inverter supports four configurable charging source priorities to optimize battery charging based on available power sources.

- Utility/AC Power Priority: Charges the battery primarily from the utility grid or generator.
- Solar Power Priority: Charges the battery primarily from solar panels.
- Solar+Utility Priority: Charges the battery from both solar and utility sources simultaneously.
- ONLY Solar Priority: Charges the battery exclusively from solar panels.
5.5 Output Source Priority Configuration
The inverter supports three output source priorities to determine which power source supplies the connected loads.
- Utility Source Priority: Prioritizes utility power for connected loads.
- Solar Power Priority: Prioritizes solar power for connected loads.
- Solar+Battery Priority: Prioritizes solar and battery power for connected loads.
5.6 Remote Monitoring (Optional)
The inverter can be monitored and controlled remotely via the "SMARTESS" app. This functionality requires an optional WiFi module, which must be purchased separately.

Download the "SMARTESS" app from the App Store or Google Play. The WiFi module and GPRS data need to be purchased separately. The QR code for the WiFi module is Q2721100111238.
6. Maintenance
Regular maintenance ensures the longevity and optimal performance of your inverter.
- Regular Cleaning: Keep the inverter clean and free from dust. Use a dry, soft cloth to wipe the exterior. Ensure ventilation openings are not blocked.
- Connection Checks: Periodically inspect all wiring connections for tightness, signs of corrosion, or damage. Tighten any loose connections.
- Battery Health: Monitor battery voltage and health according to the battery manufacturer's guidelines. Ensure batteries are properly charged and maintained.
- Environmental Check: Ensure the installation environment remains within specified temperature and humidity ranges.
- Firmware Updates: Check the official PowMr website for any available firmware updates for improved performance or new features.
7. Troubleshooting
This section provides guidance for common issues. For complex problems or persistent errors, contact customer support.
- No Power Output:
- Check battery connections and ensure the battery is charged.
- Verify AC input and PV input connections.
- Ensure the inverter is powered on and circuit breakers are not tripped.
- Low Output Power:
- Check battery charge level.
- Assess PV array performance (e.g., shading, dirt on panels).
- Ensure connected loads do not exceed the inverter's capacity.
- Fault Indicator On:
- Refer to the LCD display for specific error codes.
- Common faults include over-voltage, under-voltage, overload, or over-temperature. Address the underlying cause (e.g., reduce load, check ventilation, verify input voltages).
- Inverter Not Charging Battery:
- Verify PV array connection and voltage.
- Check charging mode settings on the inverter.
- Ensure the battery is not fully charged or faulty.
- Settings Error: If incorrect settings cause issues, use the one-click restore default settings function to revert to factory defaults.
8. Specifications
| Parameter | Value |
|---|---|
| Model | POW-HVM4.2M-N |
| Rated Output Power | 4200W |
| Input DC Voltage | 24VDC |
| Output AC Voltage | 220V/230VAC (Single-phase) |
| Max PV Array Power | 6200W |
| MPPT Voltage Range | 60Vdc-500Vdc |
| Max PV Open Circuit Voltage | 500VDC |
| Max Charging Current | 120A (MPPT Controller) |
| No-Load Power Consumption | 35W |
| Product Dimensions | 14 x 5 x 17 inches |
| Item Weight | 17.6 pounds |
| Battery Compatibility | 24V Lead Acid & Lithium Battery |
9. Warranty and Support
For warranty information, technical support, or service inquiries, please contact PowMr customer service. Ensure you have your product model number (POW-HVM4.2M-N) and purchase details available when contacting support.
Visit the official PowMr website for the latest support resources, FAQs, and contact information.