Introduction
Thank you for choosing the Lulive HI1519 3-Drawer Dresser with Charging Station. This manual provides essential information for the safe assembly, operation, and maintenance of your new furniture. Please read all instructions carefully before beginning assembly and retain this manual for future reference.
Product Overview
The Lulive HI1519 dresser is a versatile furniture piece designed for bedrooms, entryways, or living rooms. It features a fluted design, three spacious drawers for storage, and an integrated charging station for electronic devices.
Key Features:
- Elegant Fluted Design: Enhances the aesthetic of your living space.
- Spacious Storage: Three drawers provide ample space for organizing items.
- Integrated Charging Station: Convenient power access for multiple electronic devices.
- Sturdy Construction: Crafted with FSC-certified wood panels and solid legs for stability.
- Smooth Drawer Operation: 3-section fold slides with ball bearing mechanisms ensure quiet and easy access.
Dimensions:
- Overall Dresser Size: 19.7" W x 15" D x 26.3" H
- Individual Drawer Size: 16.7" W x 11.8" D x 4.7" H
- Item Weight: 37.4 pounds
- Weight Capacity: Up to 133 lbs (top surface)
- Power Cord Length: 4.9 ft
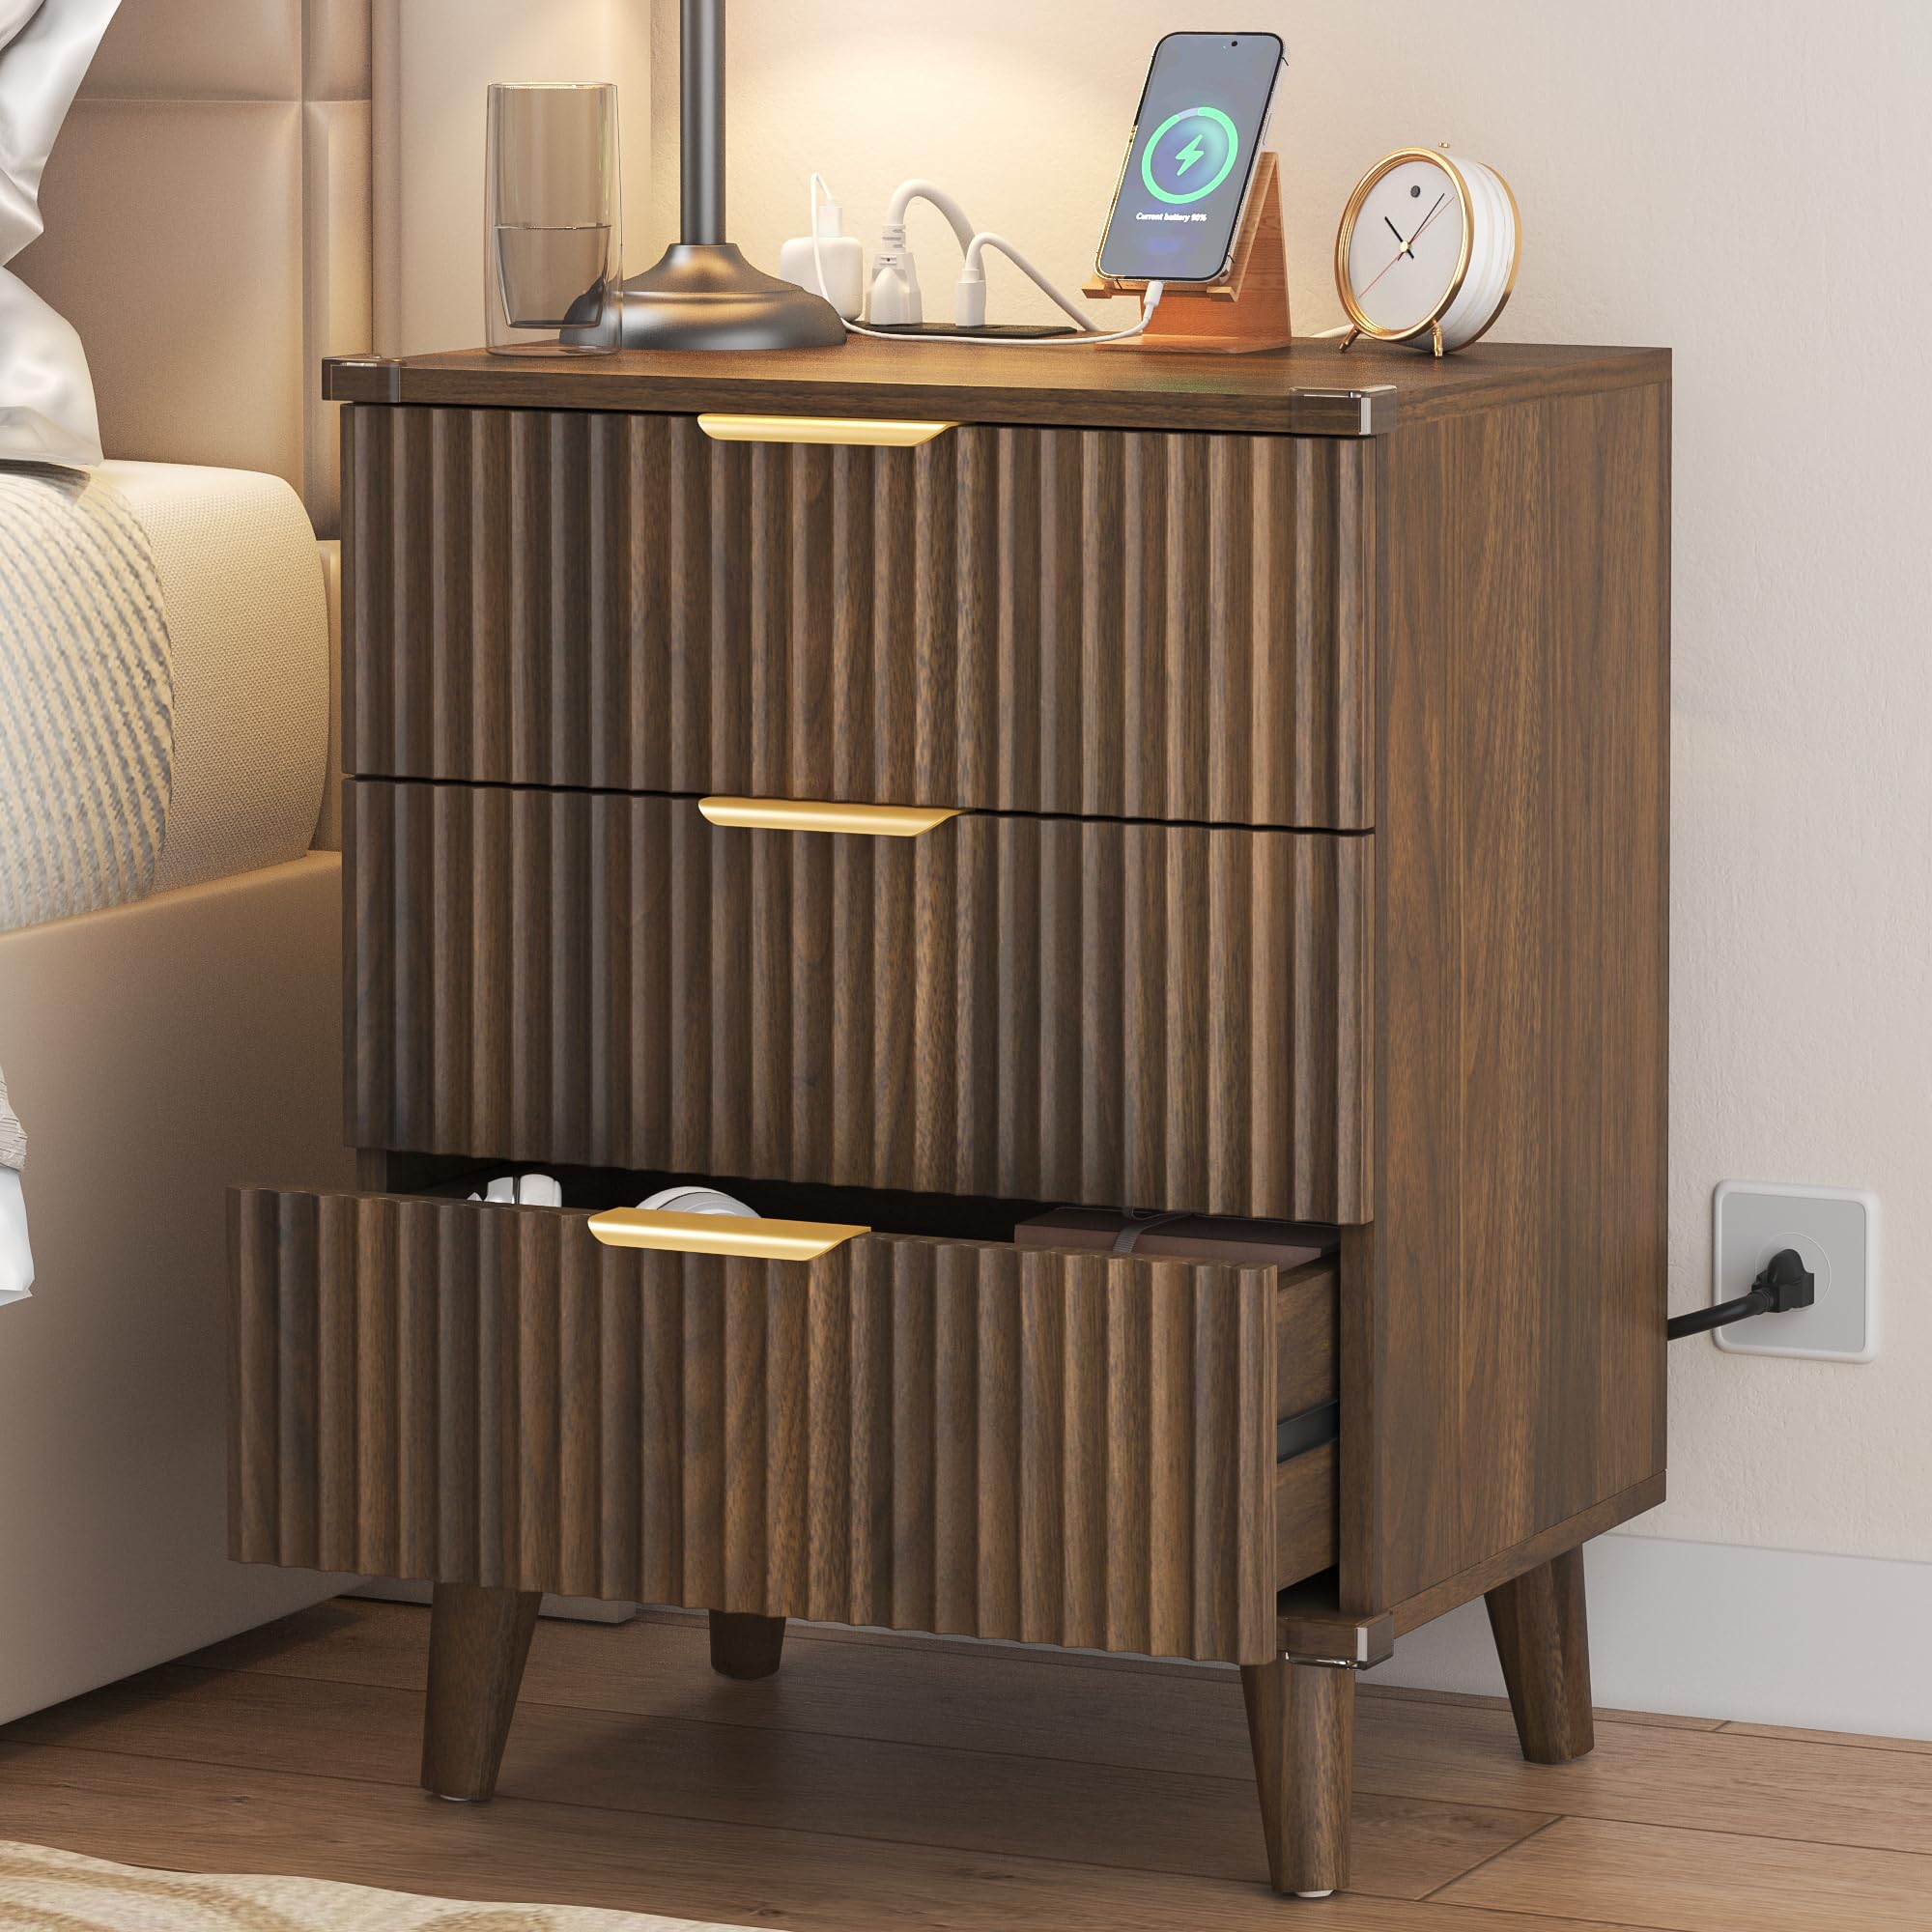
Image 1: Front view of the Lulive HI1519 3-Drawer Dresser with key dimensions labeled, including overall size, drawer size, and power cord length. The dresser is shown in a walnut finish.
Safety Information
To ensure safe use of your Lulive dresser, please observe the following precautions:
- Anti-Tip Hardware: Always install the included anti-tip hardware to secure the dresser to a wall. This prevents accidental tipping, especially important in households with children.
- Weight Distribution: Distribute weight evenly across drawers and on the top surface. Do not overload drawers.
- Stability: Ensure the dresser is placed on a flat, stable surface. Adjust feet if necessary to prevent wobbling.
- Electrical Safety:
- Do not exceed the maximum electrical load of the charging station.
- Keep liquids away from the charging station to prevent electrical shock.
- Do not use the charging station if the cord or plug is damaged.
- Unplug the dresser from the power outlet before cleaning or if not in use for extended periods.
- Assembly: Follow all assembly instructions carefully. Two adults are recommended for assembly.

Image 2: Detailed view highlighting the smooth drawer rails, transparent protective corner, metal handle, and solid wood legs, emphasizing the quality and safety features of the dresser.
Assembly Instructions
Assembly is required for this product. Please ensure all parts are present before beginning. A detailed instruction manual and video guide are typically included in the product packaging. If you are missing any parts or require assistance, please contact customer service.
- Unpack Components: Carefully unpack all parts and hardware. Lay them out on a clean, soft surface to prevent scratches.
- Identify Parts: Refer to the parts list in your included manual to identify each component.
- Assemble Frame: Begin by assembling the main frame of the dresser according to the step-by-step diagrams.
- Install Drawer Slides: Attach the drawer slides to the dresser frame and to the drawer sides, ensuring correct orientation for smooth operation.
- Assemble Drawers: Construct the three drawers, then attach the fluted front panels and handles.
- Insert Drawers: Carefully insert the assembled drawers into the frame.
- Attach Legs: Securely attach the solid wood legs to the base of the dresser.
- Install Charging Station: Integrate the power panel into the designated slot on the dresser top.
- Secure Anti-Tip Kit: Attach the anti-tip hardware to the back of the dresser and to a wall stud, following the specific instructions provided with the kit.
Important: Pay close attention to the orientation of rails and panels during assembly to avoid rework. Two adults are recommended for efficient and safe assembly.
Operating Instructions (Charging Station)
The integrated charging station provides convenient power access for your electronic devices.
- Power Connection: Plug the dresser's power cord into a standard wall outlet.
- Device Charging: Use the USB ports or AC outlets on the charging station to power or charge your smartphones, tablets, e-readers, or other compatible devices.
- Overload Protection: The charging station is designed with safety features. Avoid plugging in high-power appliances that may exceed its capacity.

Image 3: The Lulive HI1519 dresser positioned as a nightstand in a bedroom, showcasing a lamp and a smartphone actively charging on its integrated power station.
Maintenance
Proper care will extend the life and appearance of your Lulive dresser.
- Cleaning: Wipe surfaces with a soft, damp cloth. Avoid harsh chemicals or abrasive cleaners that can damage the finish.
- Dusting: Regularly dust with a dry, soft cloth.
- Spills: Clean spills immediately to prevent staining.
- Drawer Slides: Periodically check drawer slides for smooth operation. If they become stiff, a small amount of silicone lubricant can be applied.
- Hardware: Periodically check all screws and fasteners to ensure they are tight. Retighten if necessary.
- Sunlight Exposure: Avoid prolonged direct sunlight exposure to prevent fading or discoloration of the wood finish.
Troubleshooting
| Problem | Possible Cause | Solution |
|---|---|---|
| Drawers do not slide smoothly. | Misaligned slides, debris in tracks, loose screws. | Check alignment of slides, clean tracks, tighten all screws. Apply silicone lubricant if needed. |
| Dresser wobbles. | Uneven floor, loose leg attachments. | Ensure dresser is on a flat surface. Check and tighten leg screws. Use shims if necessary. |
| Charging station not working. | Not plugged in, power outage, overloaded circuit, damaged cord/device. | Verify power cord is securely plugged into a working outlet. Check household circuit breaker. Reduce number of devices. Inspect cord for damage. Test with another device. |
| Dresser appears unstable. | Anti-tip kit not installed or improperly installed. | Immediately install or re-secure the anti-tip hardware to a wall stud. |
Specifications
- Brand: Lulive
- Model Number: HI1519
- Color: Walnut (as per current product variant)
- Number of Drawers: 3
- Material: FSC-certified wood panels, Metal rail, Aluminum handle
- Style: Vintage, Coastal, Mid-Century, Minimalist, Modern
- Assembly Required: Yes
- Package Dimensions: 20.47 x 14.96 x 11.81 inches
- Item Weight: 37.4 pounds
- First Available Date: November 24, 2025
Warranty and Support
For warranty information, missing parts, or customer support, please refer to the contact details provided in your product packaging or visit the official Lulive website. Keep your purchase receipt as proof of purchase for any warranty claims.
Return Policy: This product typically has a 30-day return policy from the date of purchase. Please check with your retailer for specific return terms and conditions.