1. Introduction
This user manual provides essential information for the safe and efficient operation of your new Hisense HS673A90X Dishwasher. Please read these instructions carefully before installation and use, and keep them for future reference.
2. Safety Information
Always follow basic safety precautions when using electrical appliances to reduce the risk of fire, electric shock, or injury.
- Ensure the appliance is properly grounded.
- Do not operate the dishwasher if it is damaged.
- Keep children away from the appliance during operation.
- Use only detergents and rinse aids specifically designed for dishwashers.
- Do not open the door during operation, especially during the hot wash cycle.
- Sharp items should be loaded with points down to prevent injury.
3. Product Overview
The Hisense HS673A90X is a high-capacity dishwasher designed for efficient cleaning. Key features include:
- Automatic Drying: Door opens automatically for complete drying.
- Auto Program: Efficient washing with reduced energy and water consumption.
- Third Basket: Dedicated space for cutlery and small utensils.
- LED Interior Lighting: Provides clear visibility inside the dishwasher.
- 15-Minute Quick Wash: For lightly soiled items, saving time and energy.
- 3 Wash Levels: Enhanced cleaning performance.
- Capacity: 16 place settings.
- Energy Class: A.
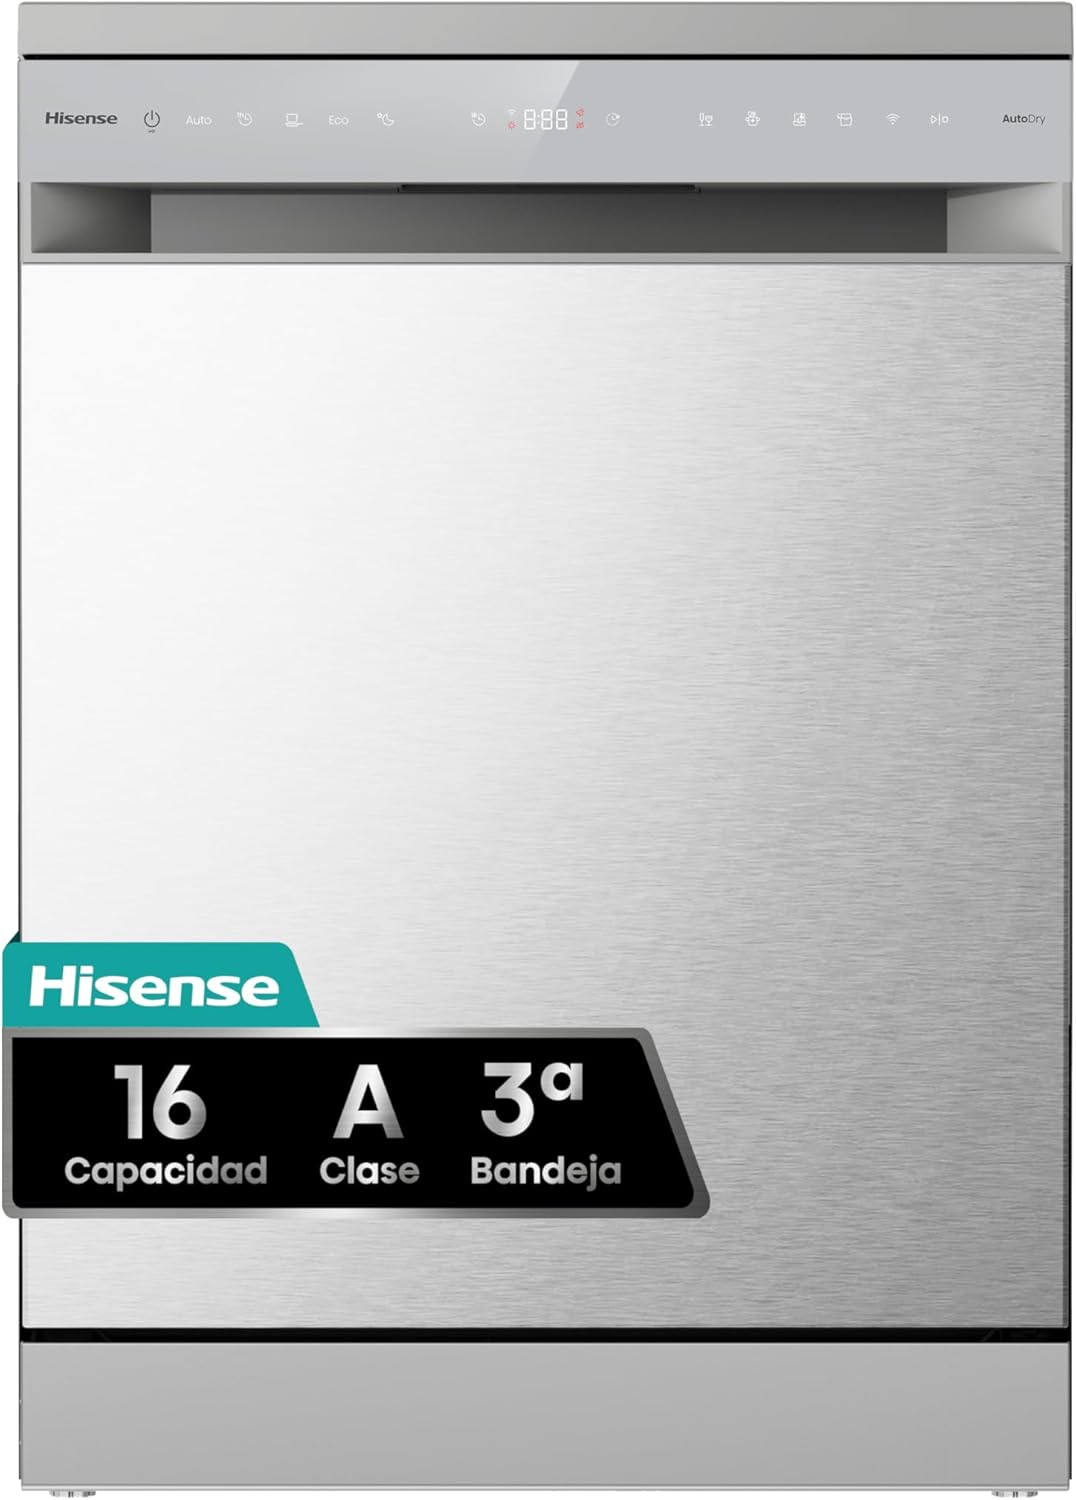
Figure 3.1: Front view of the Hisense HS673A90X Dishwasher.

Figure 3.2: Dimensions of the Hisense HS673A90X Dishwasher (Height: 846mm, Width: 599mm, Depth: 598mm).
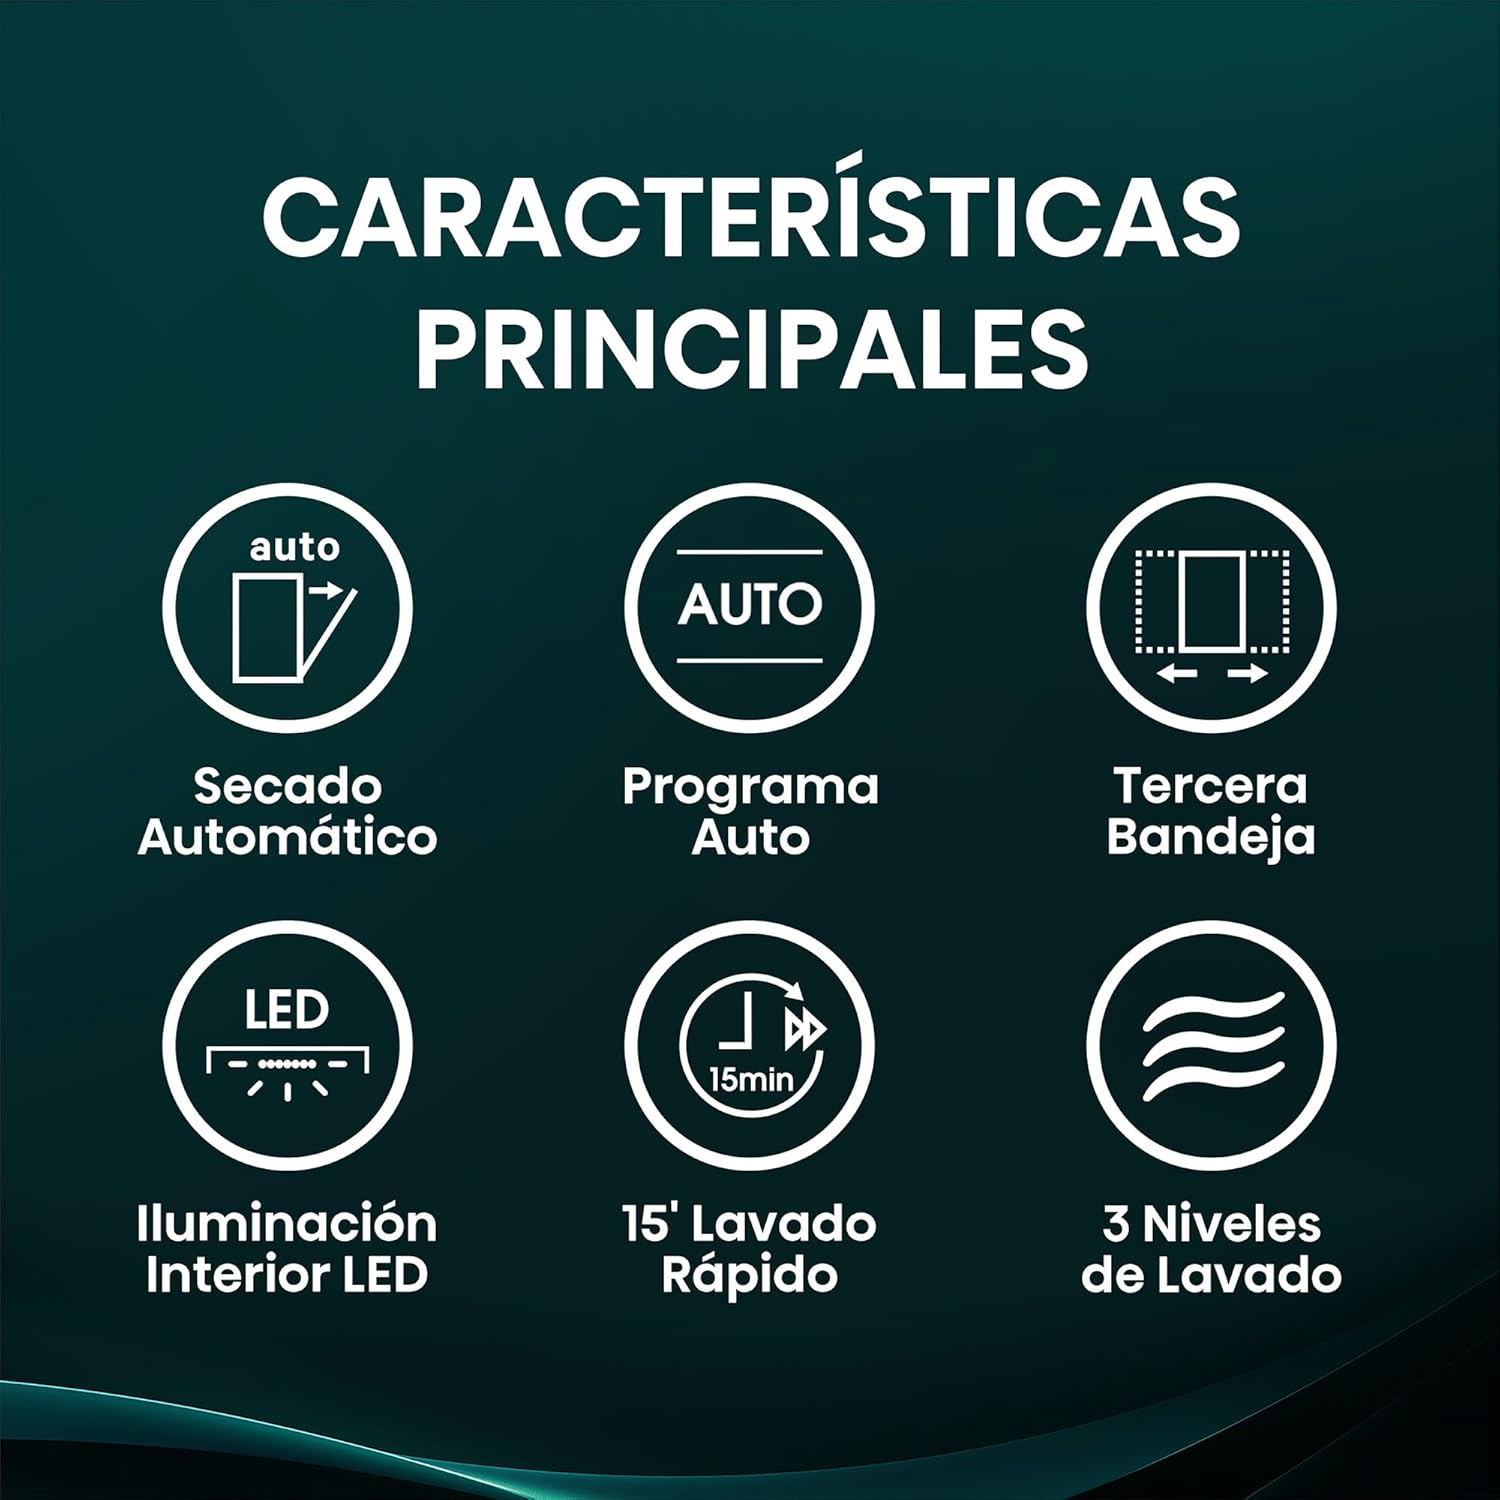
Figure 3.3: Icons representing key features such as Automatic Drying, Auto Program, Third Basket, LED Interior Lighting, 15-minute Quick Wash, and 3 Wash Levels.
4. Setup and Installation
Before installing your dishwasher, ensure you have the necessary tools and connections. It is recommended that installation be performed by a qualified technician.
4.1 Unpacking
- Carefully remove all packaging materials.
- Inspect the dishwasher for any damage during transit. Report any damage immediately to your retailer.
- Ensure all accessories, including the drain hose and user manual, are present.
4.2 Placement
- Place the dishwasher on a level, stable surface.
- Ensure there is adequate space for the appliance (Dimensions: 59.8 cm depth x 59.9 cm width x 84.6 cm height).
- Avoid placing the dishwasher near heat sources or in direct sunlight.
4.3 Water Connection
- Connect the water inlet hose to a cold water supply with a minimum pressure of 0.04 MPa and a maximum of 1 MPa.
- Ensure all connections are tight to prevent leaks.
4.4 Drain Connection
- Connect the drain hose to your household drainage system.
- Ensure the drain hose is not kinked or obstructed.
4.5 Electrical Connection
- Connect the dishwasher to a grounded electrical outlet (Voltage: 220V).
- Do not use extension cords or adapters.
5. Operating Instructions
Follow these steps for optimal washing results.
5.1 Loading the Dishwasher
- Scrape off large food particles from dishes.
- Load dishes securely, ensuring water can reach all surfaces.
- Utilize the third basket for cutlery and small items.

Figure 5.1: Close-up view of the third basket designed for cutlery and small kitchen utensils.

Figure 5.2: Interior view of the dishwasher showing the LED lighting, which improves visibility during loading and unloading.
5.2 Adding Detergent and Rinse Aid
- Fill the detergent dispenser according to the manufacturer's instructions and the soil level of your dishes.
- Refill the rinse aid dispenser when the indicator light illuminates.
5.3 Program Selection
Your dishwasher offers 7 programs, including specialized options:
- Auto Program: Automatically adjusts wash cycle based on soil level. Ideal for mixed loads.
- 15-Minute Quick Wash: For lightly soiled dishes that need a fast clean.
- Other programs for various needs (e.g., intensive, eco, delicate). Refer to the control panel for full program details.

Figure 5.3: Illustration of the Auto Program feature, which optimizes water and energy consumption for various load types.
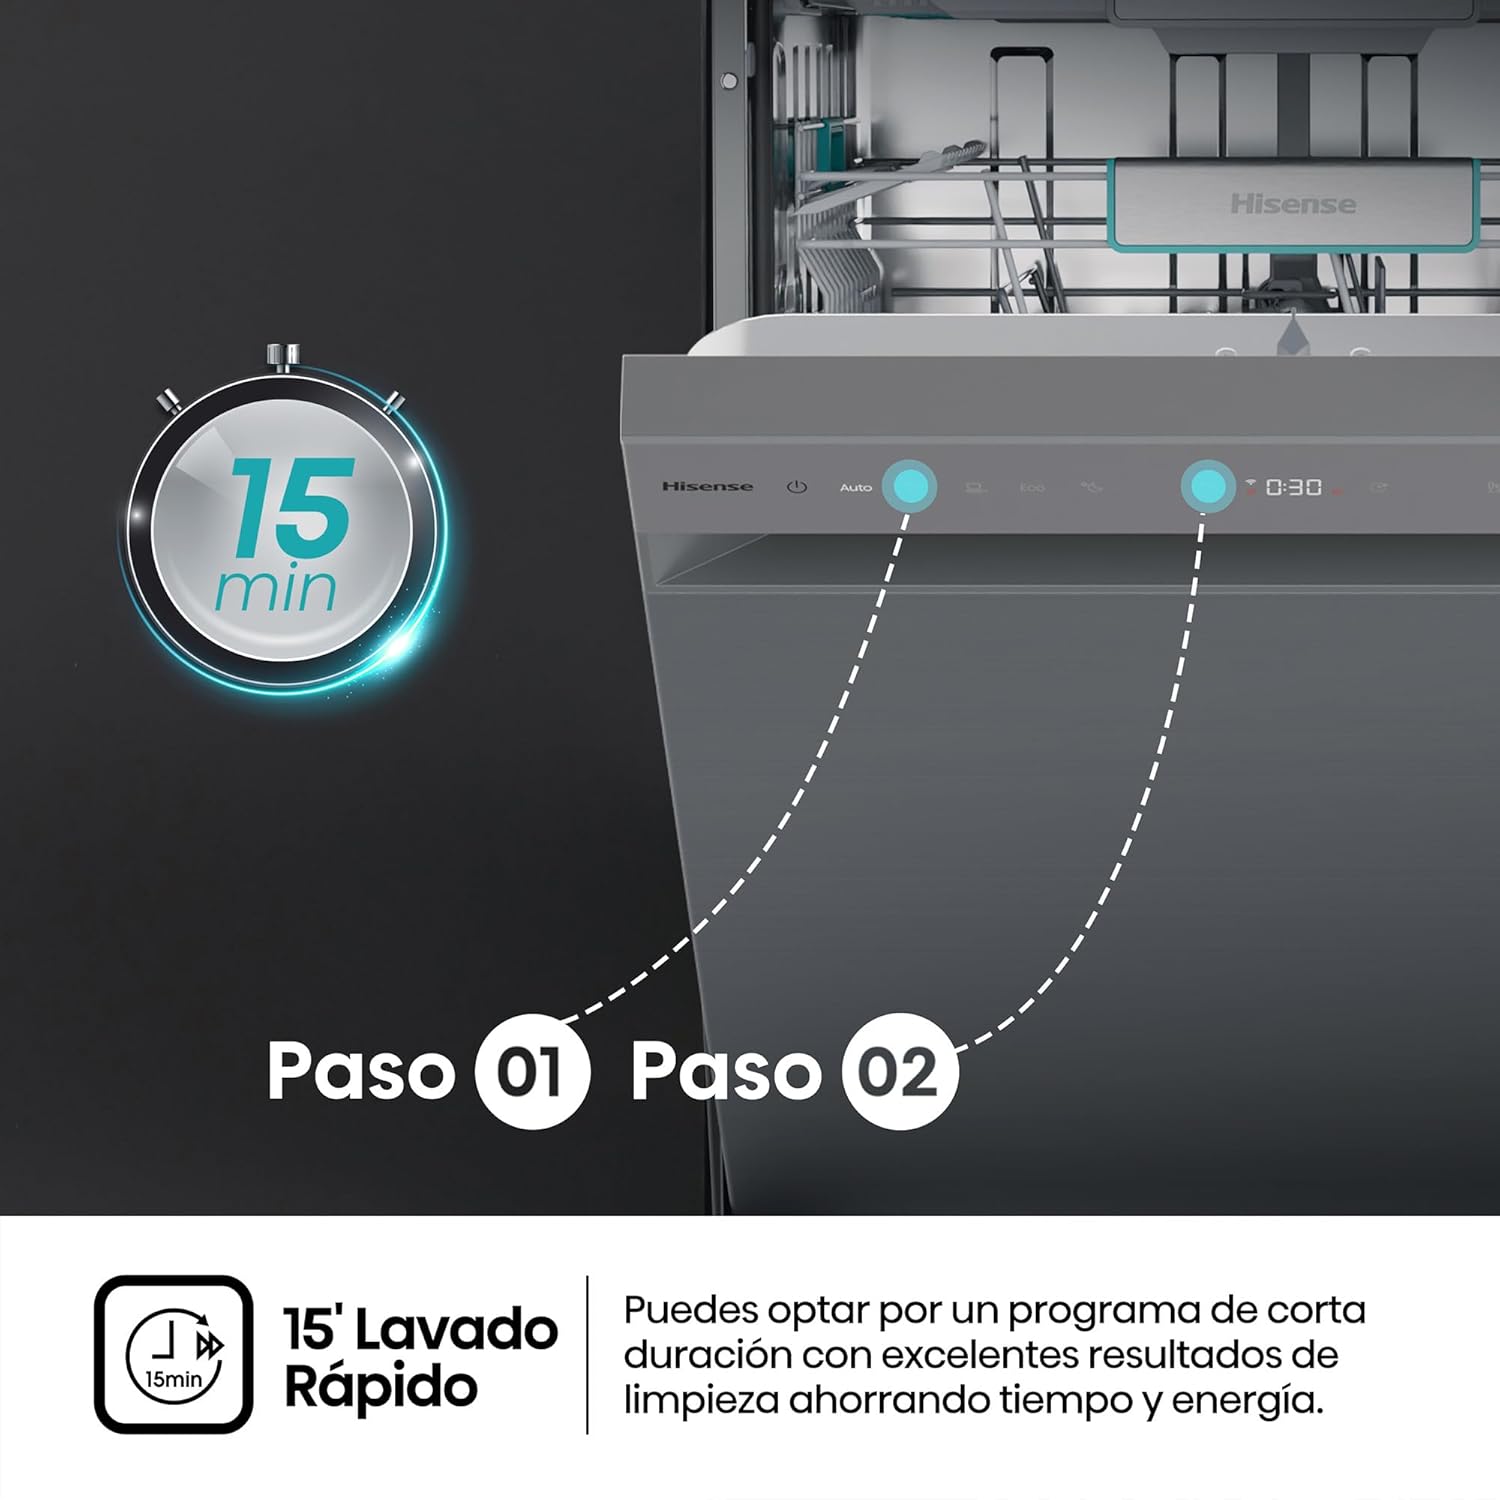
Figure 5.4: Diagram showing the two steps for activating the 15-minute Quick Wash program.
5.4 Starting a Wash Cycle
- Close the dishwasher door firmly.
- Select your desired wash program using the control panel.
- Press the Start button.
5.5 Automatic Drying
The dishwasher features an Automatic Drying function where the door will open slightly at the end of the cycle to facilitate complete drying and reduce energy consumption.

Figure 5.5: The dishwasher door automatically opening slightly at the end of a cycle for enhanced drying.
5.6 Wash Levels
The Hisense HS673A90X utilizes 3 Wash Levels, improving cleaning results by up to 30% compared to models with only two spray arms.
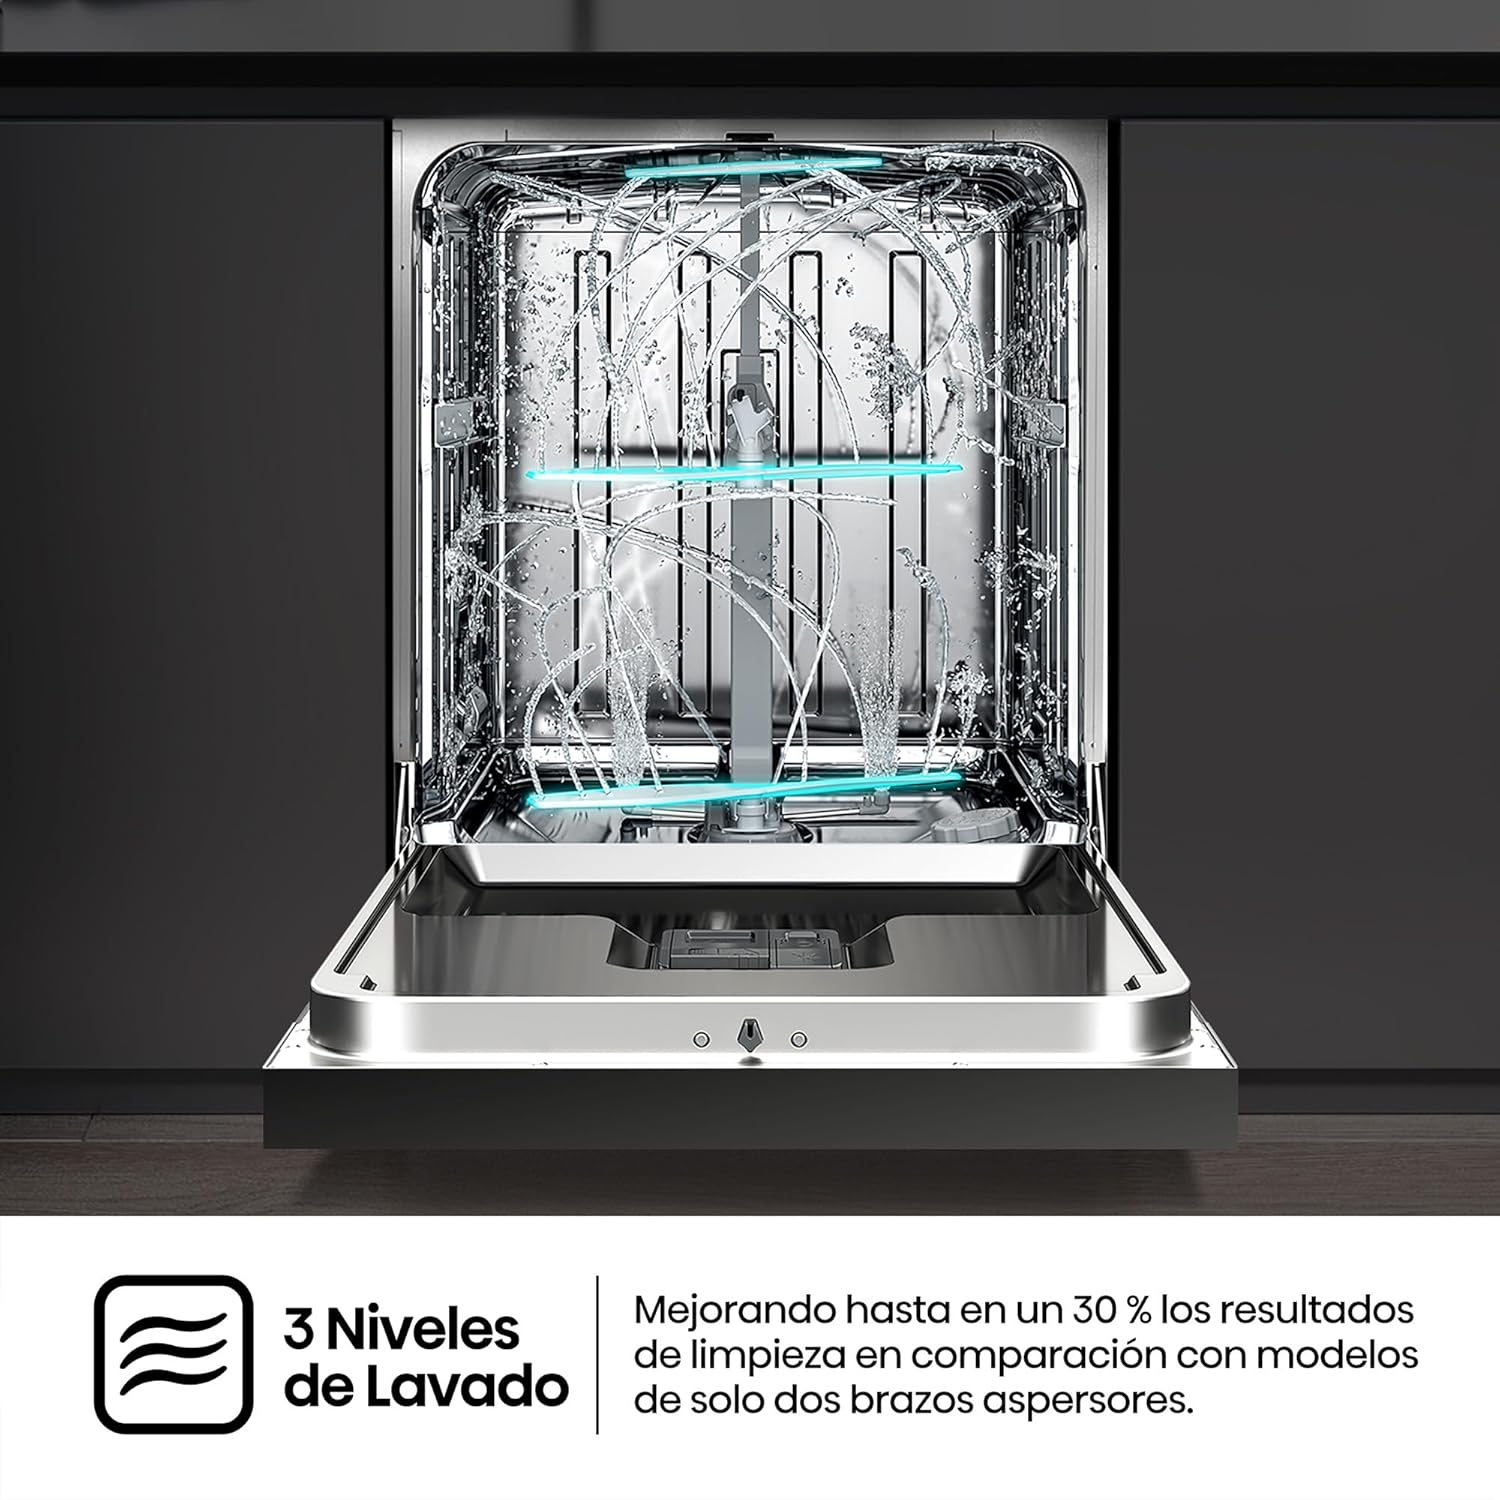
Figure 5.6: Interior view of the dishwasher demonstrating the three levels of water spray for comprehensive cleaning.
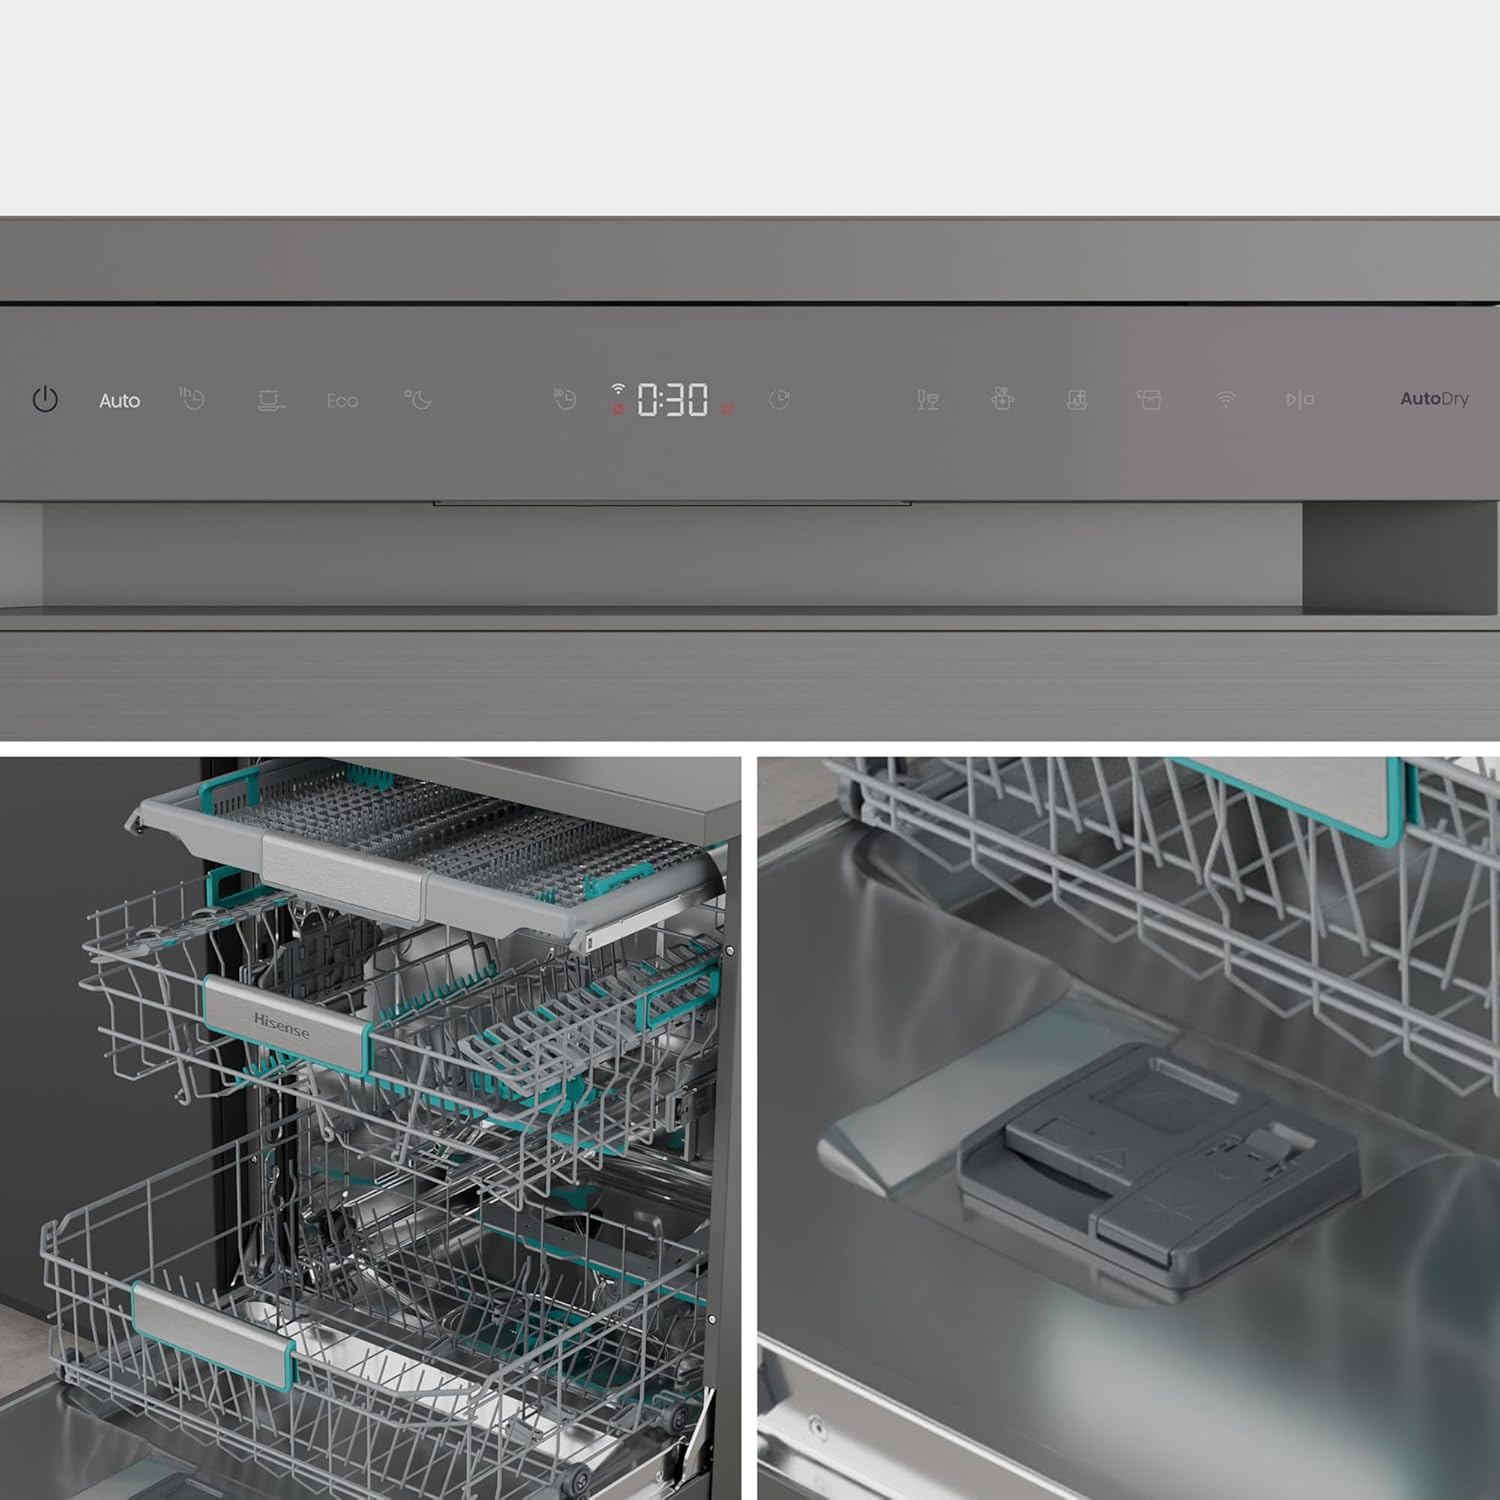
Figure 5.7: Close-up of the touch control panel and the detergent dispenser inside the dishwasher.
6. Maintenance and Cleaning
Regular maintenance ensures the longevity and optimal performance of your dishwasher.
6.1 Cleaning the Filters
- Locate the filter assembly at the bottom of the dishwasher tub.
- Twist and remove the coarse filter, fine filter, and main filter.
- Rinse all filters under running water to remove food particles.
- Reassemble the filters and place them back into the dishwasher, ensuring they are securely locked.
6.2 Cleaning the Spray Arms
- Periodically check the spray arm nozzles for blockages.
- If blocked, remove the spray arms and clear the holes with a thin wire.
6.3 Exterior and Interior Cleaning
- Wipe the exterior surfaces with a soft, damp cloth. Do not use abrasive cleaners.
- Clean the interior with a dishwasher cleaner or a mixture of vinegar and baking soda periodically to prevent odors and limescale buildup.
7. Troubleshooting
Before contacting service, refer to the following table for common issues and their solutions.
| Problem | Possible Cause | Solution |
|---|---|---|
| Dishwasher does not start | Power cord not plugged in; door not closed properly; fuse blown. | Check power connection; ensure door is latched; check household fuse/circuit breaker. |
| Dishes are not clean | Improper loading; insufficient detergent; clogged spray arms; dirty filters. | Reload dishes correctly; add more detergent; clean spray arms; clean filters. |
| Water not draining | Clogged drain hose; clogged filter; drain pump malfunction. | Check and clear drain hose; clean filters; contact service if pump is faulty. |
| Excessive noise | Dishes rattling; foreign object in pump; improper installation. | Rearrange dishes; check for foreign objects; ensure dishwasher is level. |
| Door does not close properly | Dishwasher not level; obstruction. | Adjust leveling feet; remove any obstructions. |
8. Specifications
Technical specifications for the Hisense HS673A90X Dishwasher:
| Feature | Detail |
|---|---|
| Model Number | HS673A90X |
| Brand | Hisense |
| Dimensions (W x D x H) | 59.9 cm x 59.8 cm x 84.6 cm |
| Weight | 44.5 kg |
| Capacity | 16 Place Settings |
| Energy Efficiency Class | A |
| Noise Level | 40 Decibels |
| Control Type | Touch |
| Voltage | 220V |
| Included Components | Drain hose, User Manual |

Figure 8.1: Exploded view of the dishwasher racks, including the third basket, middle rack, and lower rack.
9. Warranty Information
Your Hisense HS673A90X Dishwasher comes with a manufacturer's warranty. Please refer to the warranty card included with your product for specific terms, conditions, and registration details. Keep your proof of purchase for warranty claims.
10. Customer Support
For further assistance, technical support, or spare parts, please contact Hisense customer service.
- Visit the official Hisense website for contact details specific to your region.
- Refer to the contact information provided in your warranty documentation.
You can also visit the Hisense Brand Store on Amazon for more product information.


