
1. Product Overview
The DXOPHIEX 8.5-inch Reptile Heat Lamp with Dimming Thermostat is designed to provide a controlled heating environment for various reptiles and amphibians. This system includes a deep dome lamp fixture, a high-precision dimming thermostat, and a 150W ceramic heat emitter. It offers advanced temperature regulation to maintain a stable and comfortable habitat.
- Integrated PID Inverter Thermostat: Features a high-precision sensor for real-time temperature monitoring and adjustment. Offers a temperature control range of 20°C to 45°C (68°F to 113°F) with easy switching between Celsius and Fahrenheit.
- Two Operational Modes: Includes a PID constant temperature control mode for stability and efficiency, and a day/night temperature difference mode that automatically reduces temperature by approximately 4°F at night.
- High Reflection Deep Dome Fixture: Constructed from 1mm thick aluminum alloy with a polished inner surface for optimal heat reflection. Features ventilation holes for efficient heat dissipation and is compatible with E26 lamp bases, accommodating bulbs up to 150W.
- 150W Ceramic Heat Emitter: Provides heat without emitting light, ensuring it does not disrupt the reptile's natural day-night cycle.
2. Package Contents
Verify that all components are present and undamaged upon opening the package:
- 8.5-inch Deep Dome Lamp Fixture
- Dimming Thermostat with Temperature Probe and Light Sensor
- 150W Ceramic Heat Emitter (E26 base)
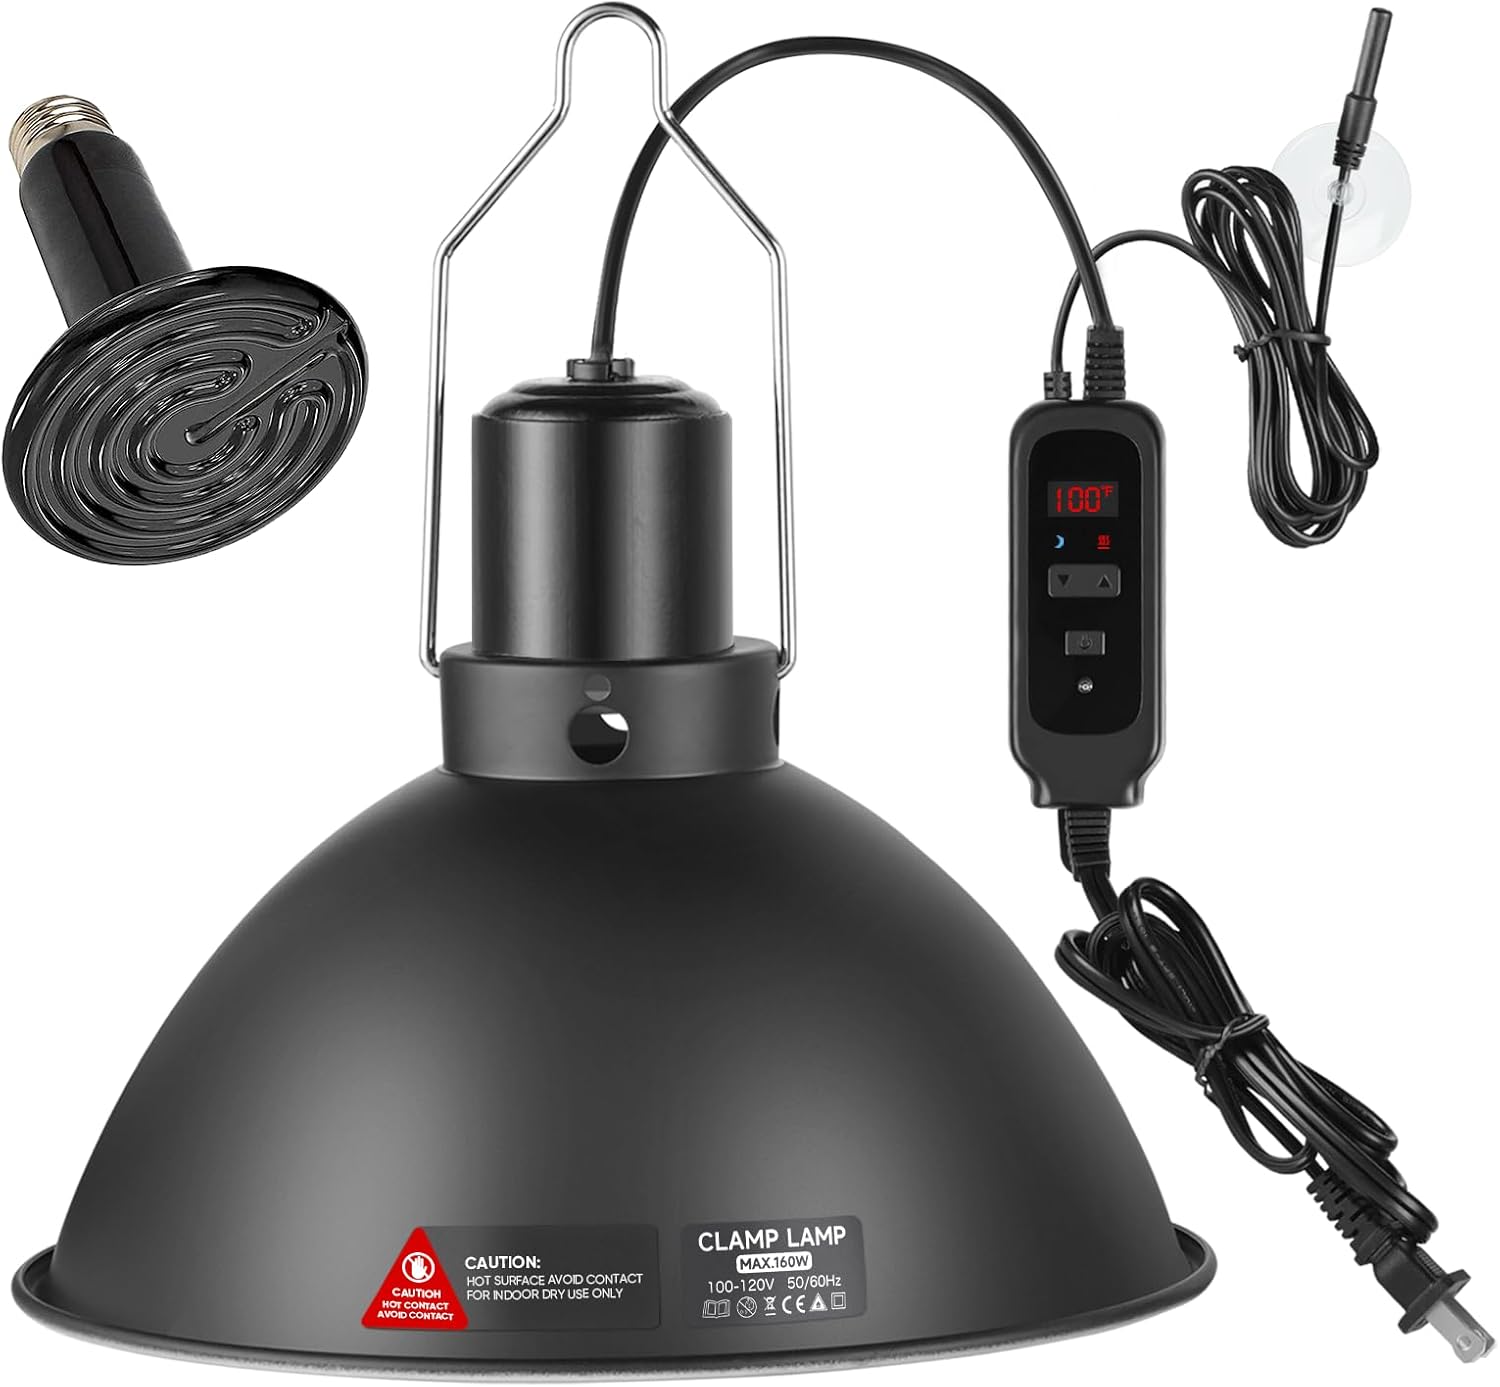
Image 2.1: All components included in the DXOPHIEX Reptile Heat Lamp package.

Image 2.2: Detailed dimensions of the lamp fixture, thermostat, and ceramic heat emitter.
3. Setup Instructions
- Install Ceramic Heat Emitter: Carefully screw the 150W ceramic heat emitter into the E26 lamp base of the deep dome fixture. Ensure it is securely tightened but do not overtighten.
- Position Lamp Fixture: Place the lamp fixture securely on top of the reptile terrarium's mesh lid or suspend it using a suitable lamp stand. Ensure the fixture is stable and cannot be easily dislodged.
- Position Temperature Probe: Place the temperature probe inside the terrarium at the desired location where temperature monitoring is critical, typically near the basking spot or a central area. Use the included suction cup to secure the probe to the terrarium wall if applicable. Ensure the probe is not directly under the heat emitter to avoid inaccurate readings.
- Connect Power: Plug the thermostat's power cord into a standard 120V electrical outlet. The digital display on the thermostat will illuminate.

Image 3.1: Example of the heat lamp and thermostat correctly installed on a reptile terrarium.
Setup Demonstration Video
Video 3.1: This video demonstrates the physical setup of the lamp fixture and temperature probe, as well as initial power-on procedures.
4. Operating Instructions
The thermostat allows for precise control over the heating environment. Familiarize yourself with the control panel:

Image 4.1: Labels for the temperature display, heating status lamp, temperature setting keys, ON/OFF key, light sensor probe, and plug.
- Power On/Off: Long press the ON/OFF key for 3 seconds to power the unit on or off.
- Switch Temperature Unit (°C/°F): Press and hold the ON/OFF key and the ▼ (down) key simultaneously for 3 seconds to switch between Celsius and Fahrenheit. The display will update accordingly.
- Set Desired Temperature:
- Long press the ▲ (up) key for 3 seconds to increase the temperature setting value. The new setting will save automatically after 5 seconds of inactivity.
- Long press the ▼ (down) key for 3 seconds to decrease the temperature setting value. The new setting will save automatically after 5 seconds of inactivity.
- Query Set Temperature: Briefly press either the ▲ (up) or ▼ (down) key to view the currently set temperature control value.
- PID Constant Temperature Control Mode: This is the default mode. The thermostat precisely controls the temperature at the set value, ensuring stability and efficiency. The heating status lamp (red indicator) will illuminate when heating is active.
- Day/Night Temperature Difference Mode:
- Activate: Press the ▲ (up) and ▼ (down) keys simultaneously for 10 seconds. The blue night cooling indicator light will blink three times, indicating the mode is active. In this mode, the light sensor probe detects natural light variations, automatically reducing the temperature by approximately 4°F during the night to simulate a natural environment.
- Deactivate: Press and hold the ▲ (up) and ▼ (down) keys simultaneously for 10 seconds. The blue night cooling indicator light will blink five times, indicating the mode is now off.

Image 4.2: Visual representation of the PID constant temperature control mode and the day/night temperature difference mode.
Operation Demonstration Video
Video 4.1: This video illustrates how to power on, switch temperature units, set the desired temperature, and activate/deactivate the day/night temperature difference mode.
5. Maintenance
Regular maintenance ensures optimal performance and longevity of your heat lamp system.
- Cleaning: Periodically wipe the exterior of the lamp fixture and thermostat with a dry, soft cloth. Ensure the unit is unplugged before cleaning. Do not use abrasive cleaners or immerse any part of the unit in water.
- Ceramic Heat Emitter Replacement: If the ceramic heat emitter ceases to function, unplug the unit and allow it to cool completely. Unscrew the old emitter and replace it with a new E26 base ceramic heat emitter, ensuring it does not exceed 150W.
- Probe Inspection: Regularly check the temperature probe and its suction cup for secure attachment and any signs of damage. Ensure the probe tip is clean and free from debris for accurate readings.
- Ventilation: Ensure the ventilation holes on top of the deep dome fixture are not obstructed to allow for proper heat dissipation.

Image 5.1: The polished reflective interior and ventilation holes of the deep dome fixture, crucial for efficient operation.
6. Troubleshooting
If you encounter issues with your DXOPHIEX Reptile Heat Lamp, refer to the following common problems and solutions:
| Problem | Possible Cause | Solution |
|---|---|---|
| Lamp not heating or insufficient heat |
|
|
| Temperature fluctuates significantly |
|
|
| Thermostat display is off or erratic |
|
|
| Lamp fixture gets excessively hot (beyond normal operating temperature) |
|
|
7. Specifications
| Feature | Specification |
|---|---|
| Brand | DXOPHIEX |
| Model Name | DX-T5 |
| Light Type | Ceramic Heat Emitter |
| Bulb Base | E26 |
| Max Wattage Capacity | 150 Watts |
| Included Ceramic Heat Emitter Wattage | 150 Watts |
| Voltage | 120 Volts |
| Temperature Control Range | 20°C to 45°C (68°F to 113°F) |
| Material | Aluminum (Fixture) |
| Color | Black |
| Item Weight | 1.55 pounds |
| Package Dimensions | 8.5 x 8.5 x 6.77 inches |
| Indoor/Outdoor Usage | Indoor |
8. Warranty and Support
Specific warranty information for the DXOPHIEX 8.5-inch Reptile Heat Lamp with Dimming Thermostat is not provided in this manual. For warranty details, technical support, or any product-related inquiries, please contact DXOPHIEX customer service directly through their official website or the retailer where the product was purchased.