1. Introduction
Thank you for choosing the AZZUNO MIG-135PRO 3-in-1 Welder. This versatile machine is designed for Flux Core MIG, Lift TIG, and Stick welding applications, offering up to 135 Amps of output power. It is suitable for various tasks, from home DIY projects to light professional use. This package also includes an AZZUNO WH-2001 Auto-Darkening Welding Helmet to ensure your safety during operation. Please read this manual thoroughly before operating the welder to ensure safe and efficient use.
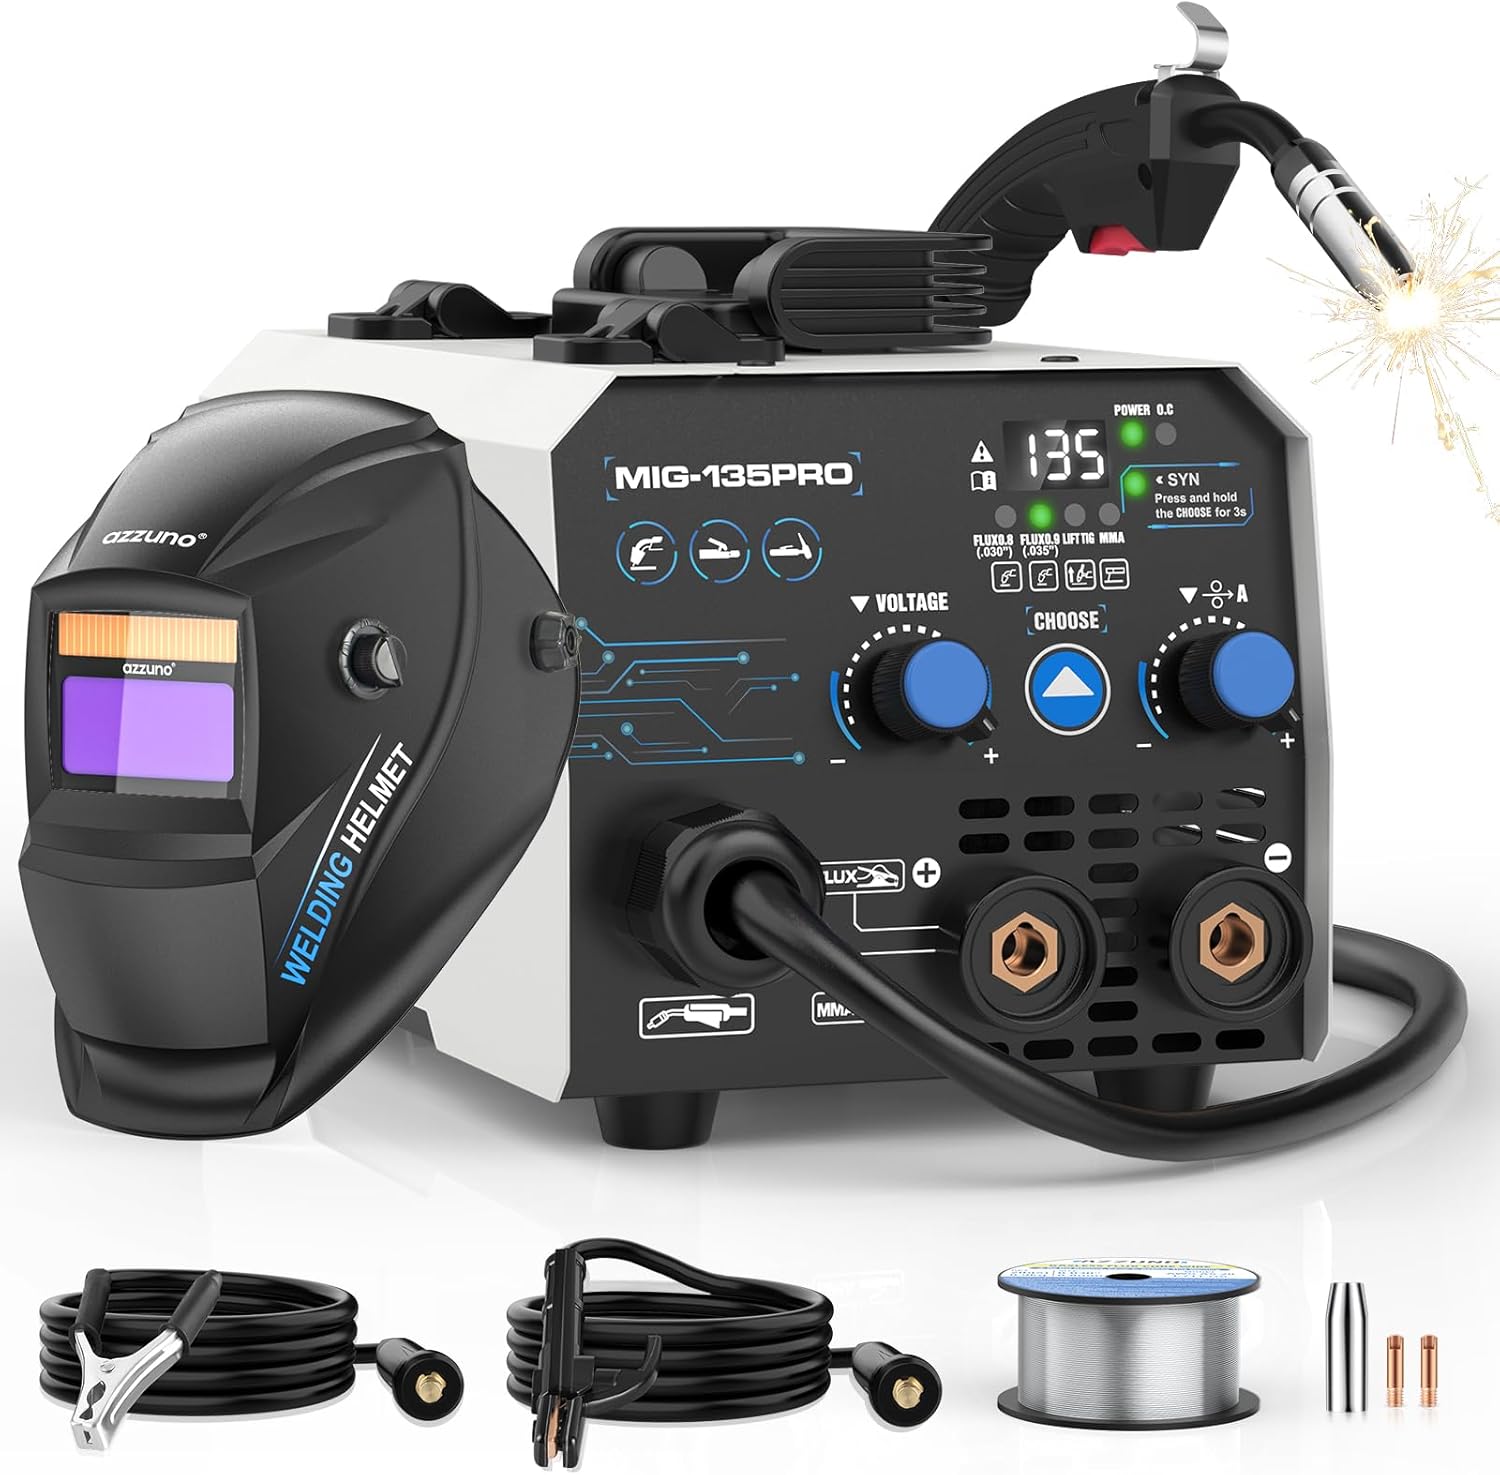
Image 1.1: The AZZUNO MIG-135PRO 3-in-1 Welder with its complete set of accessories, including the auto-darkening welding helmet, flux-cored wire, electrode holder, and ground clamp.
2. Safety Information
Welding can be hazardous. Always follow safety precautions to prevent injury or damage. This section outlines essential safety guidelines.
2.1 General Safety Precautions
- Wear Personal Protective Equipment (PPE): Always use a welding helmet with appropriate shade, flame-resistant gloves, protective clothing, and safety glasses.
- Ensure Adequate Ventilation: Welding fumes can be harmful. Work in a well-ventilated area or use fume extraction equipment.
- Prevent Electric Shock: Ensure the welder is properly grounded. Do not touch live electrical parts. Keep work area dry.
- Fire Prevention: Remove flammable materials from the welding area. Have a fire extinguisher readily available.
- Arc Rays: Protect eyes and skin from arc rays, which can cause burns and eye damage.
2.2 Welder Safety Features
The MIG-135PRO welder includes an automatic overheat protection system. If the internal temperature exceeds safe limits, the machine will pause operation and illuminate an indicator light. A high-efficiency cooling fan assists in heat dissipation, protecting internal components and ensuring stable performance.

Image 2.1: The welder is equipped with multiple protection systems, including overload, over-voltage, over-heat, and over-current protection, indicated by a glowing fan and protective icons.
3. Package Contents
Verify that all items listed below are present in your package:
- AZZUNO MIG-135PRO Welder Machine
- AZZUNO WH-2001 Auto-Darkening Welding Helmet (headband requires assembly)
- 0.030" Flux-Cored Wire
- Electrode Holder
- Ground Clamp
- Contact Tips (x2)
- Nozzle (x1)
- Brush & Hammer
- Extra replacement Outer/Inner Lens for helmet
4. Product Features
4.1 3-in-1 Welding Capability
The AZZUNO MIG-135PRO offers three welding processes: Flux Core MIG, Lift TIG, and Stick (MMA) welding. This versatility allows you to tackle a wide range of materials and projects. The machine provides up to 135 Amps of output, capable of welding steel up to 5/32" (4mm) thick. Please note that a TIG torch is not included and must be purchased separately for Lift TIG welding.

Image 4.1: Visual representation of the three welding modes: Flux MIG, MMA (Stick), and Lift TIG.
4.2 Smart Synergic Control
The welder features SYNERGIC control, which automatically adjusts voltage and current settings based on your selected wire size (0.030" or 0.035"). This simplifies setup and ensures optimal welding parameters, making it easier for both beginners and experienced welders to achieve consistent results.
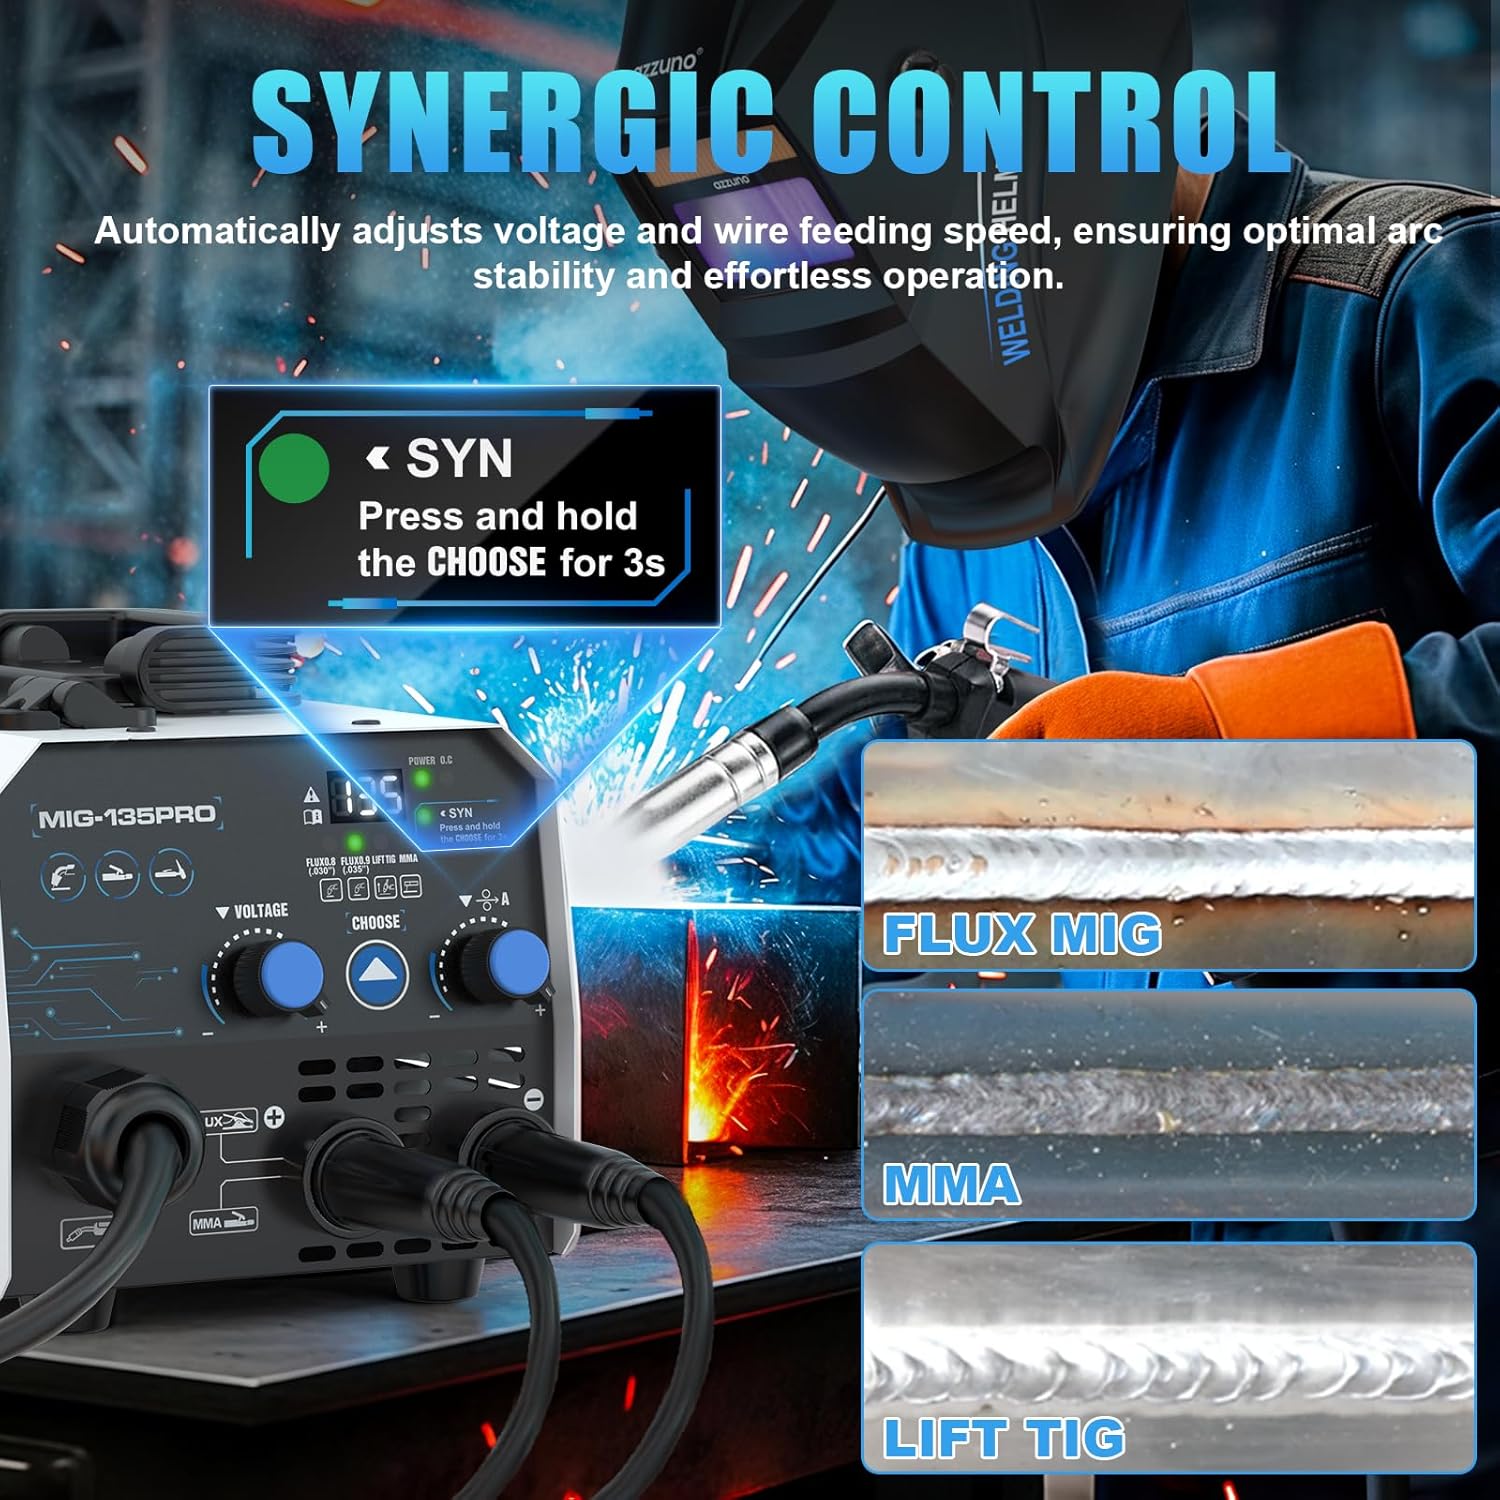
Image 4.2: The synergic control feature automatically adjusts welding parameters for stable arc performance.
4.3 Compact and Portable Design
Weighing only 9 lbs and measuring 10.6" x 5.64" x 6.3", the MIG-135PRO is designed for portability. Its compact size makes it ideal for mobile welding, home repairs, or working in confined spaces.
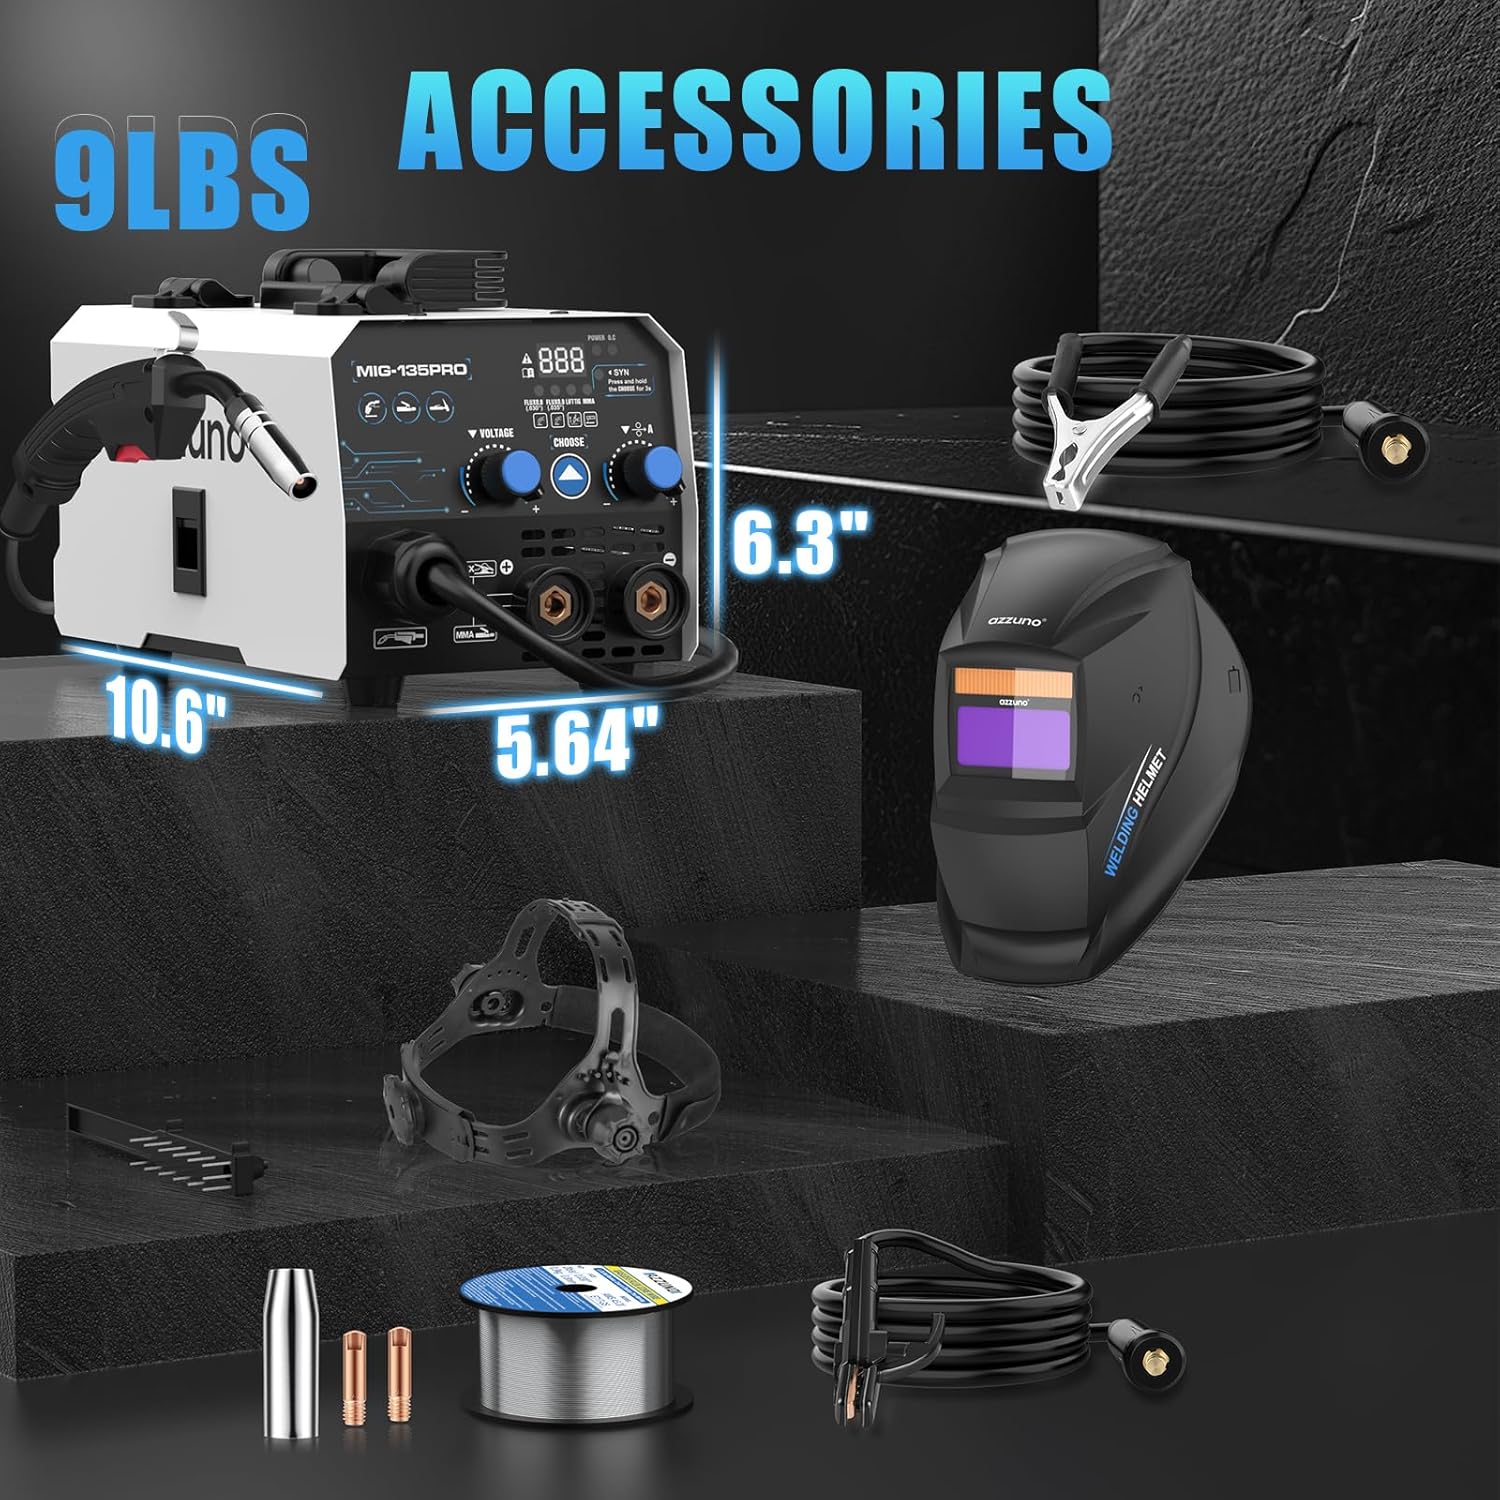
Image 4.3: The compact dimensions and light weight of the welder, along with its accessories.
4.4 Auto-Darkening Welding Helmet (WH-2001)
The included WH-2001 auto-darkening welding helmet features a large viewing area of 3.66" x 1.69" and a rapid 3/10000s auto-darkening response time. It utilizes a true color lens with a shade range of 9-13 for welding and DIN 4 for grinding, providing clear visibility and protection.

Image 4.4: Key features of the auto-darkening welding helmet.

Image 4.5: The welding helmet is powered by dual sources: solar cells and a replaceable lithium battery.
5. Setup Instructions
5.1 Welder Connections
- Connect the ground clamp cable to the negative (-) terminal on the welder.
- Connect the electrode holder cable (for Stick welding) to the positive (+) terminal.
- For Flux Core MIG welding, connect the MIG torch to the designated MIG connector. Ensure all connections are secure.
- For Lift TIG welding, connect the TIG torch (not included) to the appropriate terminals as per the torch's instructions.
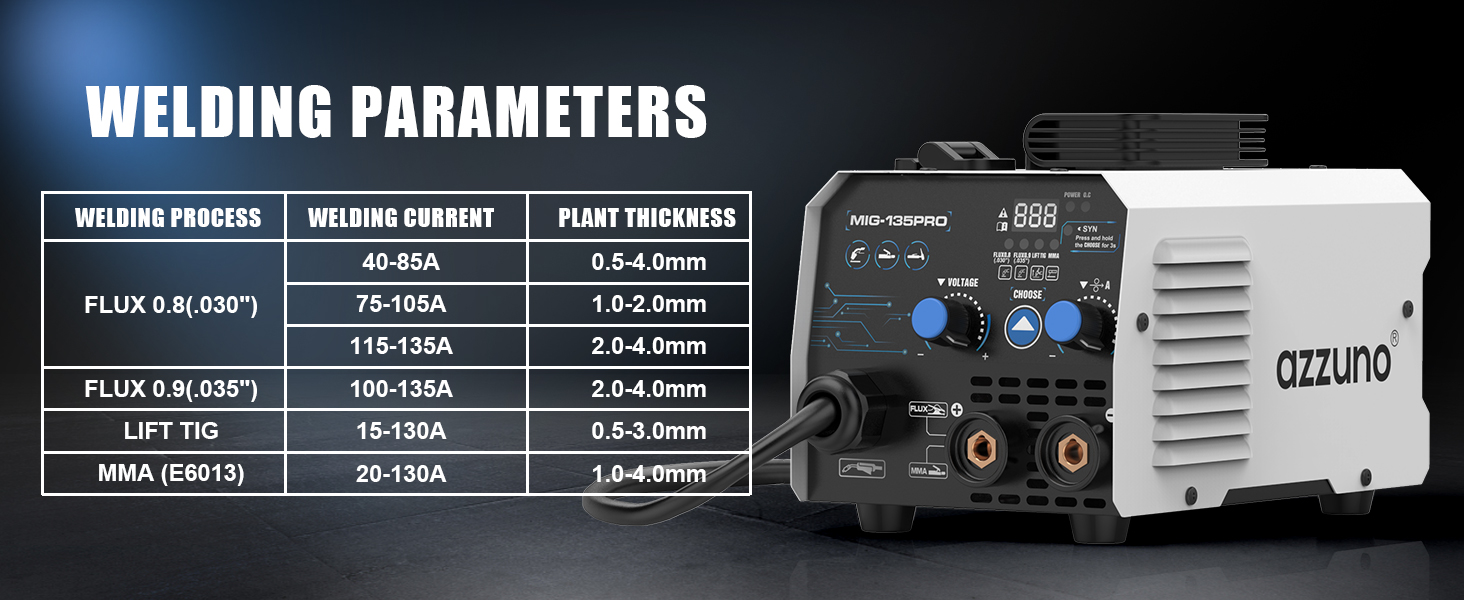
Image 5.1: Connection diagrams for Gasless MIG, Stick, and Lift TIG welding setups.
5.2 Wire Installation (Flux Core MIG)
- Open the wire feed compartment.
- Place the 0.030" flux-cored wire spool onto the spindle, ensuring it rotates freely.
- Thread the wire through the guide tube and into the drive roller mechanism.
- Close the drive roller tension arm and adjust the tension appropriately.
- Feed the wire through the MIG torch liner until it exits the contact tip.
5.3 Welding Helmet Assembly
Assemble the headband to the auto-darkening welding helmet according to the instructions provided with the helmet. Ensure all adjustments (top strap, distance, tightness, angle) are set for a comfortable and secure fit.

Image 5.2: Adjustable features of the welding helmet headband for a customized fit.
6. Operating Instructions
6.1 Control Panel Overview
Familiarize yourself with the welder's control panel:
- Power Light: Indicates the machine is powered on.
- Over Heat Indicator: Illuminates if the machine overheats.
- SYN Mode Indicator: Shows when synergic control is active.
- Welding Mode Display: Shows the currently selected welding process (Flux 0.8, Flux 0.9, Lift TIG, MMA).
- Mode Choose Button: Press to cycle through welding modes. Press and hold for 3 seconds to activate/deactivate SYN mode.
- Voltage Adjusting Knob: Adjusts welding voltage.
- Current Adjusting Knob: Adjusts welding current.

Image 6.1: Introduction to the welder's user-friendly control panel.
6.2 Selecting Welding Mode
Press the 'CHOOSE' button to select your desired welding mode: Flux 0.8 (0.030" wire), Flux 0.9 (0.035" wire), Lift TIG, or MMA (Stick).
6.3 Using Synergic Control (SYN Mode)
For simplified setup, use the Synergic Control:
- Press and hold the 'CHOOSE' button for 3 seconds until the 'SYN' light illuminates.
- Select either 'Flux 0.8' or 'Flux 0.9' welding mode. The machine will automatically set optimal voltage and wire feed speed.
- You can then make slight adjustments to the current knob to fine-tune the arc.

Image 6.2: Steps to engage and utilize the Synergic Control feature.
6.4 Manual Adjustment
If not using SYN mode, or for specific applications, you can manually adjust the voltage and current using their respective knobs.
6.5 Welding Parameters
Refer to the table below for recommended welding parameters:

Image 6.3: Recommended welding parameters for various processes and material thicknesses.
6.6 Welding Helmet Modes
The WH-2001 helmet supports two modes:
- Weld Mode (DIN 9-13): Automatically darkens upon arc ignition, protecting your eyes during welding.
- Grind Mode (DIN 4): Provides a lighter shade suitable for grinding operations, offering protection from sparks and debris.

Image 6.4: The welding helmet's Weld and Grind modes.
7. Maintenance
Regular maintenance ensures the longevity and optimal performance of your welder and helmet.
- Cleaning: Periodically clean the welder's exterior with a dry cloth. Ensure cooling vents are free from dust and debris. Clean the welding helmet lens according to its specific instructions.
- Connections: Regularly check all cable connections for tightness and signs of wear or damage. Replace worn cables immediately.
- Wire Feed Mechanism: Inspect the wire feed rollers and liner for wear. Clean any accumulated debris from the wire path to ensure smooth wire feeding.
- Cooling Fan: Ensure the cooling fan operates freely and is not obstructed.
8. Troubleshooting
If you encounter issues, refer to the following common problems and solutions:
- No Arc: Check power supply, ground clamp connection, and ensure the welding mode is correctly selected. Verify wire feed and contact tip are clear.
- Wire Feeding Issues: Inspect the wire spool for tangles, check drive roller tension, and ensure the wire liner is not clogged or kinked.
- Overheat Indicator On: Allow the machine to cool down. Ensure adequate ventilation around the welder. Do not block air inlets/outlets.
- Helmet Not Darkening: Check helmet battery (if applicable), ensure sensors are clean and unobstructed, and verify sensitivity settings.
For persistent issues, contact AZZUNO customer support.
9. Specifications
| Feature | Specification |
|---|---|
| Manufacturer | AZZUNO |
| Model Number | MIG-135PRO-AZNH-2001 |
| Item Weight | 9 pounds |
| Product Dimensions | 10.6 x 5.64 x 6.3 inches |
| Welding Processes | Flux Core MIG, Lift TIG, Stick (MMA) |
| Input Voltage | 110V |
| Output Current | Up to 135A |
| Max Weld Thickness | 5/32" (4mm) |
| Welding Helmet Model | WH-2001 |
| Helmet Viewing Area | 3.66" x 1.69" |
| Helmet Darkening Time | 3/10000s |
| Helmet Shade Range | DIN 9-13 (Weld), DIN 4 (Grind) |
10. Warranty and Support
For warranty information, technical support, or service inquiries, please contact AZZUNO customer service. Keep your purchase receipt as proof of purchase. Contact details can typically be found on the AZZUNO official website or through your retailer.