
Gevi ECM-8503UL
Contents
Gevi Espresso Machine User Manual
Model: ECM-8503UL
Brand: Gevi
1. Introduction
This manual provides detailed instructions for the safe and efficient operation, maintenance, and troubleshooting of your Gevi Espresso Machine with Milk Frother. Please read this manual thoroughly before first use and retain it for future reference.

Image: Front view of the Gevi Espresso Machine, showing its sleek silver stainless steel exterior and two espresso shots being brewed simultaneously.
2. Important Safety Instructions
Always follow basic safety precautions when using electrical appliances to reduce the risk of fire, electric shock, and injury to persons.
- Read all instructions before operating the appliance.
- Do not touch hot surfaces. Use handles or knobs.
- To protect against fire, electric shock, and injury, do not immerse cord, plugs, or appliance in water or other liquid.
- Close supervision is necessary when any appliance is used by or near children.
- Unplug from outlet when not in use and before cleaning. Allow to cool before putting on or taking off parts, and before cleaning the appliance.
- Do not operate any appliance with a damaged cord or plug, or after the appliance malfunctions or has been damaged in any manner.
- The use of accessory attachments not recommended by the appliance manufacturer may result in fire, electric shock, or injury to persons.
- Do not use outdoors.
- Do not let cord hang over edge of table or counter, or touch hot surfaces.
- Do not place on or near a hot gas or electric burner, or in a heated oven.
- Always attach plug to appliance first, then plug cord into the wall outlet. To disconnect, turn any control to "off", then remove plug from wall outlet.
- Do not use appliance for other than intended use.
- Use extreme caution when disposing of hot steam.
3. Product Components
Your Gevi Espresso Machine package includes the following items:
- Gevi Espresso Maker with Milk Frother x 1
- Portafilter x 1
- 58mm 2 Cup Single Wall Filter x 1
- 58mm 1 Cup Single Wall Filter x 1
- Spoon & Tamper x 1
- User Manual x 1
- Stainless Steel Milk Frothing Pitcher x 1

Image: A visual representation of the complete set of accessories included with the Gevi Espresso Machine, designed to provide a full coffee brewing experience.
4. Initial Setup
Before first use, follow these steps to prepare your espresso machine:
- Unpacking: Carefully remove all components from the packaging. Retain packaging for future storage or transport.
- Cleaning: Wash the water tank, portafilter, filter baskets, milk frothing pitcher, and drip tray with warm, soapy water. Rinse thoroughly and dry. Wipe the exterior of the machine with a damp cloth.
- Water Tank Installation: Ensure the detachable 50.7 oz (1.5L) water tank is properly seated at the back of the machine.
- Filling the Water Tank: Fill the water tank with fresh, cold water up to the MAX line.

Image: The transparent, detachable water tank, highlighting its capacity and ease of refilling for continuous use.
- First Use Cycle (Priming):
- Place a large cup under the portafilter spout (without coffee grounds).
- Press the "On/Off" button to turn on the machine. The button will illuminate.
- Once the machine is heated (indicator light stable), press the "Double Cup" button to run a cycle of hot water through the system. This primes the pump and cleans internal components.
- Repeat this process for the steam wand by turning the steam knob to release steam until water flows consistently.
- Drip Tray: Ensure the drip tray is correctly installed at the base of the machine. It is removable for easy cleaning.
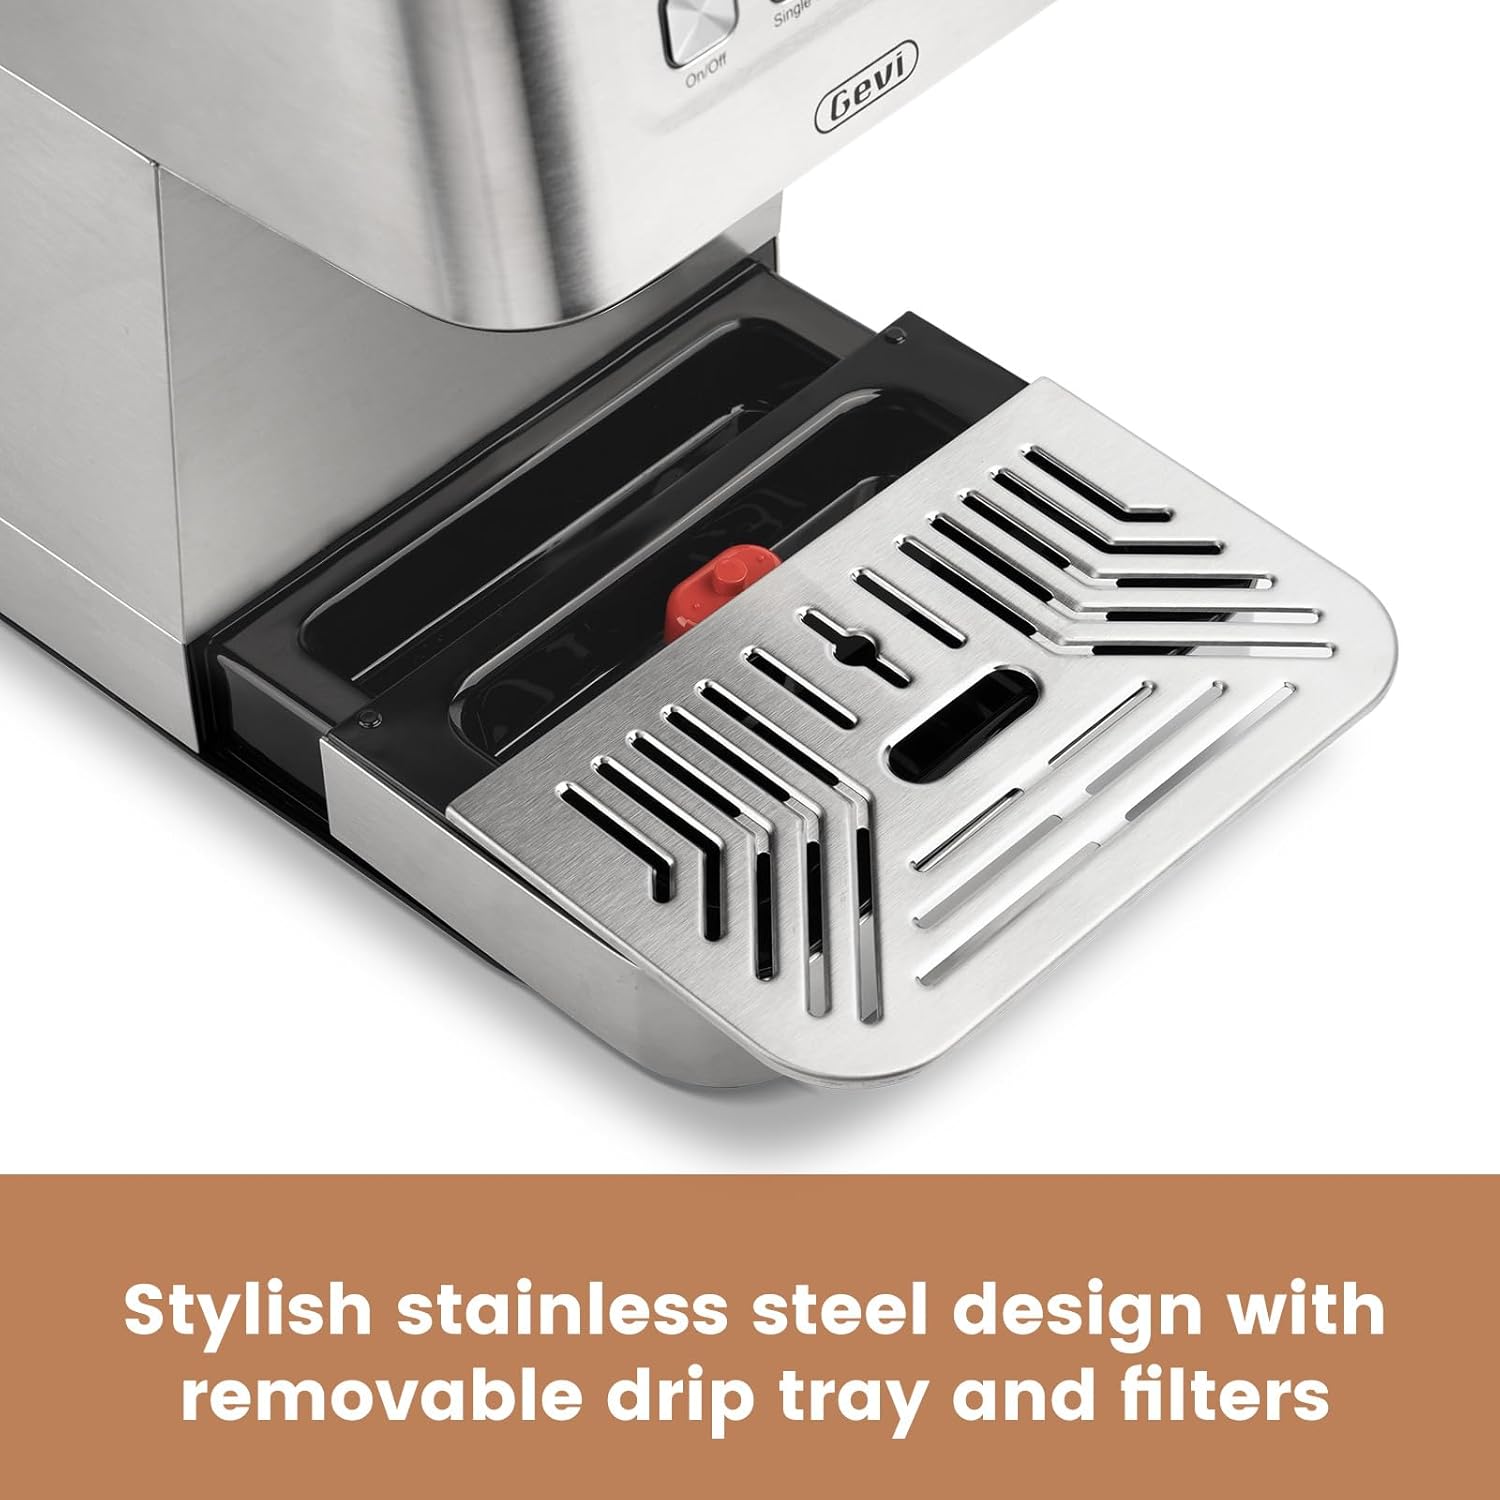
Image: Close-up of the machine's removable drip tray, designed for easy cleaning and maintenance.
5. Operating Instructions
5.1 Brewing Espresso
- Prepare the Portafilter: Insert either the 1-cup or 2-cup filter basket into the 58mm professional portafilter.
- Add Coffee Grounds: Fill the filter basket with finely ground espresso coffee. Use the included spoon to measure.
- Tamp the Grounds: Use the tamper to press the coffee grounds firmly and evenly. Ensure the surface is level.
- Attach Portafilter: Align the portafilter with the group head on the machine and twist it firmly to the right until it is securely locked.
- Place Cup(s): Place one or two espresso cups on the drip tray directly under the portafilter spouts. For optimal flavor, place cups on the top warming plate before brewing to preheat them.

Image: The top warming plate of the espresso machine, designed to preheat cups for an enhanced coffee experience.
- Select Brew Size: Press the "Single Cup" button for a single shot (approx. 10-25 seconds extraction) or the "Double Cup" button for a double shot (approx. 20-50 seconds extraction). The machine will automatically stop when the programmed volume is reached.

Image: Close-up of the intuitive control panel with illuminated buttons for On/Off, Single Cup, Double Cup, and Steam, demonstrating ease of use.

Image: Espresso extraction in progress, illustrating the recommended extraction times for single and double shots to achieve optimal flavor.
- Enjoy: Once brewing is complete, carefully remove your cup(s).
5.2 Frothing Milk
The integrated steam wand allows you to create rich, creamy milk foam for cappuccinos, lattes, and more.
- Prepare Milk: Fill the stainless steel milk frothing pitcher with cold milk (dairy or non-dairy) to about one-third full.
- Activate Steam Function: Press the "Steam" button. The button will illuminate, indicating the machine is heating up for steam production.
- Purge Steam Wand: Once the steam light is stable, position an empty cup under the steam wand and turn the steam control knob to release a small amount of steam to purge any condensed water. Turn the knob off.
- Froth Milk: Immerse the tip of the steam wand just below the surface of the milk in the pitcher. Turn the steam control knob to release steam. Move the pitcher up and down slowly to incorporate air and create foam. For latte art, aim for a silky, microfoam texture.

Image: The steam wand in action, demonstrating how to effortlessly create smooth microfoam for various milk-based coffee beverages.
- Stop Steaming: Once desired foam consistency and temperature are reached, turn the steam control knob off and then press the "Steam" button again to deactivate the steam function.
- Clean Steam Wand: Immediately wipe the steam wand with a damp cloth to remove any milk residue. Purge a small amount of steam again to clear the internal nozzle.
6. Cleaning and Maintenance
Regular cleaning ensures optimal performance and extends the lifespan of your Gevi Espresso Machine.
6.1 Daily Cleaning
- Portafilter and Filter Baskets: After each use, remove the portafilter, discard coffee grounds, and rinse the portafilter and filter basket under hot water. Use a brush to remove any stubborn coffee residue.
- Drip Tray: Empty and rinse the drip tray daily or when the red indicator floats up.
Image: Close-up of the machine's removable drip tray, designed for easy cleaning and maintenance.
- Steam Wand: As mentioned in the operation section, wipe the steam wand immediately after frothing and purge steam to prevent milk buildup.
- Water Tank: Empty any remaining water from the tank if the machine will not be used for an extended period. Rinse and refill with fresh water before next use.
- Exterior: Wipe the stainless steel exterior with a soft, damp cloth. Avoid abrasive cleaners or scouring pads.
6.2 Descaling
Descaling is crucial to remove mineral buildup (limescale) that can affect machine performance and coffee taste. The frequency depends on water hardness and usage, but generally every 2-3 months is recommended.
- Prepare Descaling Solution: Mix a descaling solution (e.g., citric acid or commercial descaler) with water according to the descaler manufacturer's instructions. Pour into the water tank.
- Run Descaling Cycle: Place a large container under the group head and steam wand. Run several "Double Cup" cycles until half of the solution is used. Then, turn the steam knob to release steam until the remaining solution is used.
- Rinse Cycle: Fill the water tank with fresh water. Run several "Double Cup" cycles and steam cycles to thoroughly rinse the machine and remove any descaler residue.
7. Troubleshooting
Refer to the table below for common issues and their solutions.
| Problem | Possible Cause | Solution |
|---|---|---|
| No coffee dispenses. | No water in tank; tank not seated correctly; clogged filter basket; machine not primed. | Fill water tank; ensure tank is seated; clean filter basket; perform priming cycle. |
| Coffee brews too slowly or drips. | Coffee grounds too fine or tamped too hard; clogged filter basket; machine needs descaling. | Use coarser grind or lighter tamp; clean filter basket; descale the machine. |
| Coffee brews too quickly or is watery. | Coffee grounds too coarse or not enough coffee; tamped too lightly. | Use finer grind or more coffee; tamp more firmly. |
| Steam wand not producing steam. | Steam function not activated; wand clogged with milk residue; machine not heated to steam temperature. | Press "Steam" button; clean wand thoroughly; wait for steam indicator light to stabilize. |
| Machine leaks water. | Water tank not seated correctly; drip tray full; portafilter not secured. | Re-seat water tank; empty drip tray; ensure portafilter is locked firmly. |
8. Product Specifications
| Feature | Detail |
|---|---|
| Brand | Gevi |
| Model Name | ECM-8503UL |
| Color | Silver |
| Product Dimensions | 10.6"D x 8.7"W x 11.7"H |
| Item Weight | 9.25 pounds |
| Coffee Maker Type | Espresso Machine |
| Operation Mode | Semi-Automatic |
| Pressure System | 20 Bar |
| Portafilter Size | 58mm Professional |
| Water Tank Capacity | 50.7 oz (approx. 1.5 Liters) |
| Voltage | 120 Volts |
| Special Features | Milk Frother, Removable Tank, NTC Temperature Control, Intuitive Button Control |
| Exterior Finish | Stainless Steel |
| UPC | 767791889091 |

Image: The espresso machine with its compact dimensions clearly marked, illustrating its space-saving design.

Image: A detailed view of the 58mm professional portafilter, designed for optimal coffee extraction and rich crema.
9. Warranty and Support
Gevi is committed to customer satisfaction. Every Gevi product purchased via an official or authorized channel is entitled to a 12-month warranty and lifetime technical support.
If you encounter any issues with your Gevi Espresso Machine or require assistance, please do not hesitate to contact Gevi customer support. Refer to the contact information provided on the Gevi official website or your purchase documentation.
For more information, visit the Gevi Store on Amazon.
Ask a question about this manual
Ask about setup, troubleshooting, compatibility, parts, safety, or missing instructions. Manuals+ will review the question and use this page’s manual context to help answer it.