
FOKEY FOKEY Weather Station with Two Remote Sensors
Contents
FOKEY Weather Station User Manual
Model: FOKEY Weather Station with Two Remote Sensors
1. Introduction
This manual provides comprehensive instructions for the setup, operation, and maintenance of your FOKEY Weather Station. This device is designed to provide accurate indoor and outdoor temperature and humidity readings, barometric pressure, moon phase, and a 12-24 hour weather forecast. Please read this manual thoroughly before using the product to ensure proper functionality and longevity.
2. Package Contents
Please verify that all items listed below are included in your package:
- 1 x FOKEY Weather Station Main Unit
- 2 x FOKEY Wireless Remote Sensors (one included, plus one extra)
- 1 x Power Adapter for Main Unit
- 1 x User Manual (this document)
Note: 2 x AA batteries are required for each outdoor sensor and are not included.
3. Product Overview
3.1 Main Weather Station Unit

Figure 3.1: FOKEY Weather Station Main Unit with two remote sensors. The main unit features a large color display showing indoor/outdoor temperature and humidity, time, date, moon phase, barometric pressure, and weather forecast icons. Two white remote sensors are shown alongside the main unit.
The main unit serves as the central display for all collected weather data. It features a vibrant color display designed for clear readability from various angles.
3.2 Display Technology

Figure 3.2: Exploded view illustrating the layers of the weather station display. From back to front, the layers include LED Backlight, Polarizer, TFT Array, Liquid Crystal, Color Filter, and Cover Window, contributing to the display's clarity.
The display utilizes advanced layering technology to ensure optimal clarity and visibility. Key components include an LED backlight, polarizer, TFT array, liquid crystal, color filter, and a protective cover window.
3.3 Display Layout and Information

Figure 3.3: Diagram showing the logical layout of information on the weather station display. Sections are clearly labeled, indicating areas for Atomic Time with WWVB, Moon Phase, Barometric Pressure, Remote Temperature & Humidity, 12-24 Hour Forecast, and Indoor Temperature & Humidity.
The display is organized to present information clearly and intuitively. Key data points include:
- Atomic Time with WWVB: Automatically synchronized time for accuracy.
- Moon Phase: Displays the current lunar phase.
- Barometric Pressure: Shows current atmospheric pressure and trend.
- Remote Temperature & Humidity: Readings from the outdoor sensor(s).
- 12-24 Hour Forecast: Predictive weather icons.
- Indoor Temperature & Humidity: Readings from the main unit's internal sensors.
3.4 Remote Wireless Sensor

Figure 3.4: Detailed view of the remote wireless sensor, highlighting its components. Labels include C1: Remote Temperature and Humidity display, C2: Channel 1,2,3 switch, C3: RF Transmit LED, C4: Wall Mount Hole, C5: °F / °C Button, C6: Channel 1,2,3 Select Button, C7: "TX" Button (Transmit RF Signal Manually), C8: Battery Compartment, and C9: Battery Cover.
Each remote sensor measures outdoor temperature and humidity and transmits data wirelessly to the main unit. It features a small display for local readings, a channel selector, and a battery compartment.
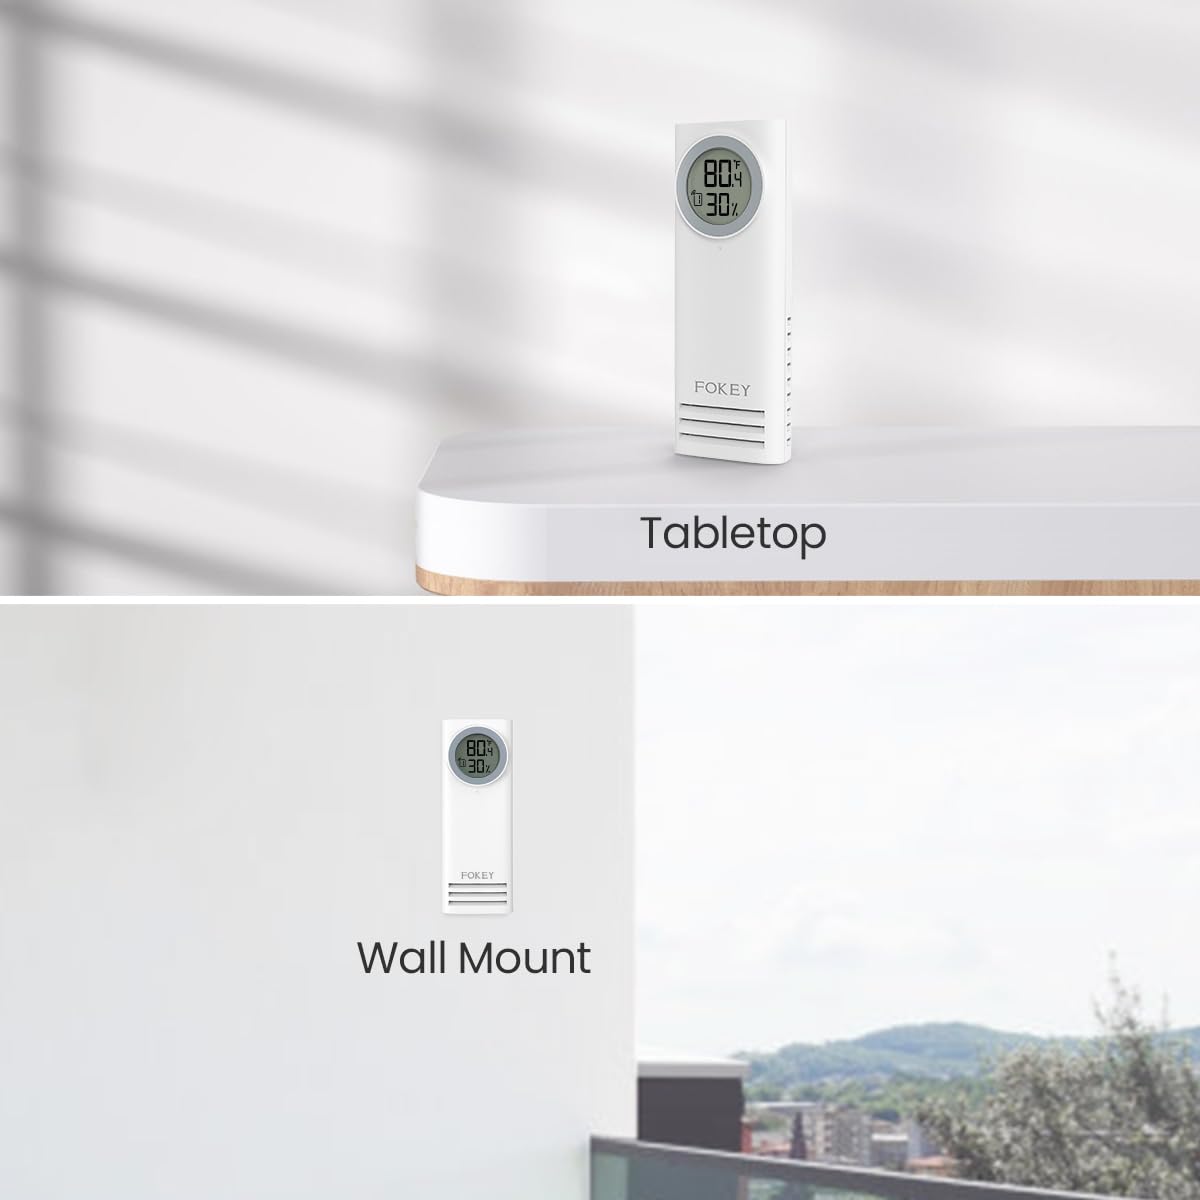
Figure 3.5: Examples demonstrating flexible placement options for the remote sensor, including tabletop and wall mount configurations. The sensor is designed to be versatile for various outdoor environments.
The remote sensor can be placed on a tabletop or mounted on a wall using the integrated wall mount hole (C4).
4. Setup
4.1 Battery Installation for Remote Sensors
- Remove the battery cover (C9) from the back of each remote sensor.
- Insert 2 x AA batteries (not included) into the battery compartment (C8), ensuring correct polarity (+/-).
- Replace the battery cover.
- Select a unique channel (1, 2, or 3) for each sensor using the Channel Select Button (C6). If using only one sensor, set it to Channel 1.
4.2 Powering the Main Unit
- Connect the provided power adapter to the main unit's power input jack.
- Plug the power adapter into a standard electrical outlet. The display will light up.
4.3 Sensor Synchronization
Once the main unit is powered on, it will automatically begin searching for remote sensors. Ensure the remote sensors are within range. The main unit will display outdoor temperature and humidity once a signal is received. If a sensor does not connect, press the "TX" button (C7) on the sensor to manually transmit a signal, or re-insert batteries.
4.4 Initial Settings (Time, Date, Units)
Refer to the operating instructions section for details on setting the time, date, and preferred units (°F/°C for temperature, inHg/hPa for pressure).
5. Operating Instructions
5.1 Display Readout
The main unit's display is divided into several sections for easy reading:
- Time & Date: Located at the top left, showing current time, day of the week, and date.
- Moon Phase: Displays the current moon phase icon.
- Barometric Pressure: Shows current pressure and a trend indicator (rising, falling, stable).
- Outdoor Temperature & Humidity: Displays readings from the connected remote sensor(s).
- Indoor Temperature & Humidity: Displays readings from the main unit's internal sensors.
- Weather Forecast: Icons representing predicted weather conditions for the next 12-24 hours (e.g., sunny, cloudy, rainy).
5.2 Adjusting Settings
Specific buttons on the main unit (usually labeled "SET", "MODE", "+", "-") allow you to adjust settings such as:
- Time and Date: Enter setting mode to adjust hours, minutes, year, month, and day.
- Temperature Units: Toggle between Celsius (°C) and Fahrenheit (°F).
- Barometric Pressure Units: Switch between inHg and hPa.
- Alarms: Set time alarms or temperature/humidity alerts.
- Brightness: Adjust the display backlight brightness.
Consult the specific button functions on your device for detailed instructions.
5.3 Understanding the Weather Forecast
The weather station predicts weather conditions based on changes in barometric pressure. The forecast icons are an estimation and may not always perfectly match actual weather conditions, especially in rapidly changing weather patterns or extreme local microclimates. It is intended as a general guide.
6. Maintenance
6.1 Cleaning
- Wipe the main unit and sensors with a soft, damp cloth.
- Do not use abrasive cleaners or solvents, as they may damage the surfaces.
- Ensure no liquid enters the device openings.
6.2 Battery Replacement
Replace batteries in the remote sensors when the low battery indicator appears on the main unit or the sensor's display. Always replace all batteries in a sensor at the same time with new ones of the same type.
6.3 Placement Considerations
For optimal performance, place the remote sensor in a shaded area, away from direct sunlight and heat sources, and protected from heavy rain. This ensures accurate temperature and humidity readings. The main unit should be placed indoors, away from direct sunlight and drafts.
7. Troubleshooting
| Problem | Possible Cause | Solution |
|---|---|---|
| No outdoor temperature/humidity reading. | Sensor out of range, low sensor battery, incorrect channel, interference. |
|
| Inaccurate temperature/humidity readings. | Sensor exposed to direct sunlight, heat sources, or moisture. |
|
| Display is blank or flickering. | Power adapter issue, main unit malfunction. |
|
8. Specifications
- Model: FOKEY Weather Station with Two Remote Sensors
- ASIN: B0FHJ3TXNS
- Indoor Temperature Range: (Typical range, exact values not provided in source)
- Outdoor Temperature Range: (Typical range, exact values not provided in source)
- Humidity Range: (Typical range, exact values not provided in source)
- Wireless Range: Up to 100 meters (330 feet) in open air (typical)
- Power Source (Main Unit): AC Power Adapter
- Power Source (Remote Sensor): 2 x AA Batteries (not included)
- Date First Available: April 14, 2025
9. Warranty & Support
FOKEY products are designed for reliability and performance. For specific warranty information, please refer to the product packaging or contact FOKEY customer support directly. If you encounter any issues or have questions regarding your weather station, please visit the official FOKEY store on Amazon or contact their customer service for assistance.
You can visit the FOKEY Store here: FOKEY Official Store
Ask a question about this manual
Ask about setup, troubleshooting, compatibility, parts, safety, or missing instructions. Manuals+ will review the question and use this page’s manual context to help answer it.