1. Safety Information
Please read and understand this entire manual before attempting to assemble, install, or operate the product. Failure to follow these instructions may result in electric shock, fire, or serious personal injury.
- Ensure all electrical connections comply with local codes, ordinances, and the National Electrical Code (NEC).
- Consult a qualified electrician if you are unfamiliar with electrical wiring.
- Disconnect power at the main circuit breaker before installation or servicing.
- Mounting structure must be capable of supporting the fan's weight (approximately 8 pounds).
- Keep hands and objects clear of fan blades during operation.
- Do not install any dimmer switch if you intend to use the remote control for dimming.
2. Package Contents
Verify that all components are present before beginning installation. If any parts are missing or damaged, contact customer support.
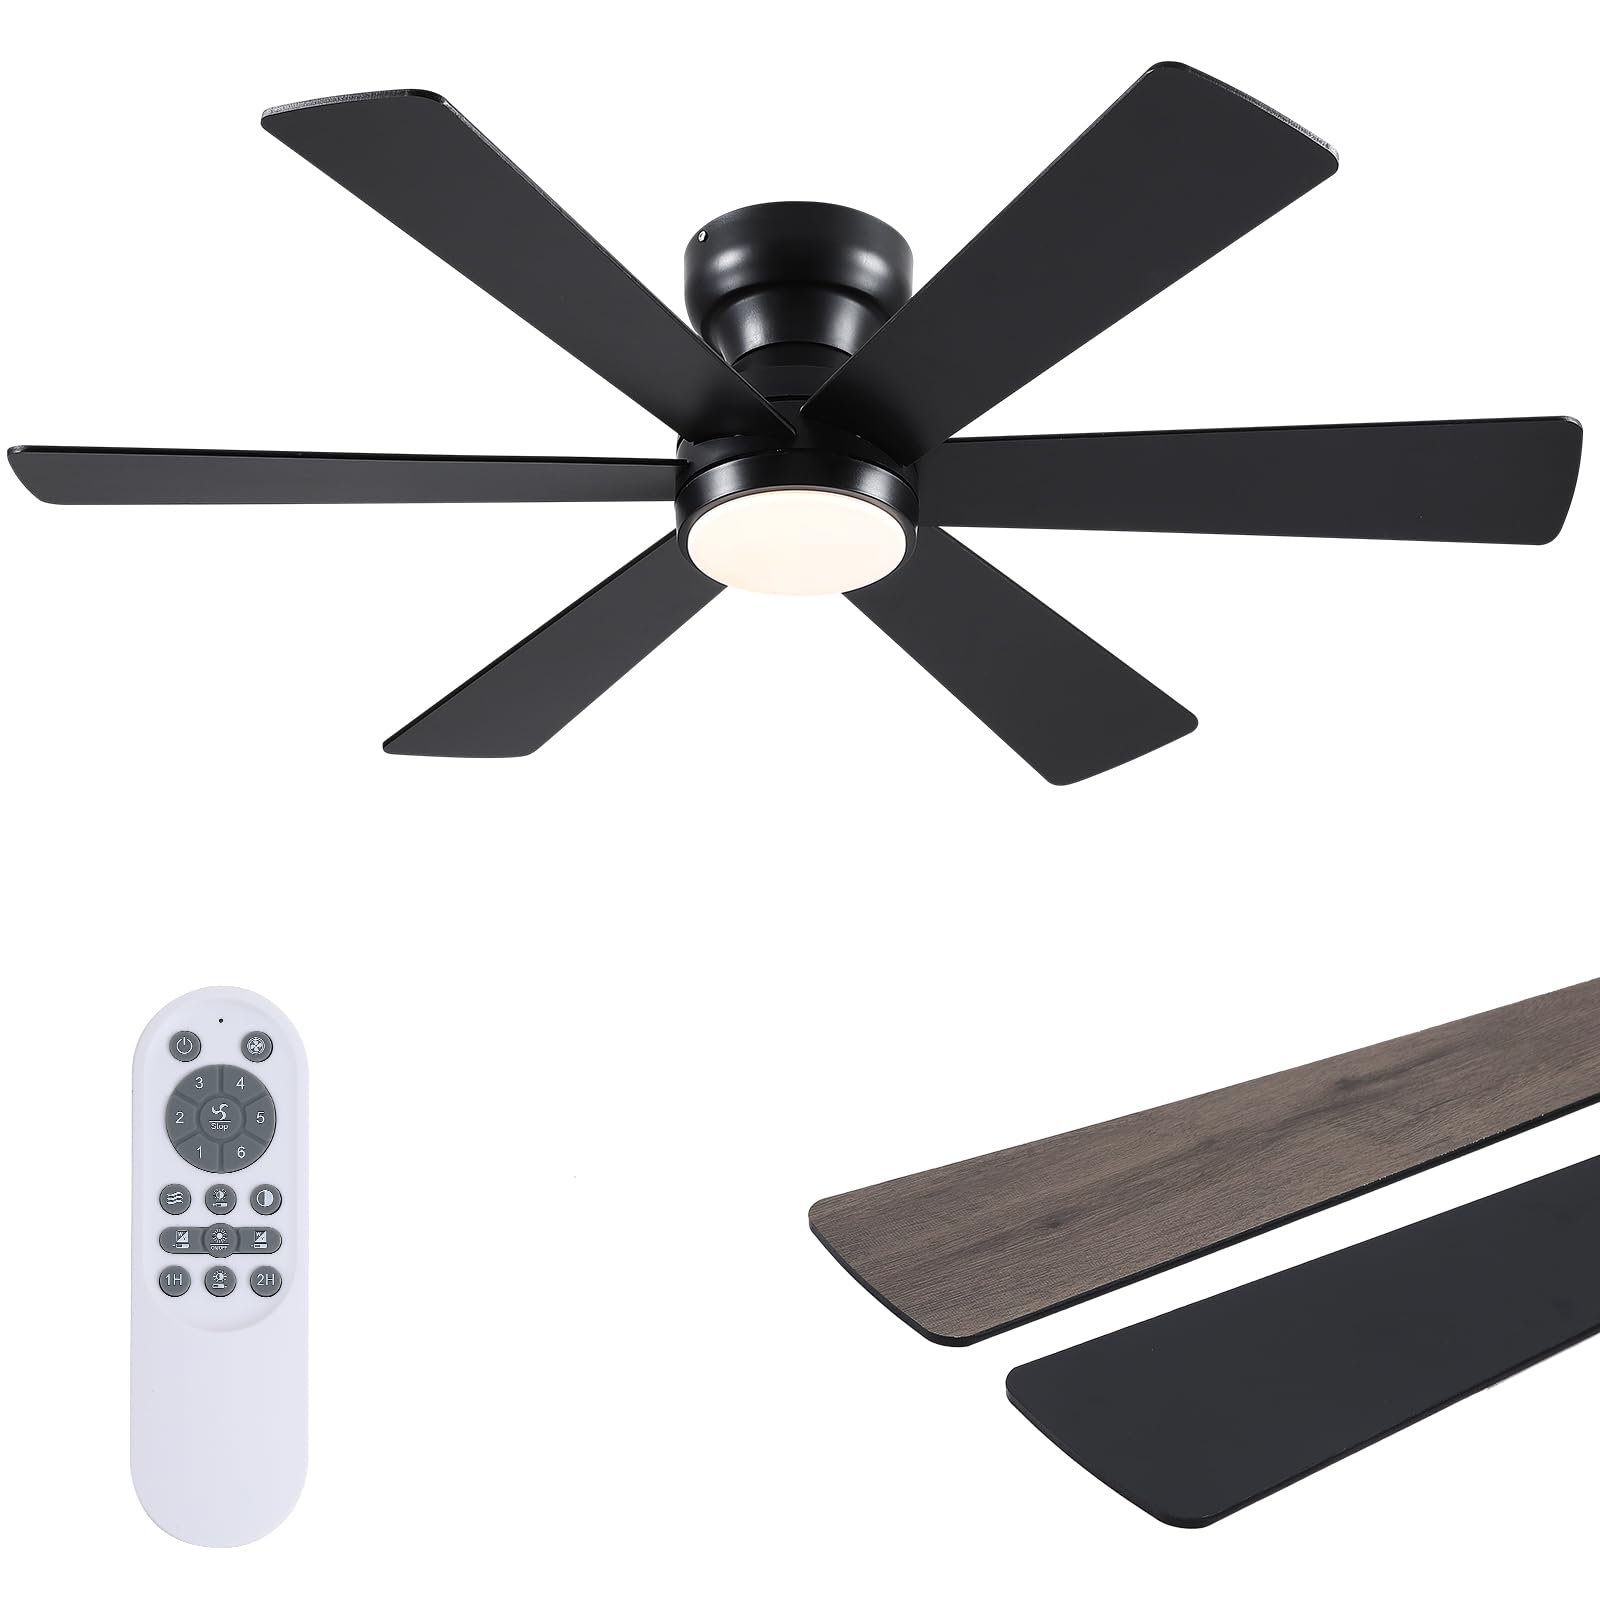
Image: Main product view of the Asyko 46-inch Low Profile Ceiling Fan.
| Component | Quantity |
|---|---|
| Fan Motor Assembly | 1 |
| Fan Blades (6) | 6 |
| LED Light Kit | 1 |
| Remote Control | 1 |
| Mounting Bracket | 1 |
| Hardware Pack (screws, washers, wire nuts) | 1 |
| User Manual | 1 |
3. Setup and Installation
Follow these steps carefully for proper installation. Refer to the provided video for visual guidance.
- Prepare the Mounting Location: Ensure the electrical box is securely mounted to the building structure and can support the fan's weight. Turn off power at the circuit breaker.
- Install the Mounting Bracket: Secure the mounting bracket to the electrical box using the provided screws.
- Assemble Fan Blades: Attach the fan blades to the motor assembly. The blades are reversible, offering two aesthetic options (black or wood grain).
- Wire the Fan: Connect the fan's electrical wires to the household wiring according to the wiring diagram in the manual. Ensure all connections are secure.
- Attach the Fan to the Mounting Bracket: Carefully lift the fan assembly and attach it to the installed mounting bracket.
- Install the LED Light Kit: Connect the LED light kit wires and secure the light assembly to the bottom of the fan motor.
- Secure the Light Shade: Twist or clip the light shade into place over the LED light kit.
Video: Official installation guide for the Asyko Flush Mount Ceiling Fan, demonstrating assembly and mounting steps.
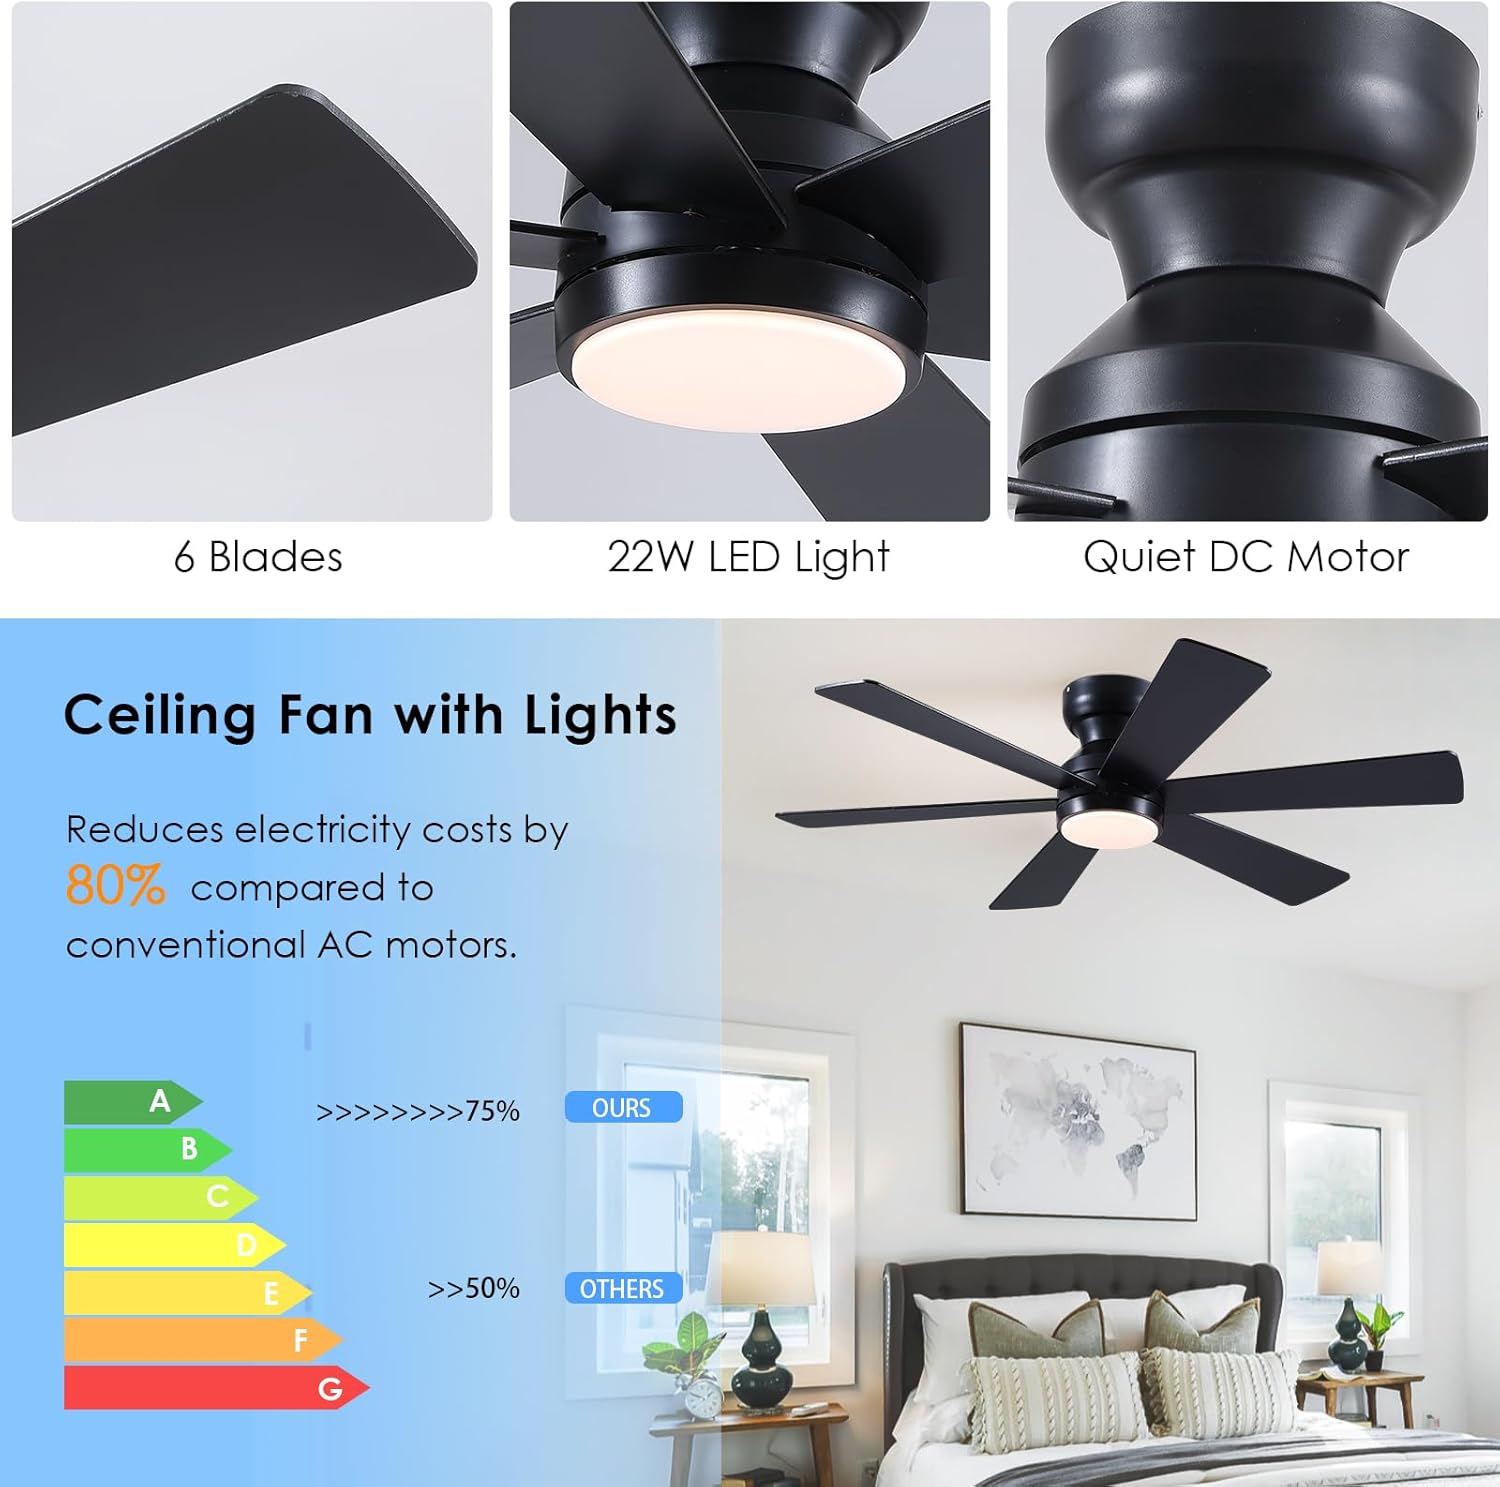
Image: Detailed view of the fan's components: 6 blades, 22W LED light, and quiet DC motor.

Image: Product dimensions, illustrating the 46-inch diameter and 10-inch height of the fan.
4. Operating Instructions
The Asyko ceiling fan is controlled via the included remote. Ensure batteries are installed in the remote control.
Remote Control Functions:

Image: Overview of the remote control with buttons for various fan and light settings.
- Power On/Off: Press the ON/OFF button to turn the fan and light on or off.
- Fan Speed: Select from 6 fan speeds using the numbered buttons (1-6).
- Light Color Temperature: Adjust the light color temperature between 3000K (warm white), 4000K (natural white), and 6000K (cold white) using the dedicated button.
- Brightness Adjustment: Dim the light from 10% to 100% brightness.
- Reversible Motor: Use the F/R button to switch between summer (downward airflow) and winter (upward airflow for air circulation) modes.
- Timer Function: Set the fan to turn off automatically after 1 or 2 hours using the 1H/2H buttons.
- Memory Function: The fan remembers your last brightness, color temperature, and fan speed settings if turned off for at least 10 seconds.

Image: Illustration of customizable light settings, including color temperatures (3000K, 4500K, 6000K) and brightness levels (10%-100%).

Image: Visual representation of the 6 adjustable fan speeds, categorized into Low, Medium, and High wind settings.

Image: Explanation of the reversible motor function for optimal airflow in both summer and winter seasons.
5. Maintenance
- Cleaning: To clean the fan, wipe with a soft, damp cloth. Do not use abrasive cleaners or solvents.
- Blade Inspection: Periodically check fan blade screws for tightness. Loose screws can cause wobbling and noise.
- Motor Lubrication: The fan's DC motor is permanently lubricated and does not require additional oiling.
6. Troubleshooting
| Problem | Possible Cause | Solution |
|---|---|---|
| Fan does not start | No power to the fan; loose wiring; remote control issue. | Check circuit breaker; ensure all wire connections are secure; replace remote batteries or re-pair remote. |
| Fan wobbles | Loose fan blades; improper mounting. | Tighten all blade screws; ensure mounting bracket is securely installed. |
| Light does not work | Loose light kit wiring; LED failure. | Check light kit connections; contact customer support for LED replacement. |
| Remote not working | Dead batteries; remote not paired. | Replace batteries; follow remote pairing instructions in the full manual. |
7. Specifications
| Feature | Detail |
|---|---|
| Brand | Asyko |
| Model Name | Ceiling Fans with Lights |
| Product Dimensions | 46"D x 46"W x 10"H |
| Item Weight | 8 Pounds |
| Number of Blades | 6 |
| Motor Type | DC (Reversible) |
| Number of Power Levels | 6 |
| Noise Level | 35 Decibels |
| Light Kit | Included (Dimmable LED) |
| Color Temperature | 3000K (Warm), 4000K (Natural), 6000K (Cold) |
| Control Method | Remote Controlled |
| Installation Type | DIY (Flush Mount) |
| Voltage | 120 Volts |
| Wattage | 65 watts |
| Indoor/Outdoor Usage | Indoor |

Image: Illustration highlighting the quiet operation of the DC motor, ensuring a noiseless experience.
8. Warranty and Support
Asyko provides a 1-year warranty for this product, covering manufacturing defects and malfunctions under normal use.
For technical assistance, troubleshooting, or warranty claims, please contact Asyko customer support. We offer a 24-hour response time to ensure your satisfaction.
Contact information can be found on the official Asyko website or through your purchase platform.


