
1. Introduction
Thank you for choosing the Warmdance 120W 18 LEDs RGBW Wall Washer Light Bar. This high-output lighting fixture is designed for various applications, including stage lighting, DJ parties, home clubs, weddings, and Halloween events. It features a dual lighting system with 18 intense RGBW LEDs and 234 auxiliary white LEDs, offering vibrant color mixing and uniform wash effects. This manual provides essential information for safe operation, setup, and maintenance of your device.
Please read this manual thoroughly before operating the product to ensure proper use and to prevent damage.
2. Safety Information
- Power Supply: Ensure the power supply voltage matches the product's requirements (100-240V).
- Grounding: Always connect the product to a grounded power outlet to prevent electric shock.
- Ventilation: Do not block ventilation openings. Ensure adequate airflow around the unit to prevent overheating.
- Moisture: Keep the device away from water, high humidity, and extreme temperatures.
- Handling: Avoid direct eye exposure to the light source. Do not open the housing; refer all servicing to qualified personnel.
- Installation: Securely mount the fixture using appropriate hardware. Ensure the mounting surface can support the weight of the device.
3. Package Contents
Verify that all items are present and in good condition upon unpacking.
- Warmdance 120W 18 LEDs RGBW Wall Washer Light Bar x 1
- Power Cord x 1
- Instruction Manual x 1
- Mounting Brackets (with screws) x 1 set

Image: Contents of the product package, showing the light bar, power cord, instruction manual, and mounting hardware.
4. Product Overview
The Warmdance Wall Washer Light Bar is equipped with advanced features for versatile lighting effects.
- High-Output Dual Lighting: 18 RGBW LEDs for vibrant colors and 234 auxiliary white LEDs for uniform wash and fill light effects.
- 25° Lens: Provides pure color and high brightness with a focused beam angle.
- Smooth Linear Dimming: 0-100% dimming capability for precise light intensity control.
- Built-in Microphone: Enables sound-activated modes with adjustable sensitivity.
- Control Panel: Features a 4-digit digital display for mode selection and settings adjustment.
- DMX512 Connection: Standard 3-pin XLR input/output for professional DMX control and RDM compatibility.
- Adjustable Mounting Bracket: Allows for 180° motor angle adjustment for wider light distribution.

Image: Front view of the Warmdance 120W 18 LEDs RGBW Wall Washer Light Bar, showcasing its array of RGBW and white LEDs.
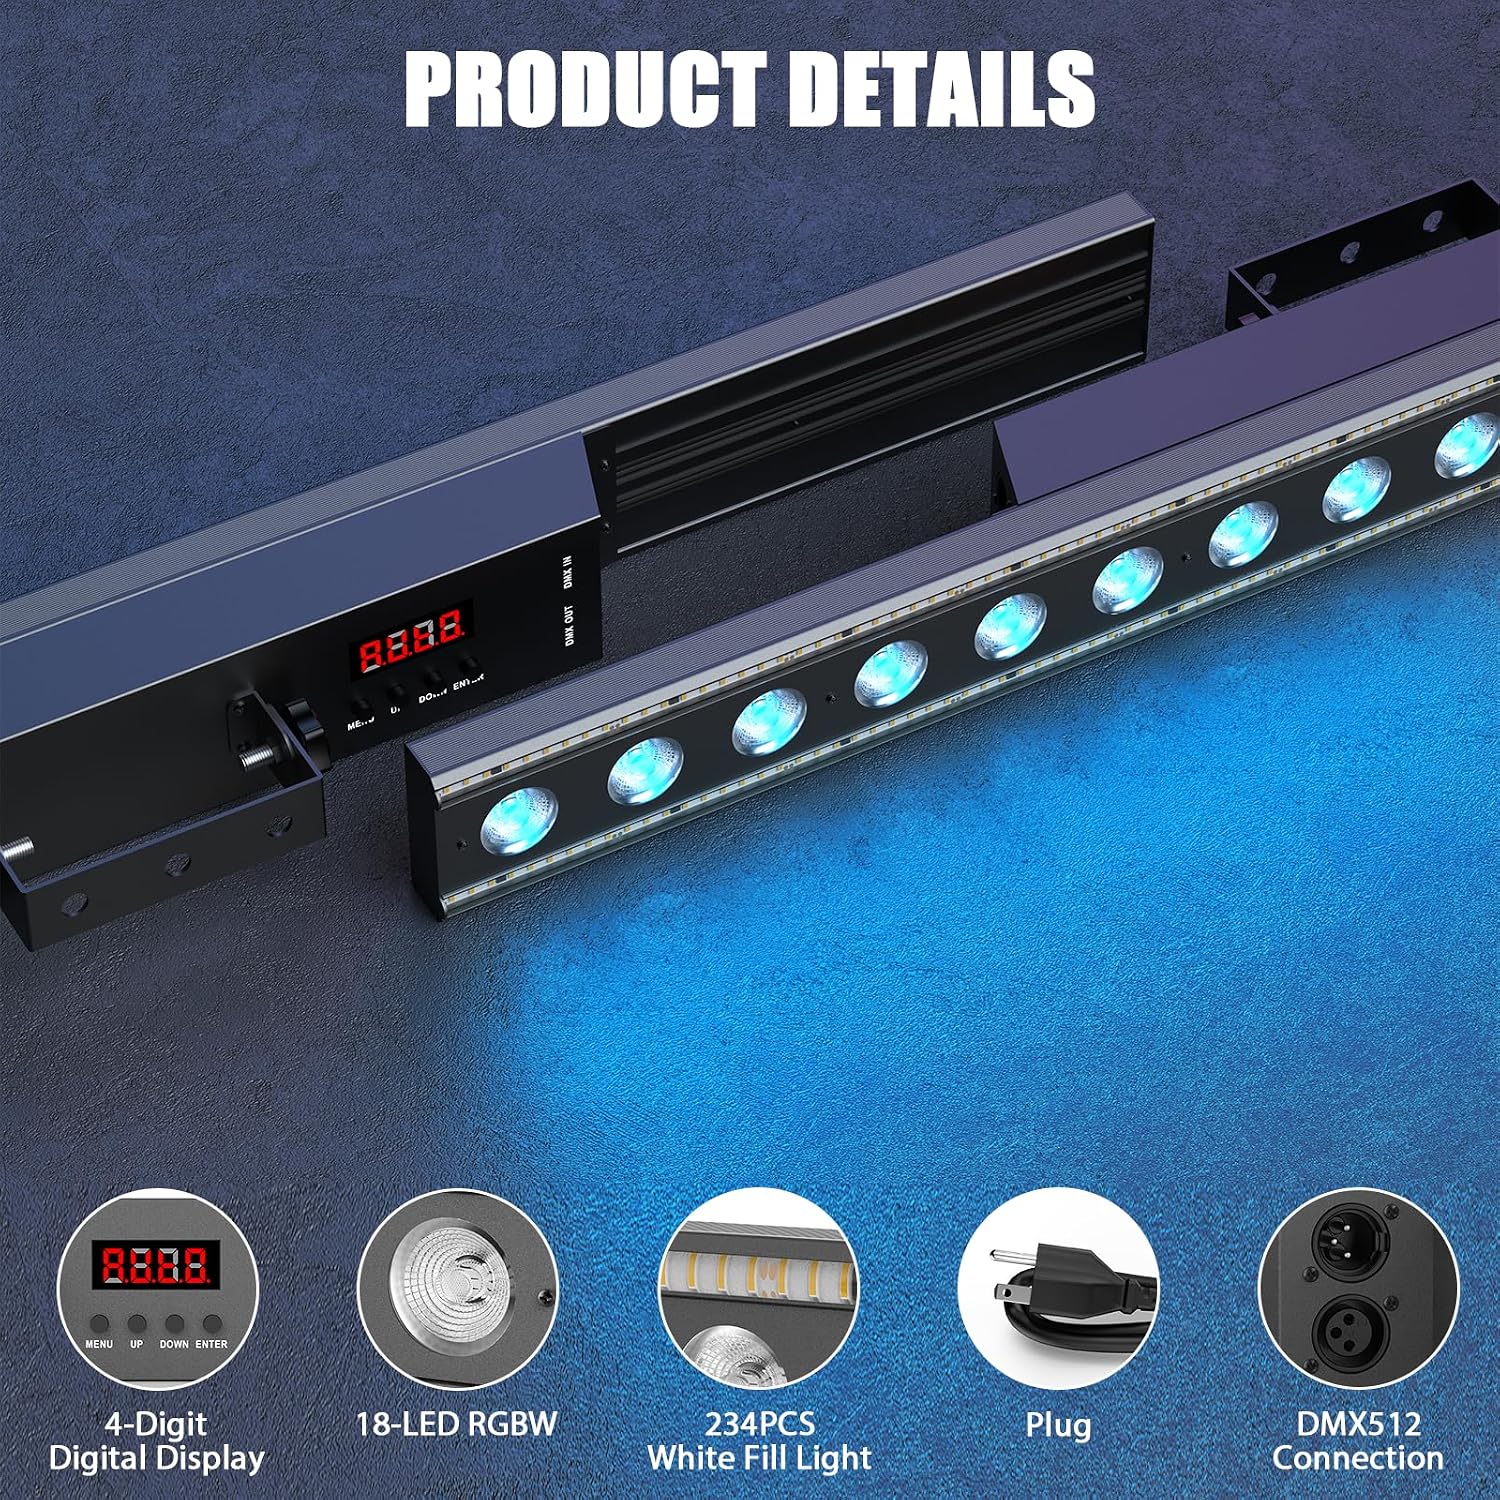
Image: Close-up view of the light bar's components, including the 4-digit digital display, 18 RGBW LEDs, 234 white fill lights, power plug, and DMX512 input/output ports.

Image: Diagram illustrating key features: high-quality RGBW beads, 180-degree adjustable motor angle, built-in microphone for sound-sync, and dedicated white fill lights.
5. Setup
5.1 Mounting the Light Bar
- Identify a suitable mounting location that is stable and can support the fixture's weight.
- Attach the provided mounting brackets to the light bar using the included screws.
- Securely fasten the light bar to the desired surface (e.g., truss, wall, floor) using appropriate mounting hardware (not always included).
- Adjust the angle of the light bar using the 180° adjustable bracket to achieve the desired light projection.

Image: Illustration of the light bar's dimensions (37.1 inches length, 4.9 inches width, 2.9 inches height) and an example of it mounted on a truss, showing the adjustable bracket.
5.2 Power Connection
- Connect the provided power cord to the power input on the light bar.
- Plug the other end of the power cord into a grounded electrical outlet (100-240V AC).
- Ensure all connections are secure before powering on the device.
5.3 DMX Connection (Optional)
For advanced control, connect the light bar to a DMX controller.
- Connect a 3-pin XLR cable from the DMX output of your controller to the DMX input of the first light bar.
- To daisy-chain multiple units, connect a 3-pin XLR cable from the DMX output of the first light bar to the DMX input of the next, and so on.
- Ensure the last fixture in the chain has a DMX terminator connected to its DMX output for stable signal transmission.
6. Operating Modes
The light bar offers multiple operating modes, selectable via the 4-digit digital display and control buttons.

Image: Diagram showing the control panel with a 4-digit digital display and listing operation modes: Self-Propelled (Auto), Voice Control (Sound-Active), Master-Slave, and DMX.
6.1 Auto Mode (Self-Propelled)
In Auto mode, the light bar cycles through its 29 main and 59 auxiliary chase programs automatically. The speed of these programs is adjustable.
- Use the "MENU" button to navigate to the Auto mode setting.
- Use "UP" and "DOWN" buttons to select different built-in programs or adjust the speed.
- Press "ENTER" to confirm your selection.

Image: Visual representation of various chasing and fill-in light effects, demonstrating the 29 main and 59 auxiliary programs available.

Image: Promotional banner highlighting the 29 chase and 59 fill effects, along with features like independent modes, adjustable speed, and 3-LED group DMX control.
6.2 Sound-Active Mode (Voice Control)
The built-in microphone allows the light bar to react to music and sound, creating dynamic light shows.
- Navigate to the Sound-Active mode using the "MENU" button.
- Adjust the microphone sensitivity using the "UP" and "DOWN" buttons to optimize responsiveness to ambient sound levels.
- Press "ENTER" to activate.

Image: Illustration of the light bar reacting to sound waves, emphasizing the built-in microphone and smart sound-responsive lighting feature.

Image: A vibrant party scene with the light bar projecting various colors, demonstrating its 8-scene RGBW auto-sync music light capability.
6.3 Master-Slave Mode
Connect multiple light bars to synchronize their operation without a DMX controller.
- Connect the DMX output of the "Master" unit to the DMX input of the "Slave" unit using a 3-pin XLR cable.
- Set the "Master" unit to any desired operating mode (Auto, Sound-Active).
- Set all "Slave" units to Master-Slave mode via their control panels. The slave units will then mimic the master unit's behavior.
6.4 DMX Control Mode
For professional and precise control over individual light bar functions, use DMX512 protocol.
- Connect the light bar to a DMX controller as described in Section 5.3.
- Set the DMX address for each light bar using the control panel. Refer to the DMX Channel Chart (typically provided in a separate DMX manual or on the manufacturer's website) for specific channel assignments.
- The light bar supports 5, 14, 33, or 37 DMX channels, offering various levels of control, including 3-LED string DMX point control for intricate patterns.
- The fixture is RDM compatible, allowing for two-way communication and remote address management from a compatible DMX console.
7. Maintenance
Regular maintenance ensures the longevity and optimal performance of your light bar.
- Cleaning: Periodically clean the lens and housing with a soft, lint-free cloth. Do not use abrasive cleaners or solvents.
- Inspection: Regularly check power cables, DMX cables, and mounting hardware for any signs of wear or damage. Replace damaged components immediately.
- Storage: When not in use for extended periods, store the light bar in a dry, dust-free environment, preferably in its original packaging.
- Servicing: Do not attempt to repair the unit yourself. Refer all servicing to qualified service personnel.
8. Troubleshooting
| Problem | Possible Cause | Solution |
|---|---|---|
| No power | Power cable not connected; no power from outlet; faulty cable. | Check power cable connection. Test outlet with another device. Replace faulty cable. |
| Light not responding to DMX | Incorrect DMX address; DMX cable issue; no DMX terminator; incorrect DMX mode. | Verify DMX address. Check DMX cable connections. Ensure DMX terminator is used. Set fixture to DMX mode. |
| Sound-active mode not working | Microphone sensitivity too low; no sound input; incorrect mode selected. | Increase microphone sensitivity. Ensure sound source is close and loud enough. Select Sound-Active mode. |
| Lights flicker or behave erratically | Loose connections; DMX signal interference; power fluctuations. | Check all power and DMX connections. Ensure DMX terminator is used. Connect to a stable power source. |
9. Specifications
| Feature | Detail |
|---|---|
| Model Number | ZQ06204 |
| Brand | Warmdance |
| Power Consumption | 120W |
| Light Source | 18x RGBW LEDs, 234x 0.2W White Fill LEDs |
| Beam Angle | 25° |
| Dimming | 0-100% Linear Dimming |
| Operating Modes | Auto, Sound-Active, Master-Slave, DMX512 |
| DMX Channels | 5 / 14 / 33 / 37 CH |
| DMX Protocol | Standard DMX512, RDM |
| Data Connection | 3-pin XLR Input/Output |
| Display | 4-Digit Digital Display |
| Material | Iron |
| Input Voltage | AC 100-240V |
| Product Dimensions | 37"L x 4.92"W x 2.91"H (94.2cm x 12.5cm x 7.4cm) |
| Item Weight | 5.5 lbs (2.5 kg) |
| CRI | ≥85 |
10. Warranty and Support
Warmdance products are designed for reliability and performance. For warranty information, please refer to the terms and conditions provided at the time of purchase or contact your retailer.
For technical support, troubleshooting assistance, or inquiries regarding your Warmdance 120W 18 LEDs RGBW Wall Washer Light Bar, please contact Warmdance customer service through the retailer's platform or visit the official Warmdance store on Amazon:
Visit the Warmdance Store on Amazon
Please have your model number (ZQ06204) and purchase details ready when contacting support.