
1. Introduction
This manual provides essential information for the safe and effective installation, operation, and maintenance of the QXNASU 13.00.04 BRETER Rotary Cam Switch. Please read this manual thoroughly before using the product and retain it for future reference. This rotary cam switch is designed for industrial applications requiring reliable switching across three positions for AC circuits.
2. Safety Information
WARNING: Electrical shock hazard. Installation and maintenance should only be performed by qualified personnel.
- Always disconnect power before installing, wiring, or servicing the switch.
- Ensure all wiring complies with local and national electrical codes.
- Do not operate the switch if it is damaged or appears to be malfunctioning.
- Verify correct voltage and current ratings before connecting to a circuit.
- Wear appropriate personal protective equipment (PPE) when working with electrical systems.
3. Product Overview
The QXNASU 13.00.04 BRETER Rotary Cam Switch is a robust electrical component designed for controlling circuits with three distinct positions. It features a durable construction suitable for industrial environments.
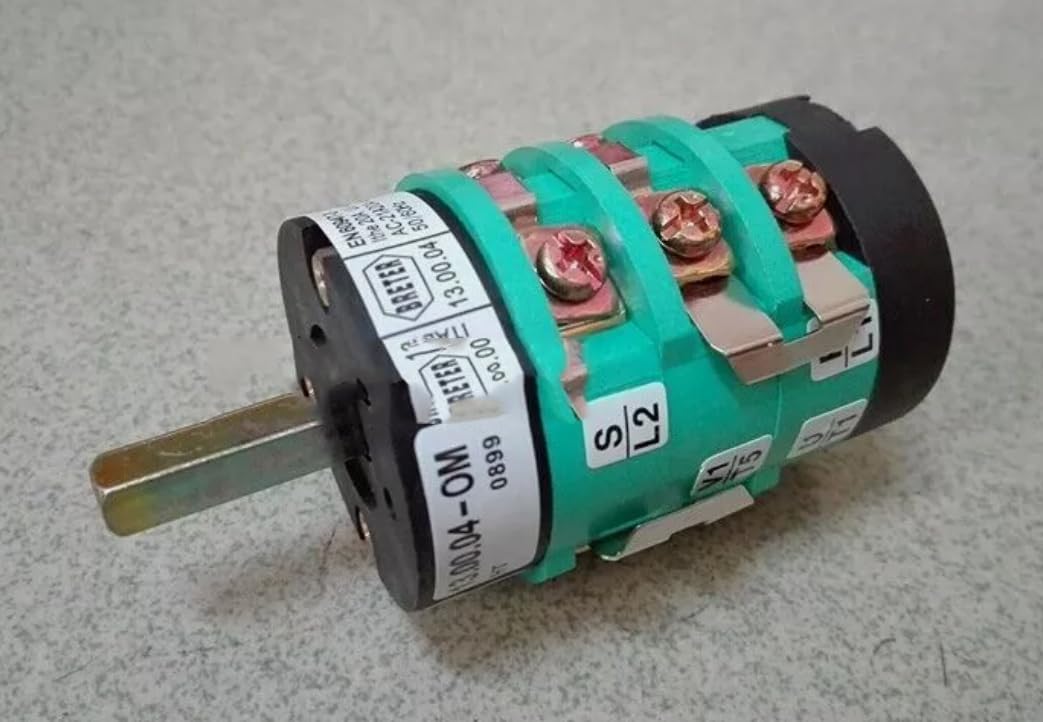
This image displays the QXNASU 13.00.04 BRETER Rotary Cam Switch. Key dimensions are highlighted, including a 32mm diameter and a 6mm square shaft. Electrical ratings such as 20A 600V- and AC-23A are visible on the label, along with voltage and power ratings (e.g., 220/240V, 5.5KW).
4. Specifications
| Feature | Specification |
|---|---|
| Model Number | 25dzyj071302 |
| Brand | QXNASU |
| Type | Rotary Cam Switch |
| Positions | 3 Positions |
| Current Rating | 20A / 21A |
| Voltage Rating | 380V / 400V AC |
| Shaft Size | 6mm square (approx.) |
| Mounting Diameter | 32mm (approx.) |
5. Setup and Installation
Proper installation is crucial for the safe and reliable operation of the rotary cam switch. Consult a qualified electrician for installation if you are not experienced with electrical wiring.
5.1 Mounting
- Choose a suitable mounting location that is clean, dry, and free from excessive vibration or extreme temperatures.
- Ensure adequate clearance for operation and maintenance.
- Mount the switch securely using appropriate fasteners through the designated mounting holes. The mounting diameter is approximately 32mm.
5.2 Wiring
- Before wiring, ensure all power to the circuit is disconnected and locked out.
- Refer to the wiring diagram provided with your specific application or equipment.
- Connect the input power lines to the designated terminals (e.g., U1, T4).
- Connect the load lines to the corresponding output terminals (e.g., V, T2).
- Ensure all connections are tight and secure to prevent loose contacts and overheating.
- Verify that the voltage and current ratings of the switch match your application (380V/400V AC, 20A/21A).
6. Operating Instructions
The QXNASU 13.00.04 BRETER Rotary Cam Switch features three distinct operating positions. The switch is typically operated by rotating the shaft (6mm square) to the desired position.
- Position 1: (Typically OFF or a specific circuit configuration)
- Position 2: (Typically ON or an alternative circuit configuration)
- Position 3: (Typically another ON state or a different circuit configuration)
The exact function of each position depends on the specific wiring and application for which the switch is installed. Always understand the circuit behavior for each position before operation.
7. Maintenance
Regular maintenance helps ensure the longevity and reliable performance of the rotary cam switch.
- Periodic Inspection: Visually inspect the switch for any signs of physical damage, wear, or loose connections.
- Cleaning: Keep the switch free from dust, dirt, and moisture. Use a dry, soft cloth for cleaning. Do not use abrasive cleaners or solvents.
- Connection Check: Periodically check all electrical connections for tightness. Loose connections can lead to overheating and failure.
- Environmental Conditions: Ensure the operating environment remains within the specified temperature and humidity ranges.
WARNING: Disconnect all power before performing any maintenance.
8. Troubleshooting
If the rotary cam switch is not functioning as expected, consider the following common issues and solutions:
| Problem | Possible Cause | Solution |
|---|---|---|
| Switch does not operate | No power supply; Incorrect wiring; Internal damage | Check power source; Verify wiring against diagram; Replace switch if damaged |
| Intermittent operation | Loose connections; Worn contacts | Tighten all connections; Inspect contacts for wear and replace switch if necessary |
| Overheating | Overload; Loose connections; Incorrect voltage/current | Reduce load; Tighten connections; Verify correct voltage/current for application |
If troubleshooting steps do not resolve the issue, contact a qualified technician or the product supplier for assistance.
9. Warranty and Support
For warranty information and technical support, please refer to the documentation provided at the time of purchase or contact your supplier directly. The manufacturer, QXNASU, and the seller, ghgmaoyi, can provide further details regarding product guarantees and service options.