
1. Introduction
The AV Access KD-E10 is a versatile 2x1 Dual Monitor KVM Switch Docking Station designed to streamline your workspace. It allows you to connect two computers (one laptop and one desktop) to two monitors, sharing a single set of keyboard, mouse, and other USB peripherals. This device supports stunning 4K@60Hz resolution, provides 100W USB-C charging for your laptop, and ensures stable 1G Ethernet connectivity. With advanced EDID emulation and rapid switching capabilities, the KD-E10 is ideal for enhancing productivity in home office and gaming environments.
2. Package Contents
Please verify that all items listed below are included in your package:
- 1x KVM Switch Docking Station
- 1x Power Adapter (DC 12V 3A)
- 1x USB 3.2 Gen 2 Type-C to Type-C Cable (L = 1m)
- 1x USB 3.0 Type-B to Type-A Cable (L = 1.5m)
- 1x HDMI 2.0 Cable
- 1x DP 1.2a Cable
- 1x User Manual
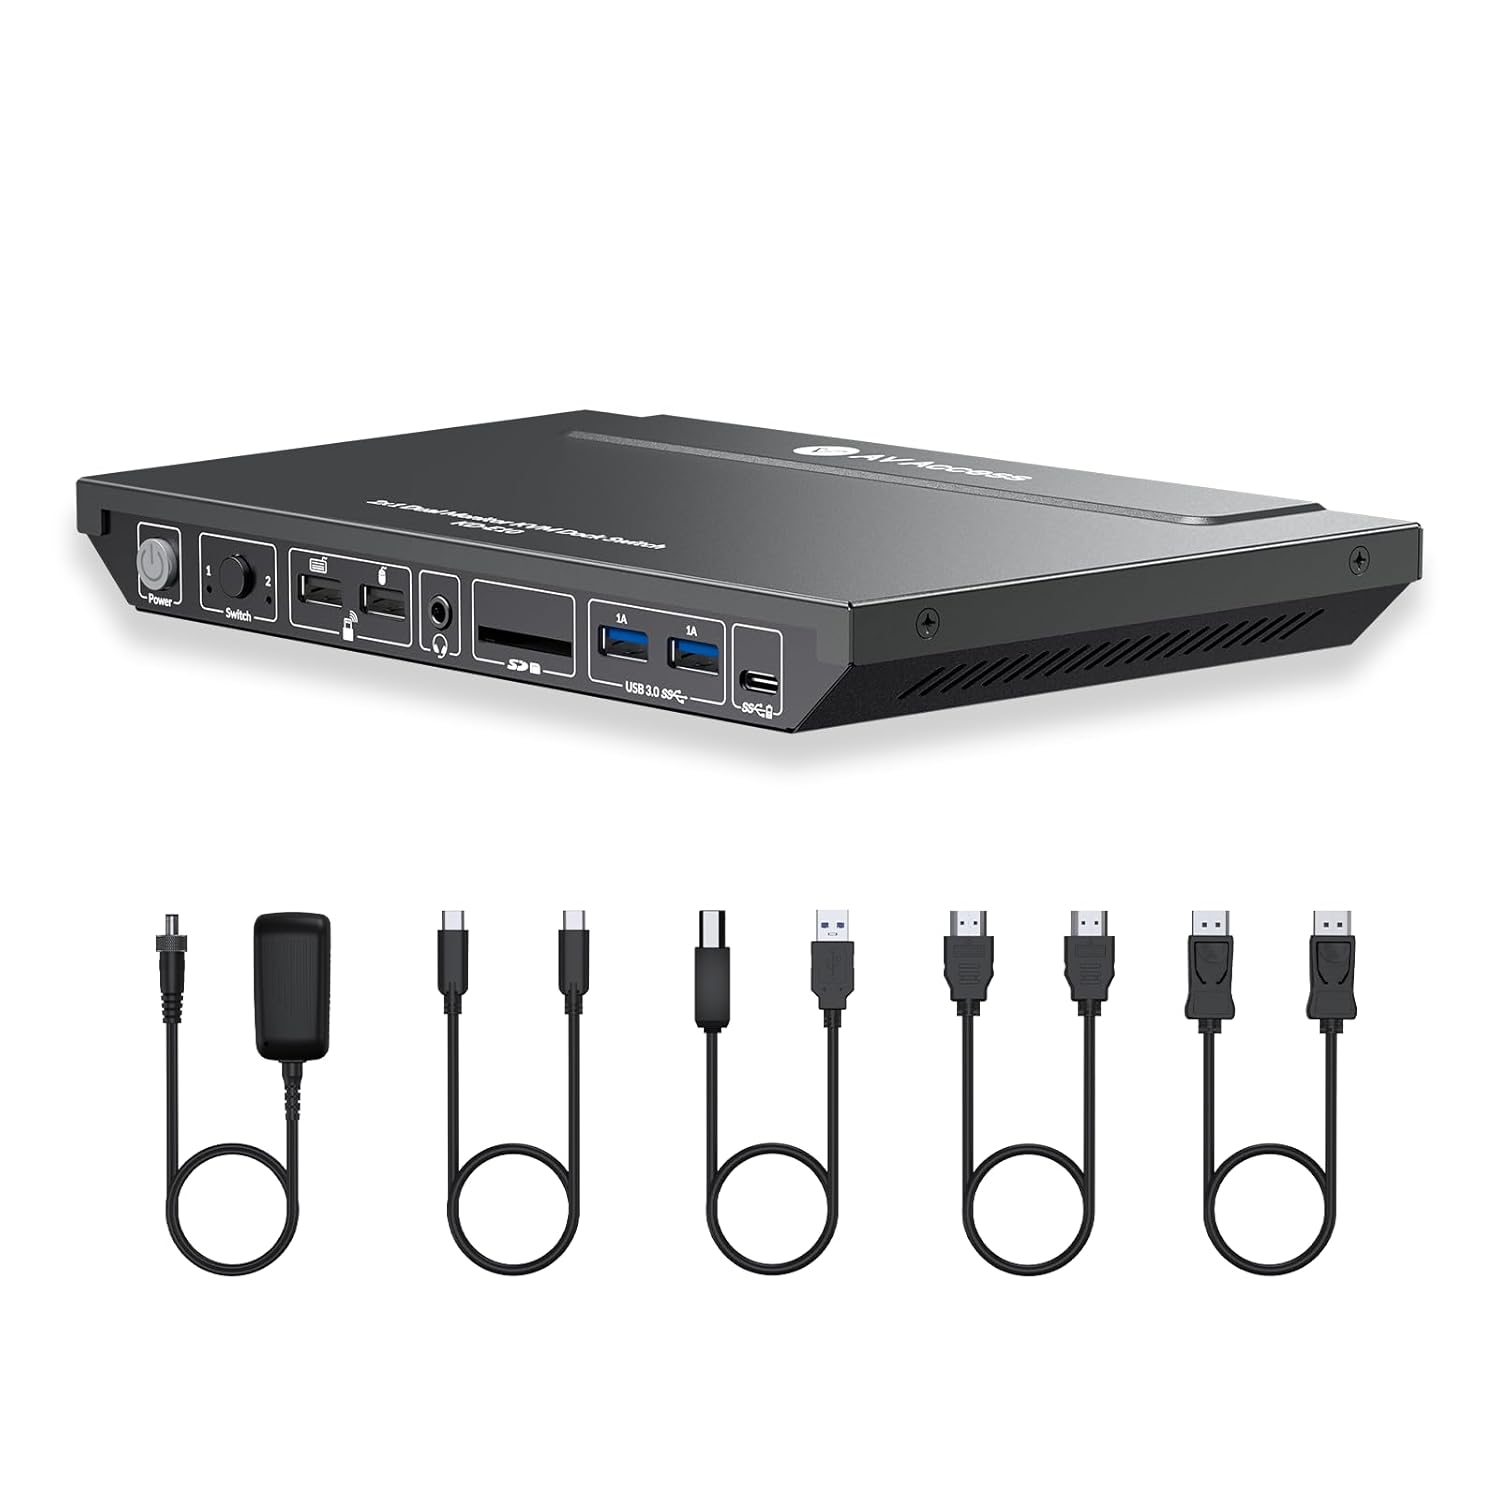
Image: The AV Access KD-E10 KVM Switch Docking Station with all its included cables and power adapter.
3. Product Overview
The KD-E10 features a robust all-metal enclosure for durability and efficient heat dissipation. It offers a comprehensive array of ports on both its front and rear panels to support a wide range of devices.
3.1 Front Panel
- 1. Power Button: Press to power the device On/Off.
- 2. Source Switching Button: Press to switch between Computer 1 and Computer 2 inputs. LEDs indicate the active input.
- 3. USB 3.0 (1.5A) Type-A Port: For high-power USB devices like webcams.
- 4. 2x USB 2.0 Type-A Ports: For keyboard, mouse, or other low-power peripherals.
- 5. 3.5mm Headphone Jack: For audio output.
- 6. SD Card Slot: For reading SD memory cards.
- 7. USB-C Port (Data Only): For data transfer.
3.2 Rear Panel
- 8. DC 12V Power Port: Connect the included power adapter here.
- 9. 2x HDMI Out (Monitor A, Monitor B): Connect your monitors here.
- 10. DP In for Desktop: Connect DisplayPort cable from your desktop PC.
- 11. HDMI In for Desktop: Connect HDMI cable from your desktop PC.
- 12. USB Type-B Port: Connect USB-B to USB-A cable from your desktop PC for KVM functionality.
- 13. LAN for Laptop: Connect Ethernet cable for wired network to your laptop.
- 14. USB-C Charging Port for Laptop: Connect an additional USB-C power adapter (not included) to charge your laptop.
- 15. USB-C In for Laptop: Connect USB-C cable from your laptop for video, data, and KVM functionality.
- 16. Micro USB Port: For firmware updates.

Image: Detailed view of the front and rear panels of the KD-E10, showing all input and output ports with their respective labels.
4. Setup Instructions
Follow these steps to set up your AV Access KD-E10 KVM Switch Docking Station:
4.1 Connecting Computers
- For Laptop (Computer 1):
- Connect the included USB 3.2 Gen 2 Type-C to Type-C Cable from your laptop to the USB-C In for Laptop port on the KD-E10. This single cable handles video, data, and KVM functionality.
- For laptop charging, connect your laptop's original USB-C power adapter to the USB-C Charging Port for Laptop on the KD-E10.
- For a wired network connection, connect an Ethernet cable from your router/modem to the LAN for Laptop port on the KD-E10.
- For Desktop (Computer 2):
- Connect the included DP 1.2a Cable from your desktop PC's DisplayPort output to the DP In for Desktop port on the KD-E10.
- Connect the included HDMI 2.0 Cable from your desktop PC's HDMI output to the HDMI In for Desktop port on the KD-E10.
- Connect the included USB 3.0 Type-B to Type-A Cable from your desktop PC's USB-A port to the USB Type-B Port on the KD-E10 for KVM functionality.

Image: Visual guide for connecting a desktop PC to the KD-E10.
4.2 Connecting Monitors
- Connect your primary monitor to the Monitor A HDMI output port on the KD-E10.
- Connect your secondary monitor to the Monitor B HDMI output port on the KD-E10.
4.3 Connecting Peripherals & Power
- Connect your keyboard and mouse to the USB 2.0 Type-A Ports on the front panel.
- Connect any other USB devices (e.g., webcam, printer, external hard drive) to the available USB 3.0 Type-A Ports or USB-C Port (Data Only) on the front panel.
- Connect your headphones or microphone to the respective 3.5mm Jacks on the front panel.
- Connect the included DC 12V Power Adapter to the DC 12V Power Port on the rear panel of the KD-E10 and plug it into a power outlet.
- Press the Power Button on the front panel to turn on the device.
Video: Official AV Access guide on 'How to Use the AV Access KD-E10', demonstrating the setup and basic operation.
5. Operating Instructions
5.1 Switching Between Computers
To switch between the connected laptop (Computer 1) and desktop (Computer 2):
- Press the Source Switching Button on the front panel of the KD-E10. The corresponding LED (1 or 2) will illuminate to indicate the active computer.
- Alternatively, use the included infrared remote control (if applicable to your model) to switch inputs.

Image: The front panel switch button allows for rapid switching between connected devices.
5.2 USB Peripherals and Charging
- All USB peripherals (keyboard, mouse, webcam, etc.) connected to the KD-E10 will automatically switch to the currently active computer.
- When an external USB-C power adapter is connected to the USB-C Charging Port for Laptop, your laptop will receive up to 100W of power delivery.
5.3 Display Modes
- macOS: Only supports mirrored display mode via the USB-C port. Extended display modes are not supported on macOS through this connection.
- Windows: Supports various extended display modes, allowing for a multi-monitor setup.
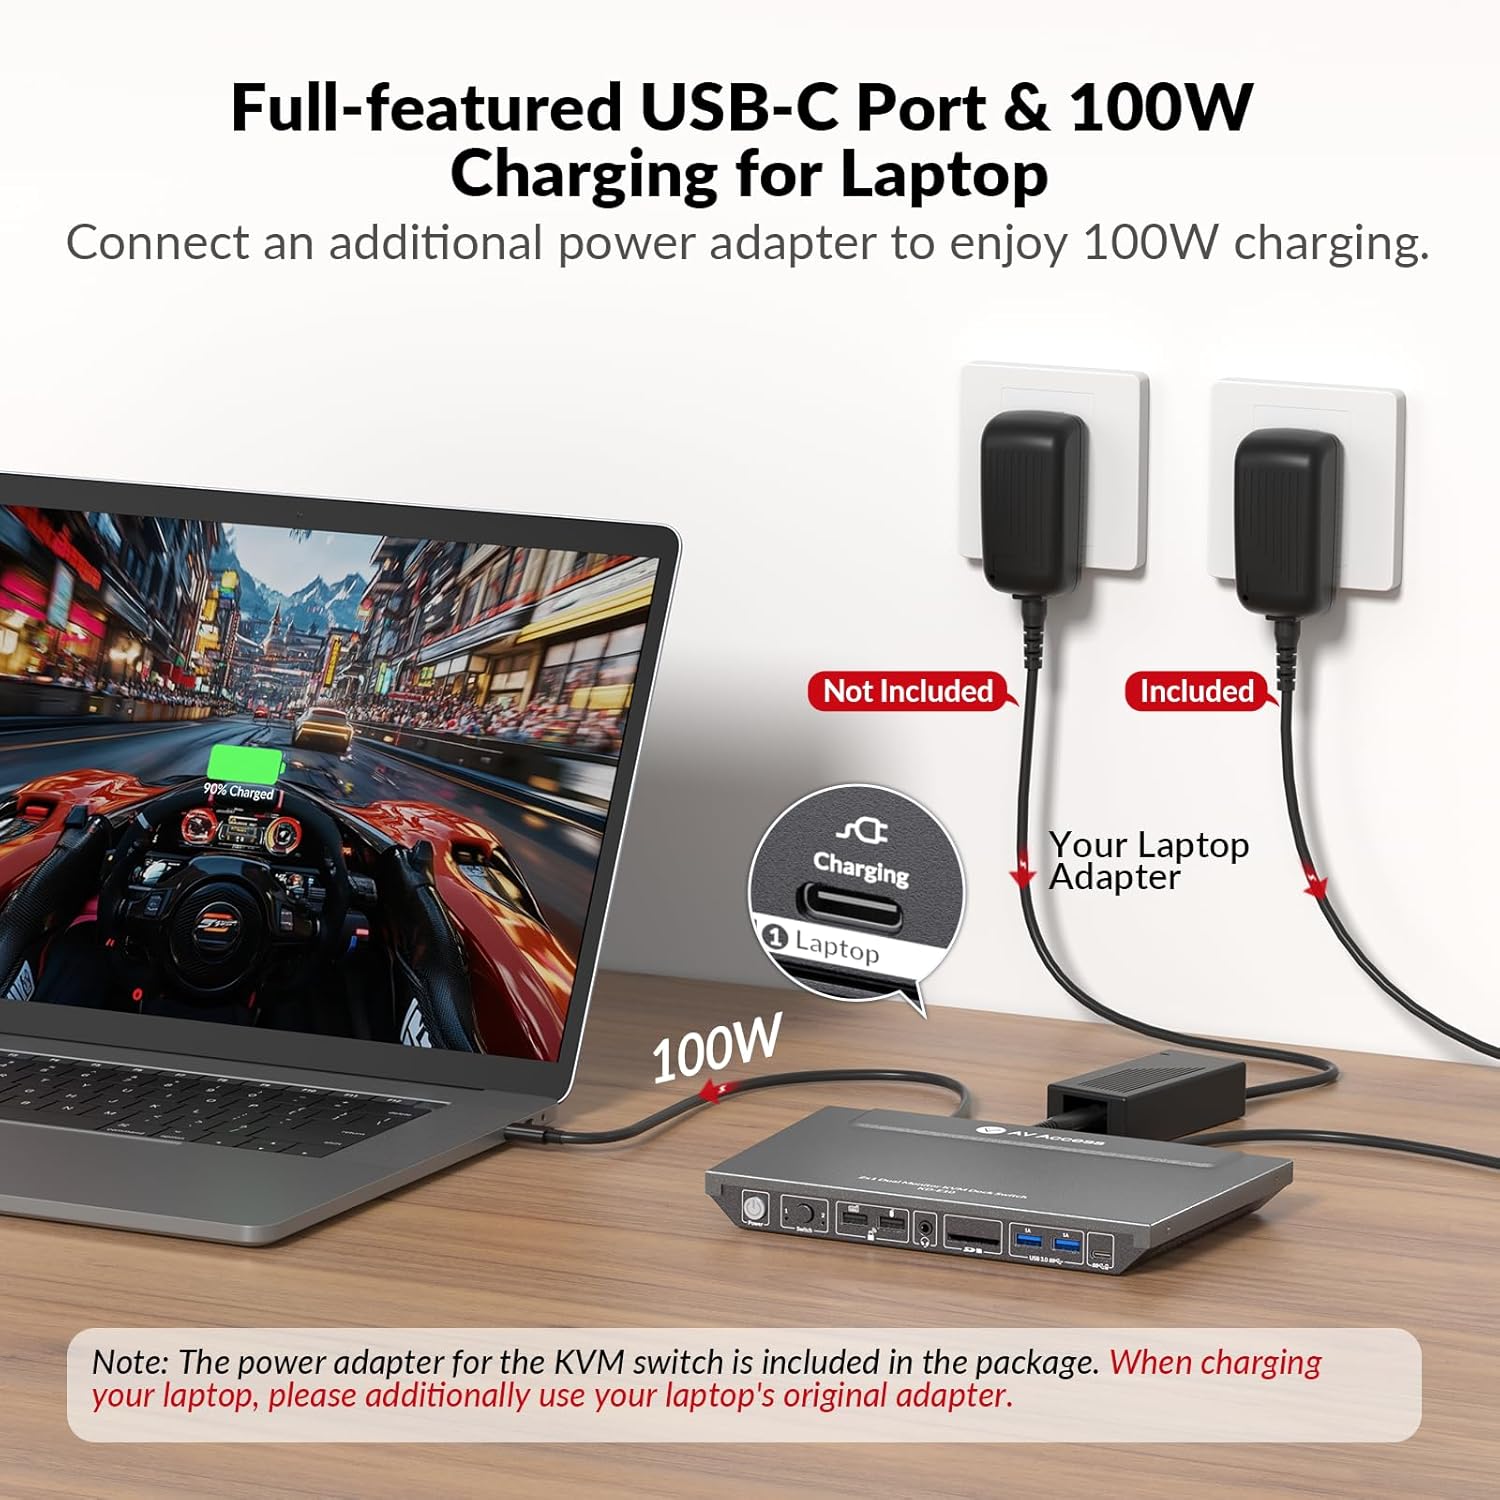
Image: Different display configurations for macOS and Windows operating systems.
6. Advanced Features
6.1 EDID Emulation
The KD-E10 features advanced EDID emulation, which ensures that your desktop icons and window arrangements remain consistent when switching between computers. This prevents common issues like desktop icon rearrangement, screen flickering, or windows cramming to the main monitor.

Image: EDID emulation prevents screen flickering and desktop rearrangement during switching.
6.2 Automatic PC Wake-up
When switching to a computer that is in sleep mode, the KD-E10 can automatically wake it up, eliminating the need to manually move your mouse or type on the keyboard.
6.3 High Refresh Rate Support
The KVM switch supports ultra-high refresh rates for a smooth visual experience, making it suitable for gaming and high-speed applications:
- 4K resolution at 60Hz
- 1440P resolution at 144Hz/120Hz
- 1080P resolution at 240Hz/165Hz/144Hz/120Hz

Image: The KD-E10 supports various high refresh rates for optimal performance.
7. Specifications
| Feature | Detail |
|---|---|
| Product Dimensions | 9.06 x 5.51 x 0.98 inches |
| Item Weight | 3.48 Pounds |
| Operation Mode | KVM Switch |
| Current Rating | 3 Amps |
| Operating Voltage | 20 Volts (DC) |
| Contact Type | HDMI Type-A 19-pin |
| Connector Type | DisplayPort, HDMI, Type-C |
| Terminal | PC, Laptop |
| Circuit Type | Button Switch |
| Actuator Type | Push Button |
8. Troubleshooting
- No Display: Ensure all video cables (HDMI, DisplayPort, USB-C) are securely connected between your computers, monitors, and the KVM switch. Verify that the KVM switch is powered on and the correct input is selected.
- USB Peripherals Not Responding: Check that the USB-B cable (for desktop) or USB-C cable (for laptop) is correctly connected to the KVM's host ports. Try connecting peripherals to different USB ports on the KVM.
- Laptop Not Charging: Confirm that an external USB-C power adapter is connected to the KD-E10's dedicated USB-C charging port for the laptop. Ensure the power adapter meets the 100W power delivery requirement.
- Desktop Icons Rearrange/Screen Flickering: This issue is typically mitigated by the KD-E10's EDID emulation. If it persists, ensure your graphics drivers are up to date and check monitor settings.
- Network Issues: The 1G Ethernet port provides network connectivity only for the laptop via the USB-C connection. Ensure the Ethernet cable is properly connected.
9. Maintenance
To ensure optimal performance and longevity of your KD-E10 KVM Switch Docking Station:
- Keep the device in a cool, dry place away from direct sunlight and excessive heat.
- Clean the device with a soft, dry cloth. Avoid using liquid or aerosol cleaners.
- Ensure proper ventilation around the unit to prevent overheating.
- Avoid placing heavy objects on top of the device.
10. Warranty & Support
For warranty information, technical support, or any inquiries regarding your AV Access KD-E10 KVM Switch Docking Station, please refer to the contact information provided in your user manual or visit the official AV Access website. Protection plans may also be available for purchase separately.


