1. Introduction
Thank you for choosing the COSTWAY 150 Pints Dehumidifier with Pump. This manual provides essential information for the safe and efficient operation, maintenance, and troubleshooting of your dehumidifier. Please read it thoroughly before use and retain it for future reference.

Image 1.1: The COSTWAY 150 Pints Dehumidifier operating in a home setting, highlighting its dehumidification capacity and coverage area.
2. Important Safety Instructions
To reduce the risk of fire, electric shock, or injury, always follow these basic precautions:
- Read all instructions before using the appliance.
- Ensure the power supply matches the voltage specified on the rating label.
- Do not operate the dehumidifier with a damaged cord or plug. If the cord is damaged, it must be replaced by the manufacturer or a qualified service agent.
- Always place the unit on a firm, level surface.
- Allow the unit to stand upright for at least 4 hours before initial use to allow the refrigerant (R32) to stabilize.
- Do not block air inlets or outlets. Maintain at least 8 inches (20 cm) clearance around the unit.
- Unplug the dehumidifier before cleaning or performing any maintenance.
- Do not use the appliance near water or in excessively damp environments where water may splash onto it.
- This appliance is not intended for use by persons (including children) with reduced physical, sensory or mental capabilities, or lack of experience and knowledge, unless they have been given supervision or instruction concerning use of the appliance by a person responsible for their safety.
- Keep children away from the appliance.
3. Setup and Installation
3.1 Unpacking
- Carefully remove the dehumidifier from its packaging.
- Remove all packing materials, tapes, and protective films.
- Inspect the unit for any shipping damage. If damaged, do not operate and contact customer support.
3.2 Placement
- Place the dehumidifier in a location where the humidity is highest, such as a basement, bathroom, or bedroom.
- Ensure the unit is placed on a stable, level surface to prevent vibration and noise.
- Maintain at least 8 inches (20 cm) of space around the unit for proper airflow.
- Avoid placing the unit near heat sources or in direct sunlight.
3.3 Initial Preparation
Before plugging in the unit for the first time, or if it has been transported horizontally, allow it to stand upright for a minimum of 4 hours. This allows the refrigerant to settle, ensuring optimal performance and preventing damage to the compressor.
4. Operating Instructions
4.1 Control Panel Overview

Image 4.1: The control panel with various function buttons.
The control panel features a digital display and several buttons for managing the dehumidifier's functions:
- Power Button: Turns the unit on or off.
- Humidity Setting Buttons (+/-): Adjusts the desired humidity level in Normal Mode.
- Fan Speed Button: Cycles through 3 fan speed settings (Low, Medium, High).
- Timer Button: Sets the 24-hour on/off timer.
- Child Lock Button: Activates or deactivates the child lock function (long press).
- Auto Defrost Indicator: Illuminates when the auto defrost function is active.
4.2 Operating Modes
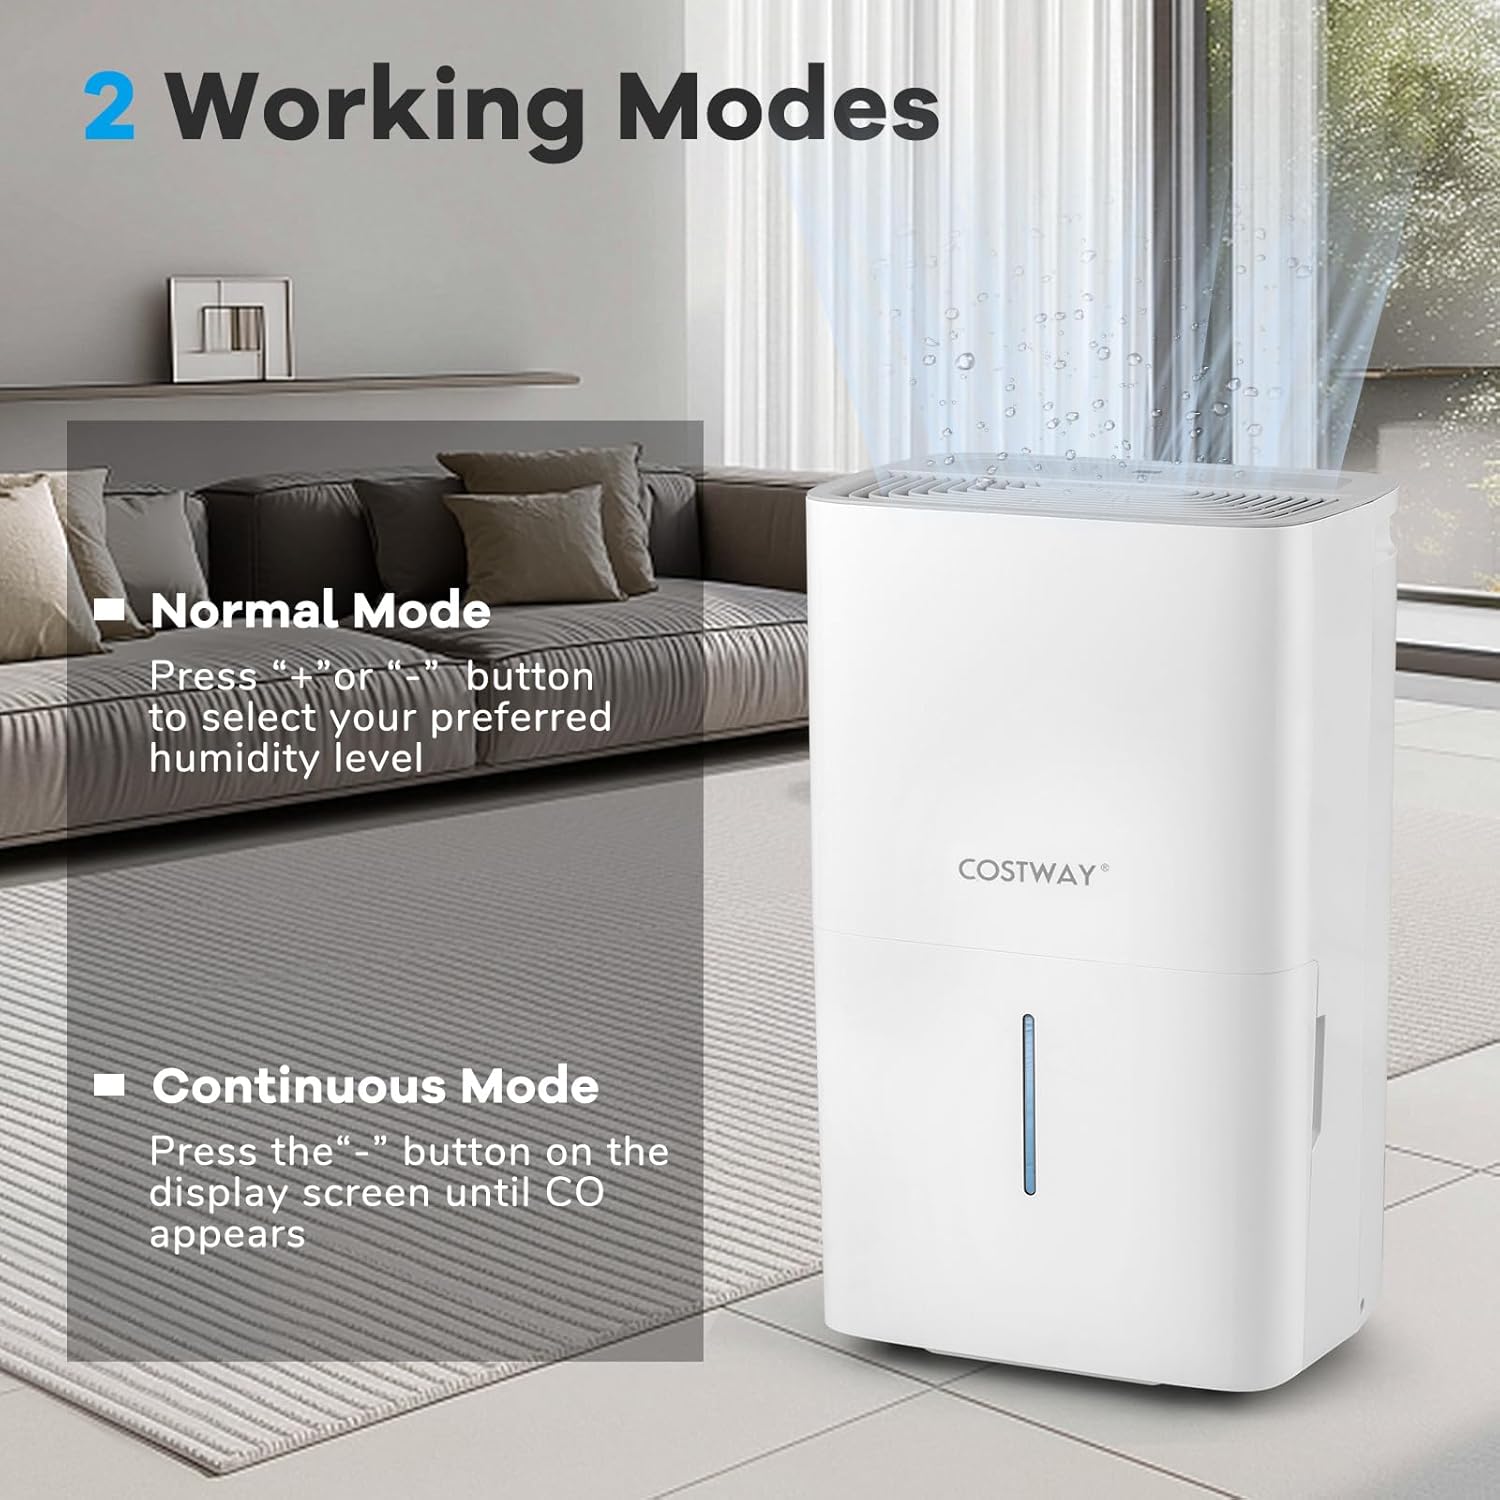
Image 4.2: Illustration of Normal and Continuous operating modes.
The dehumidifier offers two primary working modes:
- Normal Mode: In this mode, you can set your preferred humidity level using the "+" or "-" buttons. The unit will operate until the set humidity is reached, then cycle on and off to maintain it.
- Continuous Mode: To activate continuous dehumidification, press the "-" button on the display screen until "CO" appears. In this mode, the unit will run continuously regardless of the ambient humidity level, ideal for very damp conditions.
4.3 Other Functions
- 24-Hour Timer: Use the timer function to program the unit to turn on or off automatically after a set period (1-24 hours).
- Child Lock: Press and hold the Child Lock button for a few seconds to lock the control panel, preventing accidental changes to settings. Repeat to unlock.
- Auto Defrost: The unit features an automatic defrost function that activates when frost builds up on the evaporator coils, ensuring efficient operation in cooler environments.
- Memory Restart: In case of a power outage, the unit will automatically restart with the last settings once power is restored.
5. Drainage Options

Image 5.1: Overview of the three available drainage methods.
Your dehumidifier offers multiple ways to remove collected water:
5.1 Manual Drainage
- The unit is equipped with a 2.4-gallon water tank.
- When the tank is full, the unit will automatically shut off, and a water full alarm will sound. The waterline display provides a visual indication of the water level.
- Carefully pull out the water tank using its handle, empty the water, and reinsert the tank firmly until it clicks into place.
5.2 Pump Drainage
- For continuous drainage to a higher elevation or distant drain, use the included 16.4 ft pump drain hose.
- Connect one end of the pump drain hose to the pump drainage port on the unit.
- Route the other end of the hose to a suitable drain, ensuring there are no kinks or obstructions.
- Ensure the hose is securely connected to prevent leaks.
5.3 Gravity Drainage
- For continuous drainage to a lower elevation, use the included 23.5-inch drain hose for gravity drainage.
- Connect one end of the gravity drain hose to the gravity drainage port on the unit.
- Ensure the hose is sloped downwards to allow water to flow out by gravity to a suitable drain.
- Do not elevate the hose above the drainage port, as this will prevent water from draining.
6. Maintenance
Regular maintenance ensures optimal performance and extends the lifespan of your dehumidifier.
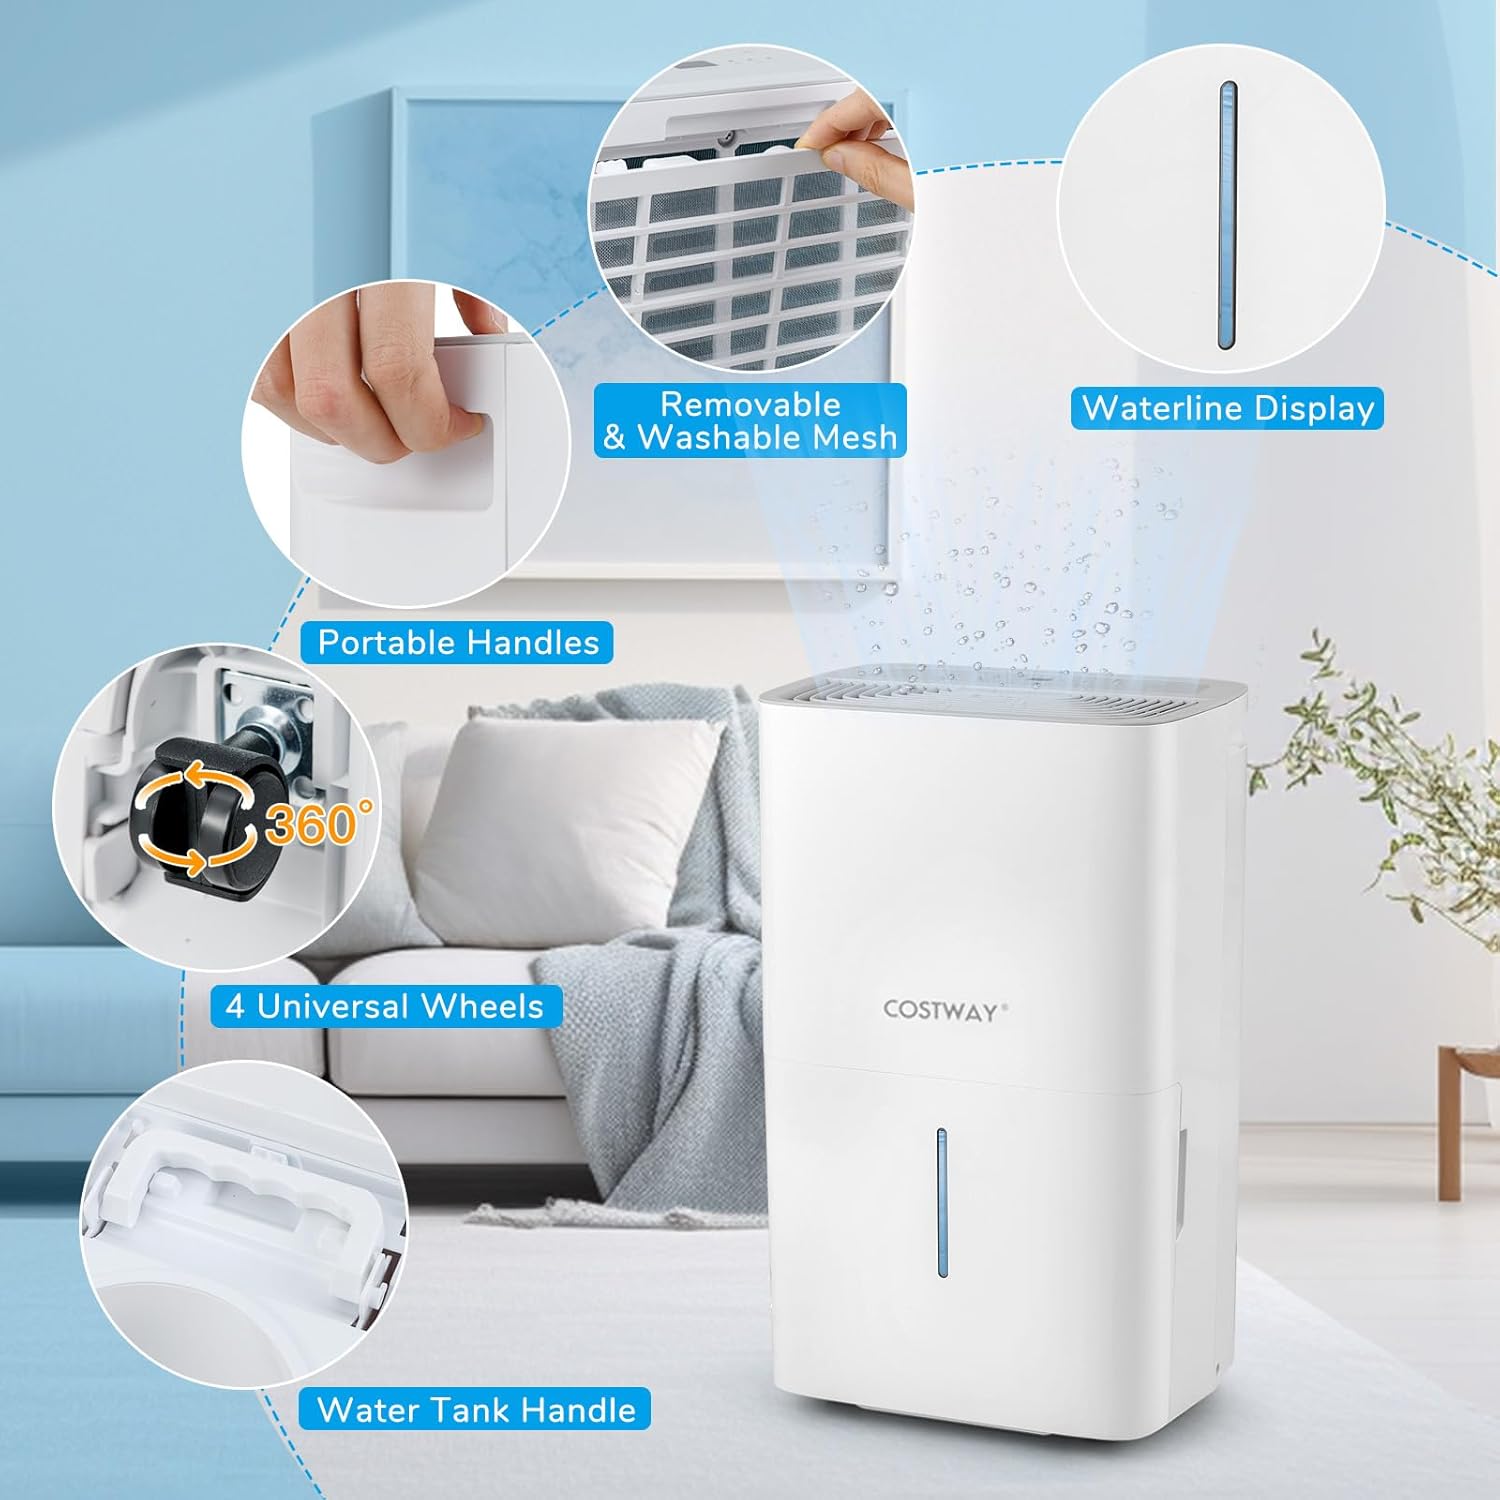
Image 6.1: Features enhancing convenience and maintenance, including the washable filter.
6.1 Cleaning the Air Filter
The mesh air filter should be cleaned regularly (every 2-4 weeks, depending on usage) to prevent dust buildup and maintain efficiency.
- Unplug the dehumidifier from the power outlet.
- Remove the mesh filter from the back or side of the unit.
- Wash the filter with warm, soapy water. Rinse thoroughly.
- Allow the filter to air dry completely before reinserting it into the unit. Do not use a dryer or direct heat.
6.2 Cleaning the Unit Exterior
- Wipe the exterior of the dehumidifier with a soft, damp cloth.
- Do not use harsh chemicals, abrasive cleaners, or solvents, as these can damage the surface.
6.3 Storage
- If storing the unit for an extended period, ensure the water tank is empty and clean.
- Clean the air filter.
- Wrap the power cord neatly and secure it.
- Store the unit in an upright position in a cool, dry place, away from direct sunlight and extreme temperatures.
7. Troubleshooting
Before contacting customer service, please refer to the following common issues and solutions:
| Problem | Possible Cause | Solution |
|---|---|---|
| Dehumidifier does not turn on. | No power; Power cord not plugged in; Water tank full or not properly inserted. | Check power outlet and plug; Empty and reinsert water tank correctly. |
| Unit not collecting water. | Air filter clogged; Room temperature too low; Humidity setting too high; Unit in Continuous Mode but drain hose is blocked. | Clean air filter; Ensure room temperature is above 41°F (5°C); Lower humidity setting; Check drain hose for kinks or blockages. |
| Unit is noisy. | Unit not on a level surface; Air filter clogged. | Place unit on a flat, stable surface; Clean air filter. |
| Water leaks from the unit. | Water tank not properly inserted; Drain hose connection loose or damaged. | Ensure water tank is fully inserted; Check drain hose connections and replace if damaged. |
| Pump drainage not working. | Pump hose kinked or blocked; Pump drainage port obstructed. | Inspect pump hose for kinks or blockages; Ensure pump drainage port is clear. |
8. Specifications

Image 8.1: Product dimensions and dehumidification capacities.
| Feature | Detail |
|---|---|
| Brand | COSTWAY |
| Model Name | ES10480US-WH |
| Dehumidification Capacity | 150 Pints/Day (at 95°F, 90% RH) |
| Coverage Area | 7000 Sq.Ft |
| Water Tank Volume | 2.4 Gallons |
| Product Dimensions (D x W x H) | 9" x 13" x 19.5" |
| Item Weight | 30.5 Pounds |
| Number of Fan Speeds | 3 |
| Operation Modes | Normal, Continuous |
| Special Features | Built-In Pump, Child Lock, Digital Display, Removable Tank, Washable Filter |
| Air Flow Capacity | 230 Cubic Feet Per Minute (CFM) |
| Upper Temperature Rating | 95 Degrees Fahrenheit |
| Material | Acrylonitrile Butadiene Styrene (ABS) |
| Included Components | Drain hose, Instruction Manual |
9. Warranty and Support
For warranty information, please refer to the warranty card included with your product or contact COSTWAY customer support directly. Keep your purchase receipt as proof of purchase.
If you encounter any issues not covered in the troubleshooting section, or require further assistance, please contact COSTWAY customer service through their official website or the contact information provided in your product packaging.