1. Introduction
Thank you for purchasing the LifePlus 1500W Infrared Heater. This manual provides important information for the safe operation, installation, maintenance, and troubleshooting of your heater. Please read this manual thoroughly before use and retain it for future reference.
This infrared heater is designed for indoor use, providing efficient warmth for areas up to 300 square feet. It features multiple heating modes, adjustable temperature control, and enhanced safety mechanisms.
2. Important Safety Instructions
When using electrical appliances, basic precautions should always be followed to reduce the risk of fire, electric shock, and injury to persons, including the following:
- Read all instructions before using this heater.
- This heater is hot when in use. To avoid burns, do not let bare skin touch hot surfaces. Use handles when moving this heater. Keep combustible materials, such as furniture, pillows, bedding, papers, clothes, and curtains at least 3 feet (0.9 m) from the front of the heater and keep them away from the sides and rear.
- Extreme caution is necessary when any heater is used by or near children or invalids and whenever the heater is left operating and unattended.
- Always unplug heater when not in use.
- Do not operate any heater with a damaged cord or plug or after the heater malfunctions, has been dropped or damaged in any manner. Return heater to authorized service facility for examination, electrical or mechanical adjustment, or repair.
- Do not use outdoors.
- This heater is not intended for use in bathrooms, laundry areas, and similar indoor locations. Never locate heater where it may fall into a bathtub or other water container.
- Do not run cord under carpeting. Do not cover cord with throw rugs, runners, or similar coverings. Arrange cord away from traffic area and where it will not be tripped over.
- To disconnect heater, turn controls to off, then remove plug from outlet.
- Do not insert or allow foreign objects to enter any ventilation or exhaust opening as this may cause an electric shock or fire, or damage the heater.
- To prevent a possible fire, do not block air intakes or exhaust in any manner. Do not use on soft surfaces, like a bed, where openings may become blocked.
- A heater has hot and arcing or sparking parts inside. Do not use it in areas where gasoline, paint, or flammable vapors or liquids are used or stored.
- Use this heater only as described in this manual. Any other use not recommended by the manufacturer may cause fire, electric shock, or injury to persons.
- Always plug heaters directly into a wall outlet/receptacle. Never use with an extension cord or relocatable power tap (outlet/power strip).
- This heater includes an overheat protection system and an automatic tip-over safety switch. If the heater overheats or tips over, it will automatically shut off.

Figure 2.1: Double Safety Protection features, including Overheat and Tip-Over protection, ensuring automatic shut-off for enhanced safety.

Figure 2.2: Visual representation of the heater's double safety features: Overheat Protection and Tip-Over Protection.

Figure 2.3: The heater is constructed with heat-resistant materials for safe operation.
3. Product Overview
The LifePlus Infrared Heater is a freestanding, cabinet-style unit designed for efficient indoor heating. It features a control panel on the front and comes with a remote control for convenient operation.
Key Components:
- Infrared Heating Elements
- Air Outlet Grille
- Control Panel with LED Digital Screen
- Power Cord
- Remote Control
- Tip-Over Safety Switch (internal)
- Overheat Protection Sensor (internal)
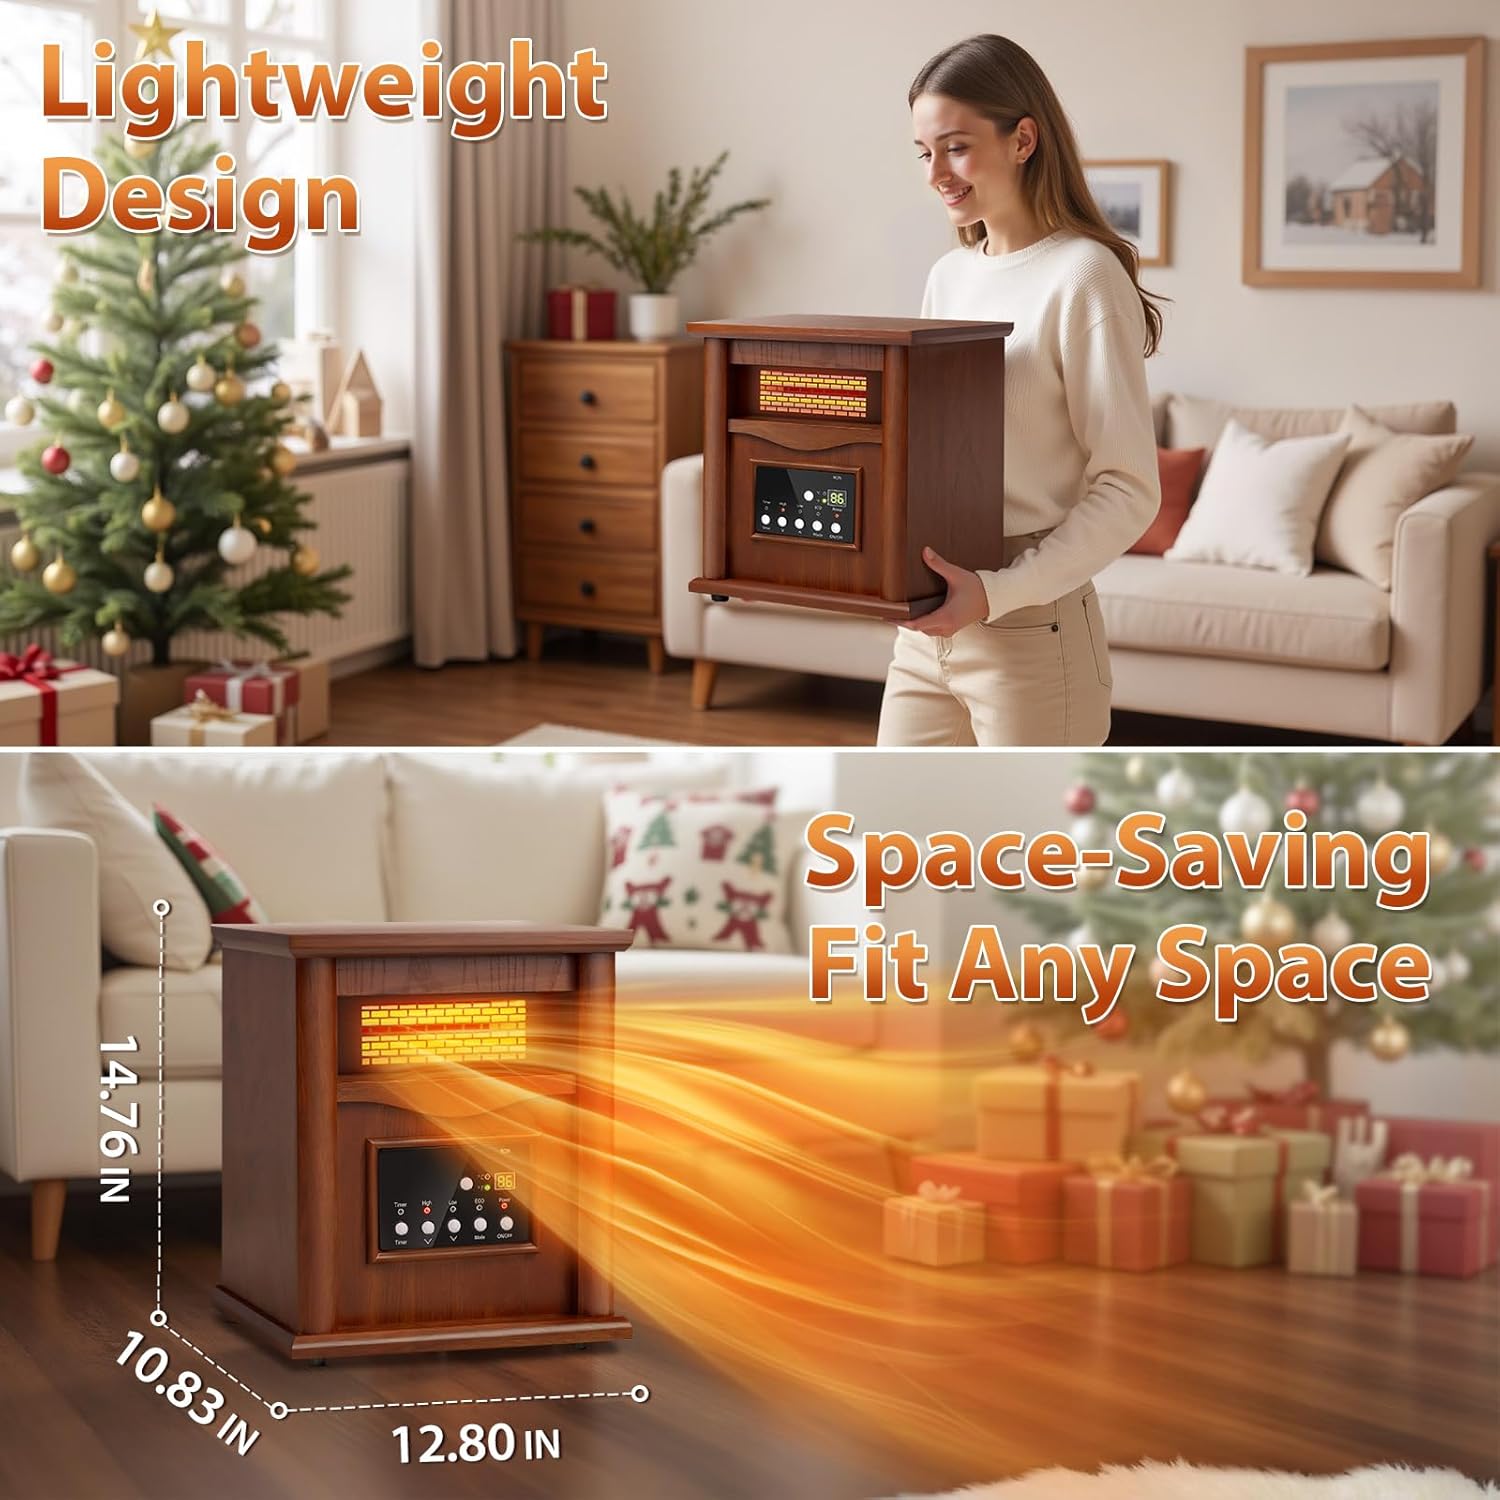
Figure 3.1: The heater features a lightweight design for easy portability.

Figure 3.2: The compact design allows the heater to fit easily into various spaces.

Figure 3.3: Dimensions of the heater, illustrating its portable size.
4. Setup
The LifePlus Infrared Heater requires no assembly. Follow these steps for initial setup:
- Unpacking: Carefully remove the heater from its packaging. Retain packaging for storage if needed.
- Placement: Place the heater on a firm, level surface. Ensure there is at least 3 feet (0.9 m) of clear space around the front, sides, and rear of the heater to prevent obstruction of air intake and exhaust. Do not place on soft surfaces like carpets or rugs that may block airflow.
- Power Connection: Plug the power cord directly into a 120V AC, 60Hz grounded wall outlet. Do not use extension cords, power strips, or surge protectors.
- Initial Power On: The heater is now ready for operation.
5. Operating Instructions
The heater can be operated using the control panel on the unit or the included remote control.
Control Panel and Remote Control Functions:

Figure 5.1: Control panel and remote control layout.

Figure 5.2: Detailed view of the easy-to-use control panel.

Figure 5.3: Operating the heater with the convenient remote control.

Figure 5.4: Remote control functions for easy adjustment.
- Power ON/OFF: Press the ON/OFF button to turn the heater on or off.
- Mode Selection: Press the MODE button to cycle through the heating modes:
- Low (750W): For gentle, continuous heat.
- High (1500W): For rapid heating of larger spaces.
- ECO (Energy-Saving): Maintains a constant temperature of 68°F (20°C) to optimize energy consumption.
- Temperature Adjustment: Use the TEMP UP and TEMP DOWN buttons to set your desired temperature between 59°F (15°C) and 86°F (30°C). The heater will maintain this temperature.
- Timer Function: Press the TIMER button to set an automatic shut-off time from 1 to 12 hours. Each press increases the timer by one hour. The display will show the set time, then revert to the current temperature.
- Temperature Unit Conversion: Press the °C/°F button (on remote) or corresponding button on the control panel to switch between Celsius and Fahrenheit.
- Quick Heating: The heater is designed to provide warmth quickly.
- Low Noise Operation: The heater operates quietly, suitable for bedrooms and offices.

Figure 5.5: Three convenient heating modes: Low, High, and ECO.

Figure 5.6: Choose from Low, High, or ECO heating modes to suit your comfort needs.

Figure 5.7: The ECO mode provides efficient energy savings, potentially reducing electricity bills by approximately 40%.

Figure 5.8: The ECO mode is designed for efficient energy consumption.

Figure 5.9: ECO Mode operation for optimized energy usage.

Figure 5.10: The 12-hour timer allows for scheduled operation, and the heater operates with low noise.

Figure 5.11: The 12-hour timer feature for convenient scheduling.

Figure 5.12: The heater provides warmth quickly after activation.

Figure 5.13: The heater operates with low noise, ideal for quiet environments.

Figure 5.14: Quiet operation ensures minimal disturbance.
6. Maintenance
Regular maintenance ensures optimal performance and longevity of your heater.
Cleaning:
- Always unplug the heater and allow it to cool completely before cleaning.
- Use a soft, damp cloth to wipe the exterior surfaces of the heater. Do not use abrasive cleaners or solvents.
- Gently vacuum the air intake and exhaust grilles to remove dust and lint.
- Do not immerse the heater in water or allow water to drip into the interior.
Storage:
- Store the heater in a cool, dry place when not in use.
- If possible, store it in its original packaging to protect it from dust and damage.
7. Troubleshooting
If your heater is not operating correctly, please refer to the following common issues and solutions:
| Problem | Possible Cause | Solution |
|---|---|---|
| Heater does not turn on. | No power to the unit. Tip-over switch activated. Overheat protection activated. | Ensure the power cord is securely plugged into a working outlet. Place the heater on a firm, level surface. Unplug the heater, wait 10-15 minutes for it to cool down, then plug it back in. Clear any obstructions around the heater. |
| Heater blows cool air. | Set temperature is lower than room temperature. ECO mode is active and room temperature is at or above 68°F. | Increase the set temperature above the current room temperature. Switch to Low or High heating mode if continuous heat is desired above 68°F. |
| Heater makes unusual noises. | Dust or debris inside the unit. Loose internal component. | Unplug the heater and gently vacuum the grilles. If noise persists or is loud, discontinue use and contact customer support. |
| Remote control not working. | Dead batteries. Obstruction between remote and heater. | Replace batteries in the remote control. Ensure a clear line of sight between the remote and the heater's sensor. |
8. Specifications
| Feature | Detail |
|---|---|
| Model Number | GD9315BCW-3J |
| Power Output | 750W (Low), 1500W (High) |
| Voltage | 120V AC, 60Hz |
| Heating Area | Up to 300 sq. ft. |
| Temperature Range | 59°F - 86°F (15°C - 30°C) |
| Timer | 1-12 Hours |
| Dimensions (D x W x H) | 11.93" x 12.8" x 15.79" |
| Weight | 16.3 lbs |
| Safety Features | Overheat Protection, Tip-Over Protection |
| Control | Control Panel, Remote Control |

Figure 8.1: The heater is capable of warming spaces up to 300 square feet.
Figure 8.2: Heating capacity of up to 300 square feet.

Figure 8.3: Heat distribution in a room, demonstrating coverage for up to 300 sq. ft.

Figure 8.4: The heater is suitable for various indoor spaces including bedrooms, offices, and living rooms.
9. Warranty and Support
For warranty information or technical support, please refer to the documentation included with your purchase or contact LifePlus customer service. Keep your purchase receipt as proof of purchase.


