1. Introduction
This manual provides detailed instructions for setting up, operating, maintaining, and troubleshooting your GMKtec EVO-T1 AI Mini PC Workstation. The EVO-T1 is designed for high performance, featuring an Intel Core Ultra 9 285H processor, Intel Arc 140T GPU, and extensive connectivity options, making it suitable for gaming, video editing, and multitasking.

Figure 1: GMKtec EVO-T1 AI Mini PC
Please read this manual thoroughly before using the device to ensure optimal performance and longevity.
2. What's in the Box
Verify that all items are present in the package:
- GMKtec Nucbox EVO T1 Intel Core Ultra 9 285H Mini PC Computer
- Power Supply & Cable
- HDMI Cable
- User Manual
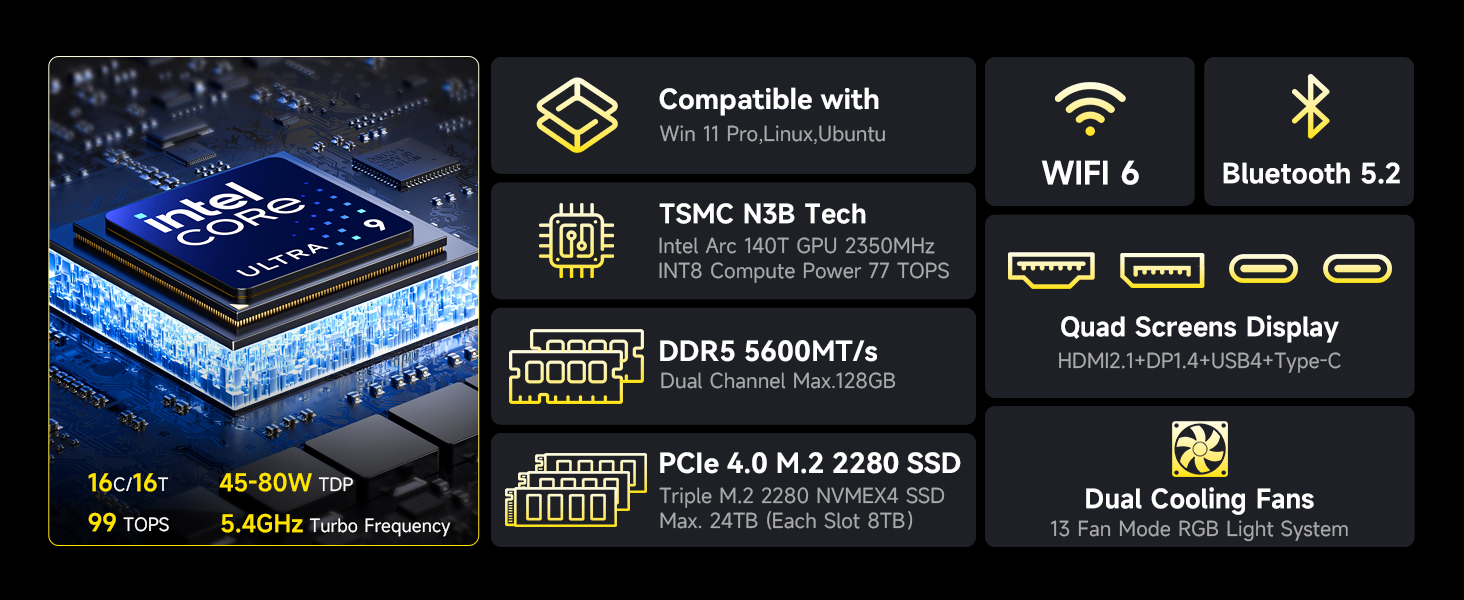
Figure 2: Retail Boxed Packaging and Contents
3. Setup
3.1 Initial Connection
- Connect Power: Plug the power supply cable into the DC IN 5525 port on the back of the Mini PC, then connect the power adapter to a wall outlet.
- Connect Display: Use the provided HDMI cable to connect your monitor to the HDMI 2.1 port on the Mini PC. For multi-display setups, utilize the DisplayPort 1.4 and USB Type-C ports.
- Connect Peripherals: Connect your keyboard and mouse to the available USB ports (USB 3.0 or USB 2.0).
- Network Connection: For wired internet, connect an Ethernet cable to the 2.5GbE LAN port. For wireless, ensure Wi-Fi is enabled in the operating system.
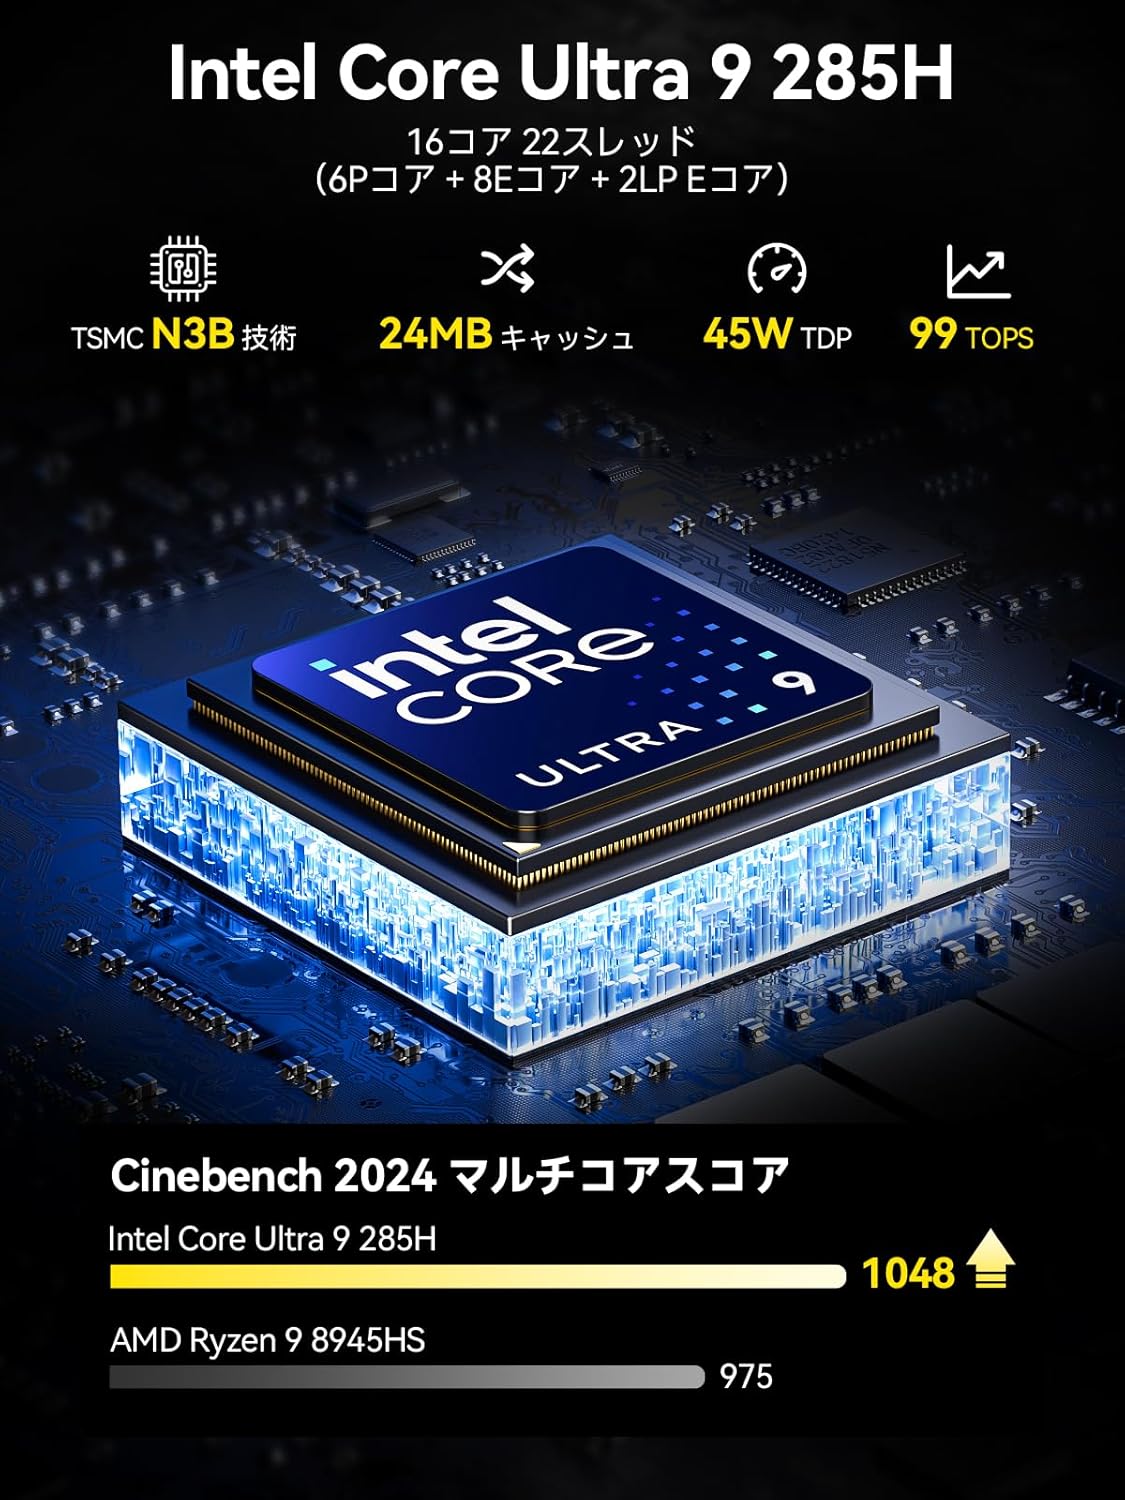
Figure 3: Rich Interface Ports (Front and Rear)
3.2 VESA Mount Installation (Optional)
If your package includes a VESA mount, you can attach the Mini PC to the back of a compatible monitor. Follow the instructions provided with the VESA mount kit for secure installation.
4. Operating
4.1 Power On/Off
- Power On: Press the power button located on the front of the Mini PC. The power indicator light will illuminate.
- Power Off: To shut down, use the operating system's shutdown function. Avoid direct power disconnection during operation to prevent data loss.
4.2 Display Configuration
The EVO-T1 supports quad-screen display output with up to 8K resolution. Connect multiple monitors using the HDMI 2.1 (8K@60Hz), DisplayPort 1.4 (4K@60Hz), and USB Type-C (supporting PD3.0/DP1.4/DATA) ports. Adjust display settings within your operating system.

Figure 4: Quad Screen 8K Display Support
4.3 Connectivity
The Mini PC features a 2.5GbE LAN port for high-speed wired networking. For wireless connectivity, it includes built-in Wi-Fi 6 and Bluetooth 5.2, ensuring stable and efficient connections for various wireless devices.
4.4 Storage Expansion
The EVO-T1 comes with a 1TB PCIe 4.0 SSD and offers three M.2 2280 expansion slots, each capable of supporting up to 4TB, for a maximum total storage of 12TB. This allows for significant storage upgrades.

Figure 5: Triple PCIe 4.0 SSD Slots and Dual-Channel DDR5 Memory
4.5 Oculink Port Usage
The Oculink port provides higher bandwidth (64Gbps) compared to Thunderbolt's 40Gbps, making it ideal for eGPU setups and professional workloads requiring high data transfer rates and lower latency. Note: Oculink does not support hot-plugging. Always power off the Mini PC before connecting or disconnecting Oculink devices.

Figure 6: Oculink Port for Enhanced Performance
5. Maintenance
5.1 General Care
- Keep the Mini PC in a clean, dry environment away from direct sunlight and excessive heat.
- Avoid placing heavy objects on top of the device.
- Clean the exterior with a soft, dry cloth. Do not use liquid cleaners.
5.2 Cooling System Maintenance
The EVO-T1 features dual turbo CPU fans and a dedicated DDR5/SSD cooling fan. To maintain optimal cooling performance:
- Ensure the air vents are not obstructed.
- Periodically clean dust from the vents using compressed air.
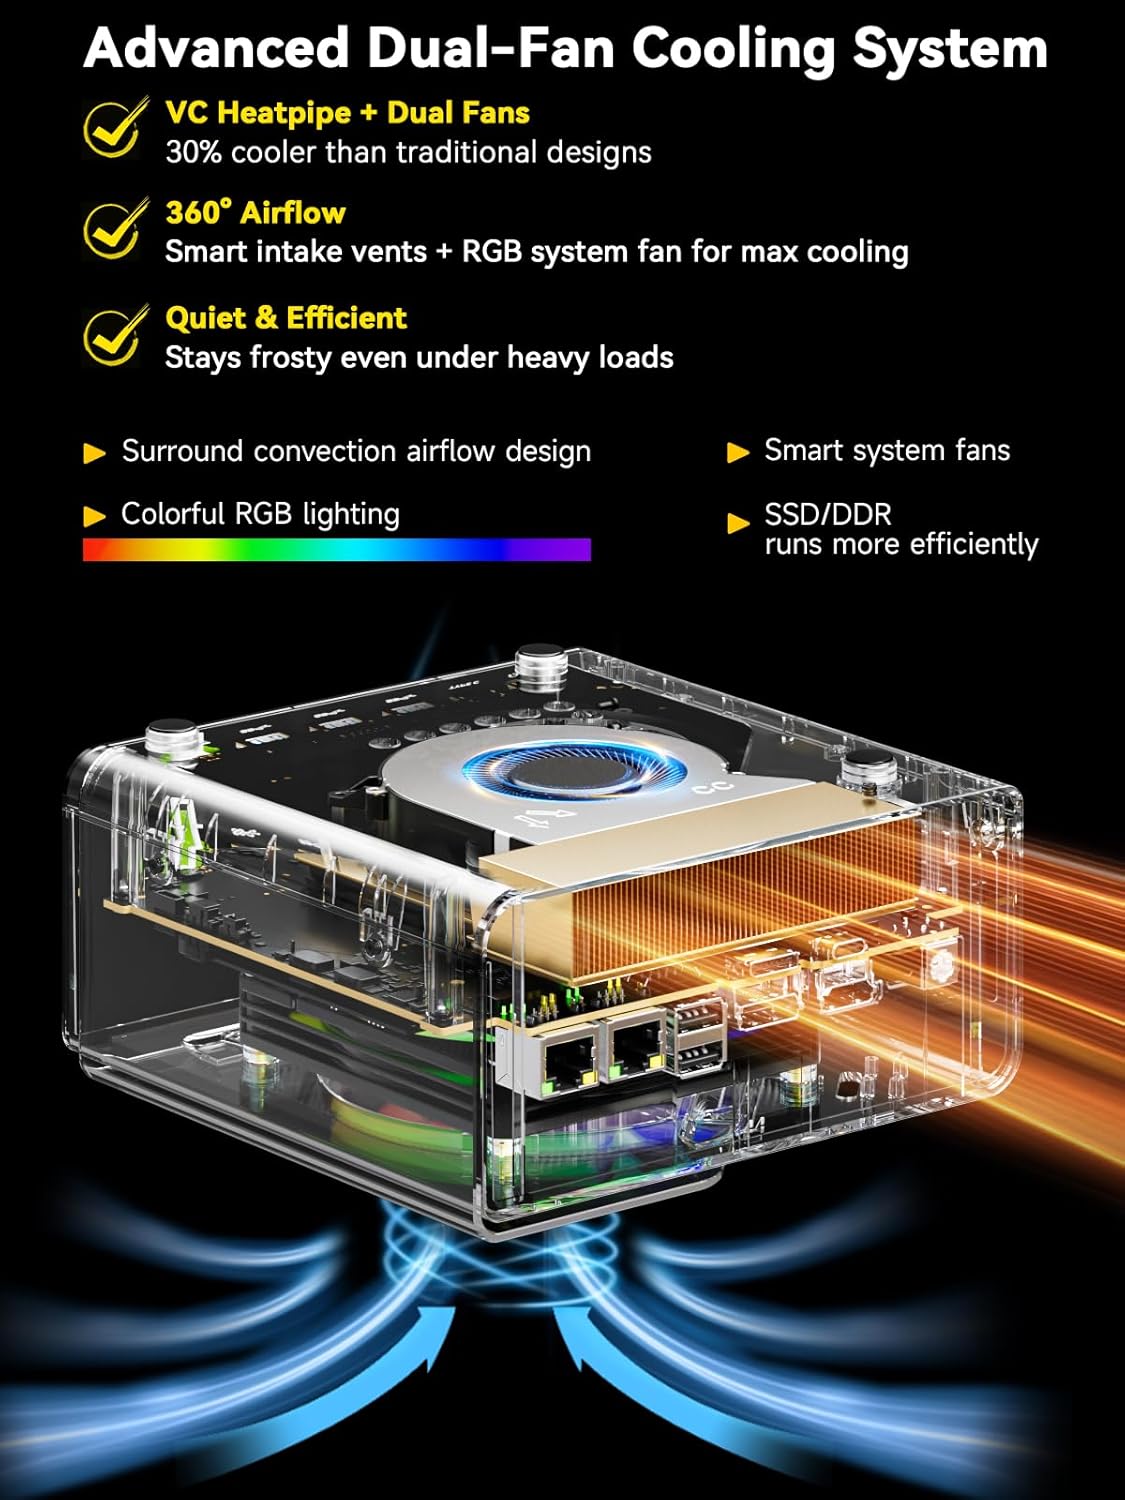
Figure 7: Advanced Dual-Fan Cooling System
6. Troubleshooting
If you encounter issues with your Mini PC, try the following basic troubleshooting steps:
- No Power: Check if the power cable is securely connected to both the Mini PC and the power outlet. Try a different outlet.
- No Display: Ensure the monitor is powered on and the display cable (HDMI, DisplayPort, USB-C) is securely connected to both the Mini PC and the monitor. Try a different cable or monitor if possible.
- No Internet Connection: For wired connections, check the Ethernet cable and router. For Wi-Fi, ensure Wi-Fi is enabled in the OS and you are connected to the correct network.
- System Freezes/Crashes: Restart the Mini PC. Ensure the operating system and drivers are up to date. Check for overheating (ensure vents are clear).
If problems persist, please refer to the Warranty & Support section for contact information.
7. Specifications
| Feature | Specification |
|---|---|
| Processor | Intel Core Ultra 9 285H (up to 5.4 GHz, 16 Cores, 22 Threads) |
| Graphics Coprocessor | Intel Arc 140T GPU 2.35GHz |
| RAM | 64GB DDR5 5600MT/S (Dual 32GB SO-DIMM) |
| Hard Drive | 1TB PCIe 4.0 M.2 2280 SSD (3x M.2 2280 Expansion Slots, Max. 12TB total) |
| Screen Resolution Support | Up to 7680x4320 (8K) |
| Display Outputs | HDMI 2.1 (8K@60Hz), DisplayPort 1.4 (4K@60Hz), USB Type-C (PD3.0/DP1.4/DATA) |
| Wireless Type | Wi-Fi 6 (802.11ax), Bluetooth 5.2 |
| Ethernet | 2.5GbE LAN Port |
| USB Ports | 3x USB 3.0, 2x USB 2.0, USB Type-C |
| Special Ports | Oculink Port (PCIe x4 speeds) |
| Operating System | OS Pro |
| Item Weight | 2.01 pounds |
| Product Dimensions | 6.06 x 5.94 x 2.87 inches |
| Color | Champagne Gold/Black |
8. Warranty and Support
GMKtec offers a 1-year limited warranty for each Mini PC, starting from the date of purchase. All defects due to design and workmanship are covered. For any inquiries or support, please use the following channels:
- Amazon Support: Log in to your Amazon account, navigate to 'Your Orders', and select 'Ask Product Question' for assistance.
- After-Sales Support: Send an email to the After-Sales Team at support@gmktec.com. GMKtec provides 24/7 customer support.
Figure 8: Warranty & Support Contact Information
GMKtec is committed to providing a satisfying experience with professional after-sales service.


