
1. Introduction
This manual provides detailed instructions for the installation, operation, and maintenance of your Uckazy 12.3 Inch Android 14 Car Radio. This device is designed to enhance your driving experience by integrating advanced multimedia and navigation features into your Mercedes Benz vehicle. Please read this manual thoroughly before installation and use to ensure proper functionality and safety.
2. Safety Information
- Professional Installation Recommended: Due to the complexity of car electrical systems, professional installation is highly recommended to prevent damage to the unit or your vehicle.
- Disconnect Battery: Always disconnect the vehicle's battery before performing any electrical work to avoid short circuits and electrical hazards.
- Wiring: Ensure all wiring connections are secure and properly insulated to prevent electrical shorts or malfunctions.
- Driving Safety: Do not operate the device in a manner that distracts you from driving. Always prioritize road safety.
- Ventilation: Ensure adequate ventilation around the unit to prevent overheating.
- Liquid Exposure: Avoid exposing the unit to water or other liquids.
3. Package Contents
Verify that all items listed below are included in your package:

Image: Included accessories for the Uckazy 12.3 Inch Android 14 Car Radio. This image displays a USB cable, an AUX cable, an AMI cable, a power cable, installation tools, and a touch pen.
- 1x Uckazy 12.3 Inch Android 14 Car Radio Unit
- 1x USB Cable
- 1x AUX Cable
- 1x AMI Cable
- 1x Power Cable
- 1x Set of Installation Tools
- 1x Touch Pen
- 1x User Manual (this document)
4. Compatibility
This Uckazy 12.3 Inch Android 14 Car Radio is specifically designed for Mercedes Benz vehicles with the NTG 4.5/4.7 system. Please ensure your vehicle's original radio system matches the compatible types shown below.

Image: This image illustrates the compatible Mercedes Benz models and NTG systems. It indicates compatibility with Mercedes Benz A-Class W176/CLA-C117 (2013-2015) and GLA-X156 (2014-2015) equipped with the NTG 4.5/4.7 system. It explicitly states that the unit is not compatible with original radios featuring NTG 4.0, NTG 5.0, or NTG 5.1 systems, showing visual examples of each.
- Compatible Models: Mercedes Benz A-Class W176, CLA-C117 (2013-2015), GLA-X156 (2014-2015)
- Compatible System: NTG 4.5/4.7 System
- Incompatible Systems: NTG 4.0, NTG 5.0, NTG 5.1
If you are unsure about your vehicle's system, please consult your vehicle's manual or contact a professional installer.
5. Key Features
The Uckazy Car Radio offers a range of advanced features to enhance your in-car experience:
- 12.3-inch HD IN-CELL Touch Screen: Features a 1920*720 resolution display with full lamination technology for clearer images, higher color brightness, and a wide viewing angle of up to 178 degrees. This technology reduces reflection by 75%.
- Android 14 Operating System: Powered by a 13 NM MediaTek Octa-core processor (4*Cortex A72 2.2GHz + 4*Cortex A51 1.8GHz) with integrated GPU, 4GB RAM, and 64GB ROM. Supports 2.4G and 5.0G Wi-Fi.
- Wireless CarPlay & Android Auto: Seamlessly integrate your smartphone for navigation, music, calls, and messaging via voice commands (Siri or Google Voice Assistant).
- Built-in DSP with 16 EQ Segments: Digital Signal Processor with 16 equalizer segments allows for detailed audio tuning, preset EQ options, and adjustment of speaker positioning for an optimized sound experience.
- Retains Original OEM System Functions: The unit integrates seamlessly with your vehicle's existing systems, retaining functions such as steering wheel controls, OEM reversing camera, iDrive system control, original CD player, and the overall original car system.
- Additional Features: Includes support for USB, Bluetooth, BT Music, Mirrorlink, and Reverse camera input.

Image: A visual comparison demonstrating the clarity and detail difference between an 800x480 pixel screen and the 1920x720 pixel screen of the Uckazy Car Radio. The higher resolution screen shows significantly improved image quality.

Image: The Uckazy Car Radio screen showing both Wireless CarPlay and Wireless Android Auto interfaces, highlighting their application icons and user experience.

Image: This image illustrates the use of voice commands (Siri and Google Assistant) for navigation and mobile music playback on the Uckazy Car Radio, showing map and music interfaces.
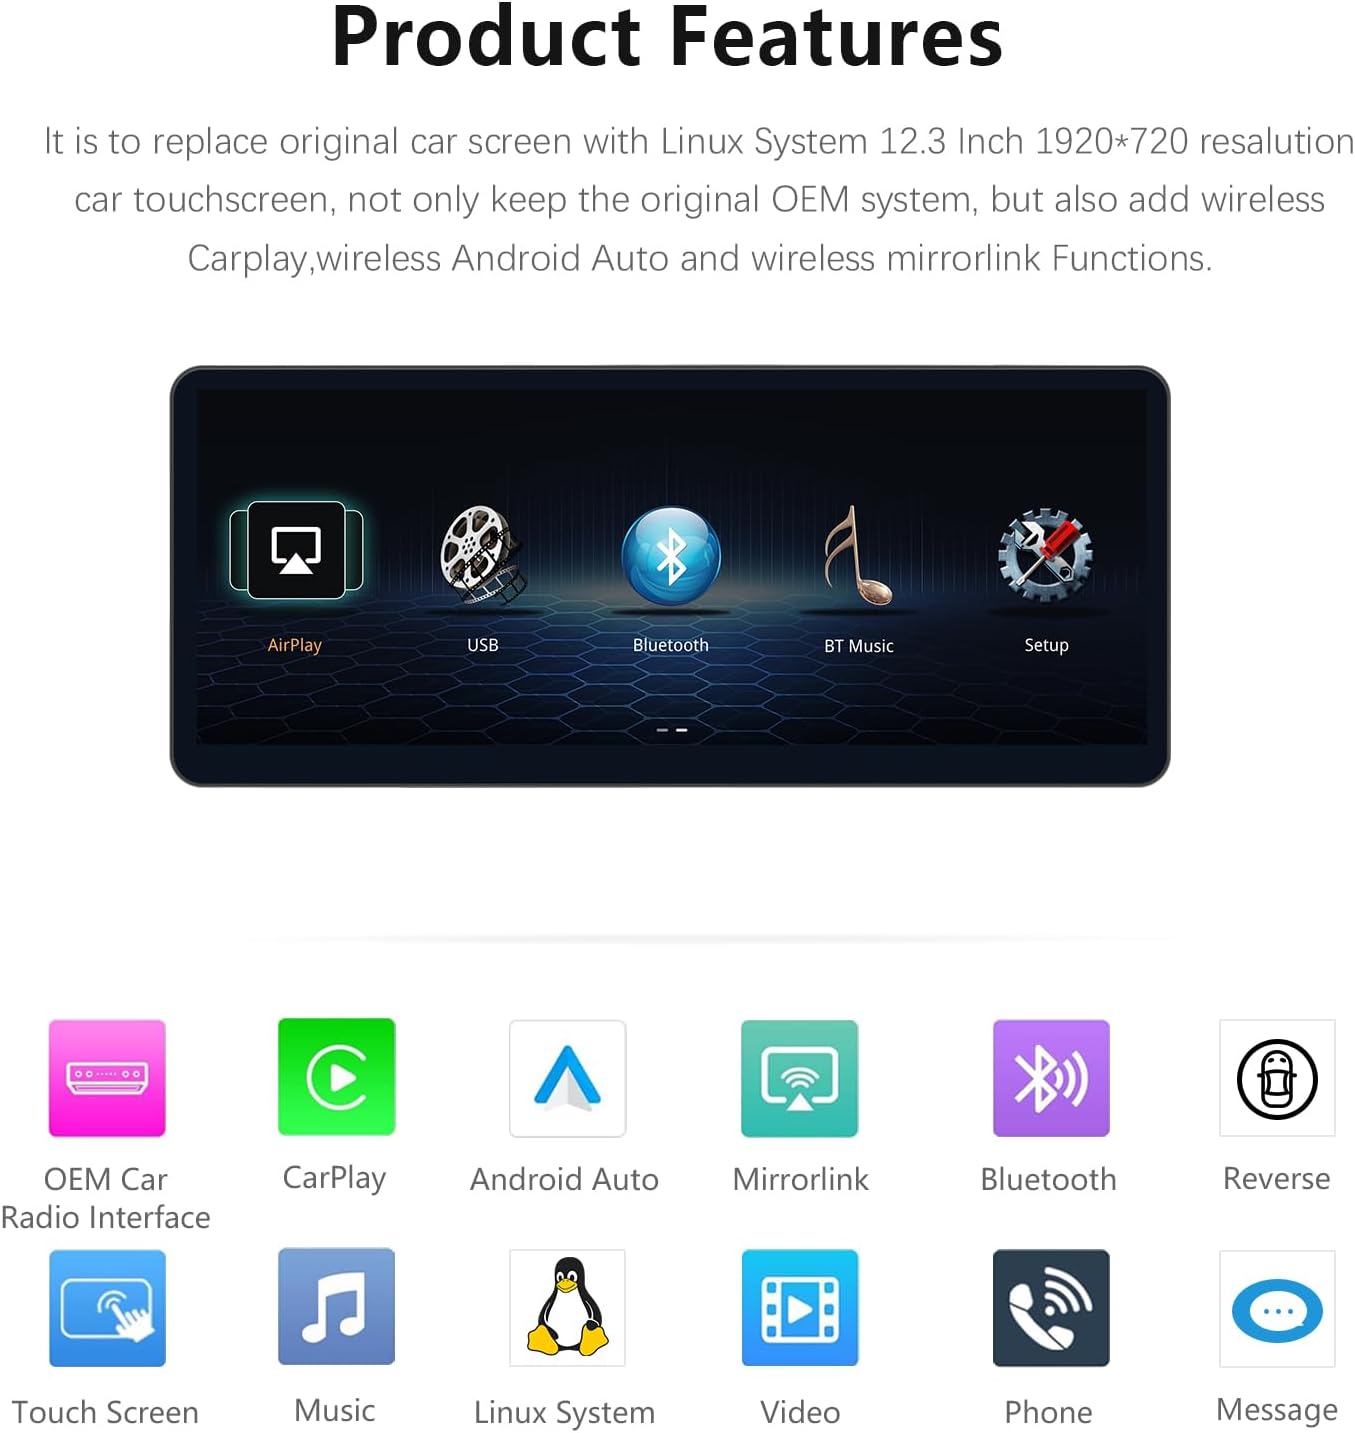
Image: The Uckazy Car Radio display showing the built-in Digital Signal Processor (DSP) interface with 16 adjustable equalizer segments, allowing users to fine-tune audio output.

Image: This image highlights how the Uckazy Car Radio supports and retains various original OEM vehicle functions, including steering wheel controls, compatibility with OEM reversing cameras and parking radar, iDrive control, sound from the original car stereo, and the ability to keep the original CD player and car system.
Image: The Uckazy Car Radio screen showing icons for various features such as AirPlay, USB, Bluetooth, BT Music, Setup, OEM Car Interface, CarPlay, Android Auto, Mirrorlink, Bluetooth, Reverse, Touch Screen, Music, Linux System, Video, and Phone.
6. Setup & Installation
Installation of the Uckazy Car Radio involves connecting various cables and integrating with your vehicle's existing system. It is highly recommended that this installation be performed by a qualified professional.
6.1 Fiber Optic Cable Transfer
For vehicles equipped with fiber optic audio systems, it is crucial to transfer the fiber optic cables from the original power harness to the new unit's power harness. This ensures proper audio functionality.
Video: This video demonstrates the process of transferring fiber optic cables from the original car harness to the new Uckazy Car Radio's power cable. It shows how to release the snap, pull out the fiber optic cable, and then insert it into the correct interface of the new power cable. This step is critical for ensuring audio output.
- Locate Original Power Cable: Identify the vehicle's original power cable connected to the factory head unit.
- Release Fiber Optic Cable: Carefully cock the snap on the original power connector and pull out the fiber optic cable.
- Locate New Power Cable: Find the corresponding power cable provided with your Uckazy Car Radio.
- Insert Fiber Optic Cable: Insert the removed fiber optic cable into the designated slot on the new power cable. Ensure it snaps securely into place.
- Connect Power Cables: Finally, connect the new power cable to the vehicle's original power cable interface. Ensure a firm connection.
Note: Pay close attention to the correct interface when connecting cables to prevent damage or malfunction.
6.2 General Wiring Connections
Connect the remaining cables as follows:
- USB Cable: Connect the provided USB cable for external storage or device charging.
- AUX Cable: Connect the AUX cable if your vehicle requires it for audio input.
- AMI Cable: Connect the AMI cable if your vehicle has an Audi Music Interface.
- Antenna Connections: Connect the GPS antenna and Wi-Fi antenna to their respective ports on the unit.
- Reverse Camera: If installing an aftermarket reverse camera, connect its video and power cables to the designated inputs on the unit.
After all connections are made, carefully secure the unit in the dashboard, ensuring no wires are pinched or damaged.
7. Operating Instructions
7.1 Powering On/Off
The unit will typically power on automatically when the vehicle's ignition is turned on. To power off, turn off the vehicle's ignition. The unit may have a power button for manual control, usually integrated with the volume knob on the original car system.
7.2 Touch Screen Navigation
Navigate the Android interface by tapping, swiping, and pinching on the 12.3-inch touch screen. The interface is designed to be intuitive and similar to a smartphone or tablet.
7.3 Wireless CarPlay & Android Auto
- Enable Bluetooth & Wi-Fi: Ensure Bluetooth and Wi-Fi are enabled on your smartphone.
- Pair Device: On the car radio, go to the CarPlay or Android Auto application and follow the on-screen instructions to pair your phone via Bluetooth.
- Connect: Once paired, the system will automatically connect to CarPlay or Android Auto via Wi-Fi for a wireless experience.
- Voice Assistant: Use voice commands (e.g., "Hey Siri" or "OK Google") to access navigation, make calls, send messages, and play music.
7.4 Audio Settings (DSP)
Access the built-in DSP settings from the main menu to customize your audio experience:
- Equalizer: Adjust the 16 EQ segments to fine-tune bass, treble, and mid-range frequencies.
- Presets: Select from various preset EQ modes (e.g., Pop, Rock, Jazz) or create your own custom settings.
- Sound Positioning: Adjust the sound stage to optimize audio for different seating positions within the vehicle.
7.5 OEM System Integration
The unit allows you to switch between the Android system and your vehicle's original NTG system. This ensures that all original car functions, such as iDrive control, original radio, and vehicle settings, remain accessible.
- Switching Modes: A dedicated button or on-screen icon typically allows you to toggle between the Android interface and the original car system display.
- Steering Wheel Controls: Your existing steering wheel controls will function with both the Android system and the original car system.
8. Maintenance
- Screen Cleaning: Use a soft, lint-free cloth to clean the touch screen. For stubborn smudges, lightly dampen the cloth with a screen cleaner solution. Avoid harsh chemicals or abrasive materials.
- Software Updates: Periodically check for software updates to ensure optimal performance and access to new features. Updates can usually be performed via Wi-Fi.
- Environmental Conditions: Avoid exposing the unit to extreme temperatures, direct sunlight for prolonged periods, or high humidity.
9. Troubleshooting
| Problem | Possible Cause | Solution |
|---|---|---|
| No Power | Loose power connection; Blown fuse; Vehicle battery issue. | Check all power cable connections. Inspect vehicle fuses. Ensure vehicle battery is charged. |
| No Sound | Incorrect fiber optic cable connection; Volume too low; Mute activated; Incorrect audio source selected. | Verify fiber optic cable transfer (refer to Section 6.1). Increase volume. Check if mute is active. Select correct audio source (e.g., AUX, Bluetooth). |
| CarPlay/Android Auto Not Connecting | Bluetooth/Wi-Fi off on phone; Phone not paired; Software glitch. | Ensure phone's Bluetooth and Wi-Fi are on. Re-pair phone. Restart both phone and car radio. |
| Touch Screen Unresponsive | Temporary software issue; Screen dirty. | Restart the unit. Clean the screen with a soft cloth. |
| Original OEM System Not Accessible | Incorrect wiring; Software conflict. | Double-check all wiring connections. Ensure the unit is properly configured to switch to the OEM system. |
If you encounter issues not listed here or if the suggested solutions do not resolve the problem, please contact Uckazy customer support.
10. Specifications

Image: Technical drawing showing the dimensions of the Uckazy 12.3 Inch Car Radio screen, with a width of 310mm and a height of 132mm.
| Feature | Detail |
|---|---|
| Screen Size | 12.3 inches |
| Resolution | HD 1920*720 |
| Operating System | Android 14 |
| Processor | MediaTek Octa-core (4*Cortex A72 2.2GHz + 4*Cortex A51 1.8GHz) |
| RAM | 4GB |
| ROM (Internal Storage) | 64GB |
| Connectivity | 2.4G & 5.0G Wi-Fi, Bluetooth |
| Audio Processing | Built-in DSP with 16 EQ segments |
| Special Features | Wireless CarPlay, Wireless Android Auto, Touchscreen, OEM System Retention |
| Package Dimensions | 22 x 20 x 16 inches |
| Item Weight | 3.4 pounds |
11. Warranty & Support
Uckazy products are designed for reliability and performance. For specific warranty details, please refer to the warranty card included with your product or visit the official Uckazy website.
For technical support, troubleshooting assistance, or inquiries regarding your Uckazy 12.3 Inch Android 14 Car Radio, please contact Uckazy customer service through the following channels:
- Website: Uckazy Official Store (for general inquiries and product information)
- Email: [Insert Customer Support Email Here, if available]
- Phone: [Insert Customer Support Phone Number Here, if available]
When contacting support, please have your product model number (NTG 4.5/4.7 System 4+64G) and purchase date ready.