1. Safety Information
- Always keep emergency keys in a secure location away from the safe and out of reach of children. Do not store them inside the safe.
- Ensure the safe is mounted securely to a wall or floor to prevent unauthorized removal.
- Do not expose the safe to extreme temperatures or humidity.
- Replace batteries promptly when the low battery indicator appears to ensure continuous operation.
- This safe is designed for security and fire resistance, but it is not water-resistant. Avoid placing it in areas prone to water exposure.
2. Package Contents
Upon unboxing, please verify that all the following items are included:
- 1 x WASJOYE 4.0 Cu Ft Large Cabinet Safe Box
- 2 x Emergency Keys
- 4 x Expansion Screws (for mounting)
- 1 x Emergency Type-C Cable
- 1 x User Manual (this document)
- 1 x Soft Fur Pad

Image: The WASJOYE Large Cabinet Safe Box, showcasing its digital keypad, emergency key, and internal storage with drawers.
3. Product Overview & Specifications
The WASJOYE Large Cabinet Safe Box (Model 70EO-C-US-B) is designed to provide secure storage for your valuables. It features robust construction and multiple access methods.
Key Features:
- Capacity: 4.0 Cubic Feet, offering ample space for documents, electronics, and other valuables.
- Construction: One-piece bending and precision laser cutting technology with 20MM solid steel locking bolts for enhanced security.
- Access Methods: Digital keypad (3-8 digits), emergency key, and Type-C cable for external power in case of low battery.
- Alarm System: Anti-tampering alarm activates after multiple incorrect password entries.
- Internal Features: Includes lockable fireproof drawers and a sensor LED light for visibility.
Specifications:
- External Dimensions (D x W x H): 14.57" x 15.57" x 27.56"
- Net Weight: 56.11 lbs
- Material: Alloy Steel
- Lock Type: Key digital password keyboard
- Mounting Type: Floor Mount (expansion screws included)
- Alarm: Audible
- Water Resistance Level: Not Water Resistant
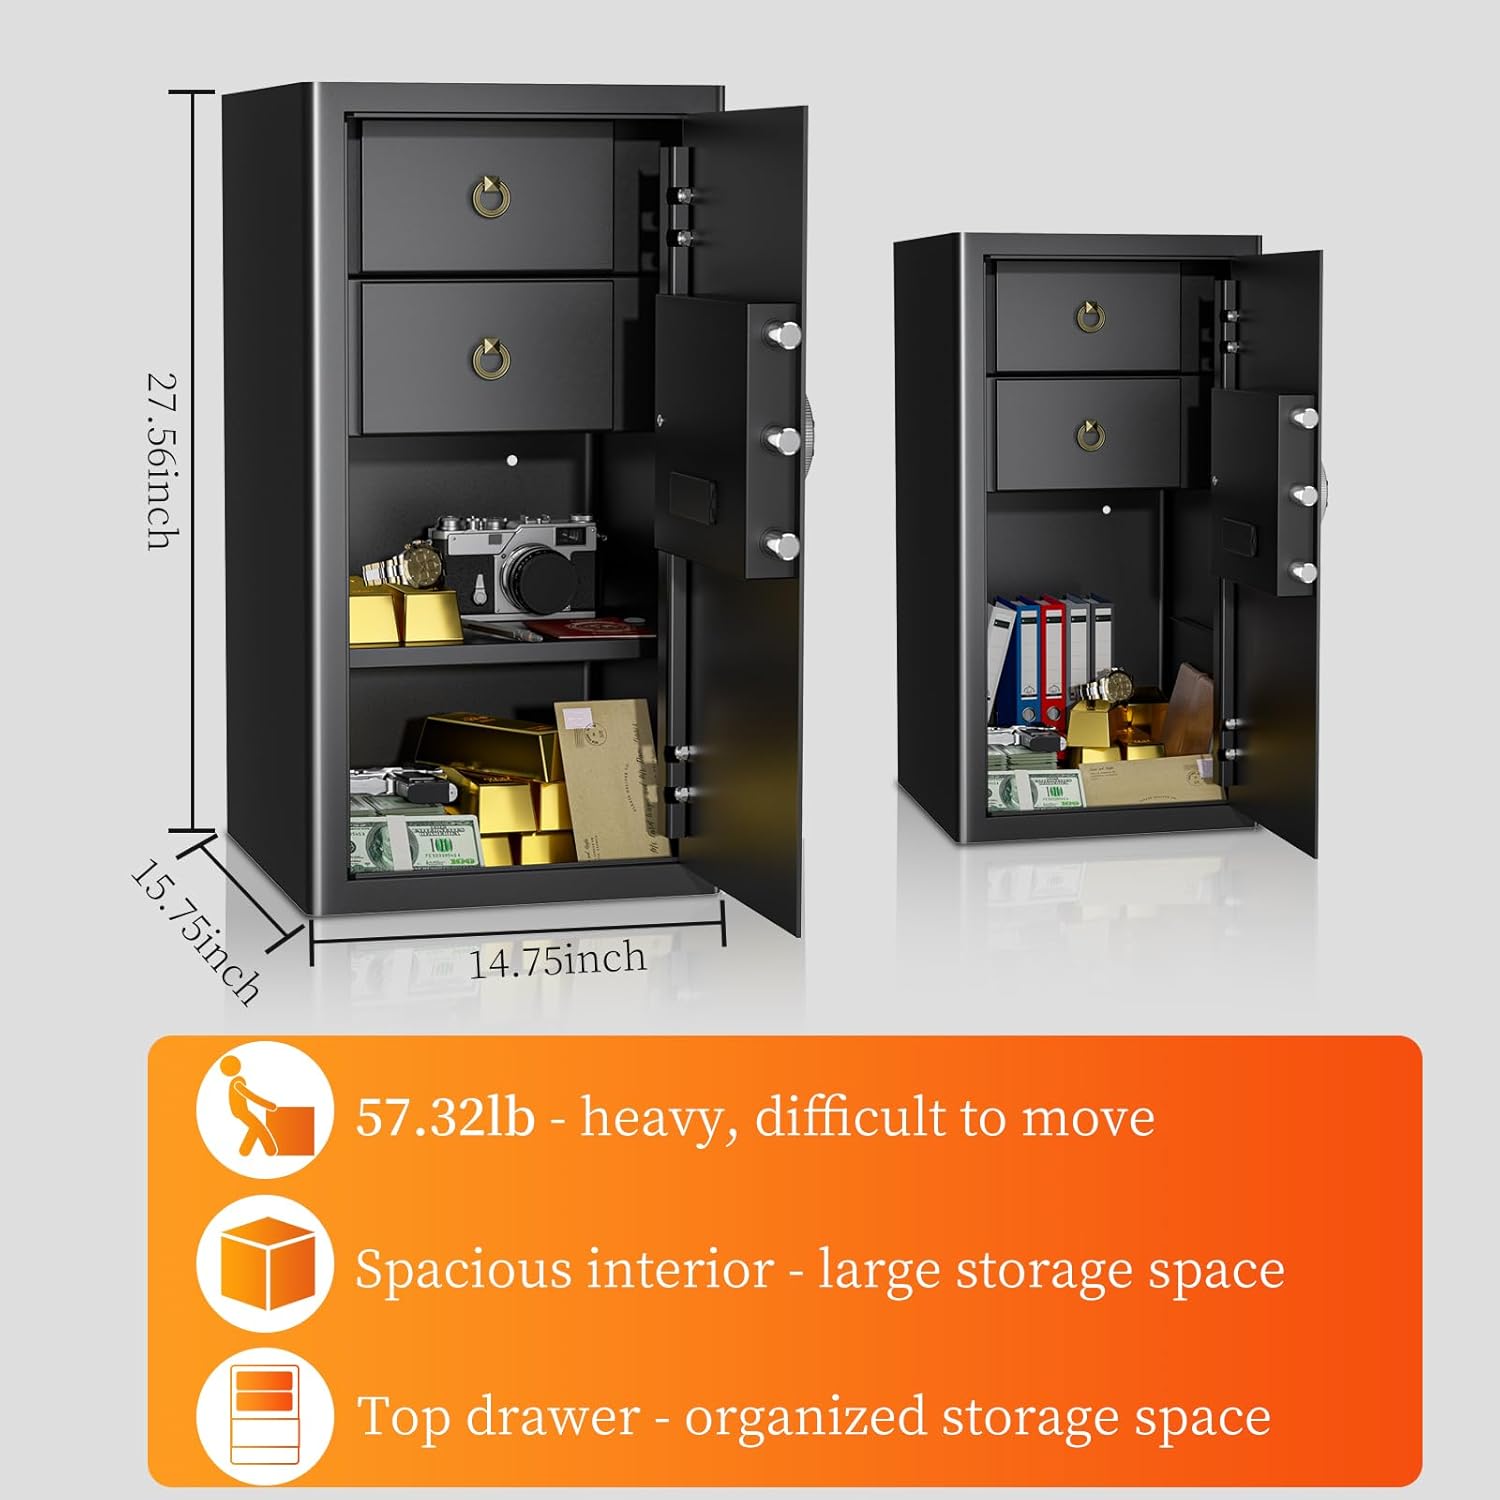
Image: Visual representation of the safe's dimensions and internal storage, highlighting its spacious interior and top drawers.
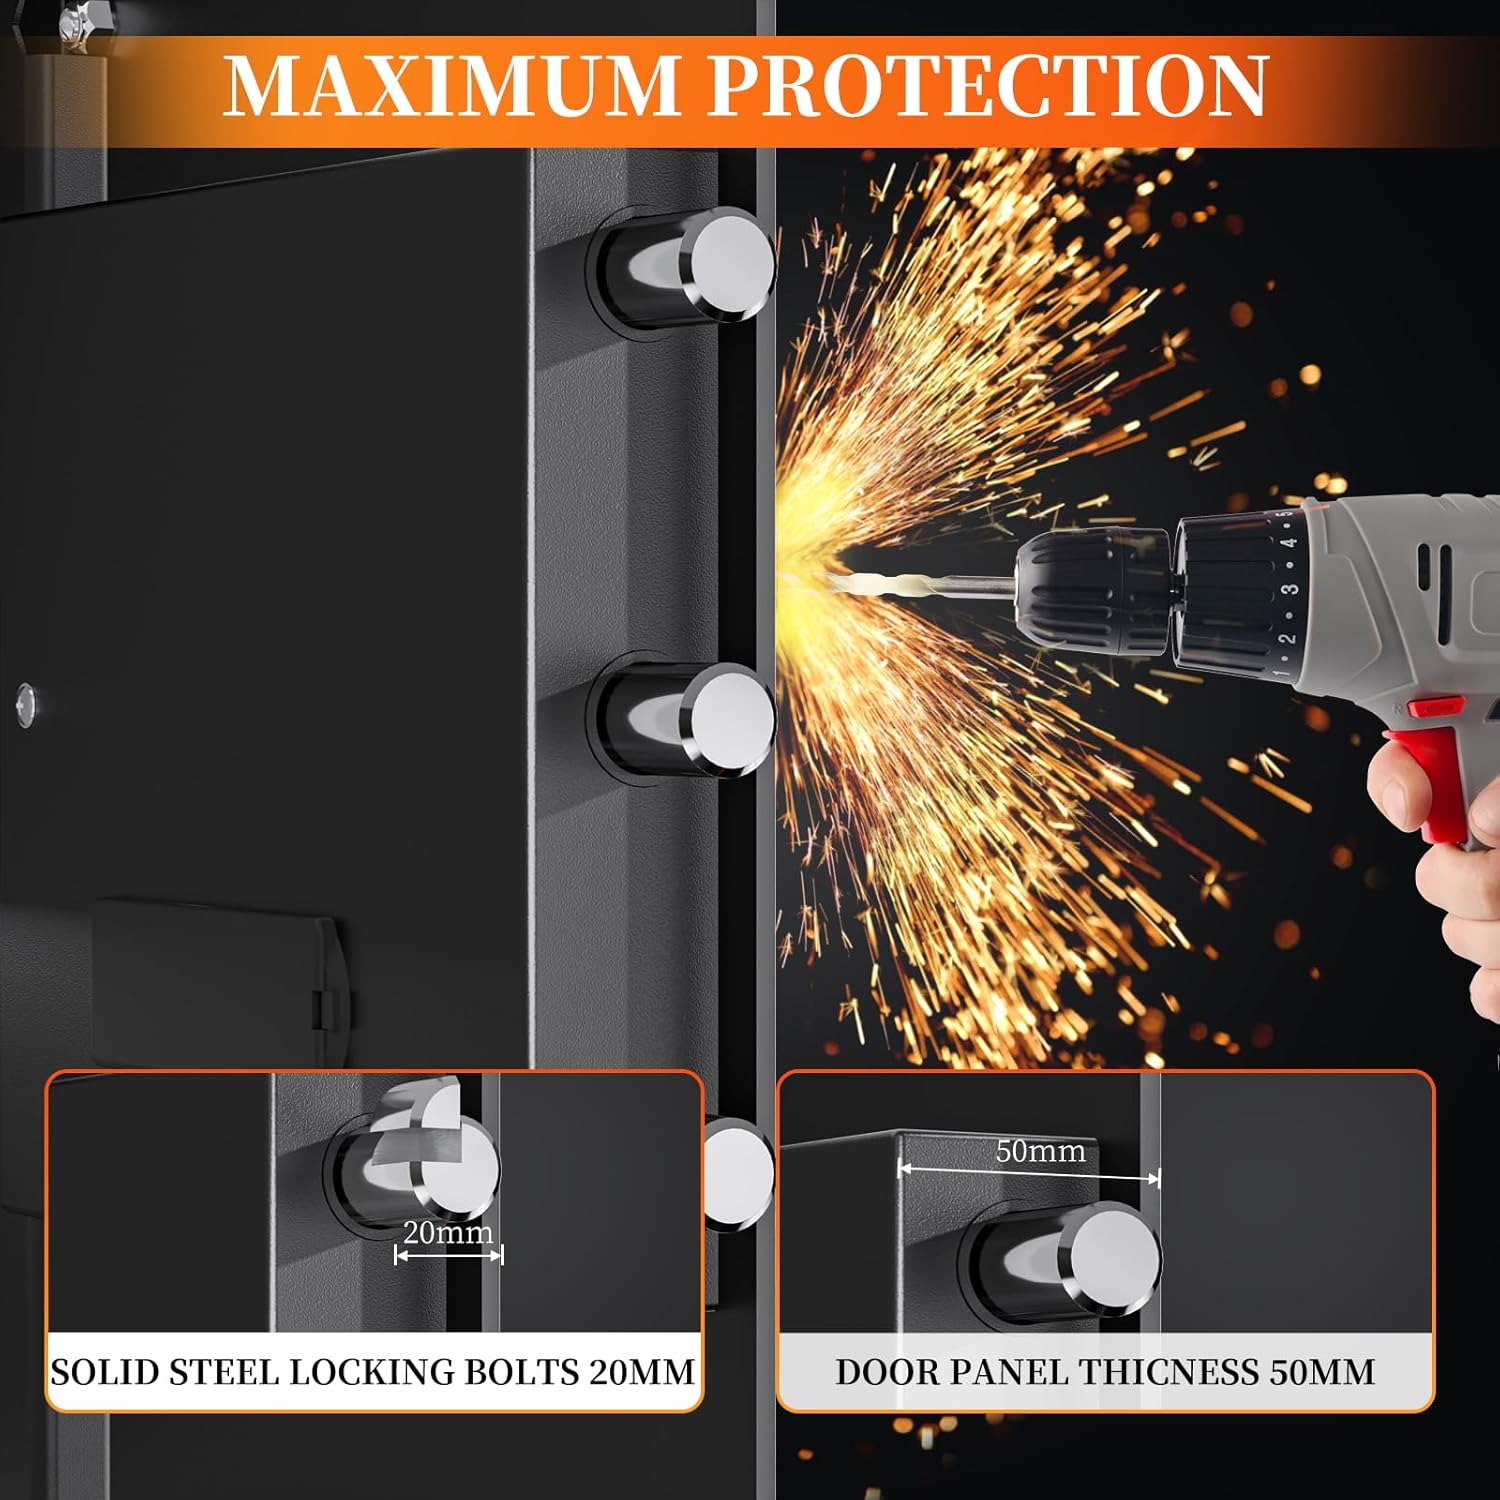
Image: Detail of the safe's 20mm solid steel locking bolts and 50mm thick door panel, emphasizing maximum protection.
Video: Demonstrates the large storage capacity of the WASJOYE safe, including its internal drawers and shelf for organizing various items.
Video: Shows a fireproof test of the WASJOYE safe, demonstrating its ability to protect contents from heat.
4. Setup
4.1 Unboxing and Initial Inspection
Carefully remove the safe from its packaging. Inspect the safe for any signs of damage. Locate the emergency keys, user manual, and other included accessories.
Video: Demonstrates the unboxing process and initial setup steps, including locating accessories and opening the safe for the first time.
4.2 Battery Installation
The safe requires 4 AA alkaline batteries (not included) for the digital keypad to function. The battery compartment is located on the inside of the safe door.
- Open the safe using the emergency key (refer to Section 5.1 for first-time access).
- Locate the battery compartment cover on the inside of the door.
- Remove the cover and insert 4 AA alkaline batteries, ensuring correct polarity (+/-).
- Replace the battery compartment cover.
Video: Illustrates the process of installing AA batteries into the safe's internal battery compartment.
4.3 Initial Access and Password Setup
For first use, or if you forget your password, the emergency key provides access. After installing batteries, you can set your personal passcode.
- First Use: Insert the emergency key into the keyhole, turn it clockwise, then turn the knob clockwise to open the safe door.
- With the door open, locate the red reset button on the inside of the door (usually near the battery compartment).
- Press the reset button. The keypad will emit a beep, and the yellow light will illuminate.
- Enter your desired 3-8 digit password on the keypad.
- Press the "#" button to confirm. The green light will flash, indicating successful password setup.
- Test your new password with the door open before closing it.

Image: Visual instructions for installing batteries, pressing the reset button, and setting a new digital password.
4.4 Mounting the Safe
For optimal security, it is recommended to mount the safe to a wall or floor using the provided expansion screws.
- Choose a stable, dry, and secure location.
- Mark the desired drilling points through the pre-drilled holes inside the safe.
- Drill pilot holes in the wall or floor.
- Align the safe with the drilled holes and secure it using the expansion screws.
5. Operating Instructions
5.1 Unlocking the Safe
The safe offers three methods for unlocking:
- Digital Keypad: Enter your 3-8 digit password, then press "#". The green light will illuminate. Within 5 seconds, turn the knob clockwise to open the door.
- Emergency Key: Insert the emergency key into the keyhole, turn it clockwise, then turn the knob clockwise to open the door. This method bypasses the digital keypad.
- Type-C Cable (Low Battery): If batteries are low or depleted, connect the emergency Type-C cable to the port on the keypad and to a power bank. Then, enter your password and press "#" to open the safe as usual.

Image: Visual guide to the three unlocking methods: digital code, emergency key, and external Type-C power with code.
Video: Demonstrates how to use the Type-C port to power the safe and open it when the internal batteries are low.
5.2 Setting/Changing Your Passcode
To change your password, follow these steps:
- Open the safe using your current password or the emergency key.
- Locate and press the red reset button on the inside of the door. The keypad will beep, and the yellow light will illuminate.
- Enter your new 3-8 digit password.
- Press the "#" button to confirm. The green light will flash, indicating successful password change.
- Test the new password with the door open before closing.
5.3 Alarm System
The safe is equipped with an anti-tampering alarm system:
- If an incorrect password is entered 3 times consecutively, the system will lock for 20 seconds.
- If an incorrect password is entered 6 times consecutively, the system will lock for 5 minutes.
- During an alarm, the keypad is disabled. To disarm the alarm, open the safe with the emergency key and remove the batteries.
- The safe also features a silent mode, which can be activated or deactivated according to the full user manual.
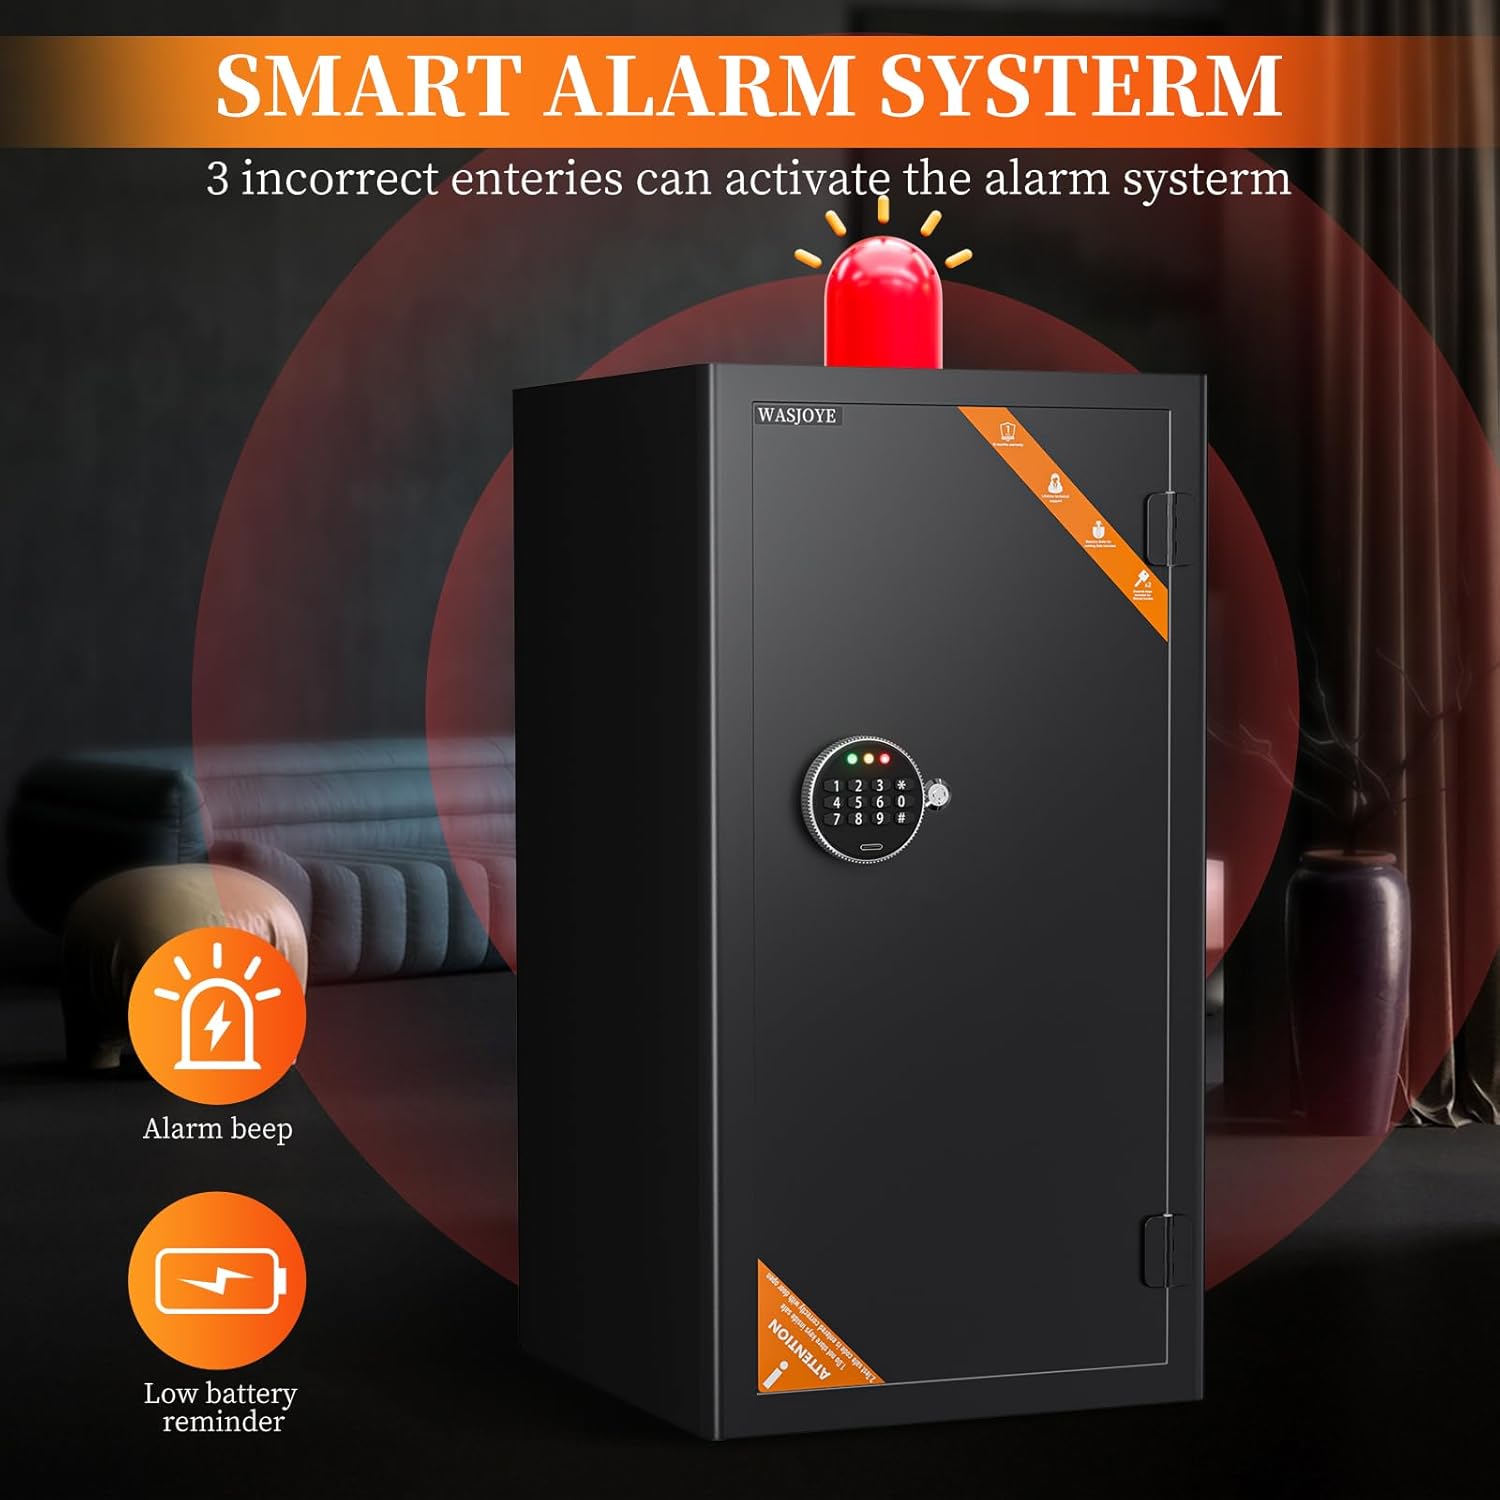
Image: Depicts the smart alarm system, indicating that 3 incorrect entries activate the alarm and showing icons for alarm beep and low battery reminder.
5.4 Internal Features
- Lockable Fireproof Drawers: The safe includes two lockable drawers for organizing smaller valuables and sensitive documents, providing an additional layer of protection.
- Removable Shelf: A removable shelf allows for flexible storage configurations to accommodate items of various sizes.
- Sensor LED Light: A built-in sensor light automatically illuminates the interior when the safe door is opened, improving visibility in low-light conditions.
- Soft Fur Pad: The interior is lined with a soft fur pad to protect valuables from scratches and damage.
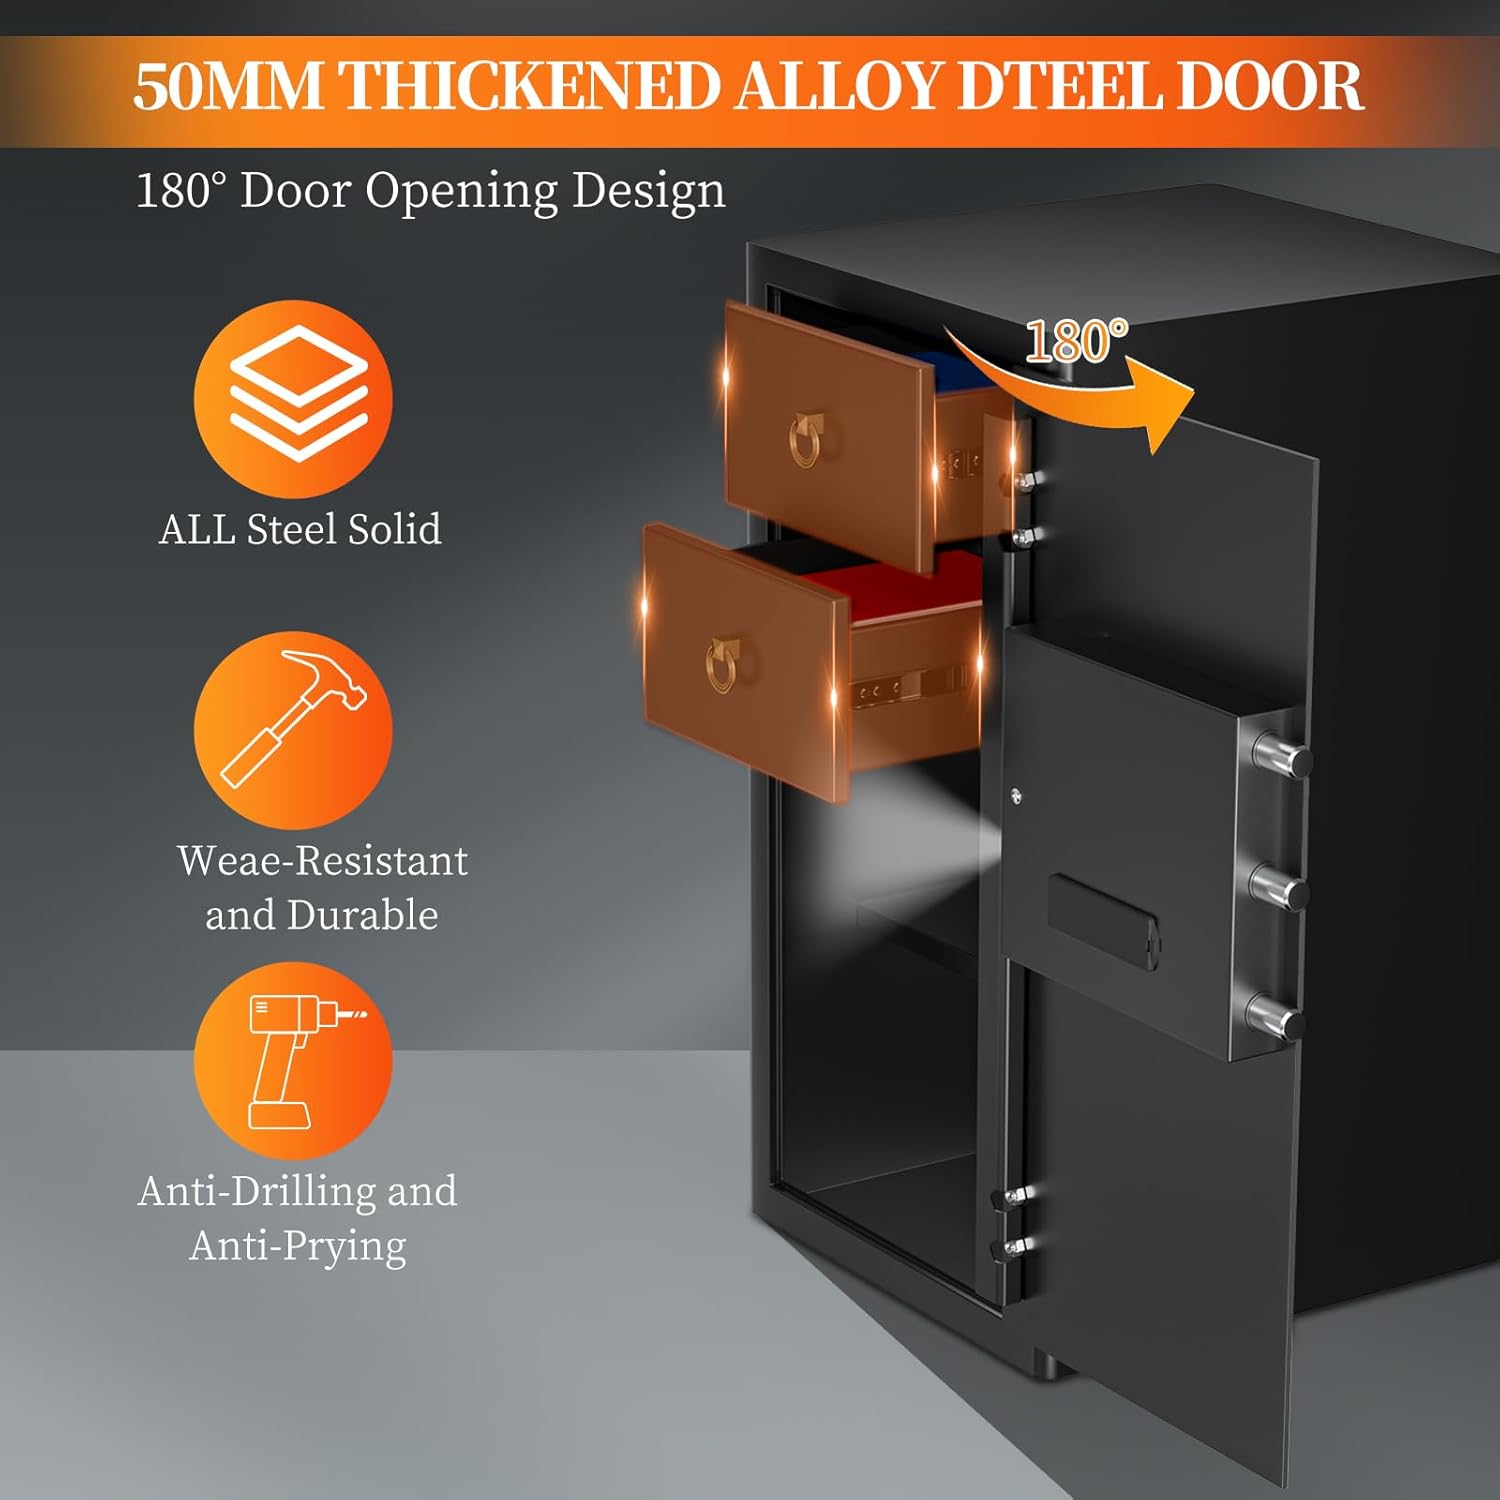
Image: The safe's interior with its 180-degree door opening, revealing two lockable drawers and a removable shelf for organized storage.
6. Maintenance
- Battery Replacement: Replace all 4 AA alkaline batteries annually or when the red low battery indicator light illuminates.
- Cleaning: Wipe the exterior of the safe with a soft, damp cloth. Avoid abrasive cleaners or solvents that could damage the finish.
- Keypad Care: Keep the digital keypad clean and dry. Avoid pressing buttons with excessive force.
- Door Hinges: Periodically check the door hinges for smooth operation. Lubricate if necessary with a small amount of silicone-based lubricant.
7. Troubleshooting
| Problem | Possible Cause | Solution |
|---|---|---|
| Safe does not open with password. | Incorrect password entered, batteries are low/dead, or keypad is locked due to multiple incorrect attempts. | Re-enter password carefully. Use emergency key. Connect Type-C cable to a power bank. If locked, wait for the lockout period to expire or remove batteries to reset. |
| Keypad does not respond. | Dead batteries, loose battery connection, or keypad malfunction. | Replace batteries. Ensure batteries are correctly inserted. Use emergency key. If problem persists, contact customer support. |
| Alarm sounds frequently. | Multiple incorrect password entries. | Ensure correct password is used. To disarm, open with emergency key and remove batteries. |
| Door does not close properly. | Obstruction in the door frame or locking mechanism. | Check for any obstructions. Ensure locking bolts retract fully when open. |
8. Warranty and Support
WASJOYE provides lifetime customer service for every safe sold. If you encounter any questions or issues, please do not hesitate to contact our support team.
Our friendly customer service is available 7 days a week, 24 hours a day, to assist you with product inquiries, troubleshooting, or warranty claims.
Please refer to the contact information provided on the product packaging or the official WASJOYE website for the most up-to-date support channels.