1. Introduction
The Bikevee GPS Bike Computer is a wireless, waterproof cycling device designed to provide comprehensive data analysis for riders of all levels. It features a 2.4-inch LCD screen, auto start/stop, auto backlight, and a 5-satellite positioning system for accurate tracking. This manual will guide you through the setup, operation, and maintenance of your new bike computer.
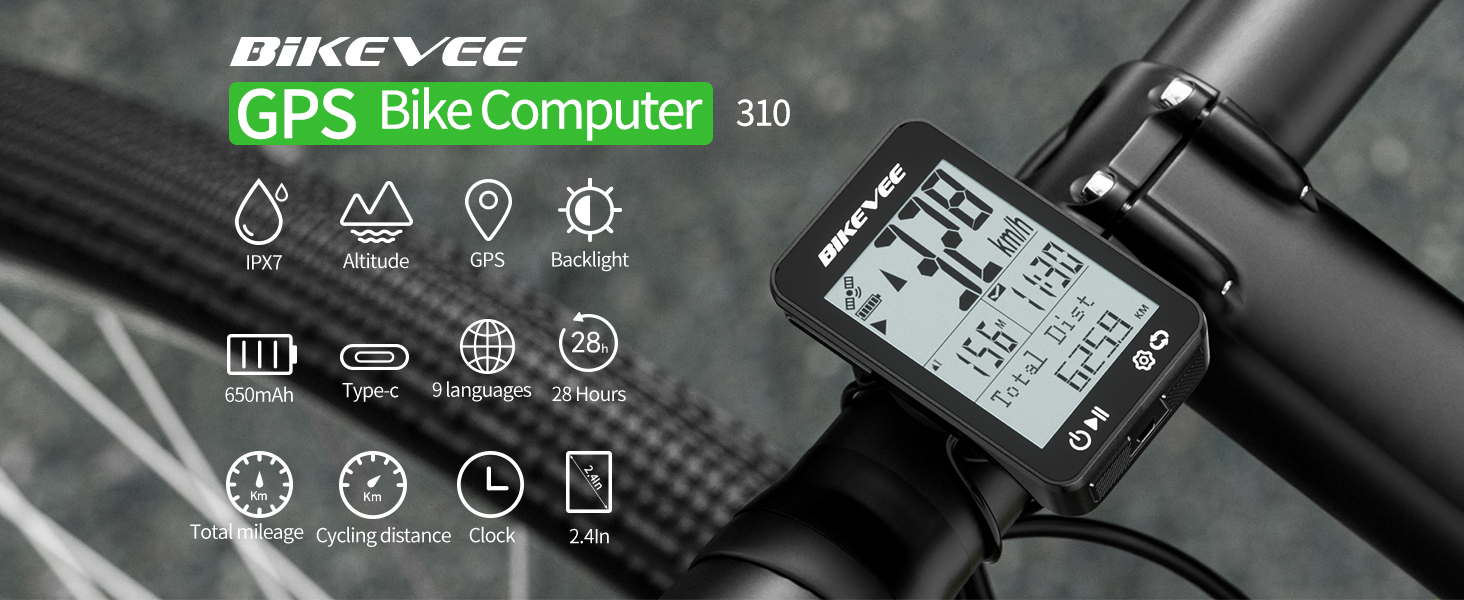
Figure 1.1: Bikevee GPS Bike Computer 310 Overview of Features.
2. What's in the Box
Your Bikevee GPS Bike Computer package includes the following items:
- Bike Computer (Main Unit)
- Charging Cable (USB-C)
- Standard Bike Mount
- Rubber Pad
- Rubber Rings (for mounting)
- User Manual

Figure 2.1: Package Contents.
3. Setup
Follow these steps to install your Bikevee GPS Bike Computer on your bicycle:
- Attach the Mount: Secure the standard bike mount to your handlebar or stem using the provided rubber pad and rubber rings. Ensure it is firmly attached and does not wobble.
- Place the Computer: Place the bike computer horizontally onto the mount.
- Secure the Computer: Turn the bike computer clockwise by 90 degrees until it clicks securely into place on the mount.
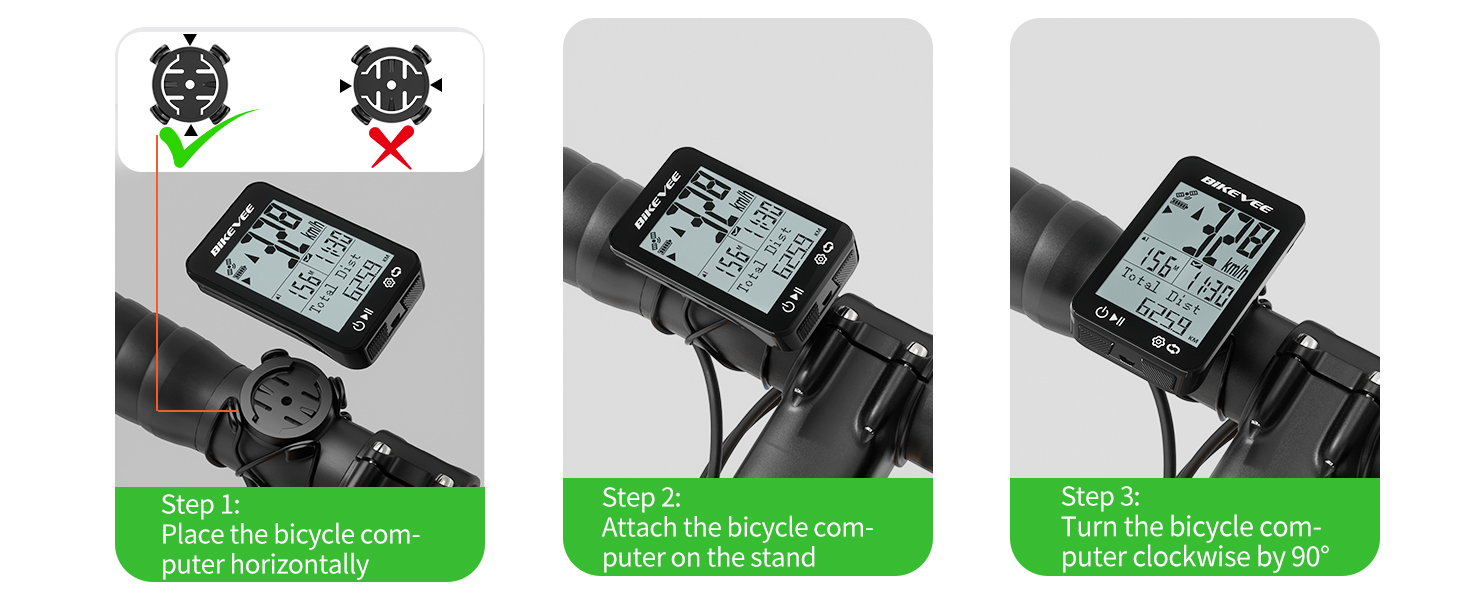
Figure 3.1: Installation Steps for the Bike Computer.
Unlike traditional wired bike computers, the Bikevee GPS Bike Computer requires no complex wiring or sensor installation. Simply mount it and it's ready to receive satellite signals for accurate data.

Figure 3.2: Simplified Installation of Wireless GPS Bike Computer.
Mounting Video Guide
Video 3.1: Demonstrates how the bike computer mount can be installed on the stem riser.
4. Operating Instructions
4.1 Power On/Off and Data Display
To power on or off the device, press and hold both buttons simultaneously for two seconds. Once powered on, the device will automatically begin searching for GPS signals.
- Click the left button (►▮) to display cycling data (play icon).
- Click the left button again to pause data display (pause icon).
- Long press the right button (⚙ ↻) to enter the settings page.
- Click the right button to move to the next data page.
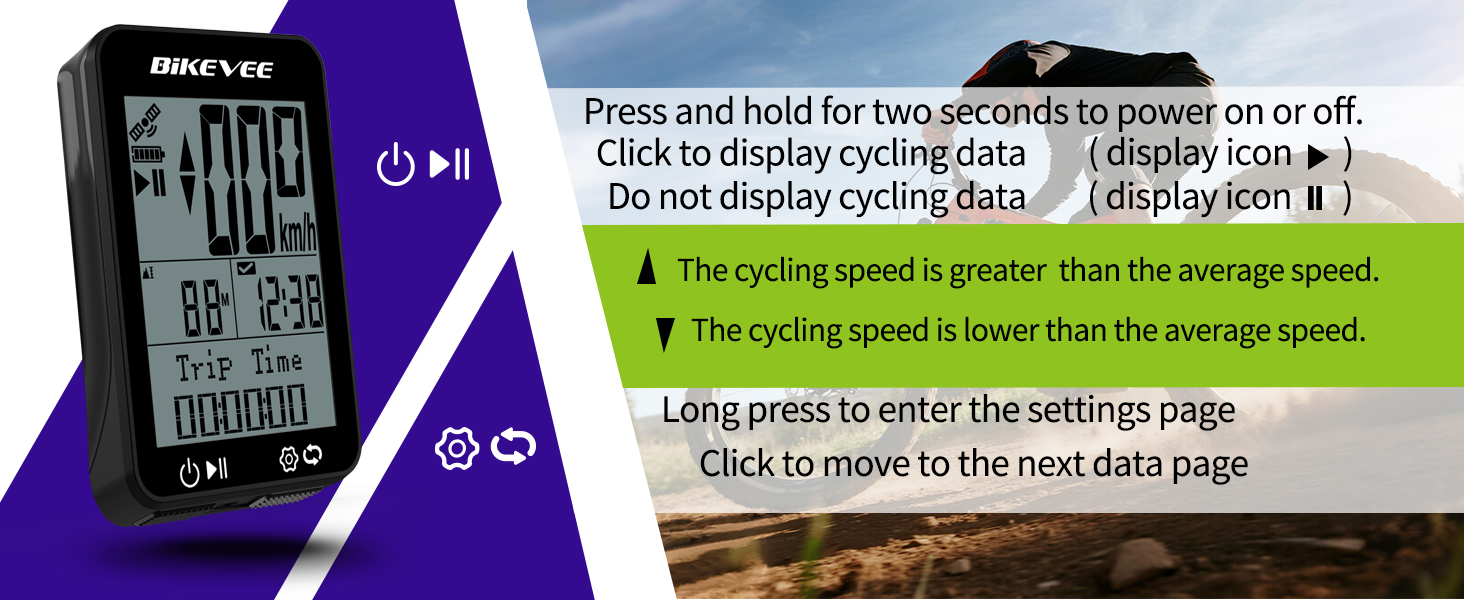
Figure 4.1: Button Functions and Data Display.
4.2 Data Pages and Metrics
The bike computer supports 6 functional pages, displaying 9 types of data:
- Current Speed: Displayed prominently in MPH or KM/H.
- Trip Distance: Distance covered during the current ride.
- Trip Time: Duration of the current ride.
- Total Distance: Cumulative distance recorded.
- Total Time: Cumulative time recorded.
- Average Speed: Average speed for the current ride.
- Max Speed: Highest speed achieved during the current ride.
- GPS Altitude: Current altitude based on GPS data.
- Clock: Current time.
- Gradient: Real-time incline/decline.
- Ascent Distance: Total uphill distance.

Figure 4.2: Examples of Functional Data Pages.
4.3 Auto Backlight and Time Calibration
The device features an auto backlight function for improved visibility in varying light conditions. Press both buttons simultaneously to toggle the backlight on or off. The backlight can be set to remain on during your ride for continuous visibility.
The bike computer supports GPS automatic time calibration, ensuring the clock is always accurate once a satellite signal is acquired.

Figure 4.3: Auto Backlight Functionality.
4.4 Unit Settings (KM/H vs MPH)
To change the unit of measurement (kilometers or miles):
- Long press the right button to enter the settings menu.
- Right-click (short press) to turn the page and find the "Units" setting.
- Press the left button to switch between kilometers (KM/H) and miles (MPH).
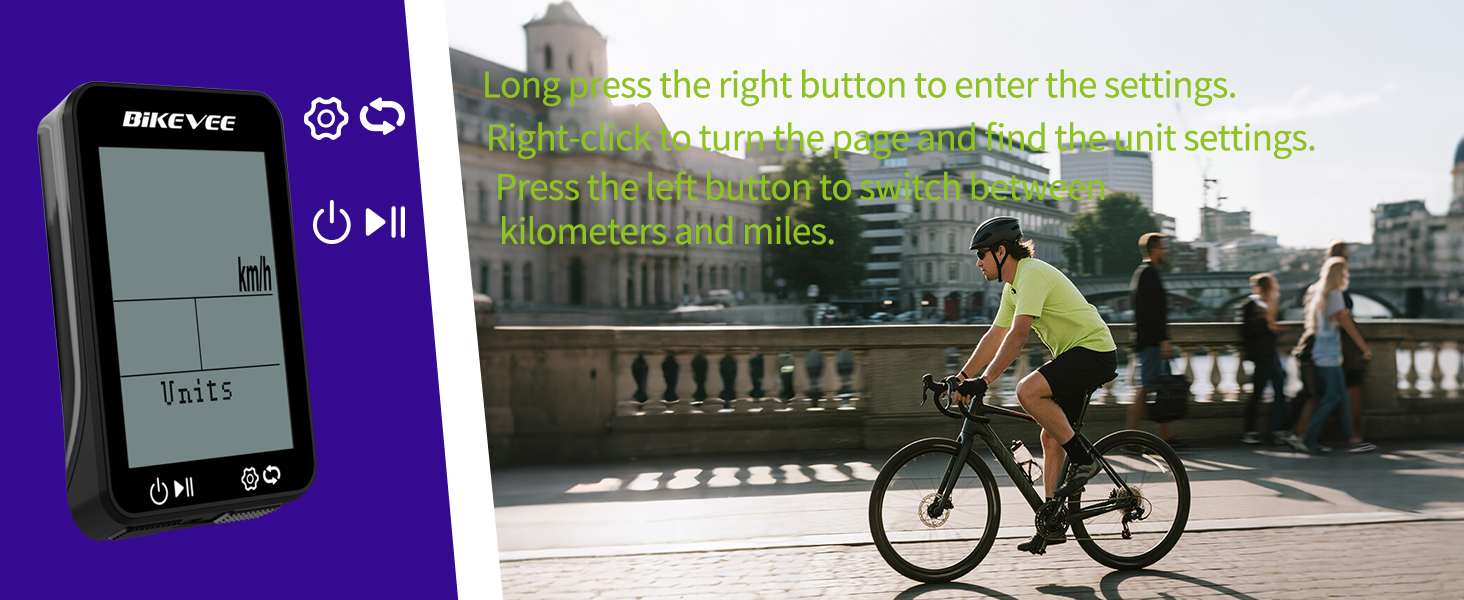
Figure 4.4: Adjusting Unit Settings.
4.5 Time Zone Setting
To set your local time zone:
- Long press the right button to enter the settings menu.
- Right-click (short press) to turn the page and find the "Time Zone" setting.
- Press the left button to change to the time zone of your country. Refer to the time zone map for common offsets.
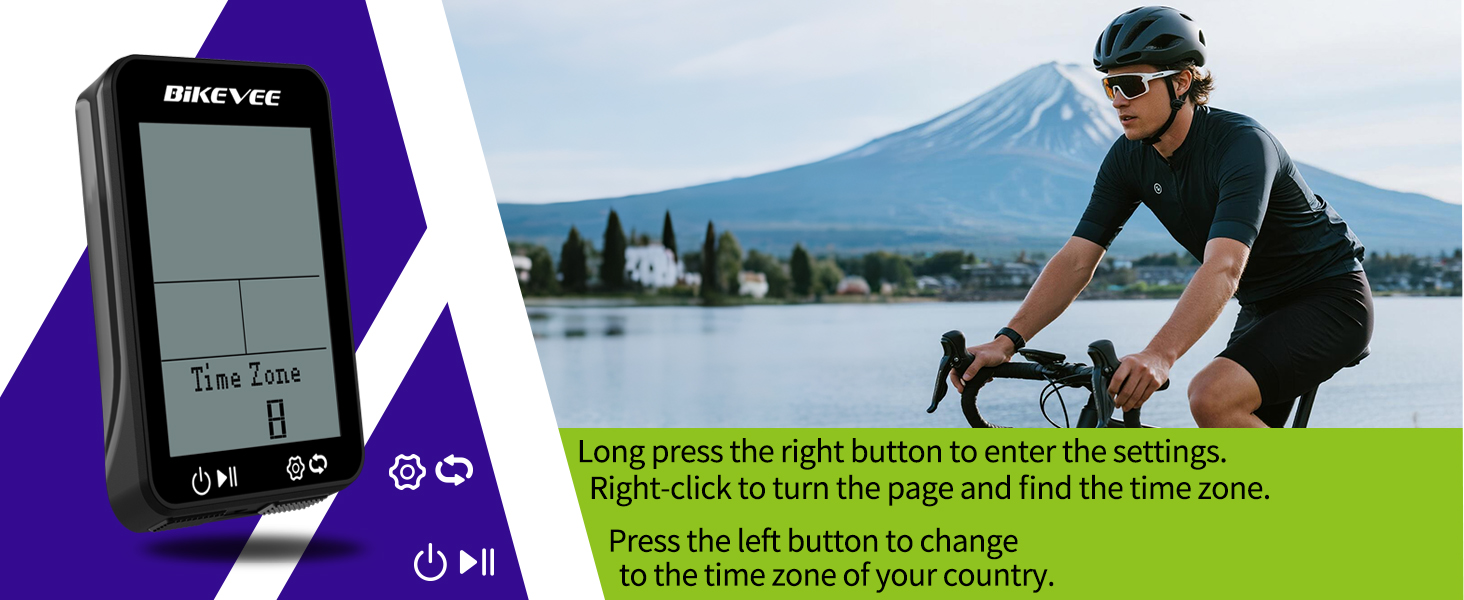
Figure 4.5: Adjusting Time Zone Settings.
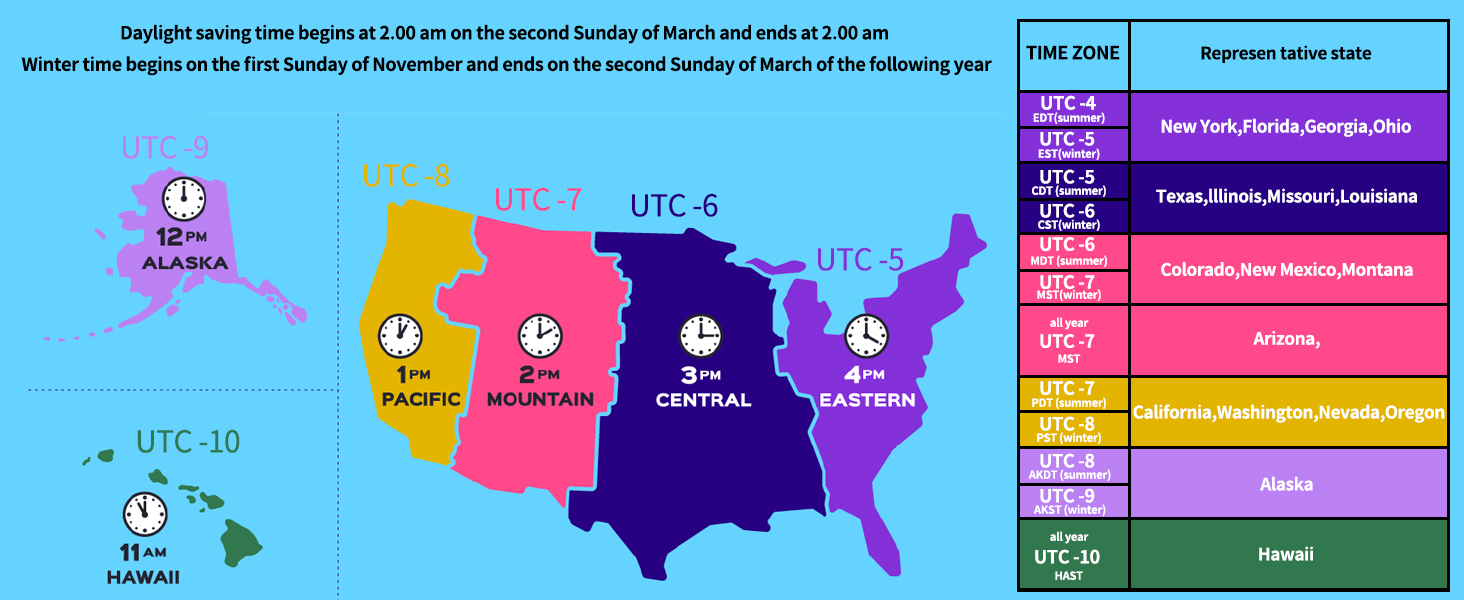
Figure 4.6: Time Zone Reference Map.
4.6 GPS Positioning
The Bikevee GPS Bike Computer utilizes a 5-satellite system (GPS, BDS, Glonass, Galileo, QZSS) for accurate and stable performance. For the first use, stay still in an open area and wait for 30 to 90 seconds to receive the satellite signal and calibrate the time. Subsequent connections will be faster.
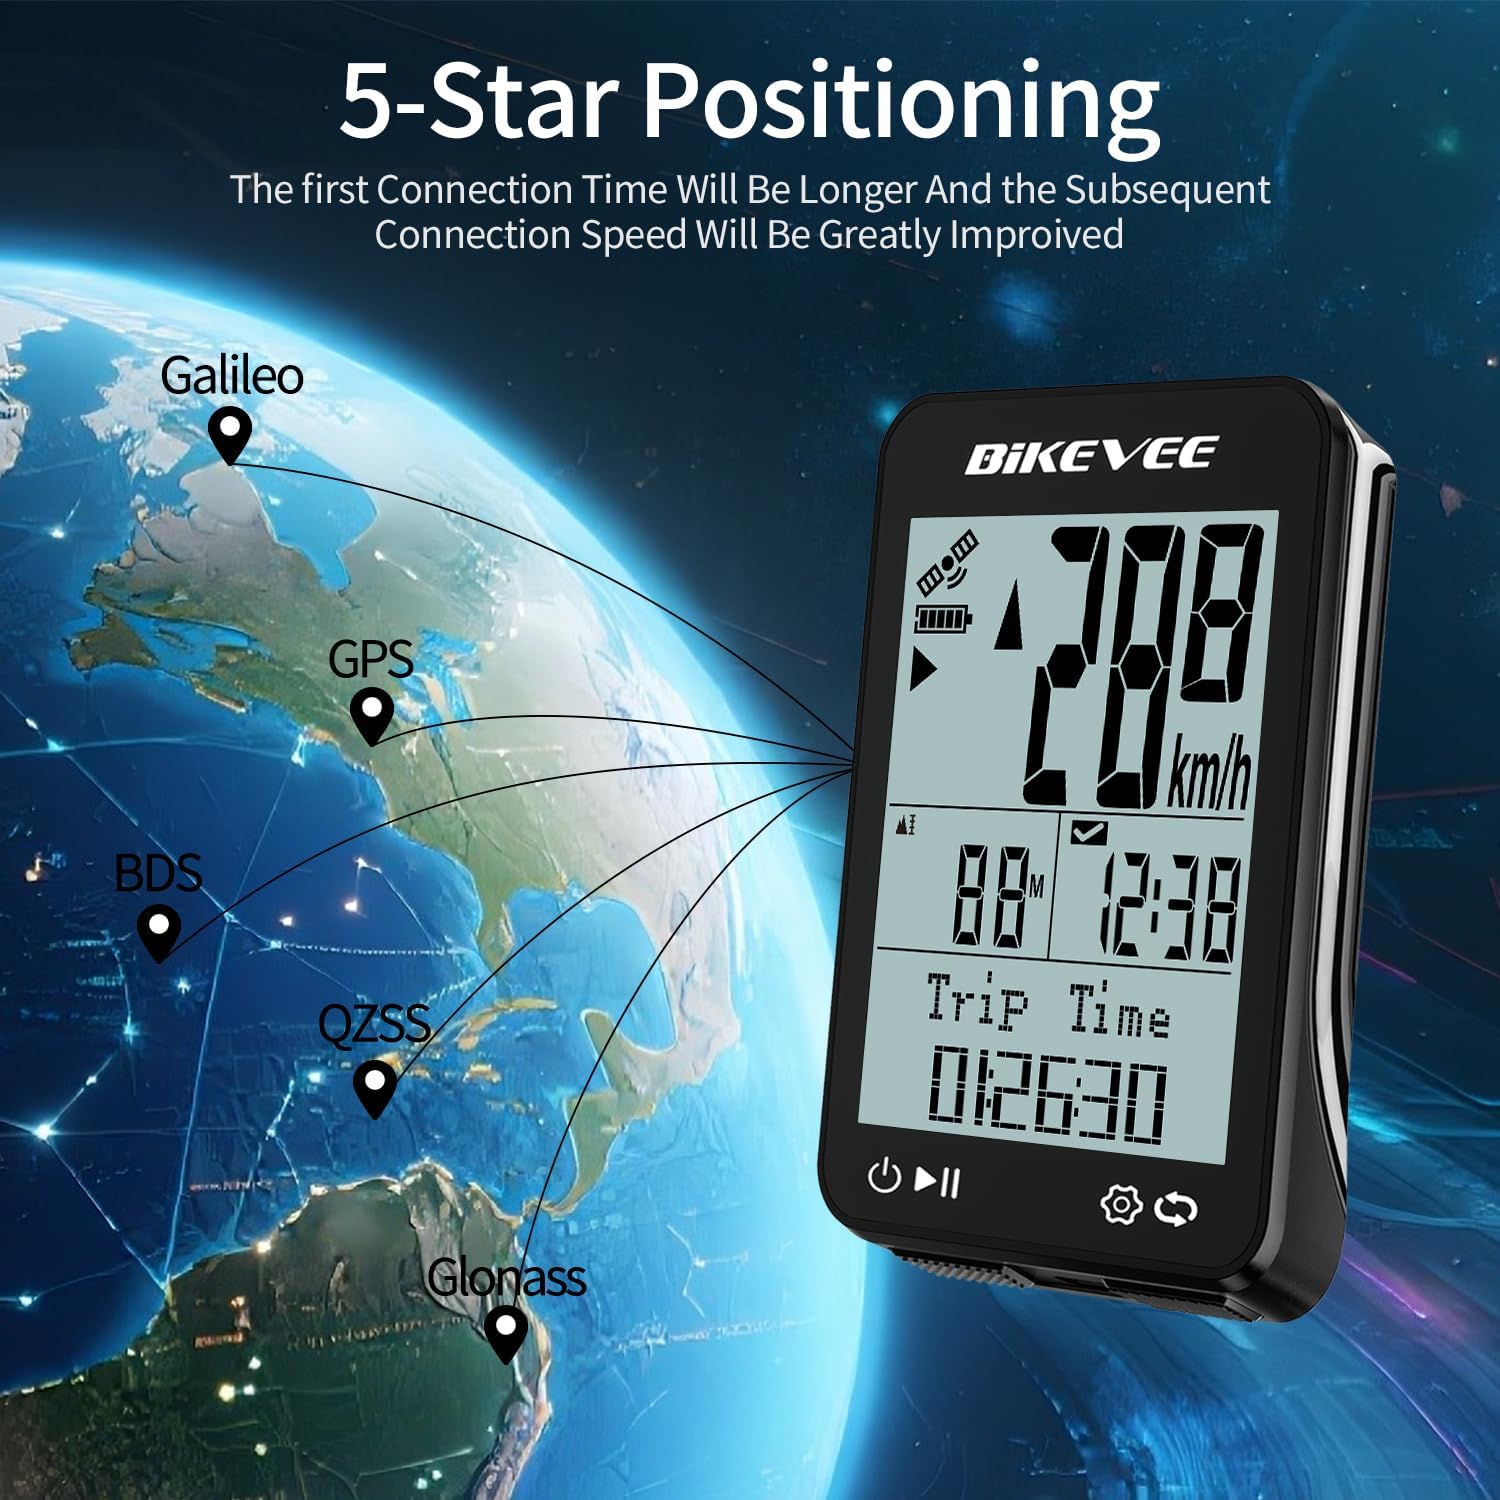
Figure 4.7: 5-Satellite Positioning System.
4.7 Language Support
The device supports 9 languages: English, Deutsch, Chinese, Czech, Polish, French, Korean, Spanish, and Italian. This allows for a user-friendly experience for a wide range of international users.

Figure 4.8: Multilingual Display Options.
5. Maintenance
5.1 Waterproofing
The Bikevee GPS Bike Computer is IPX7 waterproof, meaning it can withstand splashes, rain, and accidental submersion up to 1 meter for 30 minutes. However, it is important not to immerse the device in water for a long period of time to ensure its longevity.

Figure 5.1: IPX7 Waterproof Feature.
5.2 Battery Life and Charging
The device is equipped with a 650mAh battery, providing an impressive 28-hour long-lasting power supply. Charge the device using the provided USB-C charging cable. Ensure the charging port is dry before connecting the cable.
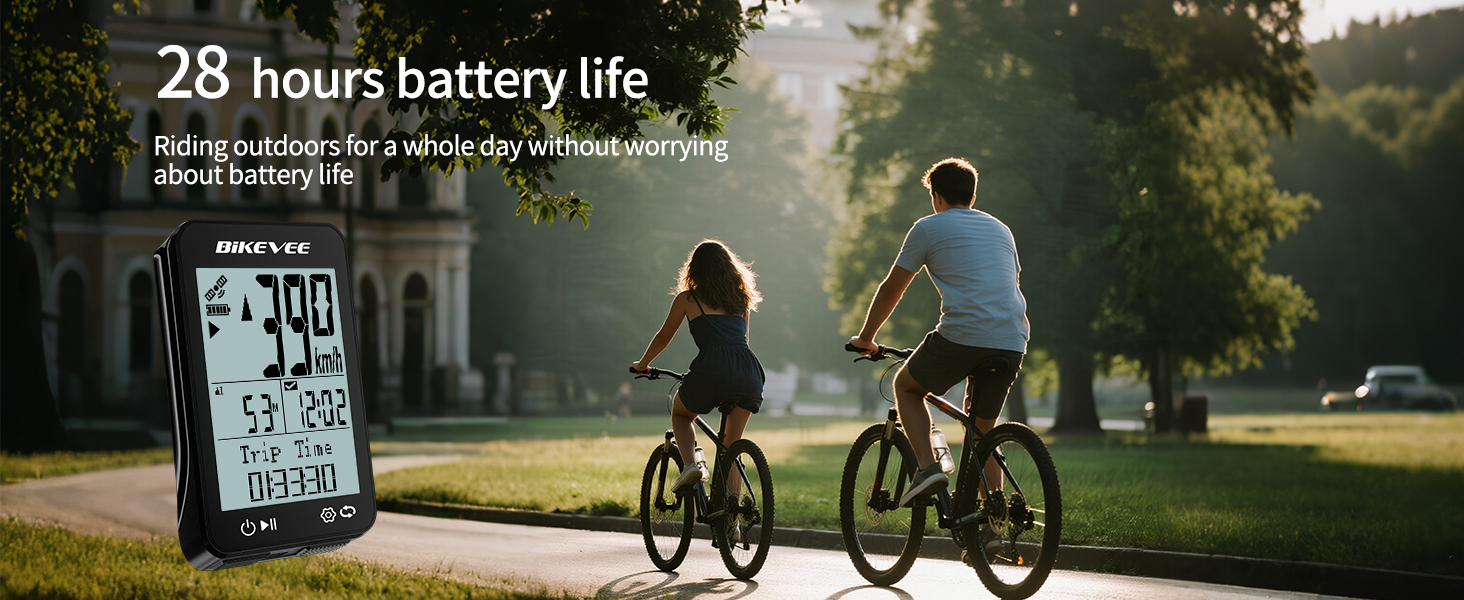
Figure 5.2: Extended Battery Life.
To clean the device, wipe it with a soft, damp cloth. Avoid using harsh chemicals or abrasive materials.
6. Troubleshooting
- Device not turning on: Ensure the battery is charged. Connect the device to the charging cable and allow it to charge for at least 30 minutes before attempting to power on again.
- No GPS signal: For the first use, or if the device has been off for a long time, ensure you are in an open area with a clear view of the sky. It may take 30-90 seconds to acquire a signal. Avoid areas with tall buildings, dense trees, or tunnels.
- Inaccurate speed/distance readings: Ensure the device has a strong GPS signal. If readings are inconsistent, try resetting the device by holding both buttons until it restarts.
- Screen not responding: If the screen freezes, try a soft reset by holding both buttons until the device powers off and then on again.
- Cannot change time/units: Ensure you are in the settings menu by long-pressing the right button. Use short presses of the right button to navigate through settings and the left button to change values.
7. Specifications
| Feature | Detail |
|---|---|
| Brand | Bikevee |
| Model Name | BKV310A |
| Color | Black |
| Product Dimensions (LxWxH) | 1.77"L x 0.63"W x 2.76"H |
| Item Weight | 1.76 ounces |
| Screen Size | 2.4 Inches |
| Display Type | LCD |
| Battery Life | 28 Hours |
| Battery Cell Composition | Lithium Ion |
| International Protection Rating | IPX7 |
| Mounting Type | Handlebar Mount |
| Human Interface Input | Buttons |
| Supported Satellites | GPS, BDS, Glonass, Galileo, QZSS |
| Supported Languages | English, Deutsch, Chinese, Czech, Polish, French, Korean, Spanish, Italian |
8. Warranty and Support
8.1 Warranty Information
The Bikevee GPS Bike Computer comes with a two-year warranty from the date of purchase. This warranty covers manufacturing defects and malfunctions under normal use. Please retain your proof of purchase for warranty claims.
8.2 Customer Support
For technical assistance, troubleshooting, or warranty inquiries, please visit the official Bikevee website or contact our customer support team. Refer to the contact information provided on the product packaging or the Bikevee brand store on Amazon.
Bikevee Brand Store: Visit Bikevee Store on Amazon


