1. Introduction
This manual provides detailed instructions for the installation, operation, and maintenance of your AINAVI 7-inch Android Car Stereo. This advanced multimedia system is designed to enhance your driving experience with features such as wireless CarPlay, Android Auto, DSP audio processing, and GPS navigation. Please read this manual thoroughly before installation and use to ensure proper function and safety.
2. Product Overview
The AINAVI 7-inch Android Car Stereo is a comprehensive in-dash navigation and entertainment system. It features a 7-inch QLED touchscreen display, Android 13 operating system, 2GB RAM, and 64GB ROM for smooth performance. Key functionalities include:
- Wireless CarPlay and Android Auto for seamless smartphone integration.
- Built-in GPS navigation with support for various map software.
- Digital Sound Processor (DSP) with Time Correction and 48-band EQ for optimized audio.
- Bluetooth and Wi-Fi connectivity.
- Support for rearview camera input.
- Steering wheel control compatibility.
- Split-screen multitasking.
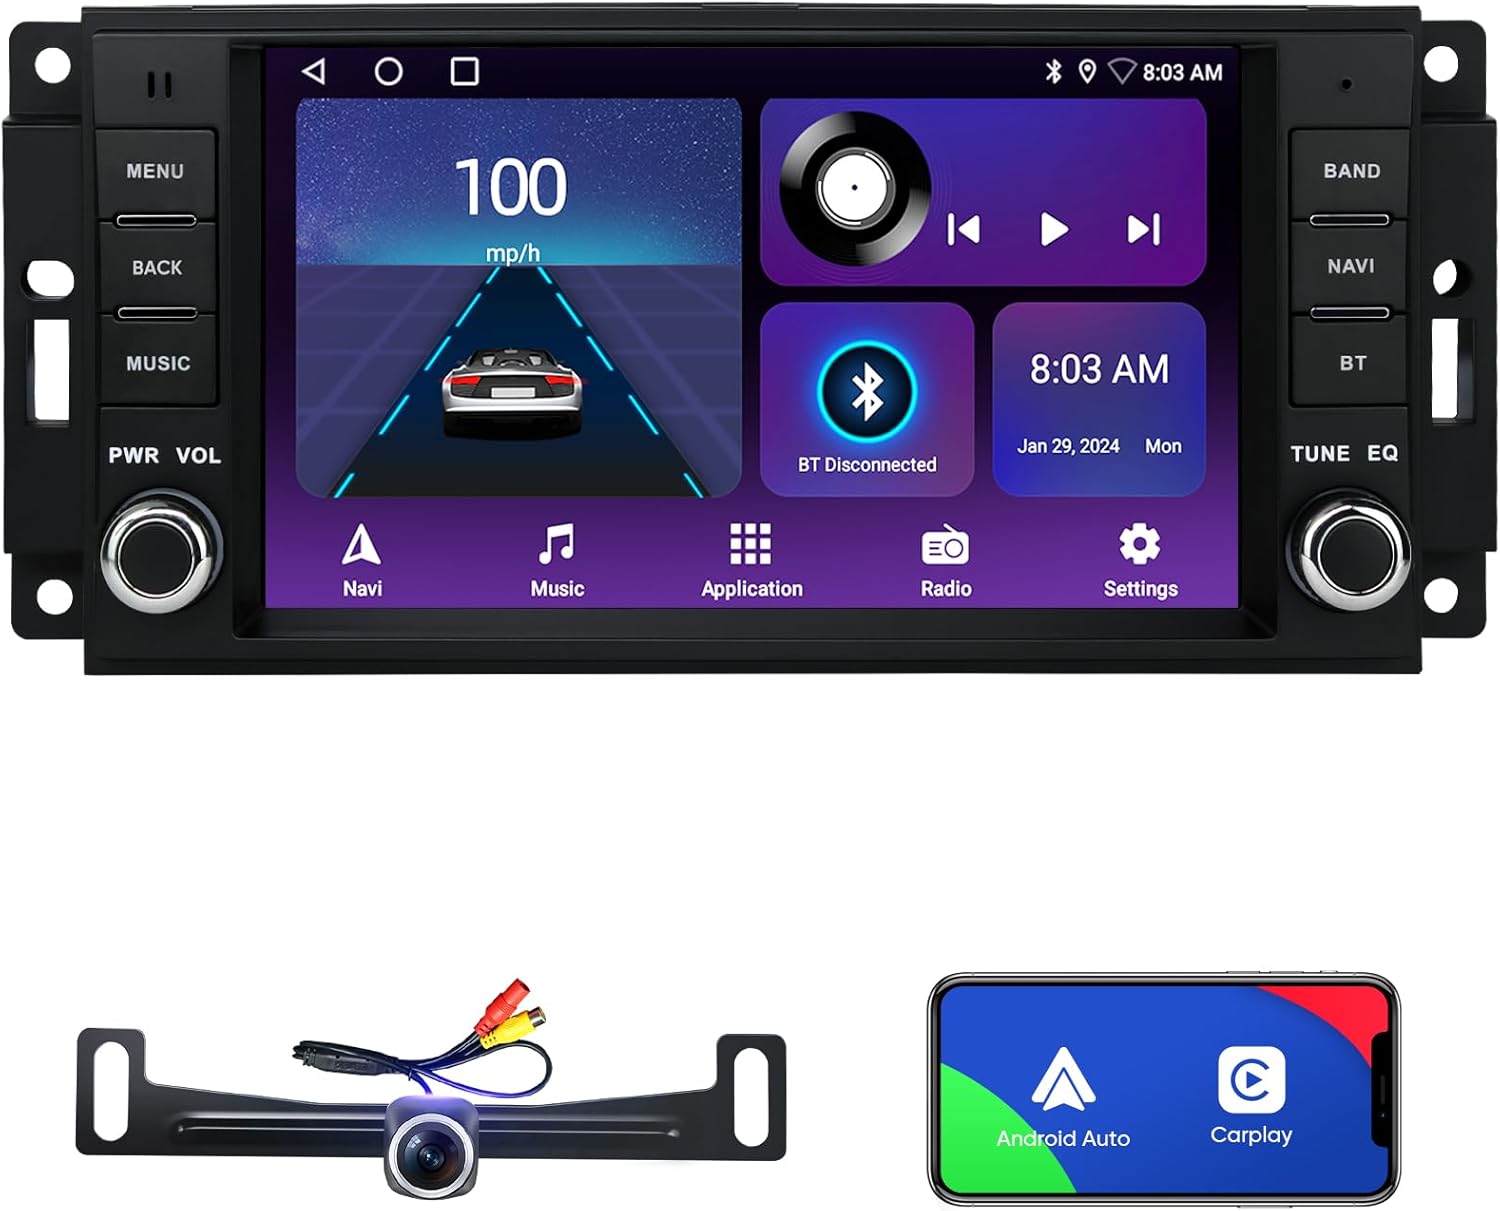
Figure 2.1: AINAVI 7-inch Android Car Stereo unit, rearview camera, and smartphone displaying CarPlay/Android Auto interface.
3. Compatibility
This AINAVI car stereo is compatible with a range of Jeep, Dodge, and Chrysler vehicles. Please verify your vehicle's make, model, and year against the list below to ensure compatibility.

Figure 3.1: Visual representation of compatible vehicle models and years.
- For Jeep:
- Wrangler/Unlimited (2007-2018)
- Compass (2009-2016)
- Patriot (2009-2016)
- Grand Cherokee (2005-2011)
- Liberty (2008-2011)
- Commander (2008-2011)
- For Chrysler:
- Sebring (2007-2010)
- Town&Country (2007-2010)
- For Dodge:
- Grand Caravan (2011-2014)
- Charger (2008-2010)
- Ram Pickup 1500/2500/3500 (2009-2012)
4. What's Included
The package includes the following components:

Figure 4.1: Diagram of included components and their dimensions.
- AINAVI 7-inch Android Car Stereo Unit
- Power Cable (some models with CANbus)
- RCA Cable
- Car Microphone
- GPS Module
- 2x USB Cables
- Reversing Control Cable
- 1080P Rear View Camera
- Frame Removal Tool
Note: The specific cables included may vary slightly by model. Please refer to the actual package contents.
5. Setup and Installation
Installation of a car stereo can be complex and may require professional assistance. Incorrect installation can damage the unit or your vehicle's electrical system. If you are unsure, it is recommended to seek professional installation.
5.1 Pre-Installation Check
- Disconnect Battery: Before starting, disconnect the negative terminal of your vehicle's battery to prevent electrical shorts.
- Verify Compatibility: Ensure the stereo is compatible with your vehicle (refer to Section 3).
- Inspect Components: Check all included components against the "What's Included" list.
5.2 Installation Steps (General Guide)
- Remove Old Stereo: Carefully remove the existing car stereo and trim using the frame removal tool or appropriate tools for your vehicle.
- Connect Wiring Harness: Connect the provided power cable and RCA cables to the corresponding ports on the new stereo and your vehicle's wiring harness. Ensure all connections are secure.
- GPS Module Installation: Mount the GPS module in a location with a clear view of the sky, typically on the dashboard or under the windshield, away from metal obstructions.
- Microphone Installation: Install the external microphone in a suitable location for clear voice pickup, such as near the rearview mirror or on the A-pillar.
- Rearview Camera Installation (Optional): If installing the rearview camera, route the camera cable from the rear of the vehicle to the stereo unit. Connect the video signal cable and power the camera from the reverse light circuit.
- Test Connections: Before fully reassembling the dashboard, temporarily reconnect the vehicle battery and power on the stereo to test basic functions (power, audio, display).
- Secure Stereo: Mount the new stereo securely into the dashboard opening.
- Reassemble Dashboard: Reinstall all trim pieces and panels.
- Final Battery Connection: Reconnect the negative terminal of the vehicle battery.

Figure 5.1: Comparison of a vehicle dashboard before and after the AINAVI stereo installation.
6. Operating Instructions
6.1 Basic Operation
- Power On/Off: Press the PWR button to turn the unit on or off.
- Volume Control: Use the VOL knob to adjust the audio volume.
- Menu Navigation: Use the touch screen or physical buttons (MENU, BACK) to navigate through the system interface.
6.2 Wireless CarPlay and Android Auto
The stereo supports both wired and wireless CarPlay and Android Auto. This allows you to integrate your smartphone for navigation, music, calls, and messages.
- Wireless Connection:
- Ensure Bluetooth and Wi-Fi are enabled on your smartphone.
- On the stereo, go to the CarPlay/Android Auto application.
- Pair your phone via Bluetooth with the stereo.
- Follow the on-screen prompts to establish the wireless CarPlay or Android Auto connection.
- Wired Connection:
- Connect your smartphone to the stereo using a USB cable.
- The system should automatically detect and launch CarPlay or Android Auto.

Figure 6.1: Apple CarPlay and Android Auto interfaces displayed on the stereo.
6.3 GPS Navigation
The unit features a built-in GPS module for navigation. You can use pre-installed maps or download additional map software from the Google Play Store.
- Access the Navigation application from the main menu.
- Enter your destination to receive turn-by-turn directions.
- Ensure the GPS antenna is properly installed for optimal signal reception.

Figure 6.2: GPS navigation interface showing a map and route details.
6.4 DSP Audio Settings
Utilize the built-in Digital Sound Processor (DSP) to customize your audio experience. Access the DSP settings to adjust:
- Time Correction: Adjust the sound delay for each speaker to create an optimal sound stage.
- 48-band Equalizer (EQ): Fine-tune audio frequencies to match your preferences.
- Bass Boost: Enhance low-frequency output.
6.5 Split Screen Mode
The split-screen feature allows you to run two applications simultaneously on the display, such as navigation and music playback.
- To activate, long-press the recent apps button or drag an app to one side of the screen.
- Select a second app to occupy the other half of the screen.

Figure 6.3: Split screen mode showing navigation and video playback.
6.6 Steering Wheel Control (SWC)
If your vehicle supports steering wheel controls, you can configure them to operate the stereo functions (e.g., volume, track skip, mode). Refer to the system settings for SWC learning and mapping.

Figure 6.4: Steering wheel controls highlighted for integration with the stereo.
6.7 Bluetooth and Wi-Fi Connectivity
Connect your smartphone or other devices via Bluetooth for hands-free calling and audio streaming. Use Wi-Fi to connect to a mobile hotspot for internet access, enabling online navigation, app downloads, and streaming services.
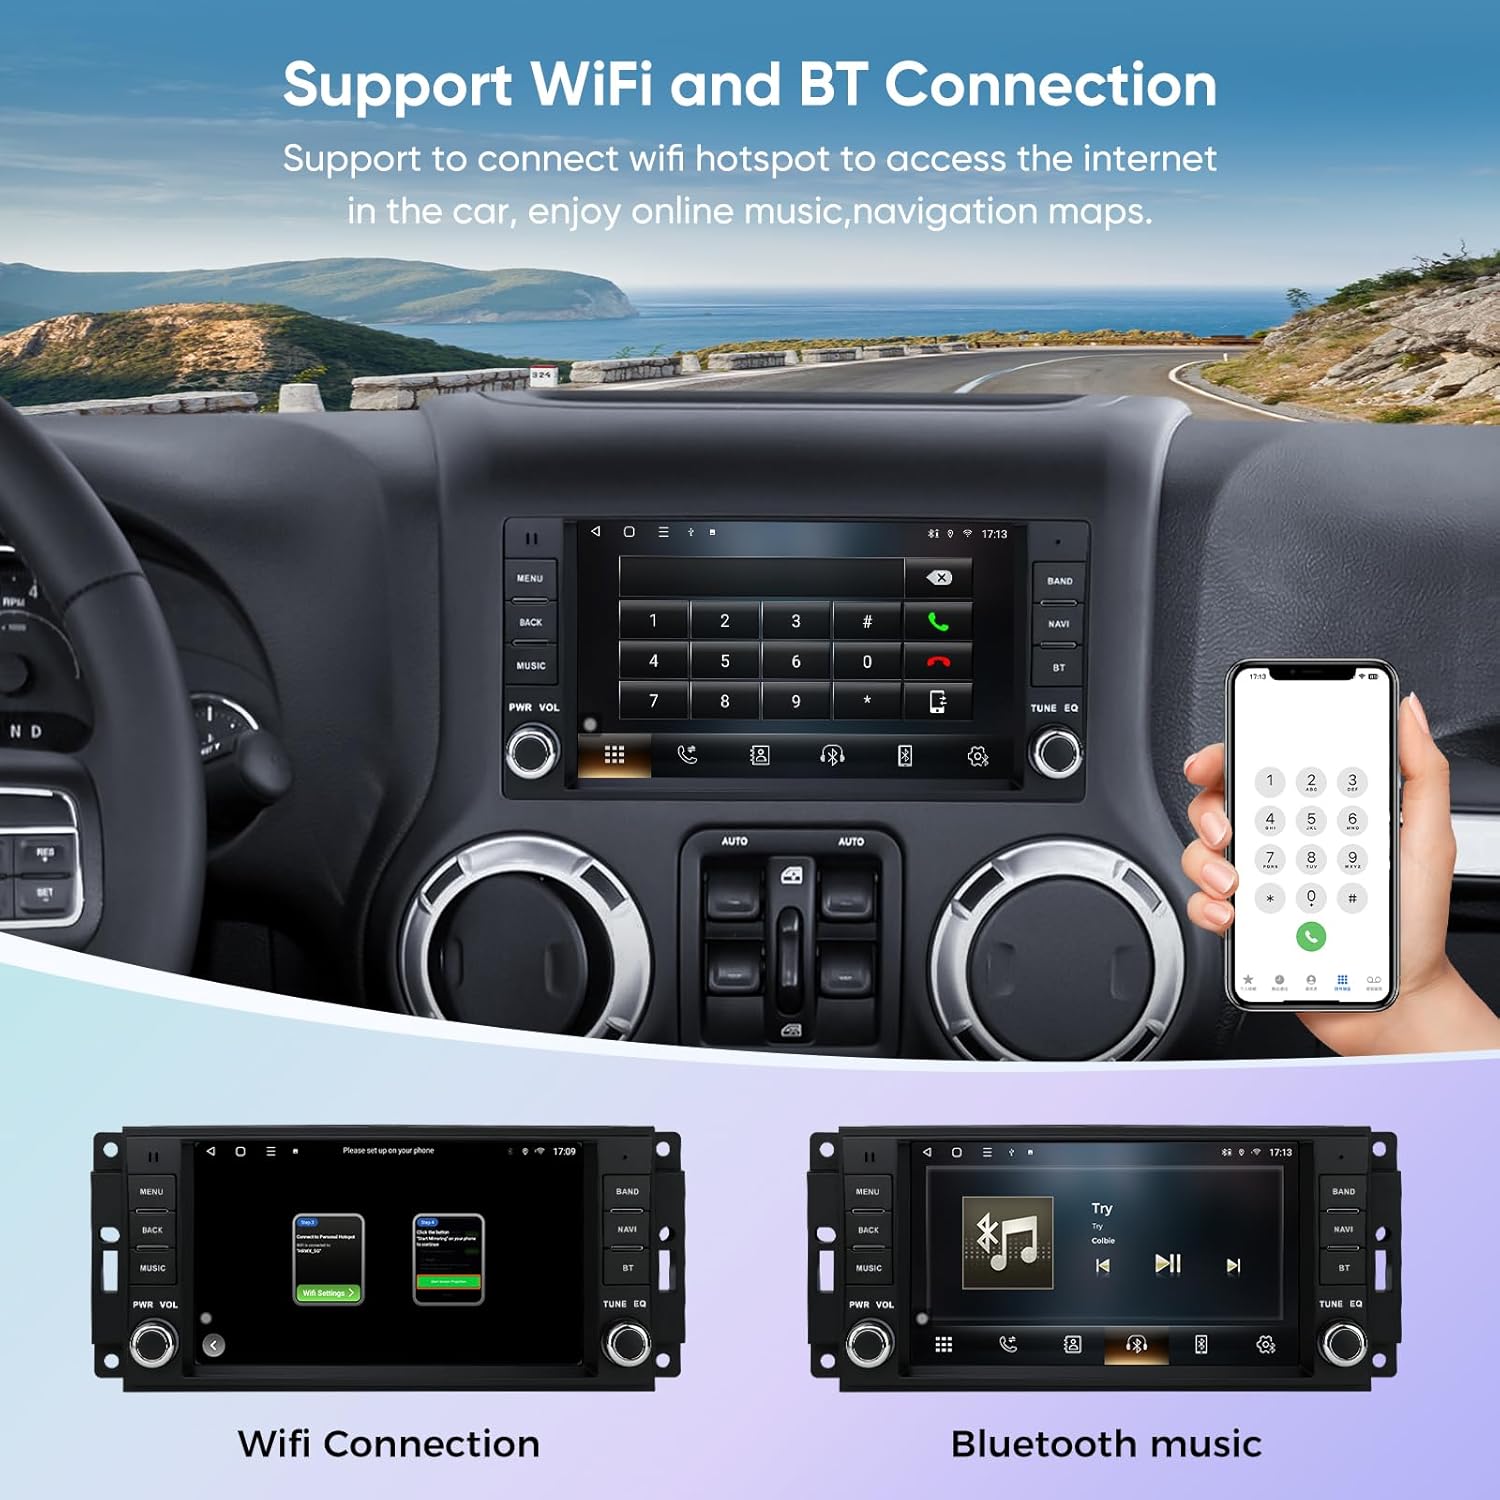
Figure 6.5: Interfaces for Wi-Fi connection and Bluetooth music playback.
6.8 Rearview Camera
The system supports a 1080P rearview camera input. When the vehicle is shifted into reverse, the display will automatically switch to the camera feed, providing a wide-angle view to assist with parking and maneuvering.

Figure 6.6: Rearview camera display with parking assistance lines.
6.9 Smart Voice Control
With CarPlay or Android Auto connected, you can use voice commands (e.g., "Hey Siri" or "Hey Google") to control various functions, including navigation, calls, messages, and music playback, allowing for safer operation while driving.

Figure 6.7: Examples of voice commands and their corresponding actions on the stereo.
7. Maintenance
Proper maintenance ensures the longevity and optimal performance of your car stereo.
- Cleaning the Screen: Use a soft, lint-free cloth to gently wipe the touchscreen. For stubborn smudges, slightly dampen the cloth with water or a screen-safe cleaner. Avoid harsh chemicals or abrasive materials.
- Software Updates: Periodically check for software updates through the system settings or the manufacturer's website to ensure you have the latest features and bug fixes.
- Avoid Extreme Temperatures: Do not expose the unit to extreme heat or cold for extended periods, as this can affect performance and lifespan.
- Cable Connections: Ensure all cables are securely connected and not pinched or damaged.
8. Troubleshooting
If you encounter issues with your AINAVI car stereo, refer to the following common problems and solutions:
| Problem | Possible Cause | Solution |
|---|---|---|
| No Power | Loose power connection, blown fuse, vehicle battery issue. | Check power cable connections. Inspect vehicle fuses. Ensure vehicle battery is charged. |
| No Sound | Volume too low, mute activated, incorrect audio source, loose speaker wires. | Increase volume. Check mute status. Select correct audio source. Verify speaker wire connections. |
| GPS Signal Lost/Inaccurate | GPS antenna obstruction, poor placement, software issue. | Ensure GPS antenna has clear sky view. Relocate antenna if necessary. Restart the unit. |
| CarPlay/Android Auto Not Connecting | Bluetooth/Wi-Fi off, incorrect pairing, faulty USB cable, phone software issue. | Enable Bluetooth/Wi-Fi on phone and stereo. Re-pair devices. Try a different USB cable. Update phone OS. |
| Touchscreen Unresponsive | System freeze, dirt on screen, hardware malfunction. | Restart the unit. Clean the screen. If issue persists, contact support. |
If the problem persists after attempting these solutions, please contact customer support.
9. Specifications
| Feature | Detail |
|---|---|
| Display Size | 7 Inches |
| Resolution | 1024 x 600 (QLED) |
| Operating System | Android 13 |
| Processor | ARM Cortex A55 4-Core |
| RAM | 2GB |
| Internal Storage (ROM) | 64GB |
| Connectivity | Bluetooth, USB, Wi-Fi |
| Special Features | Wireless CarPlay, Android Auto, Built-in DSP (Time Correction & 48-band EQ), GPS Navigation, Touchscreen, Microphone |
| Audio Output Mode | Stereo (Max. output 4*45W) |
| Mounting Type | Dashboard Mount |
| Item Weight | 3.45 pounds |
| Package Dimensions | 13.94 x 9.76 x 5.16 inches |
10. Warranty and Customer Support
10.1 Warranty Information
Your AINAVI car stereo comes with a 12-Month Manufacturer's Guarantee from the date of purchase. This warranty covers defects in materials and workmanship under normal use. Please retain your proof of purchase for warranty claims.
10.2 Customer Support
For technical assistance, installation support, or warranty inquiries, please contact AINAVI customer support:
- Phone: +1 (833) 858-5016
- Working Hours: 01:00 PM to 00:00 AM PST
- Email: info@ainavi.com

Figure 10.1: AINAVI Customer Support contact information.
You can also seek help via your order center on Amazon.


