
Pisichen 27INTS-2K-240HZ
Pisichen 27-Inch 2K 240Hz QHD Touch Screen Monitor User Manual
Model: 27INTS-2K-240HZ
1. Introduction
This manual provides detailed instructions for the installation, operation, maintenance, and troubleshooting of your Pisichen 27-Inch 2K 240Hz QHD Touch Screen Monitor. Please read this manual thoroughly before using the product to ensure proper setup and optimal performance. Keep this manual for future reference.
2. Safety Information
Observe the following safety precautions to prevent damage to the monitor and ensure user safety:
- Do not expose the monitor to rain, moisture, or extreme temperatures.
- Ensure proper ventilation around the monitor to prevent overheating.
- Use only the power adapter supplied with the monitor.
- Avoid placing heavy objects on the power cord or monitor.
- Disconnect the power cable from the outlet before cleaning the monitor.
- Do not attempt to disassemble or repair the monitor yourself. Refer all servicing to qualified personnel.
3. Package Contents
Verify that all items are present in the package:
- Pisichen 27-Inch 2K 240Hz QHD Touch Screen Monitor
- Monitor Stand (Base and Neck)
- Power Adapter
- HDMI Cable
- DisplayPort (DP) Cable
- USB-C Cable
- USB-B Cable (for touchscreen functionality)
- User Manual
4. Product Overview
The Pisichen 27-Inch 2K 240Hz QHD Touch Screen Monitor is designed for high-performance visual and interactive experiences. Key features include:
- Display: 27-inch QHD (2560x1440) IPS panel for wide viewing angles and accurate colors.
- Refresh Rate: 240Hz for ultra-smooth motion and reduced input lag.
- Touchscreen: 10-point multi-touch support for intuitive interaction.
- Connectivity: HDMI, DisplayPort, USB-C, and USB-B ports for versatile device connections.
- Adaptive Sync: Reduces screen tearing and stuttering for fluid visuals.
- Ergonomics: Features tilt adjustment for comfortable viewing.
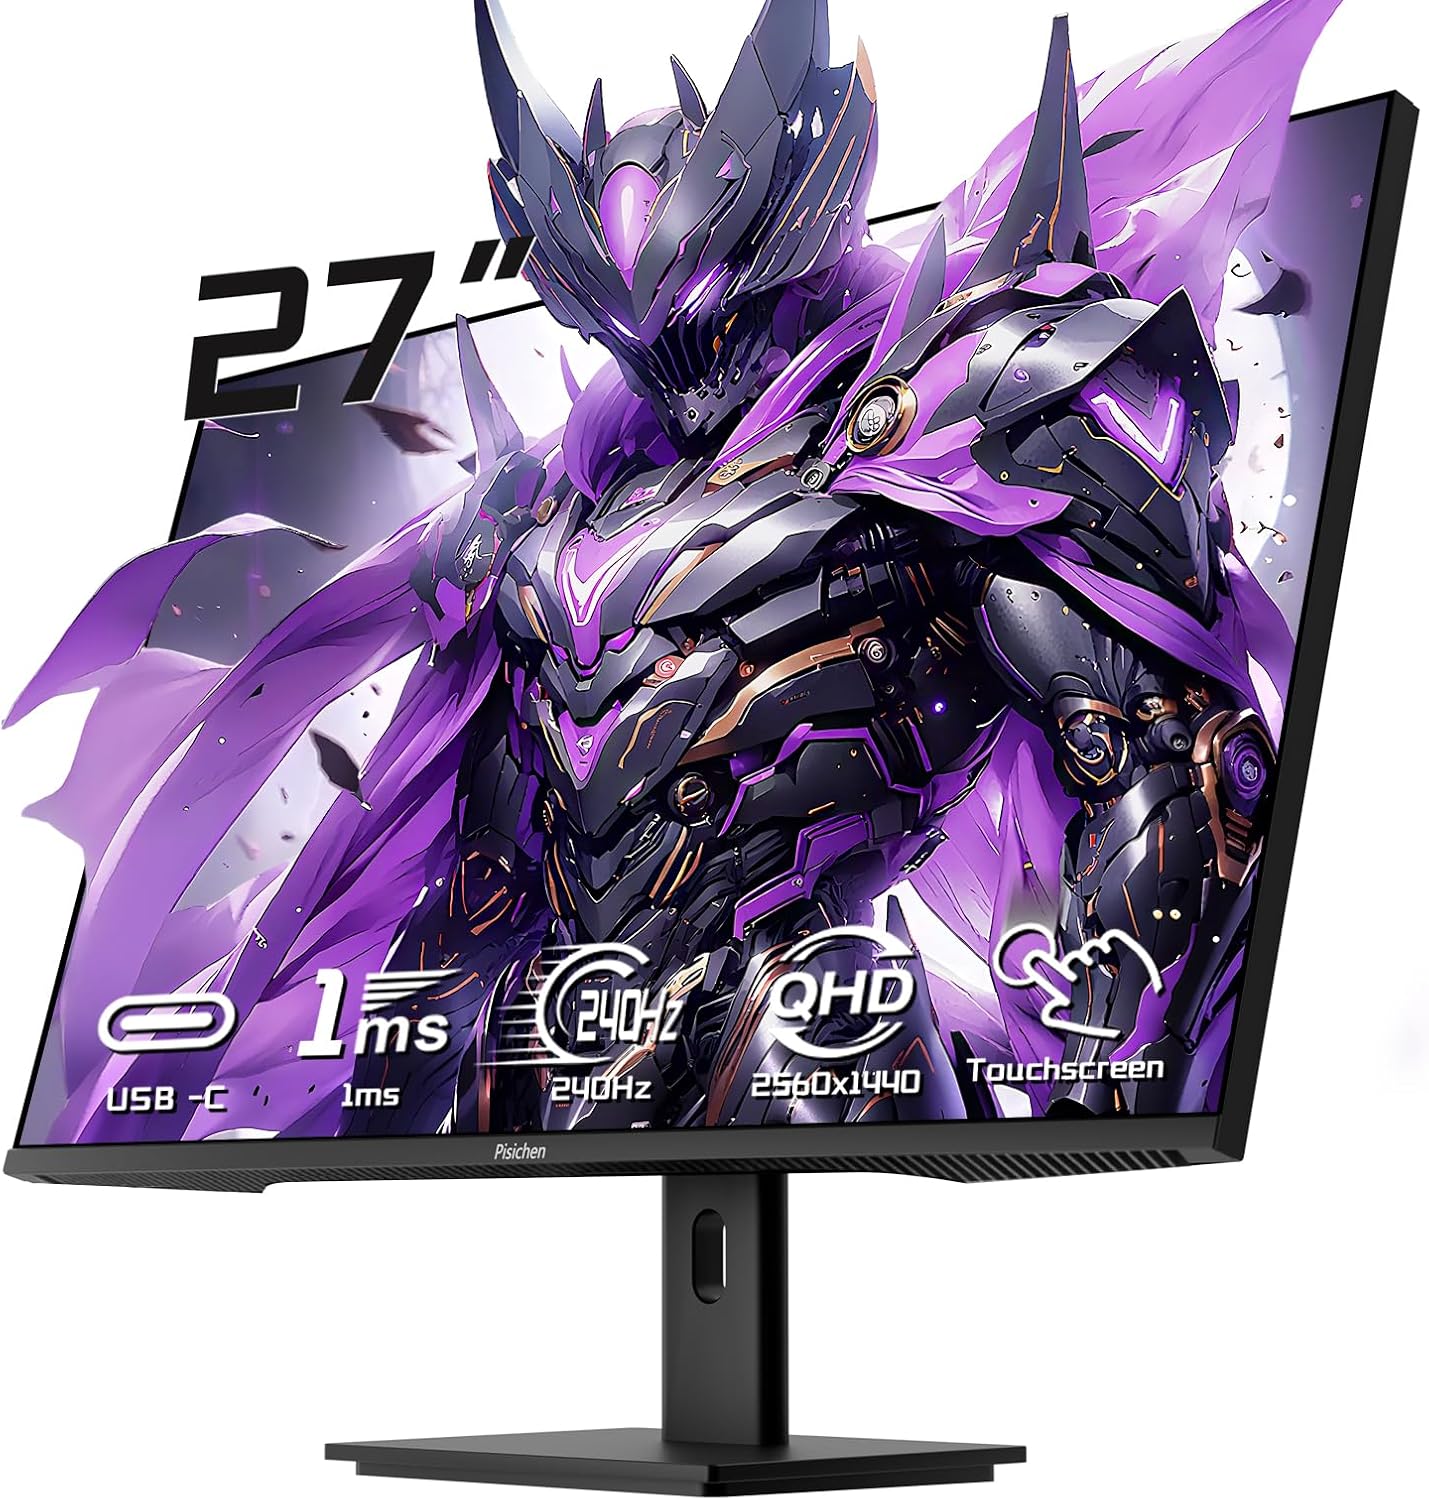
Figure 4.1: Front view of the Pisichen 27-Inch Touch Screen Monitor, highlighting its frameless design and key features like USB-C, 1ms response time, 240Hz refresh rate, QHD resolution, and touchscreen capability.
5. Setup Instructions
5.1 Assembling the Stand
- Carefully remove the monitor and stand components from the packaging.
- Attach the stand neck to the monitor's rear mounting point.
- Secure the stand base to the stand neck using the provided screws.
- Place the assembled monitor on a stable, flat surface.
5.2 VESA Mounting (Optional)
The monitor supports VESA mounting for wall or arm installation. Remove the stand if attached. Use compatible VESA mounting hardware (not included) according to the VESA standard for this monitor.

Figure 5.1: Illustration comparing VESA wall mounting and the standard monitor base setup, demonstrating space-saving benefits of VESA mounting.
5.3 Connecting to a Device
The monitor offers multiple connection options. Choose the appropriate cable for your device.
- HDMI/DisplayPort: Connect one end of the HDMI or DisplayPort cable to your computer's graphics card and the other end to the corresponding port on the monitor.
- USB-C: For devices supporting video output via USB-C, connect the USB-C cable from your device to the monitor's USB-C port. This may also provide power and touch functionality depending on your device.
- USB-B (for Touchscreen Functionality): To enable the 10-point multi-touch feature, connect the USB-B cable from the monitor's USB-B port to an available USB-A port on your computer. This connection is crucial for touch input.
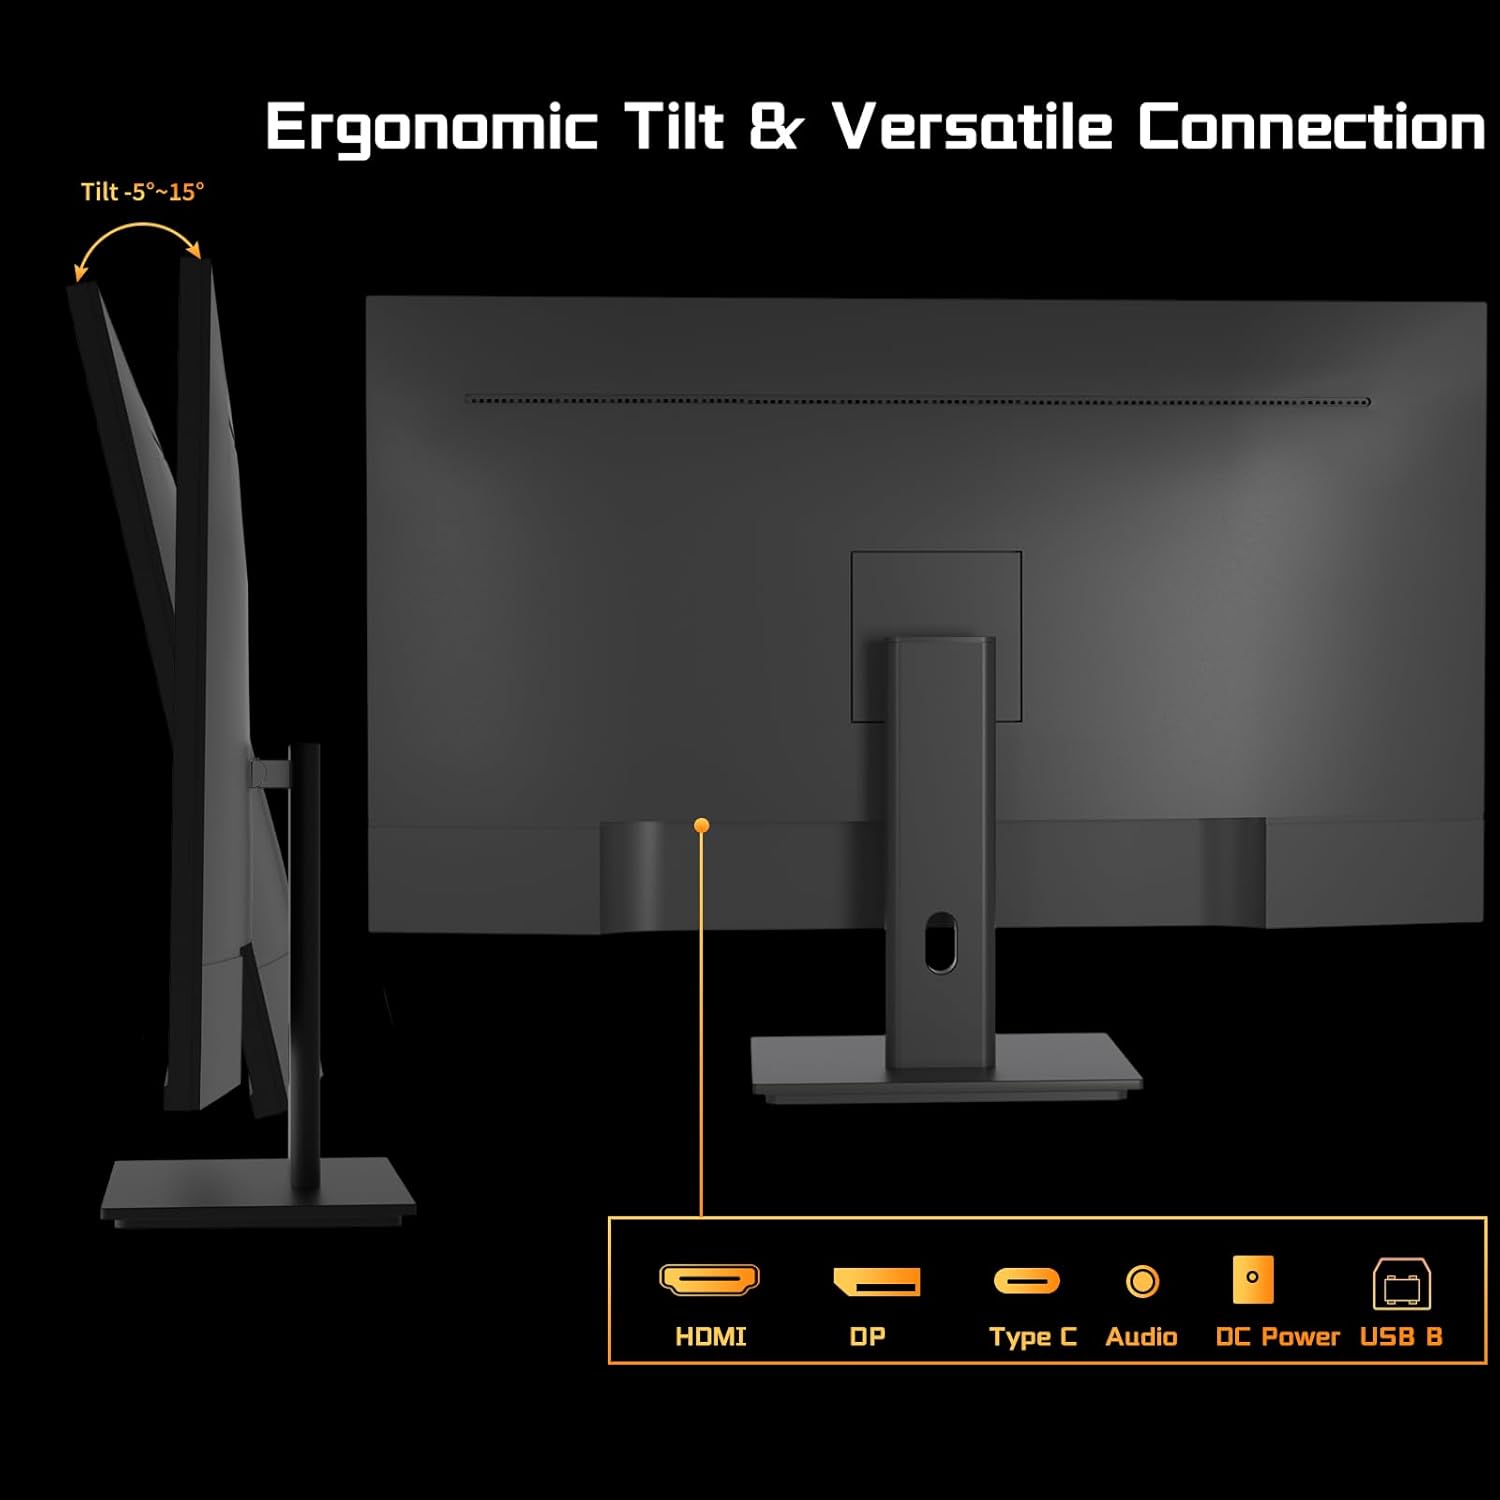
Figure 5.2: Rear view of the monitor showing available ports: HDMI, DisplayPort, USB-C, Audio Out, DC Power, and USB-B. The USB-B port is essential for touchscreen functionality.

Figure 5.3: Connection diagram illustrating how to connect the monitor as a second display (HDMI/DP) and as a touchscreen monitor (HDMI/DP + USB-B for touch signal).
5.4 Power Connection
Connect the power adapter to the monitor's DC power input, then plug the adapter into a power outlet.
5.5 Initial Power On
Press the power button on the monitor. The power indicator will illuminate, and the display will turn on. If no signal is detected, ensure all cables are securely connected and your computer is powered on.
6. Operating Instructions
6.1 Power On/Off
Press the power button located on the monitor to turn it on or off.
6.2 On-Screen Display (OSD) Menu
The OSD menu allows you to adjust various monitor settings. Use the buttons on the monitor (typically located on the back or bottom) to navigate the menu. Common settings include:
- Brightness/Contrast: Adjust display luminance.
- Color Settings: Modify color temperature, gamma, and saturation.
- Input Source: Manually select HDMI, DisplayPort, or USB-C input.
- Picture Mode: Select predefined display modes (e.g., Standard, Game, Movie).
- Adaptive Sync: Enable or disable this feature for compatible graphics cards.
6.3 Touchscreen Functionality
With the USB-B cable connected to your computer, the monitor functions as a 10-point multi-touch display. You can use gestures such as:
- Tap: Equivalent to a mouse click.
- Double Tap: Equivalent to a double-click.
- Pinch-to-Zoom: Use two fingers to zoom in or out.
- Swipe: Navigate through content or scroll.
- Drag: Move items on the screen.
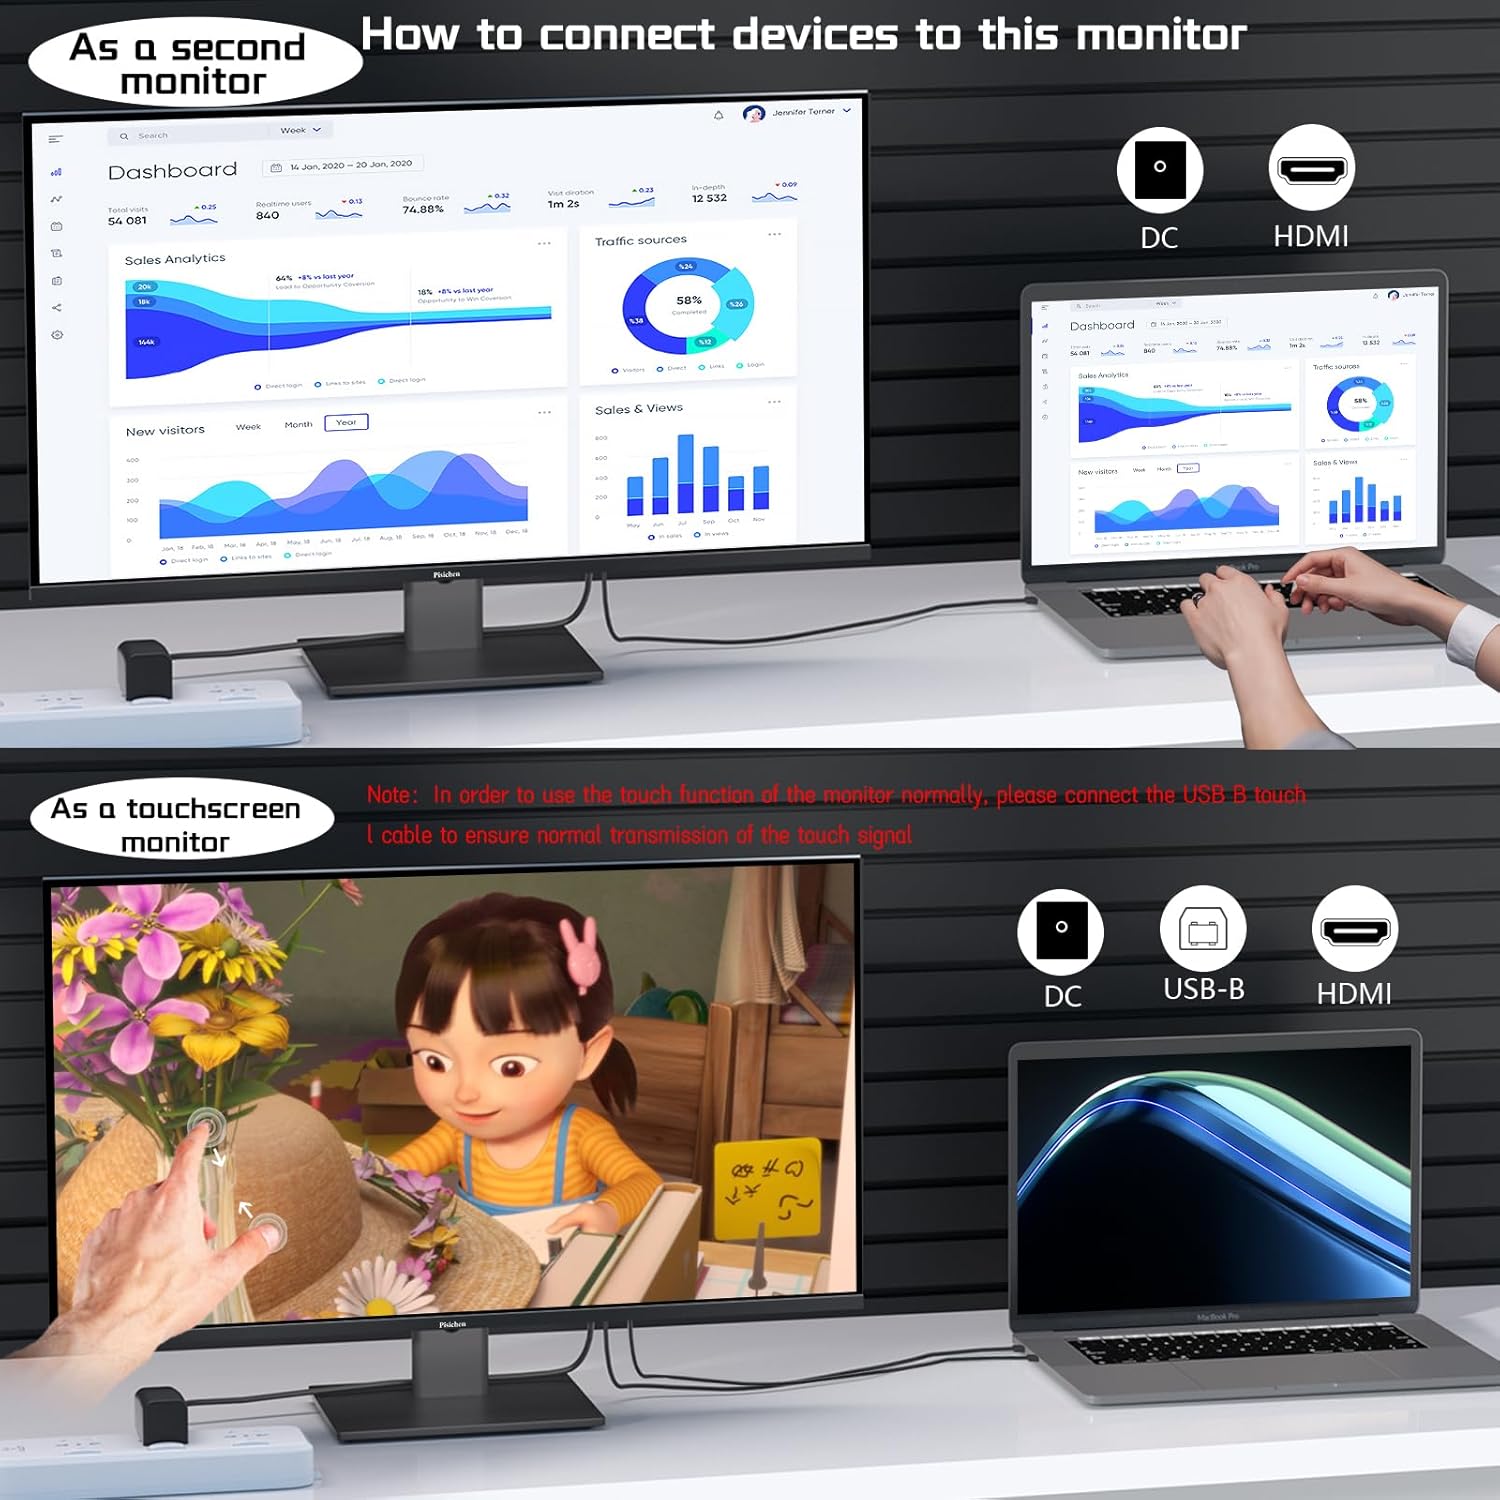
Figure 6.1: A user interacting with the monitor's touchscreen, demonstrating its application in business or productivity tasks.

Figure 6.2: Compatibility chart showing devices that support multi-touch (Laptops, Smartphones, Tablets, All-in-one PCs, Desktop Hosts) and devices where touch functionality is not supported (iPhone, iPad, Switch, Fire TV, PS3/4/5, Xbox, Steam Deck, and some Apple products like Mac mini).
6.4 Refresh Rate and Adaptive Sync
The monitor supports a 240Hz refresh rate. Ensure your computer's display settings are configured to utilize this refresh rate for the smoothest experience. Enable Adaptive Sync in the OSD menu and your graphics card settings to synchronize the monitor's refresh rate with your GPU's frame rate, reducing screen tearing.

Figure 6.3: Visual comparison demonstrating the smoothness of a 240Hz refresh rate compared to lower refresh rates, illustrating reduced lag and delay.
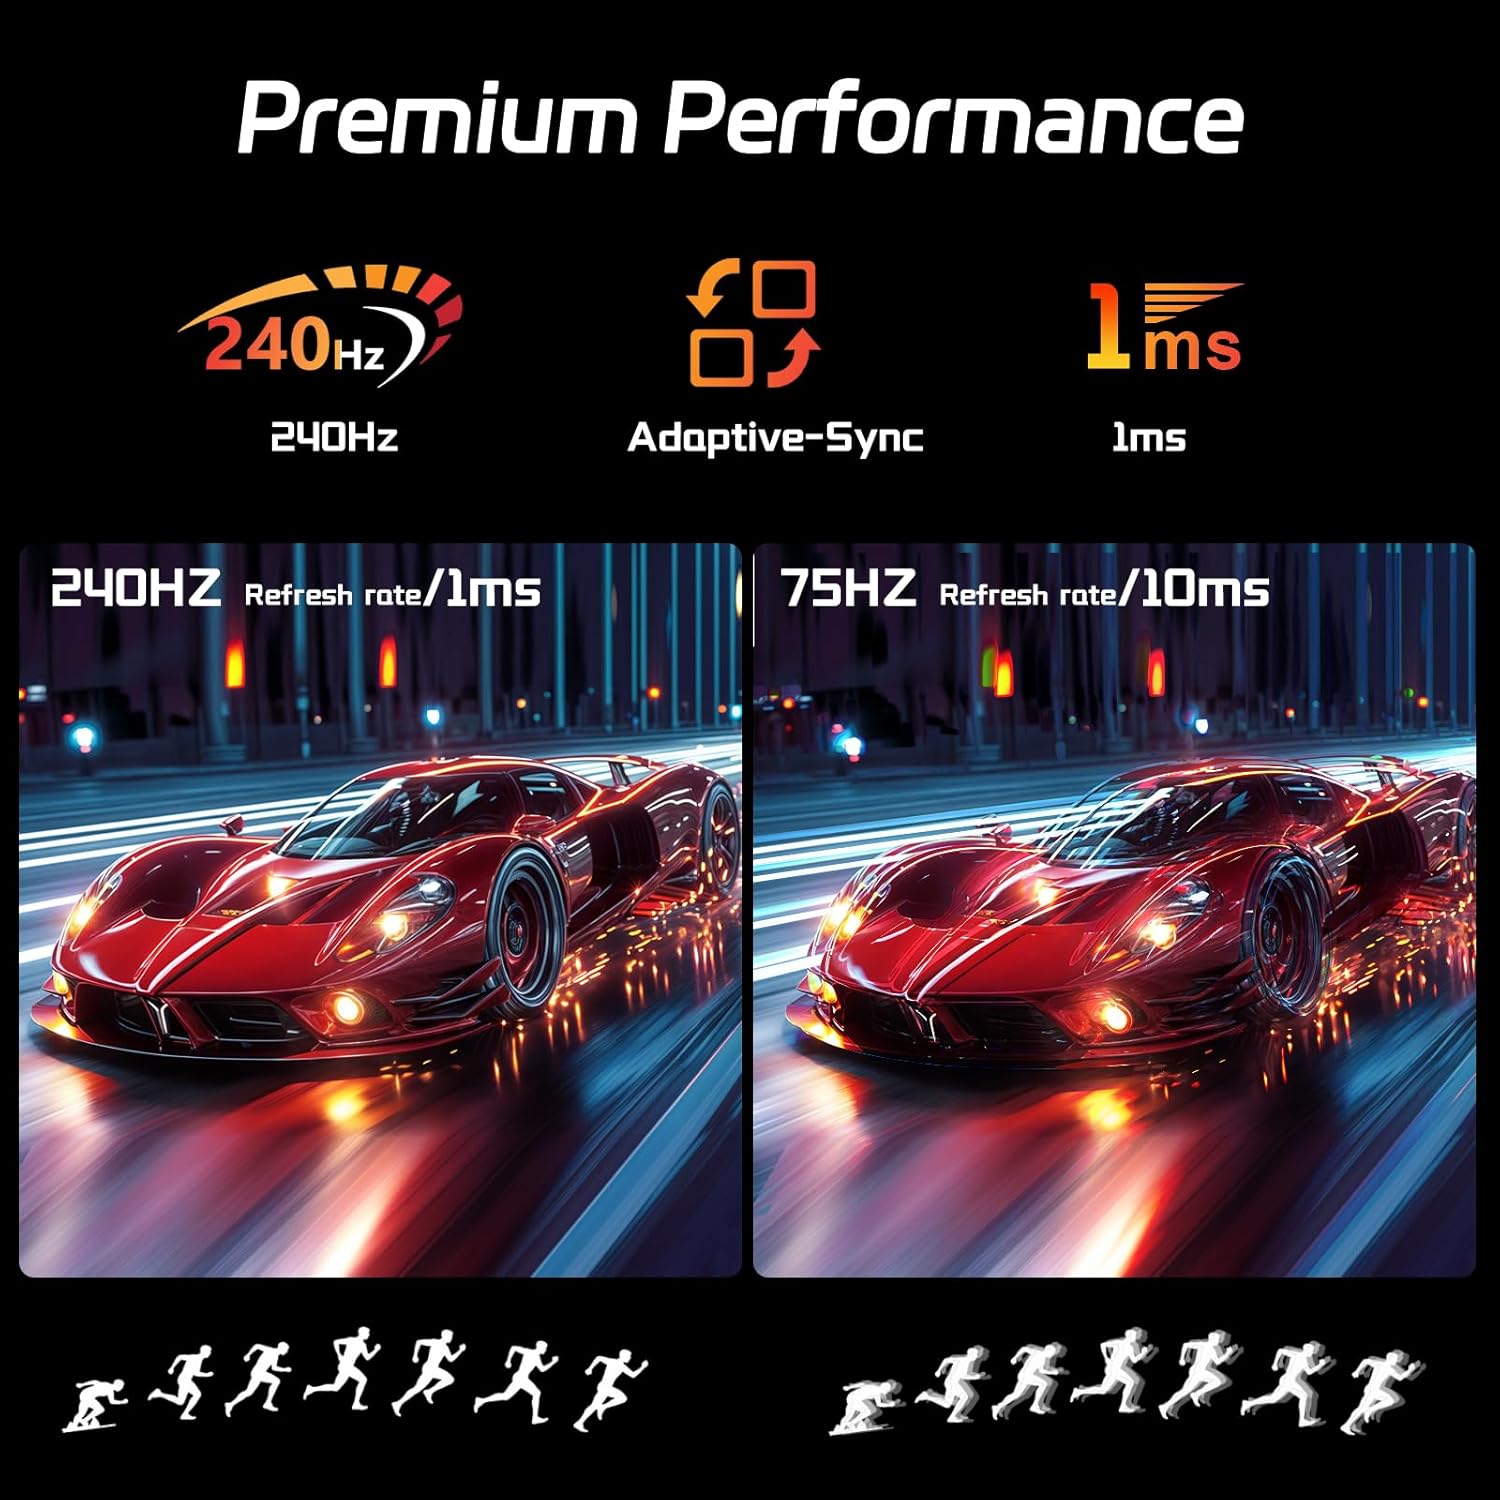
Figure 6.4: Illustration of premium performance features including 240Hz refresh rate, Adaptive-Sync, and 1ms response time, with a visual comparison of motion clarity at 240Hz versus 75Hz.
6.5 Eye-Friendly Technology
The monitor incorporates technology to reduce screen flicker and blue light emissions, aiming to minimize eye strain during prolonged use. These features can typically be adjusted or enabled through the OSD menu.

Figure 6.5: Visual representation of Eye-Friendly Technology, showing how it reduces screen flicker and blue light to enhance user comfort.
7. Maintenance
- Cleaning the Screen: Gently wipe the screen with a soft, lint-free cloth. For stubborn marks, lightly dampen the cloth with water or a non-abrasive screen cleaner. Do not spray cleaner directly onto the screen.
- Cleaning the Casing: Use a soft, dry cloth to wipe the monitor casing. Avoid using harsh chemicals or abrasive materials.
- Storage: If storing the monitor for an extended period, disconnect it from power, cover it to protect from dust, and store in a cool, dry place.
8. Troubleshooting
| Problem | Possible Cause | Solution |
|---|---|---|
| No image on screen | Monitor not powered on; incorrect input source; loose video cable. | Ensure power cable is connected and monitor is on. Select correct input source via OSD. Check video cable connections. |
| Touchscreen not responding | USB-B cable not connected; incorrect driver; incompatible device. | Ensure USB-B cable is connected from monitor to computer. Check device compatibility. Calibrate touch input in OS settings if multiple touchscreens are present. |
| Image flickering or distorted | Faulty video cable; incorrect resolution/refresh rate; graphics card issue. | Replace video cable. Adjust resolution/refresh rate in OS settings. Update graphics drivers. |
| No sound from monitor speakers | Volume too low; audio output not selected; no audio signal via video cable. | Increase monitor volume. Ensure monitor is selected as audio output in OS. Check if video cable supports audio transmission. |
9. Specifications
| Feature | Detail |
|---|---|
| Screen Size | 27 Inches |
| Resolution | 2560 x 1440 Pixels (QHD Wide 1440p) |
| Refresh Rate | 240Hz |
| Panel Type | IPS |
| Touchscreen | 10-Point Multi-Touch |
| Aspect Ratio | 16:9 |
| Image Brightness | 400 Candela (cd/m²) |
| Connectivity | HDMI, DisplayPort, USB-C, USB-B |
| Product Dimensions | 0.7 x 24 x 14.1 inches |
| Item Weight | 13.52 pounds |
| Manufacturer | Shenzhen Konowa Electronics Co., LTD |
| Model Number | 27INTS-2K-240HZ |
10. Warranty and Support
This Pisichen monitor comes with a standard manufacturer's warranty. For specific warranty terms and conditions, please refer to the warranty card included in your package or visit the official Pisichen website. For technical support, troubleshooting assistance beyond this manual, or to inquire about warranty claims, please contact Pisichen customer service through their official channels.
Online Support: Visit the Pisichen Store on Amazon
Ask a question about this manual
Ask about setup, troubleshooting, compatibility, parts, safety, or missing instructions. Manuals+ will review the question and use this page’s manual context to help answer it.